
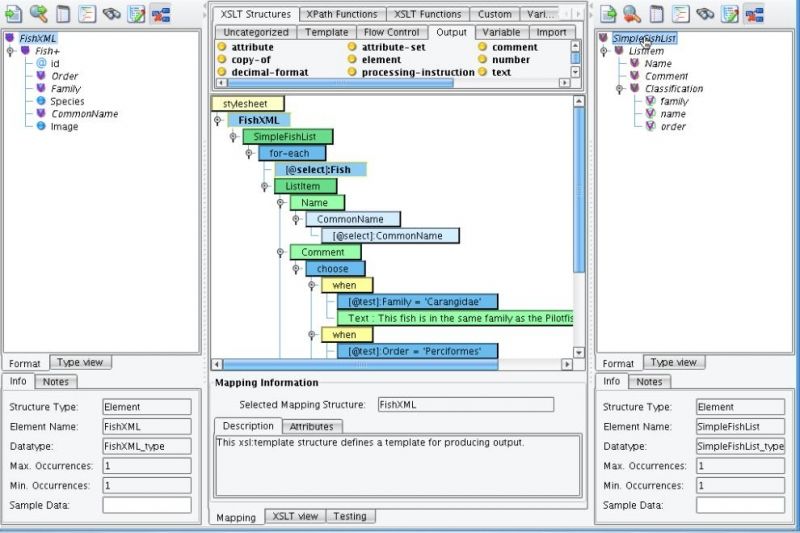
Welcome back to the XCS Data Mapper XSLT data transformation tutorial series. In this 10 minute tutorial on XSLT Flow Control and basic XPaths, we’ll further explore the use of XSL for-each and XPath predicates to handle looping logic. This tutorial builds on concepts discussed in the XSLT Conditional Logic lesson. By the end of this episode you’ll be able to create and test basic XPath predicates using the XPath editor, control the order of iteration with XSL sort, filter a list with XSL if, and store the result of an XPath expression and a variable. We’ll begin where we left off in the conditional logic lesson. We have our FishXML Source and our SimpleFishList Target.
The first thing we’ll want to do today is filter the results of the for-each. In the XSLT Structures tab, in the Flow Control sub-tab, there’s a sort tool. Drag the sort so it’s an immediate child of the for-each element.
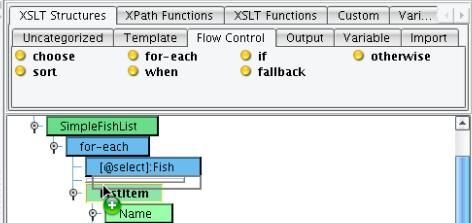
The next thing we’ll want to do is add the selection criteria that we choose to sort by. Let’s do this in XSLT view by clicking on the XSLT tab. You’ll see our generated XSL sort.
Go into the XSLT and hit Space. You’ll see that the code completion gives us the option of choosing the select attribute.

We then populate the select attribute with the XPath that we wish to sort by. Note that this XPath is relative to the current context node. are nodes which have attributes and child nodes. generally they pretty interchangeable. using a good analogy you can think of it this way: node is like fruit an element apple. apple kind class=”lexicon-term”>node. The context Node is a very important concept in XSLT and XPath. It is essentially a current directory or current path. We always start off at the root that we’ve matched on – you’ll see that we’ve matched on FishXML.

However, now that we’re inside a for-each, our context has changed to the Fish.

So our select attribute should be populated with a path relative to our current Fish directory. We’ll sort on CommonName, so enter CommonName in the attribute.

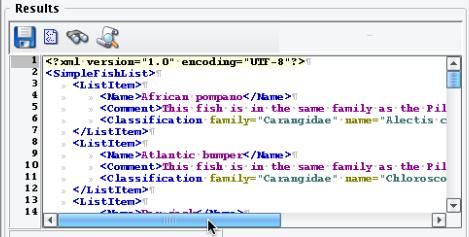
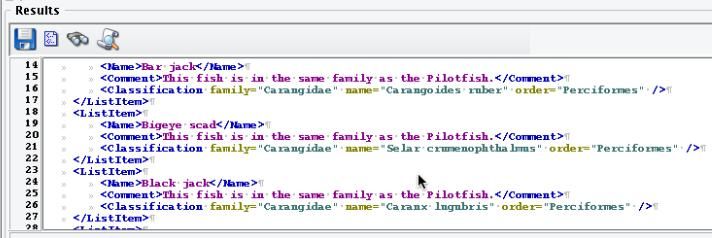
Click on the Testing tab and execute the test. You can see now that we’re sorted on name with blank values coming first, A’s second, and if we look all the way down at the end of the list we can see the Zabaleta anchovy is last.
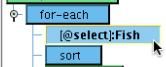
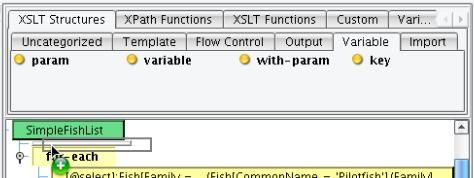
Return back to the Mapping tab. The next thing we’ll do is look at how we can use XPath to control what we iterate over in a for-each. Currently, we’re iterating over each Fish that we come across. However, let’s say we want to limit this list to only those Fish that have something in common with the Pilotfish. For instance, let’s iterate over only those that are in the same Family. The same condition that we used in our choose clause can become an XPath in our for-each. To add an XPath predicate, we’ll double click the Fish. You’ll see there’s a button on the right hand side of the editor.

This launches the Data Mapper’s XPath editing dialogue. The XPath editor allows us to test XPaths against a sample document.

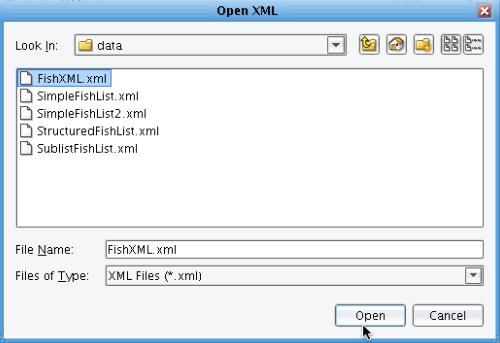
To load a sample document we use the folder icon in the upper left. We should load Source format sample data, so we’ll load the FishXML.xml here.
When the XPath editor is initialized the context node, that current directory we were speaking of, shows up in a reddish color. Each of the result node. are nodes which have attributes and child nodes. generally they pretty interchangeable. using a good analogy you can think of it this way: node is like fruit an element apple. apple kind class=”lexicon-term”>nodes based on the XPath in the text box will show up in green. Right now every Fish node is selected.

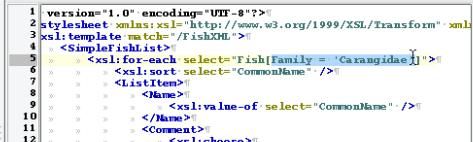
To add a condition or predicate we use square brackets – Fish[Family = ‘Carangidae’]. This can be read as the Fish where the Family is equal to this value. You’ll note now that not every Fish is selected; only a subset of those that are in the same Family as the Pilotfish.
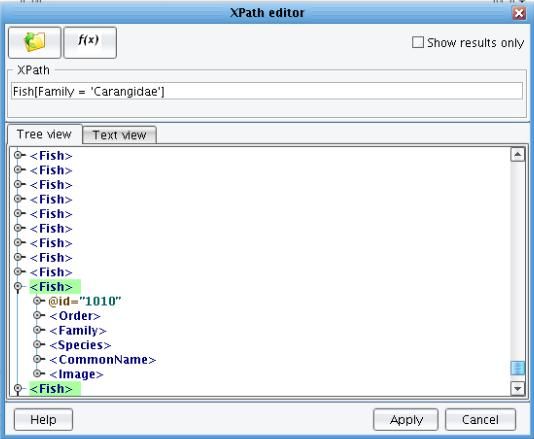
When we click Apply, the new value will now appear in our select.

The XPath editor can be used any time we have a select attribute. We’ll hit Enter to select the value, and you’ll note that the graphical view will show us only the shorthand – the Fish. Every time we double click you’ll see the full XPath expression.
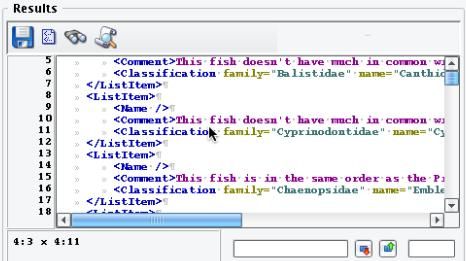
Returning to Testing Mode and rerunning the transform, we’ll see the sorted list with only those Fish in the same Family as the Pilotfish.
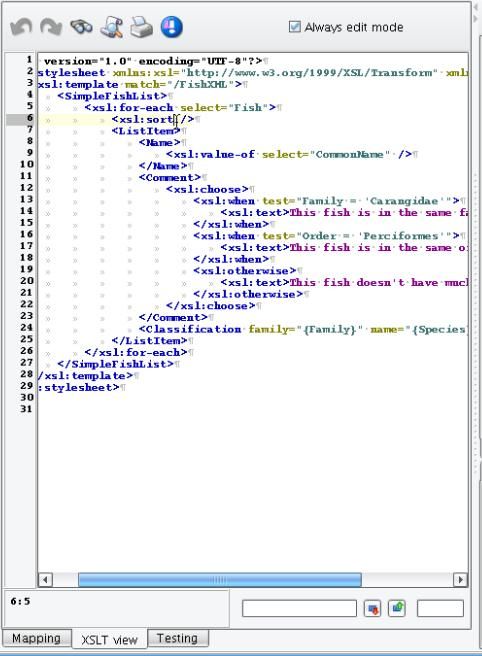
Let’s go back to the Mapping tab again. Let’s filter this further with a slightly more complex XPath. This time rather than using the XPath editor or the graphical view, we’ll again go into the XSLT. When we switch to the XSLT tab we can see that the current line is highlighted and can see the XPath expression.
Let’s be a little bit more logically correct with what we’re saying here. We want to find all of those fish whose Family is the same as the Family of the Fish with the Common Name of Pilotfish. You can see we can enter in a more complex condition here. We can look for the Fish where the Family is equal to the Fish whose Common Name equals Pilotfish’s Family. Let’s look at this a little bit closer. We’re selecting a Fish or a set of Fish where the Family is equal to .. (just like in the directory we’re moving up a level to look at all of the Fish), then we’re filtering this list of Fish further to find only that one that has the Common Name of Pilotfish and we’re looking at the value of its Family – so logically we’re saying find the All Fish whose Family is the same as the Family of the Pilotfish.

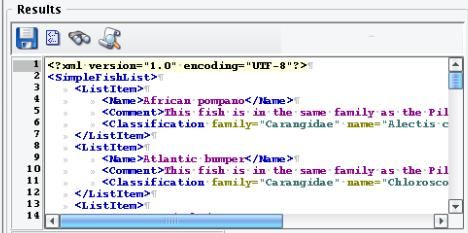
To test this, again we can go to Testing Mode and click the Execute button. And we get the same results.
Return back to the Mapping view. You’ll note that this was a relatively lengthy XPath expression that we used in here inside of this predicate.

Let’s say we wanted to store the Family of the Pilotfish and reference it separately in a number of different places. To do that we can use the XSLT variable structure. Underneath the XSLT Structures tab, in the Variable sub-tab, you’ll find the variable tool. Variables have scope and they’re visible in any peer node or any child node underneath it. We’ll want to place this variable right at the root underneath the FishList.
If you drag and drop in the Data Mapper and the node doesn’t appear where you’d like, you can use these icons to move a node up a level in a tree…

Or up amongst its siblings. We’ve done that here.

Variables have a name and then an XPath expression. We’ll give this one the name pilotfishFamily and hit Enter.

Now its selection criteria should be the same as we used in here. We want to find the Fish whose Common Name is Pilotfish, and then find its Family.

So we can copy the value from here and paste it in the select node.

However, we’re not done yet. You’ll note that here we have the .. at the beginning. When we were inside of this predicate our current context was the Fish. We needed to move up a level in our tree to be looking at the entire FishXML in order to do our predicate. However, we’re already at that level. FishXML is our context. So we can delete the ../ and just hit Enter.

Now, to use this value in our for-each, we can replace that portion of the predicate with a reference to the variable pilotfishFamily. Referencing variables in XSLT consists of using the $ and then the name of the variable.

If all worked as expected when we return to Testing Mode and execute the test, we should again get the same results.
So there you have it. We’ve looked at how you can sort based on a selection criteria – that selection criteria can be any XPath. We looked at how you can use for-each with a more complex predicate to filter results. And, we looked at how you can use the XSL Variable tab to store the results of an XPath expression. This concludes our tutorial on XSLT Flow Control and basic XPaths.