Tutorial
eiConsole Foundation
Configuring a Listener
You will need to download sample files to do this tutorial. If you have not done so yet, please click this LINK.
Note: The Tutorials in the eiConsole Foundation, 1-13, are modular and are designed to be used in the sequence presented.
The next step is to configure the Listener. A Listener is a type of adapter. Its function is to send and receive data through various functional stages. For example, the data that the Listener receives can be files from a directory that it is monitoring.
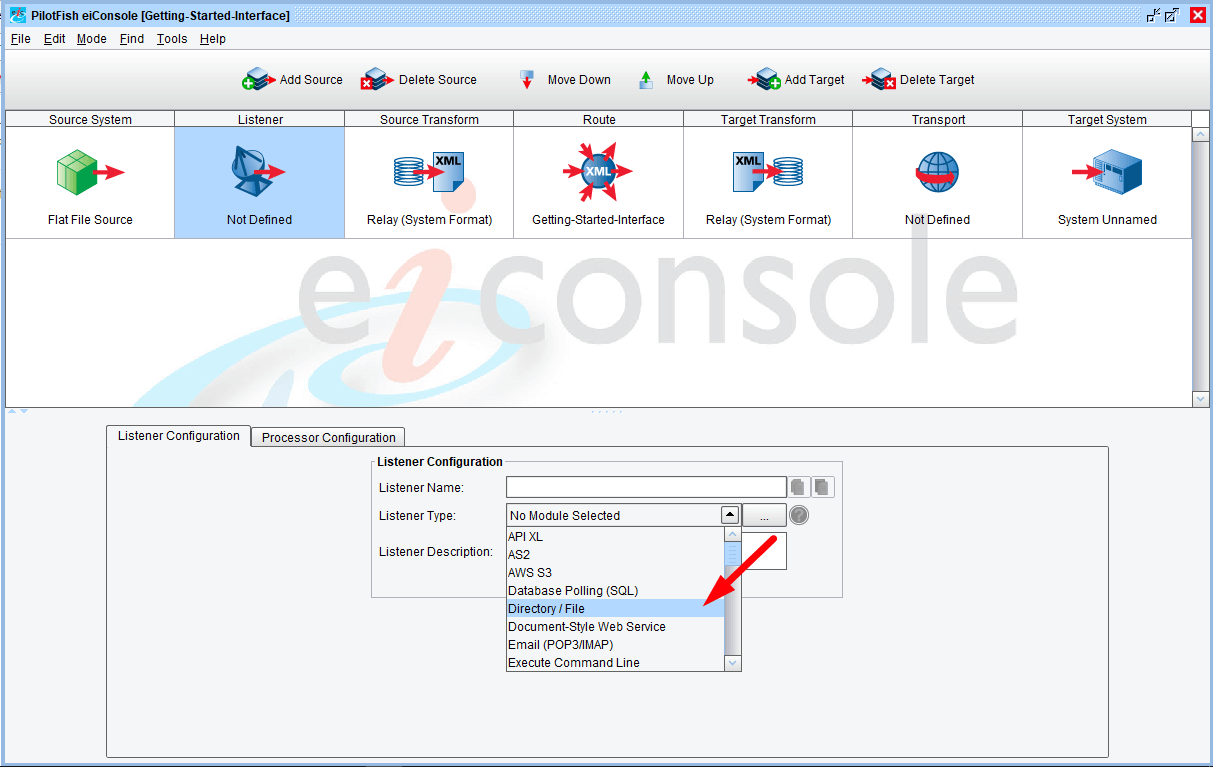
Click the Listener icon. When you click the Listener stage notice the Configuration panels that appear in the bottom half of the window. Throughout the eiConsole’s Assembly Line process, as you work across the stages, you’ll be presented with these configuration panels which help you easily configure an interface.
Your next step is to select the desired Listener type from the Listener Type drop-down.
Note: for each Listener Type that you select a different configuration panel will appear in the bottom half of the screen. Select Email (POP3). The Module Name will automatically be filled out to reflect that particular listener. Notice that there is a configuration panel and the requirement for a Server.
For a complete list of available Listener types, click link below
eiConsole II – Adapters – Types of Listeners (Documentation)
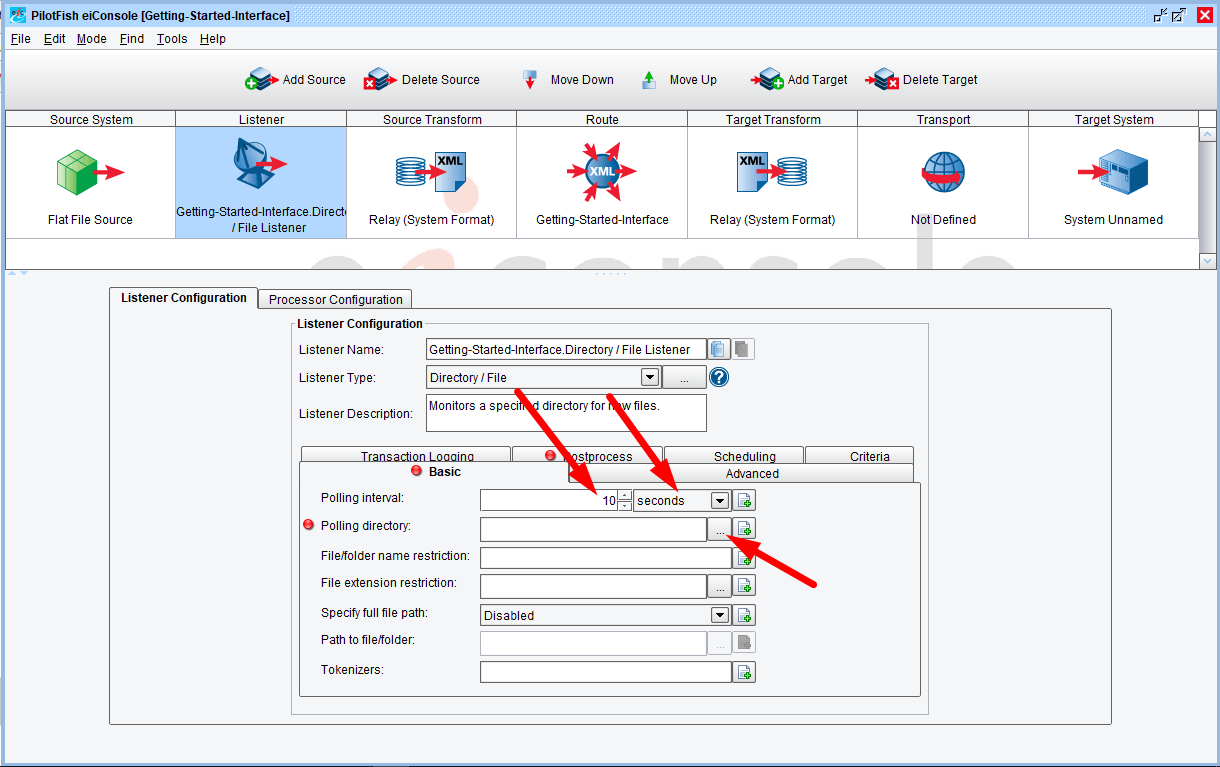
But for now, let’s return to the current interface. Select the Directory / File Listener. Once you select the Listener type, you will see a new set of configuration panels appear. In this case, you have Basic, Advanced, Postprocess, Scheduling and Criteria tabs. For this Listener, there is a requirement for a Polling Directory.
In this interface, the Polling interval needs to be configured so that the Directory you select will be polled every 10 seconds for new files, so enter “10”.
Note: you can use the drop-down to select other polling intervals – minutes, hours, days or even weeks.
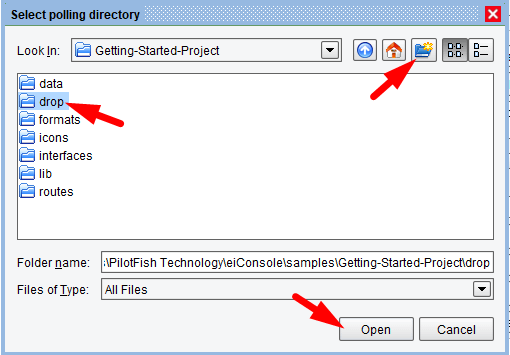
The Polling directory is the directory that the Listener will poll. Next, click the Ellipsis button to the right of the Polling directory configuration item. The Select polling directory window opens.
In your {Working Directory}/Getting-Started-Project folder click the New Folder icon and create a new folder. Name it “drop”. This means that files coming into this interface will be placed into this folder. Select it, then click Open.
Now that the drop folder is selected for your Polling directory you can enter in a File name restriction. This will indicate what files should be picked up based on their names. But for this interface, you will allow the Listener to pick up any files regardless of name. You will, however, want to require the file extension “txt”, so enter that in the File extension restriction field. This ensures that only text files will be picked up by the Listener for processing.
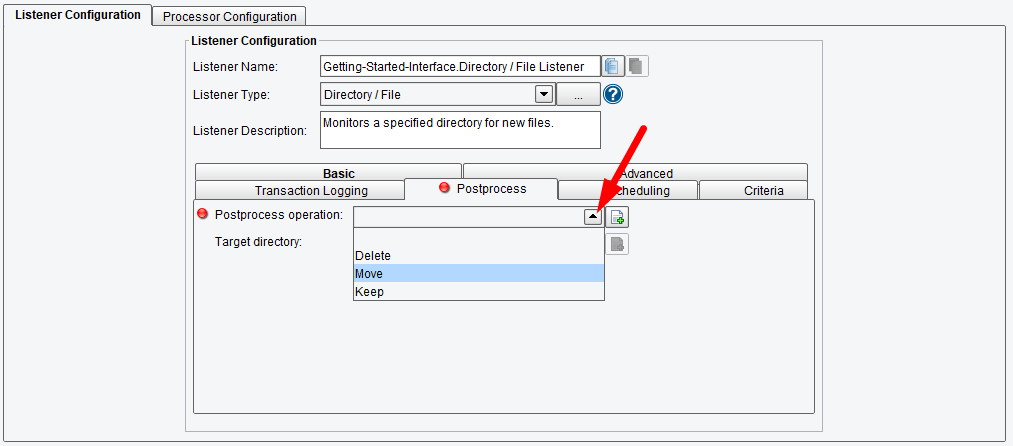
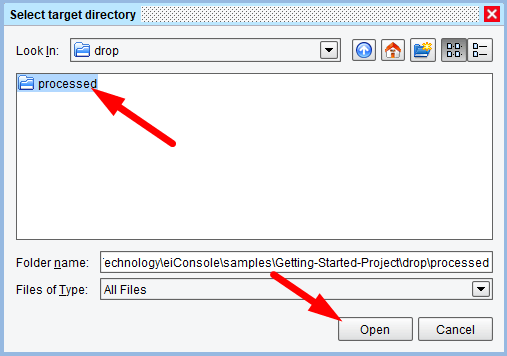
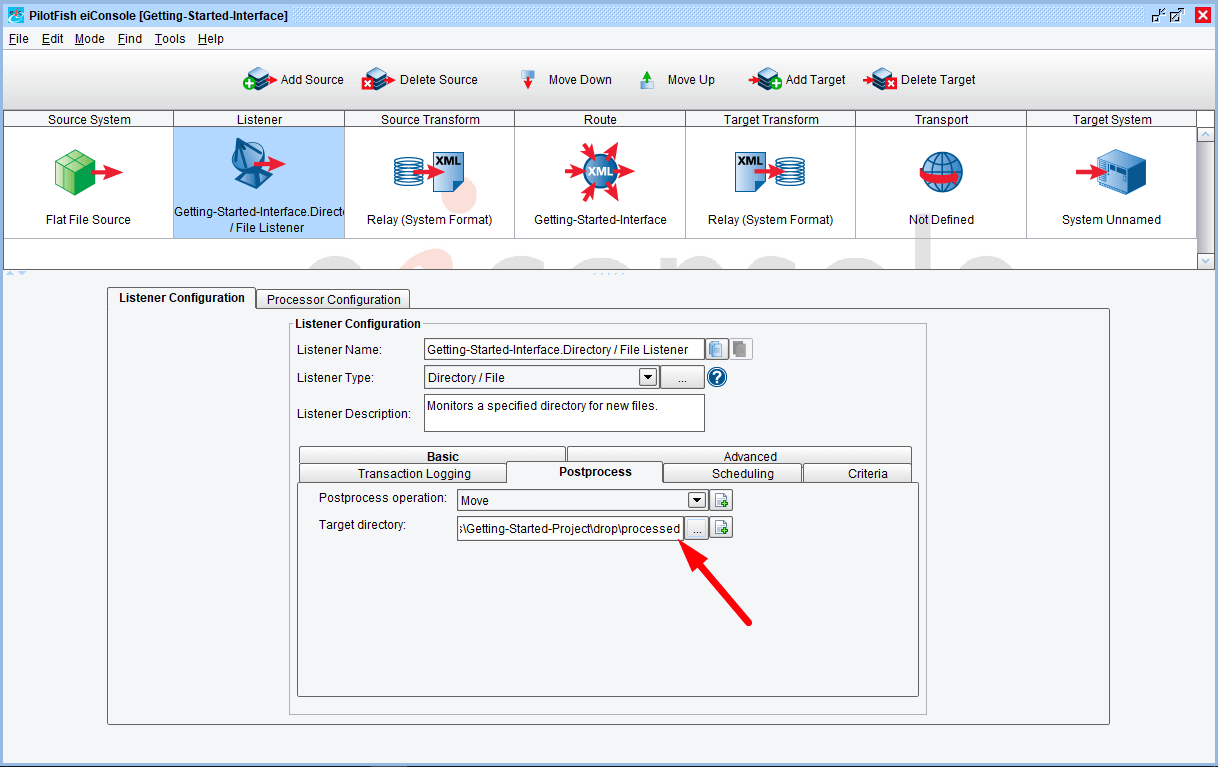
Next, to set the Target Directory, click the Ellipsis button to the right of Target directory. The Select Target Directory dialogue opens. Navigate to the newly created drop folder in your Working Directory. Select it and double click. Click the New Folder icon and name the new folder “processed”, select it and click Open.
Whenever a file is picked up by the Listener, it will be moved into this directory after it has been processed.
Processing the file
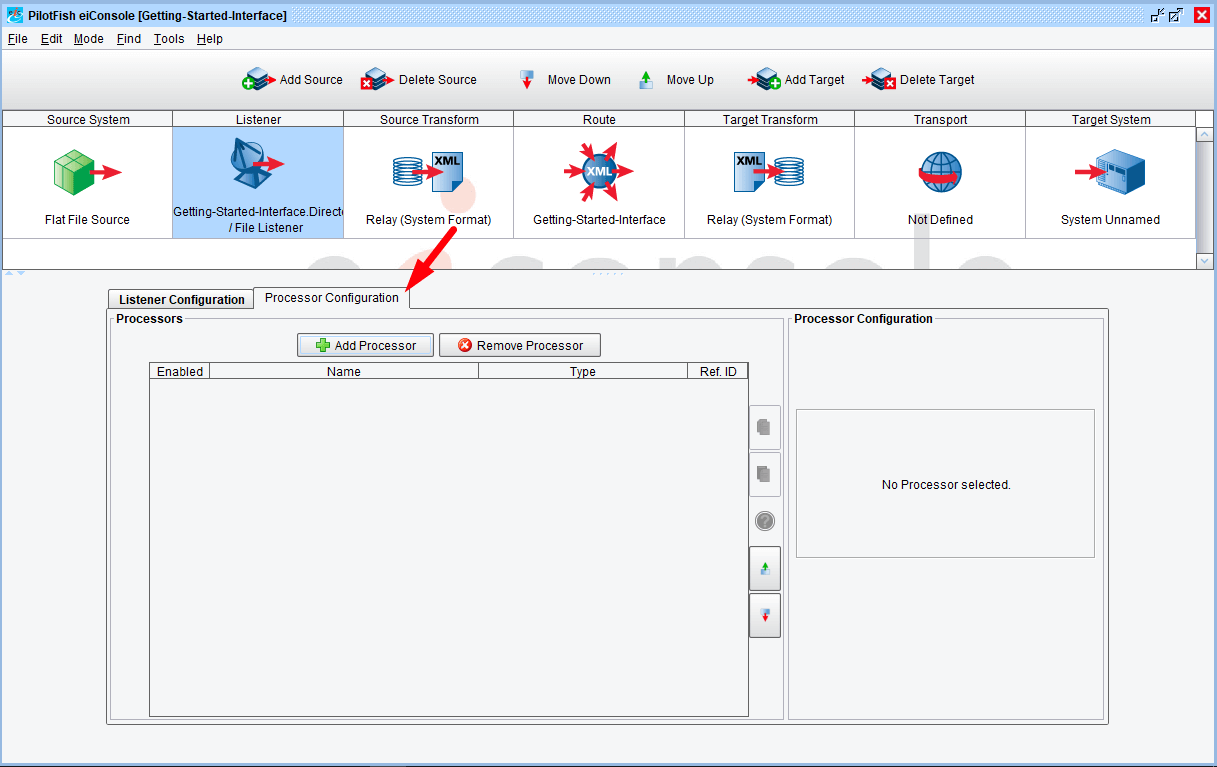
There are several built-in processors available to process the incoming file.
The next stage of the process is the Processor Configuration, so choose this tab. Processors allow you to do general work over the data stream after information has been brought into the eiConsole.


