eiConsole Bundle Upgrade
There are 2 ways to update the eiConsole bundle: PilotFish Interfaces Exchange (PIE) and direct .eipb file download.
The most common is updating through PilotFish Interface Exchange. Note, that every bundle version at PilotFish Interface Exchange is a separate bundle. So, if you want to download bundle version 1.1 instead of 1.0, you can’t just click some Update button, you should download bundle 1.1 as another new bundle.
PilotFish Interface Exchange
Welcome to the eiConsole PilotFish Interface Exchange (PIE) bundle/template demonstration. In this demo, we’ll show how bundle/templates can be downloaded from the PilotFish Interface Exchange (PIE). We begin with an empty project in the Route File Management window. The first thing we’ll do is open up the PilotFish Interface Exchange Web Center, or PIE Web Center, by clicking this icon.
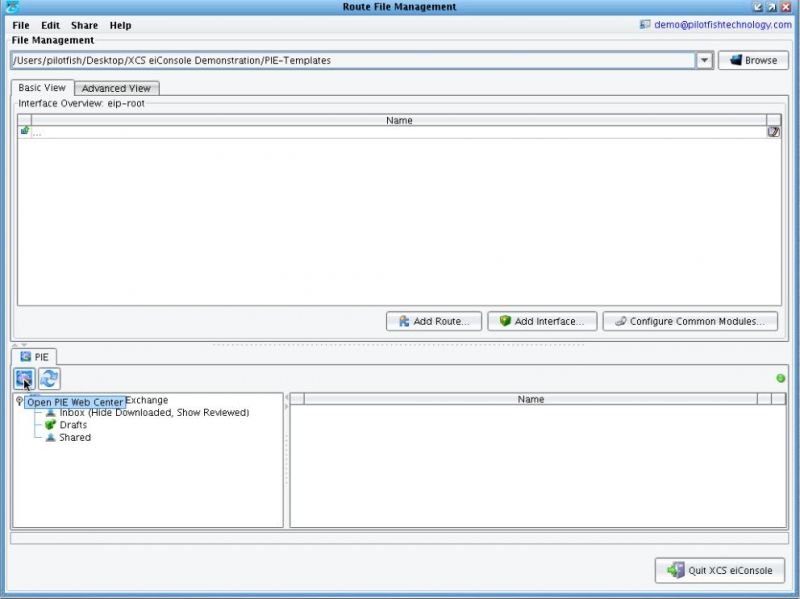
Visiting the PIE from the eiConsole will automatically log you in. You’ll notice that you’re logged in by the presence of a LOGOUT button in the upper right-hand corner of the screen.
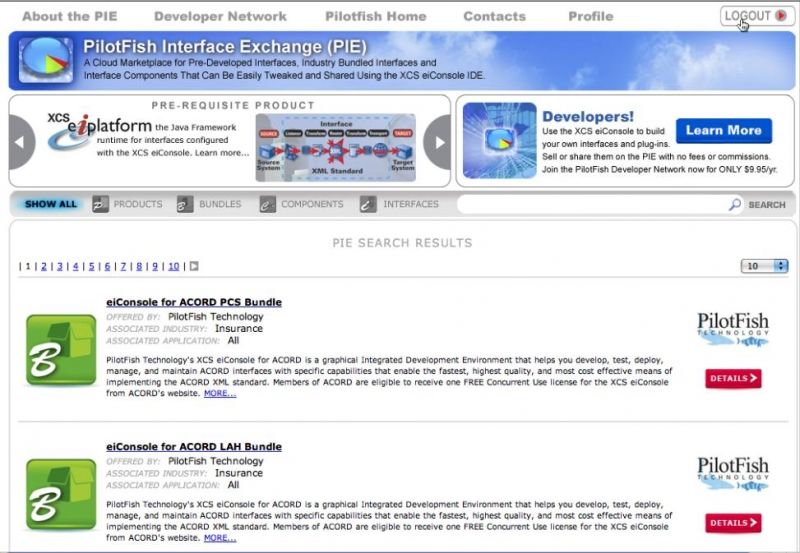
Next, we’ll search for the bundle/template that we want to download. In this case, we’ll be looking for an HL7 Immunization template. Type the search term in the search box, and then hit SEARCH and you’ll be presented with a list of products available on the PIE.

Click the Details button on the product that you’re most interested in.

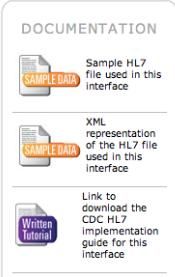
Here on the right-hand side of the screen, you can see various documentation. For an HL7 template, this will include a sample HL7 message, a sample XML representation of the message after it’s been processed through the HL7 Transformation Module and a link to the appropriate Implementation Guide on the HL7 or other HL7 Health related site.
Assuming that this is the template that you’re interested in downloading, proceed to click the Free Download button.

No download will occur in the browser. Instead, you’ll be greeted with a message that says, “This version is marked as downloaded for you.”

Returning to the eiConsole, you’re immediately presented with a dialogue that allows you to download this resource. Click the Download Now button.

If prompted, make sure to accept any agreements that are presented. After download, links to the implementation guide, the sample XML, and sample HL7 message will appear in your PIE inbox.

Most importantly, there will also be an icon indicating the product or template itself.

To move this template into your project, select it from the PIE Inbox and drag it into your Project View. When you release the mouse, the Package Import dialogue will appear.
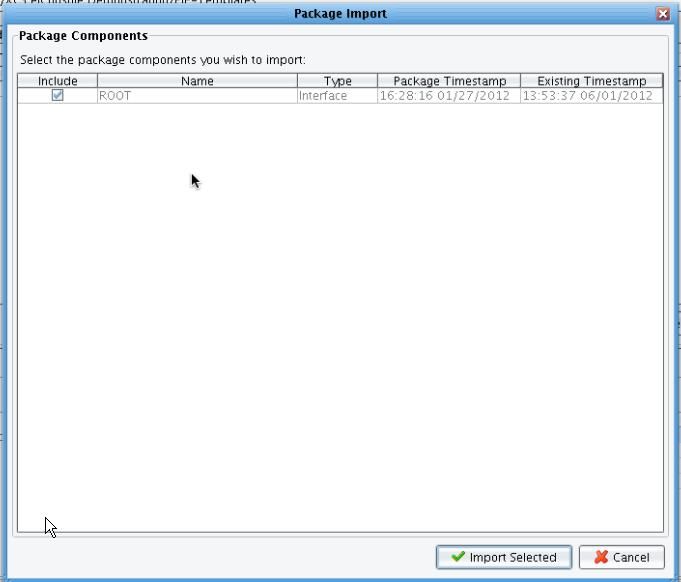
It will list all of the components in the template, in this case, an interface. You can choose what you want to include or exclude. In this example, we’ll include the single root interface that was included in the template bundle.

Now, click the Import Selected button.

Next, you’ll be prompted to merge Environment Settings. If this project had existing Interfaces are the highest-level of visible abstraction within the eiConsole. Any given Interface is defined by one or more Routes. ” class=”lexicon-term”>interfaces, it may have existing environment settings properties. In that case, you would be able to merge additional environment settings from this template with your existing environment properties. Since this is a brand new project, it will merge it with a blank environment settings. Click the Yes button to continue.

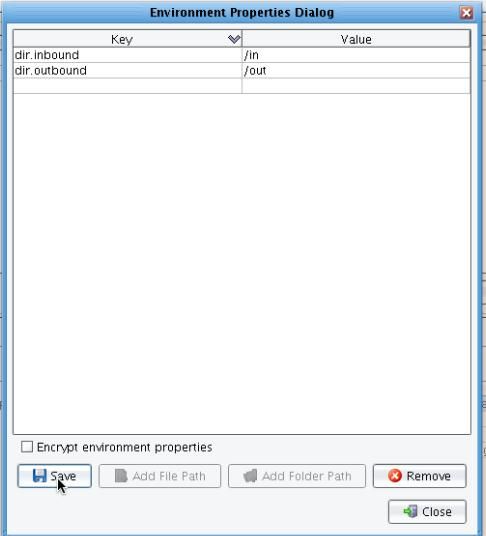
Next, you’ll be presented with the Environment Properties Dialog. This gives you a list of all of the specific environment settings used by this interface template. In this case, it includes an inbound and outbound directory for consuming and producing files. You can change the value here to match your system.
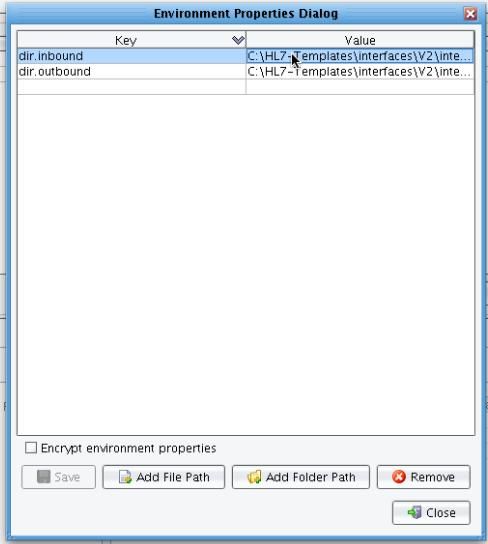
After you’ve changed these values to match your system, click the Save button and then Close.
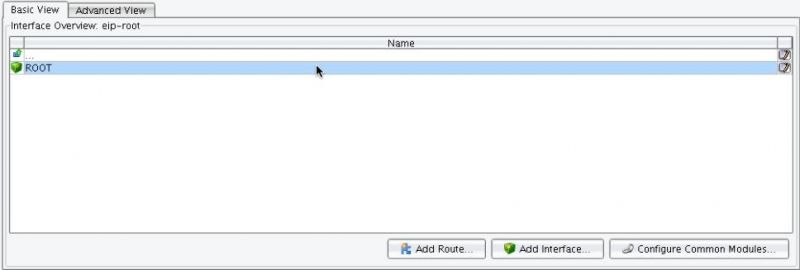
Having completed the import you can see that the Root interface now appears within the project.
Direct .eipb file download
Open Route File Management window. The first thing we’ll want to do is to set up a new Working Directory so that we can import the sample files.
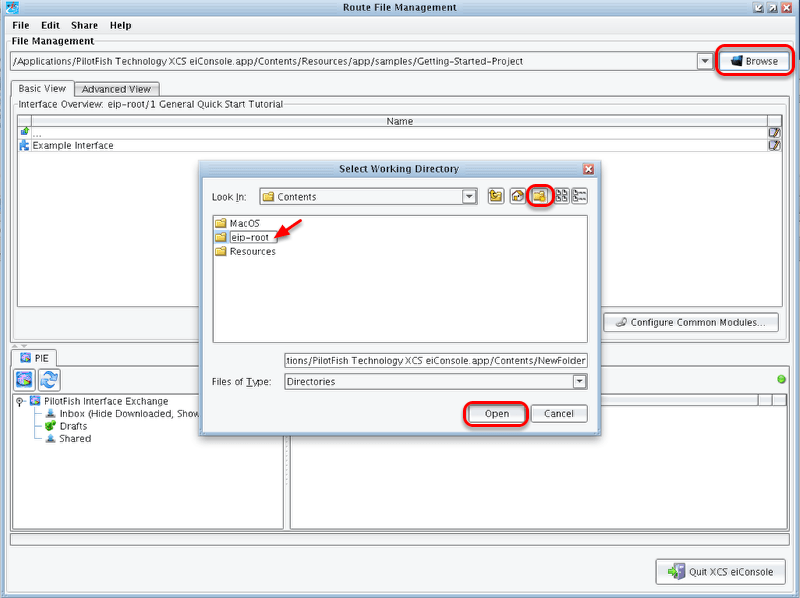
Select the Browse button and using the icon buttons (Up One Level, Home, etc.) navigate to the location of your choosing for a new Working Directory (This can be anywhere on your computer). I select my XCS eiConsole’s contents folder, I use the Create New Folder icon to create a new folder, and I enter a name. For ease of reference in this tutorial, I name it “eip-root”. (You can name the folder anything you choose.) I then select it and click Open.
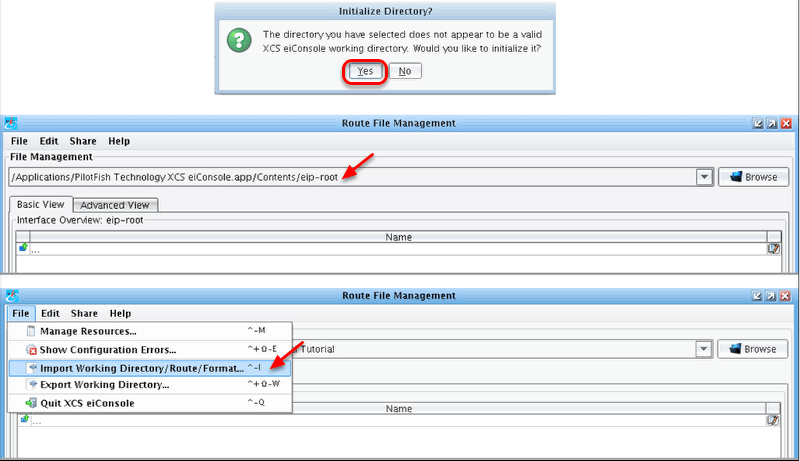
So first, the Initialize Directory window will open and ask you if you would like to initialize it. Click Yes. (This creates the necessary directories data, formats, lib and routes that the eiConsole requires.)
Next, the Route File Management window gets updated. Note your new Working Directory path in the drop-down (under File Management, next to the Browse button.)
What you will want to do now is to open the sample files. From the File menu at the top, Select the Import Working Directory / Route / Format from the drop-down and click.
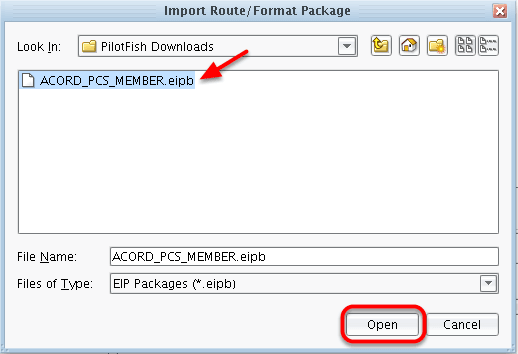
When the Import Route / Format Package window opens, navigate to the location of the downloaded eiConsole .eipb file (mine was on my Desktop in a folder called PilotFish Downloads.) I select it and click Open.
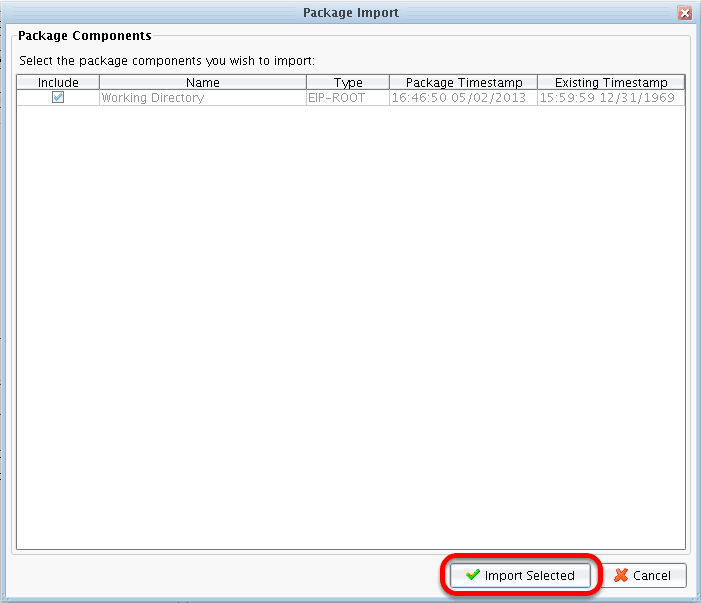
The Package Import window will open. Select the Working Directory (in this instance there is only one file. Make sure it is checked). Then, click the Import Selected button.

You may be prompted to restart. If so, click Restart Now.
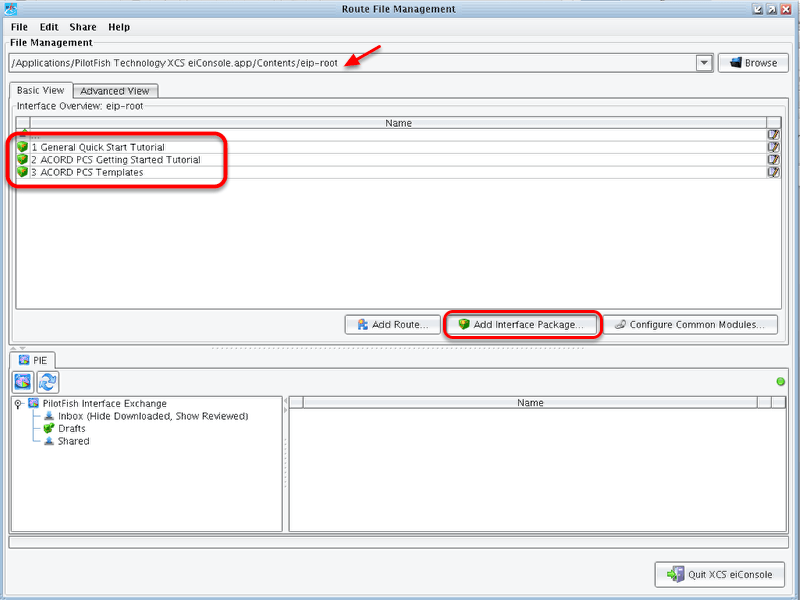
The Route File Management window will open with all the Interface Packages included in your specific Bundle. Depending on which bundle you selected, the names will be similar to those shown above. Also, here you can add custom interface packages or routes.
Bundle is installed.
