
FastRez Tutorial – Part 2
Welcome to part two of the XCS eiConsole for OpenTravel FastRez Getting-Started tutorial.
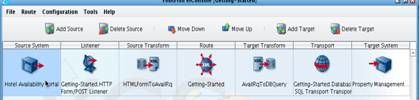
In the first part of this tutorial you developed the Getting-Started interfaces are the highest-level of visible abstraction within eiconsole. any given>Interface is defined by one or more Routes. ” class=”lexicon-term”>interface. In this Interface, information was posted from an HTML Form to an HTTP Form/POST Listener. A transformation translated an XML version of the information posted from the Form into a FastRez HotelAvailRequest. That information was then routed along towards a Property Management system database. The Target Transform translated the HotelAvailabilityRequest message into a database query. The database query was executed against a local relational database and the results were returned to the Transport. You configured the CallBack Listener of this Transport to call the Hotel-Avail-Portal-Response-Listener; however, the response route was not developed. During the course of this tutorial, you’ll build that response interface.
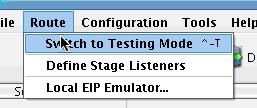
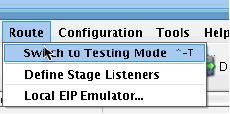
The first thing you need to do is get a sample of the data that will be returned from this Transport. To do this, open up the Getting-Started route, and in the Route menu switch to testing mode.
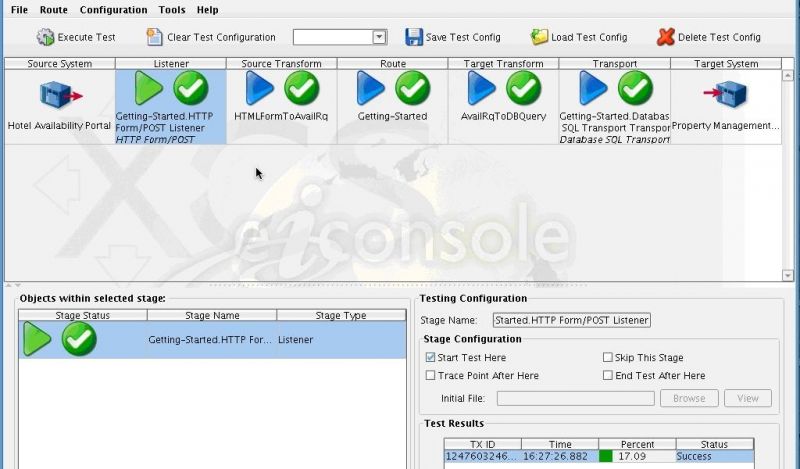
Let’s run a test just as we did at the conclusion of the first part of the tutorial. Click on the Listener icon and choose Start Test Here in the Stage Configuration.
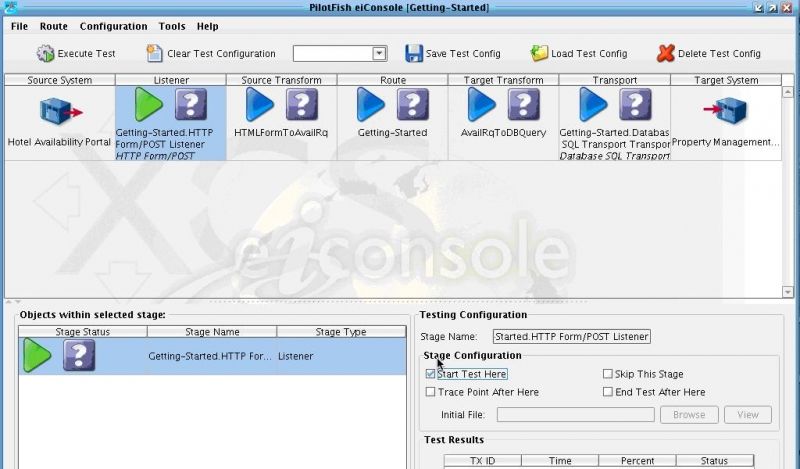
Now click Execute Test.

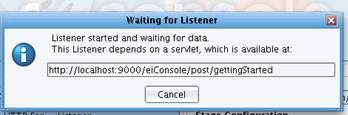
The Getting Started HTML Form/POST Listener will wait for information to be submitted from the Web Form.
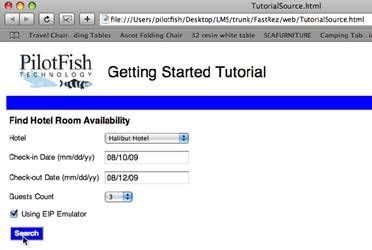
In the web directory underneath your installation you’ll find the Tutorial Source HTML page. Open this in your browser.
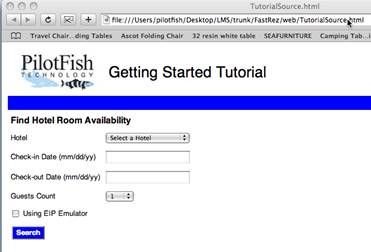
Fill out the form and click Search.
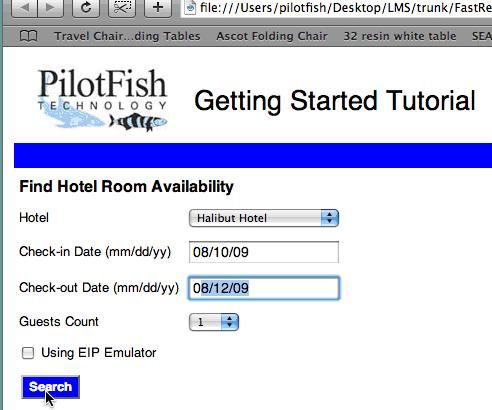
Checkmarks will indicate successful execution of the HotelAvailabilityRequest.
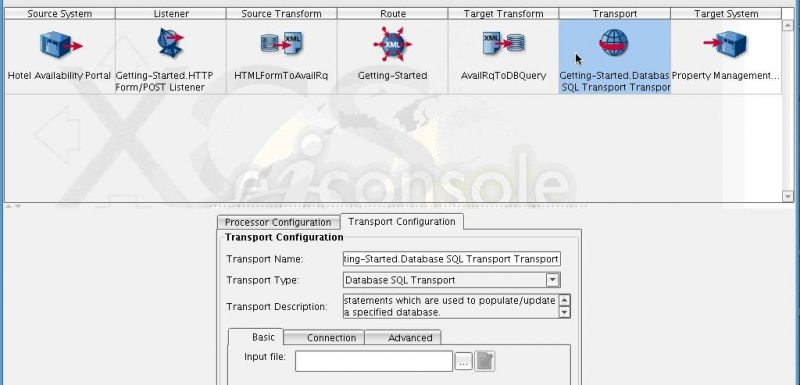
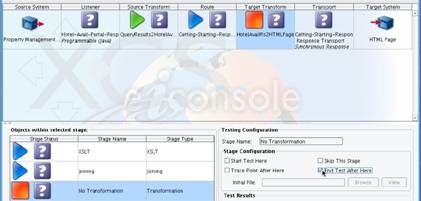
Now click on the Transport stage and double click on the Getting-Started.Database transport in the Objects within selected stage table.
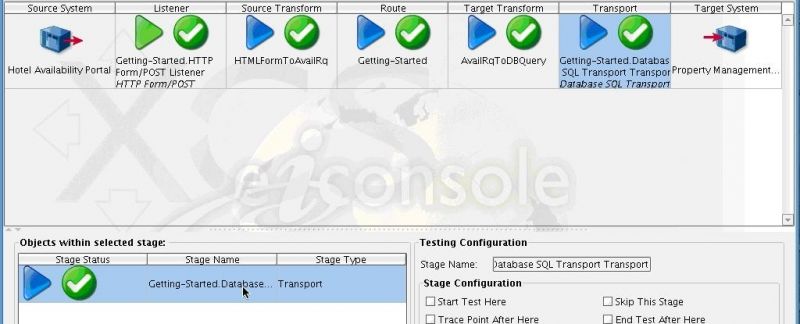
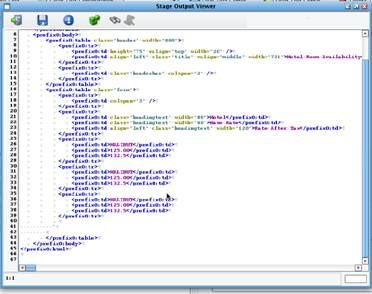
Once again, this is the information that is returned from the relational database in response to the HotelAvailability query. This XML data stream will be an example of the Source XML you’ll expect in your subsequent response interface.
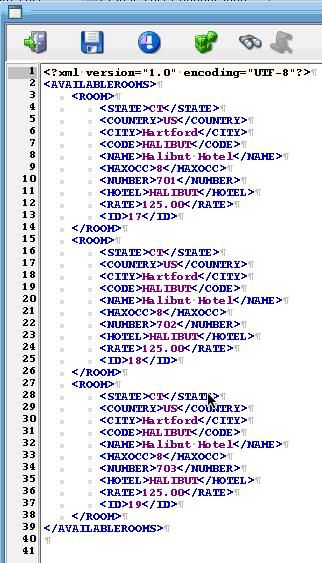
Let’s save this to disk. Click the Save Results icon in the Stage Output Viewer.

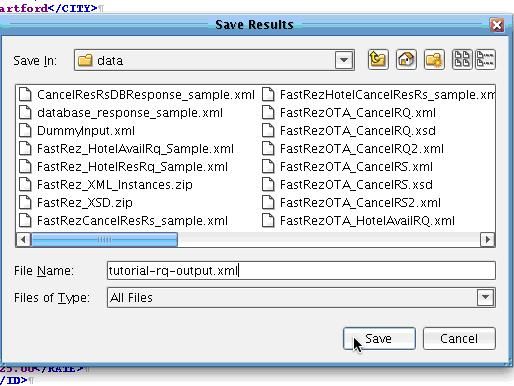
Save it in the data folder under the name tutorial-rq-output.xml. Click Save.
Now click the Return to Console Icon.

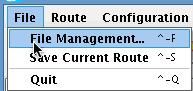
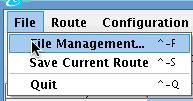
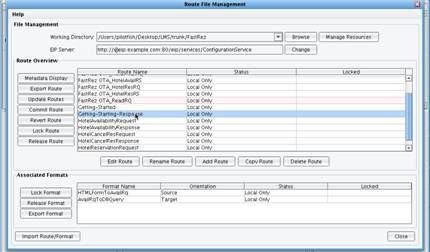
Underneath the main file menu, return back to the File Management dialogue by selecting File Management.
You now have what you need to begin building the response interface. Click the Add Route button.
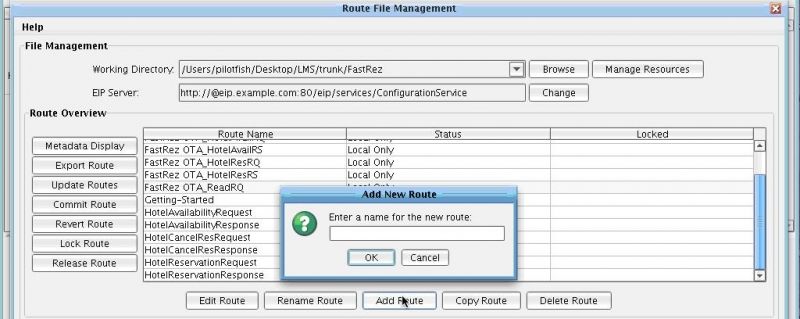
The Add New Route dialogue will appear. Enter the name Getting-Started-Response for your route and click OK.

Double click the Getting-Started-Response row in the main route grid. Click Add Source and Add Target.
You’ll now work from left to right across the screen depicting the flow of the response data from the Property Management
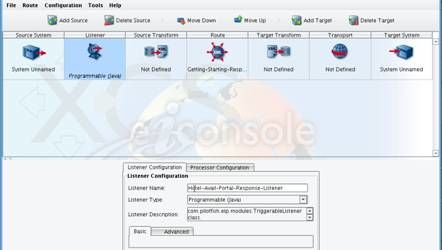
system database back to your Web browser client. Click on the Listener icon.
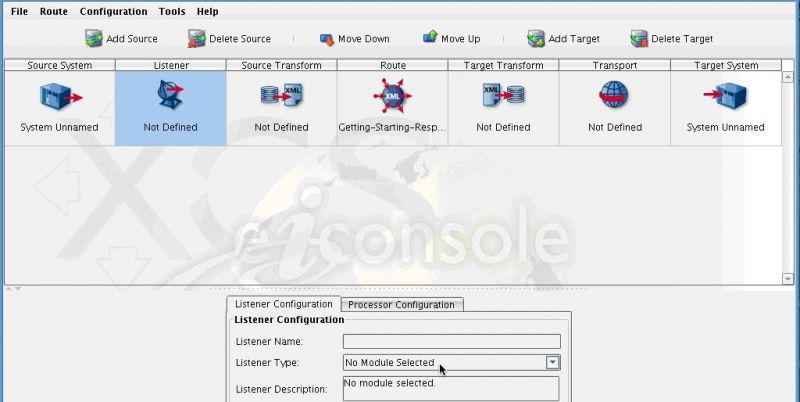
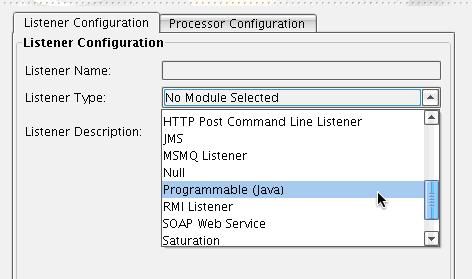
In the case of a request-response interface, the Listener configuration used is typically a programmatic or triggerable Listener. Select Programmable from the Listener type dropdown.
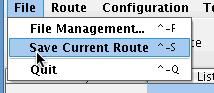
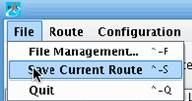
When the database SQL Transport of the request route completes, it will receive the response data from the database and translate it into the XML data stream that you just saved. It will then call the Listener configured as the callback Listener in that Transport. This Listener name should match the configuration option you use there. Let’s simply cut and paste. Under the File menu, select Save Current Route.
Then, return back to the File Management screen by selecting File Management from the same menu.

Double click the Getting Started interface and click on the Transport stage.
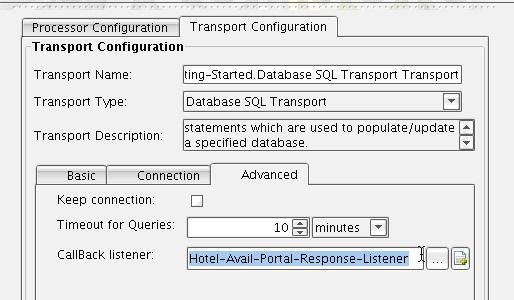
In the Transport Configuration area, click on the Advanced tab. Copy the value from the CallBack Listener.
Return to the File Management window…
And re-open the Getting-Started-Response route. Double click the Getting-Started-Response in the Route Overview Grid.
Click the Listener icon, then paste the Listener name that you just copied from the CallBack Listener of your request route. It should read: Hotel-Avail-Portal-Response-Listener. This is all the configuration that you’ll need to do for the Listener.
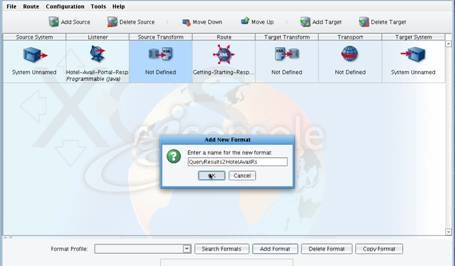
Now move on to the Source Transformation. The Source Transformation that you’ll need here will need to take the data returned from the database and translate it into a HotelAvailabilityResponse message. Click Add Format to create this transformation. Name it QueryResults2HotelAvailRs and click OK.
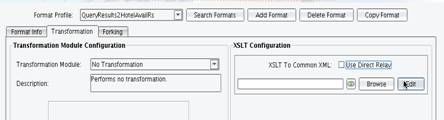
Since your query results are already in XML form, no Transformation Module will be required. In the XSLT Configuration section, uncheck Use Direct Relay, and click the Edit button to launch the XCS Data Mapper.
You’ll now need to load the database results as the Source and the OpenTravel FastRez message as your Target. Click the Open source format icon above the left hand panel.

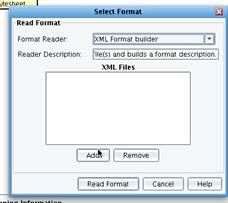
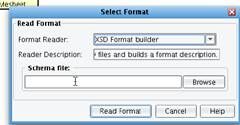
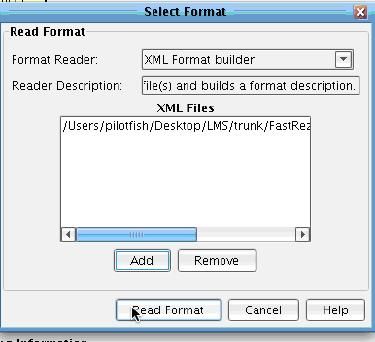
Read in the sample XML that you saved from test mode earlier. Select XML Format builder from the Format Reader dropdown

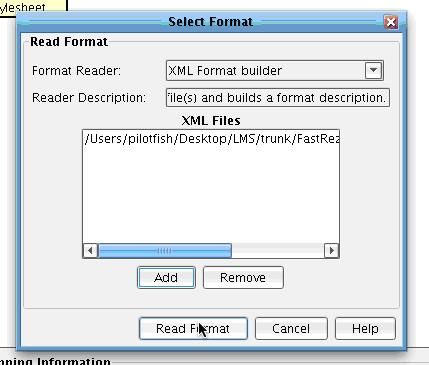
The XML Format builder allows you to enter a set of XML files from which you’ll infer a schema. Click the Add button underneath the XML files list.
Navigate to, and double click on, the tutorial-rq-output.xml that you saved from test mode. It will appear in the XML Files list. Now click Read Format
When prompted to use the XML as Source sample data, click Yes.

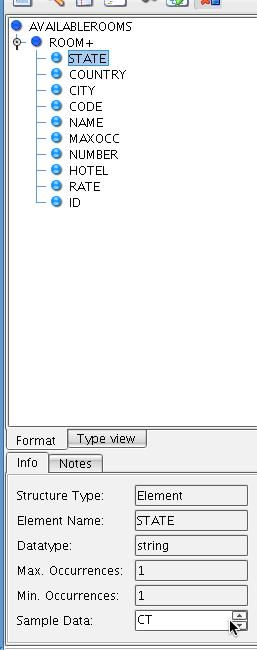
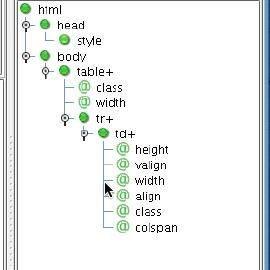
You’ll note that the tree on the left hand side of the screen now depicts the logical structure of the results coming back from the database. You’ll also see if you click on a particular field, Sample Data will be populated and a scrollable list below.
You’ll now need to load in the FastRez HotelAvailabilityResponse. Above the right hand panel, click the Open target format button

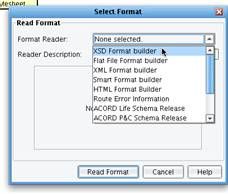
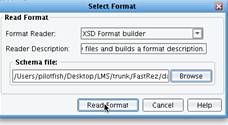
This time you’ll use the XSD

Format builder. Select that in the Format Reader dropdown.
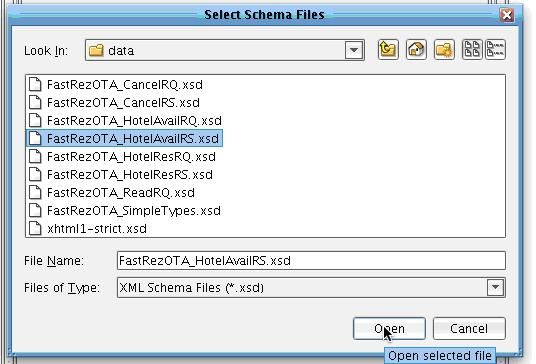
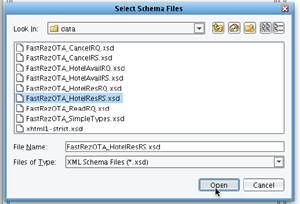
Click Browse in the schema file list…

And navigate to the FastRezOTA_HotelAvailRS.xsd response schema. If you have not yet licensed the OpenTravel FastRez schemas, you’ll need to do so before completing this portion of the exercise. Select this schema and click Open.
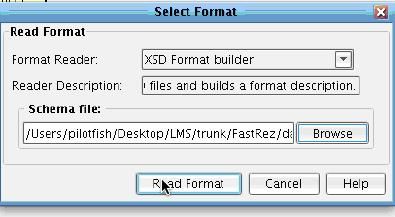
Click Read Format.
The structure of the HotelAvailabilityResponse will appear on the right hand side of the screen. You’ll note that when you click on an element or attribute that has documentation, a Doc tab will also appear.
You’ll now need to load a sample of the HotelAvailabilityResponse that you’ll use as a template for the mapping. Click the View sample data button above the right hand panel.
![]()
![]()
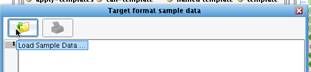
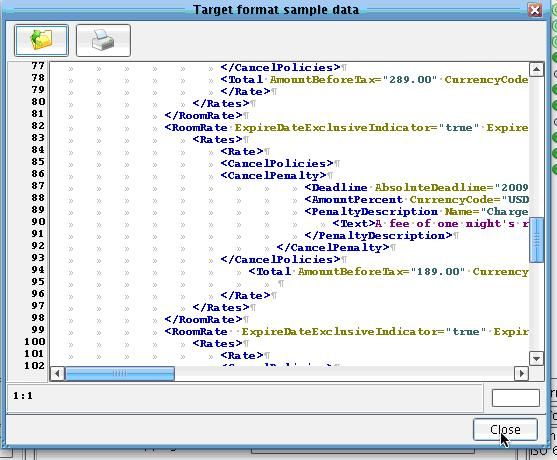
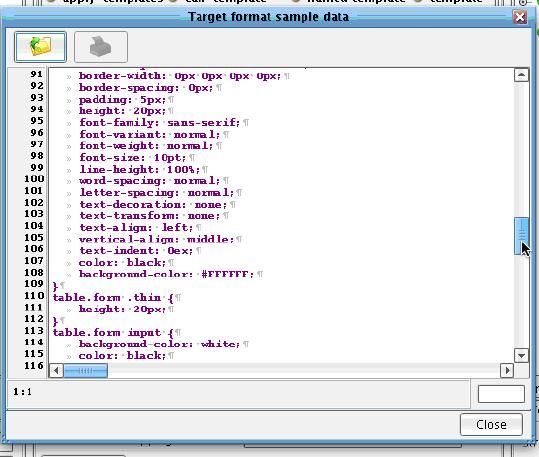
The Target format sample data dialogue will appear. Click the Load sample data button.
You’ll now need to navigate and double click on a HotelAvailabilityResponse sample.

Click Close.
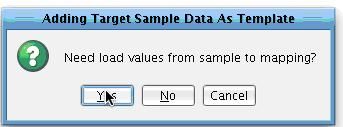
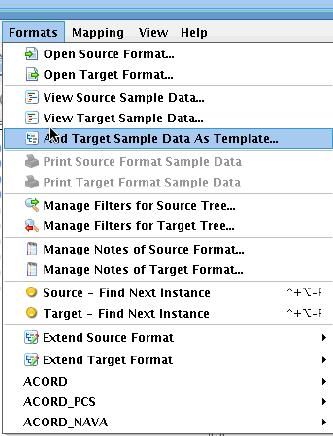
You’ll now add the Target sample data as a template. Under the Formats menu, select Add Target Sample Data As Template

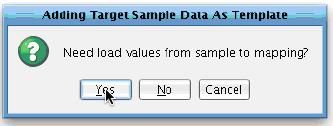
The Adding Target Sample Data As Template dialogue will appear. When prompted as to whether or not you want to load the values from the sample to the mapping, click Yes.
Now that you’ve loaded the sample data on the Source side and the HotelAvailabilityResponse message on the Target side, you’ll need to drag and drop to create the mapping in the middle.
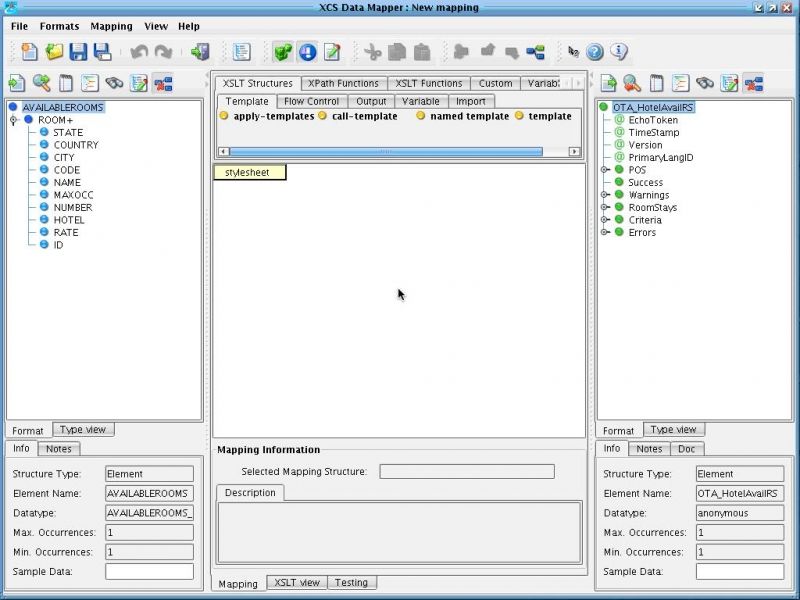
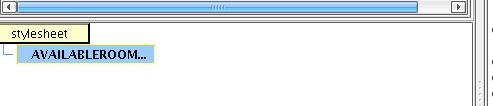
You’ll be creating one OTA_HotelAvailRS message each time you hit an AVAILABLEROOMS element. So first, drag the AVAILABLEROOMS element onto the style sheet. This will create your root template.
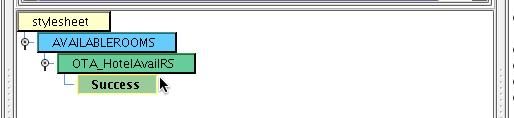
Now, generate the structure that you want to create. You’ll want to create an OTA_HotelAvailRS element. Drag it from the Target and release it above AVAILABLEROOMS in the mapping.

Also include a Success element. Drag this on top of the OTA_HotelAvailRS message.
For each available room, you’ll want to indicate the rate for that room. To do that you’ll want to add a RoomStays element. Drag this onto the OTA_HotelAvailRS element.
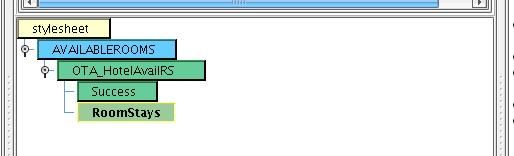
Similarly, drag RoomStay onto RoomStays.

Expand RoomStay in the Target tree. You’ll be mostly interested in just the rates for the rooms. Include the RoomRates element underneath RoomStay. Select RoomRates and drag it on top of RoomStay in the mapping.

Expand the RoomRates node. are nodes which have attributes and child nodes. generally they pretty interchangeable. using a good analogy you can think of it this way: node is like fruit an element apple. apple kind class=”lexicon-term”>node to include an individual RoomRate underneath RoomRates. Select RoomRate and drag it on top of RoomRates in the mapping.
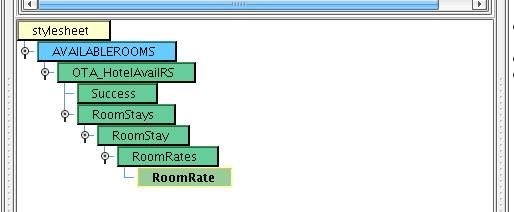
Expand the RoomRate Node. Underneath this you’ll see Rates. Select Rates and drag it on top of RoomRate.
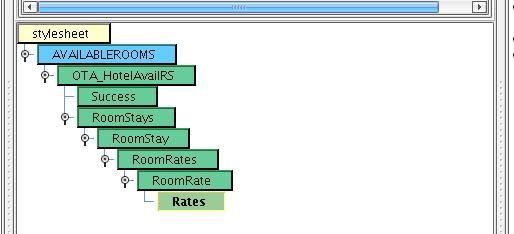
Expand the Rates element and choose Rate. Select Rate and drag it on top of the Rates element.
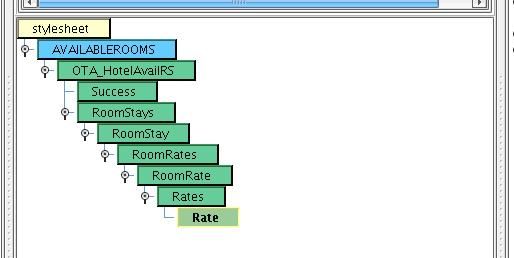
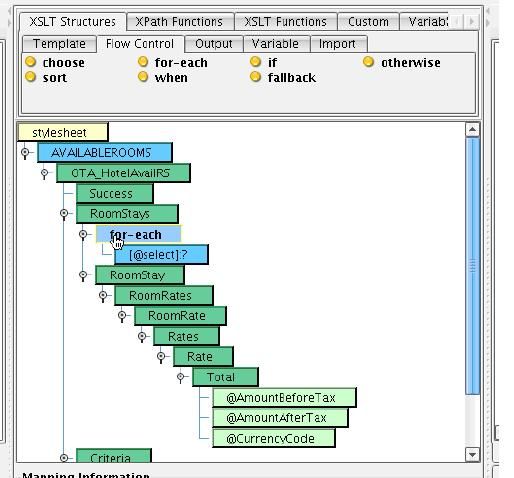
Expand Rate and add the Total element. Drag this on top of Rate.
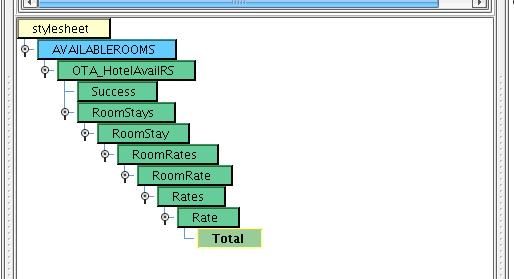
Expand the Total and you’ll see that you have the AmountBeforeTax and the AmountAfterTax. The information in your database is just the information before tax, but you can calculate the amount after tax. Drag both onto Total.
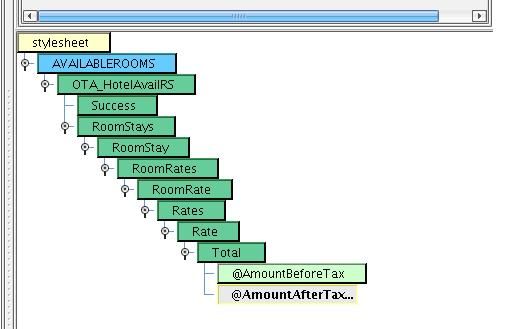
Your rates are in US dollars, so add the CurrencyCode.
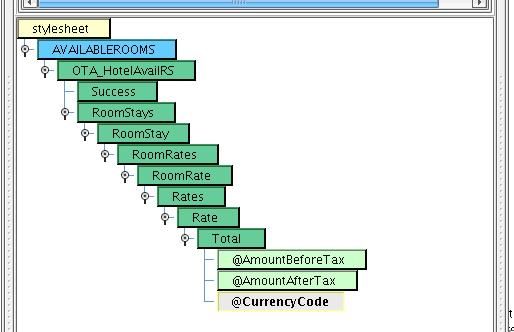
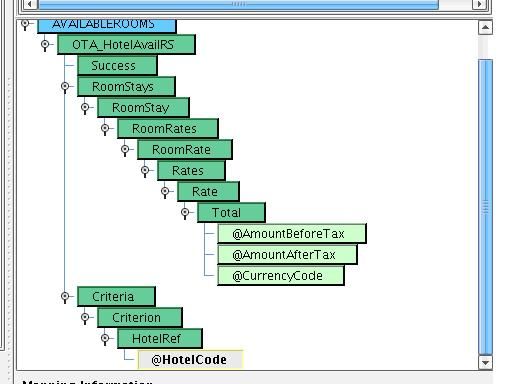
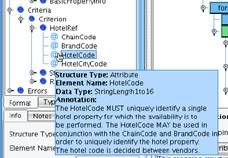
In addition to the rate information, you’ll include information that was present in the query, primarily the hotel code that you were providing rates for. Select Criteria from the Target and drag it on top of its appropriate parent – OTA_HotelAvailRS.

Also drag Criterion on top of Criteria, HotelRef on top of Criterion, HotelCode on top of HotelRef.
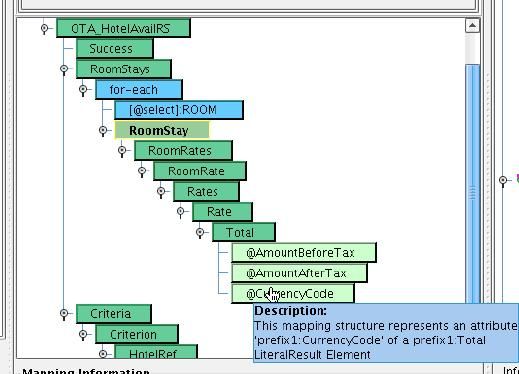
That should be enough for your purposes. Now you’ll need to map information onto these various elements. For each available Room from your response in the query, you’ll want to generate a RoomStay. To do that, you’ll need to create a looping structure between the RoomStays element, which will occur once, and the RoomStay element which will repeat for each room. To do this, select the XSLT Structures tab at the top of the screen, and click on the Flow Control sub-tab. You’ll use the for-each tool. Click for-each and drag it in between RoomStays and RoomStay. A for-each will appear.
Since you’ll want to create a RoomStay for each room, you’ll select the Room element from the Source and drag it onto the for-each.

You now have a ma
pping block that will repeat for each room in the input. You’ll want to generate the whole RoomStay element for each room. You’ll now need to move RoomStay underneath that for-each. To do this, select RoomStay and drag it on top of the for-each element.
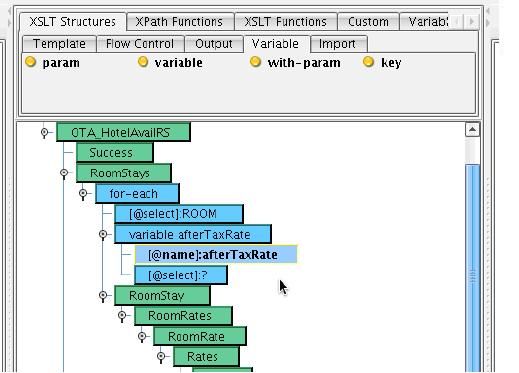
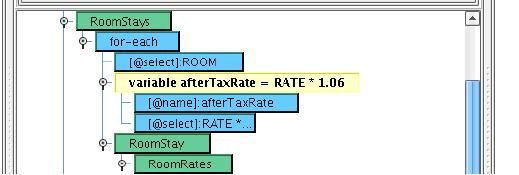
You now have three fields that you’ll wish to map, the AmountBeforeTax, AmountAfterTax and CurrencyCode. The Rate in your Source is the AmountBeforeTax. You can create a variable to hold the AmountAfterTax. To do this, select the XSLT structures table and Variable sub-tab. Drag the variable node directly underneath the for-each. A blue variable element should appear between the for-each and the RoomStay.

You’ll need to give the variable a name, and also indicate how the value should be selected. Double click on the name attribute underneath variable. Enter the name afterTaxRate and click Enter. Now the afterTaxRate will be the rate times the 6% sales tax and the rate where the hotel is.
Select Rate and drag it onto the Select attribute. Now, double click the Select attribute and edit the text * 1.06 (to multiply the rate by 1.06). Click Enter.
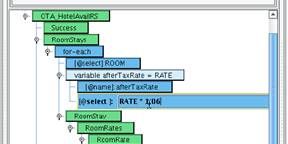
You’ve now successfully defined a variable for the afterTaxRate.
Now, you’ll want to return to mapping the Total section. You’ll want to map the AmountBeforeTax to the Rate from the Source. Select Rate, and drag it onto the AmountBeforeTax attribute.

To map the AmountAfterTax, double click on the AmountAfterTax attribute in the mapping. In the Value section, enter: $afterTaxRate. The $ indicates that you are going to be referencing the value of a variable. afterTaxRate is the variable that you defined earlier. Click Enter.
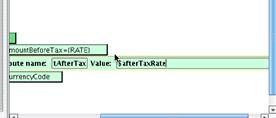
CurrencyCode will always be USD. Double click the CurrencyCode attribute and enter the single quoted value USD. Hit Enter.
The only other attribute that you’ll map is the HotelCode attribute underneath the HotelRef. Select HOTEL from the Source format and drag it on top of the HotelCode attribute.

You’ve now completed your mapping. You can test the mapping from right within the XCS Data Mapper. To do this, click on the Testing tab at the bottom. You’ll see that the sample XML document already appears as the Source for your test. Clicking the Gear icon in the top left portion of the testing pane will execute the transformation…
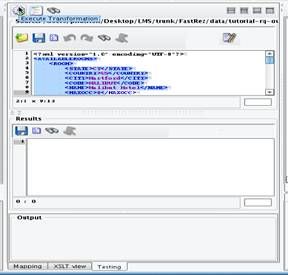
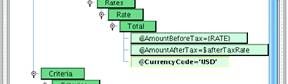
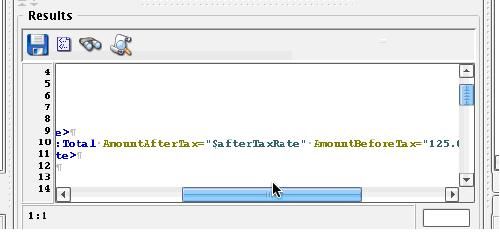
And place the results in the Results area. You can now review the results. Looking at what you’ve mapped to the Total element, you can see that the afterTaxRate is not correct. It is showing the $afterTaxRate as opposed to the actual calculated value.
To fix this, click on the Mapping tab. Double click on AmountAfterTax. You’ll note that when you pull a Value to populate an attribute, you use the { } around the expression. In the Value text field, add the { before the $ and } at the end of afterTaxRate. Click Enter.

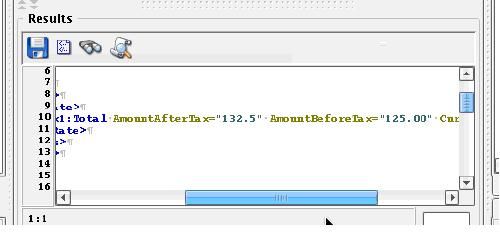
Return to the Testing tab by clicking the Testing label at the bottom portion of the screen and re-execute the transformation by pressing the gear. When you now examine the total you see that the correct amount after tax and before tax is visible. The CurrencyCode is correctly mapped to USD.
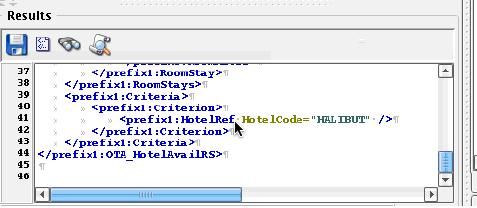
You’ll see that you correctly created a RoomStay for each room available. You’ll see that you’ve also correctly mapped HotelCode into the HotelRef HotelCode attribute.
Since your transformation now looks good, you can click the Save icon in the upper left hand corner of the screen.
![]()
![]()
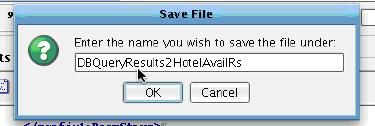
The Save File dialogue will appear, prompting you to provide a name. Let’s name this DBQueryResults2HotelAvailRS and click OK.
You can now click the Return to Console icon.
![]()
![]()
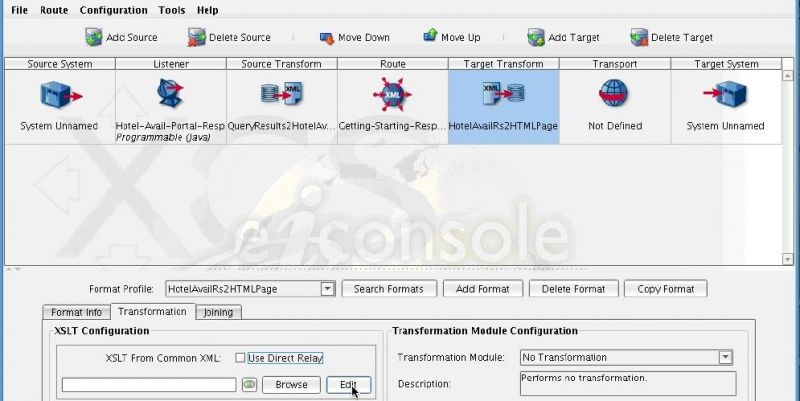
Your Source transformation is now configured. You don’t need to do any work in the Routing stage, so you can move directly to the Target Transform. Your Target Transformation for this route will take data directly from the HotelAvailabilityRS message and lay it out in HTML so that it can be returned back to the requester’s browser. To build this Transformation, click Add Format. Enter the Format name HotelAvailRS2HTMLPage and click OK.

The only configuration you’ll need to do here is the XSLT configuration. Once again, no Transformation Module will be required. You’re simply translating the data from the FastRez HotelAvailabilityRS message into an HTML page to be presented to the user. To do this, uncheck Use Direct Relay and again click the Edit button to open the XCS Data Mapper.
In this transformation, your Source will be the HotelAvailabiltyRS message. Click the Open Source format button above the left hand panel.
![]()
![]()
Select the XSD Format Builder from the Format Reader dropdown.
Click the Browse button in the Schema file configuration area. Again select the HotelAvailabilityResponse schema. Click Open.
Click Read Format.
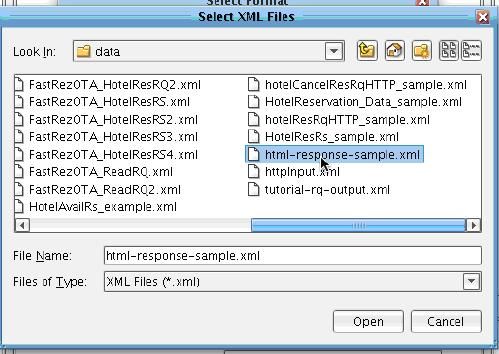
Your Target in this case will be an HTML page. Click the Open Target format button above the right hand panel. Select the XML Format builder from the Format Reader dropdown. You’ll be using the sample XHTML document to build your result. Click the Add button underneath the XML Files list.

In the data directory you’ll see a sample HTML file. It’s named html-response-sample.xml. Select this file and click Open.
Then choose Read Format.
Choose Yes when prompted to use that as sample data.

You’ll see the general structure of the HTML response depicted as a tree on the right hand side of the screen.
If you click the View Sample Data icon, you can see the actual HTML of your result.

This HTML represents a static page. You’ll want to replace the static portions that you want to have created dynamically with mappings.
To do this, first choose Add Target Sample Data As Template, select this from the Formats menu.
When promoted to load values from the sample to the mapping, click Yes.
The structure of the HTML document that you want to produce will now be present in the OTA HotelAvailRS template.

To give you an idea of what you’ll be doing here, first you may want to take a look at the way that the static HTML appears when launched to the browser. In the Web directory the TutorialResponse.html file is an HTML version of the file that you just loaded into the Data Mapper. You’ll see that you have a basic HTML page labeled Hotel Room Availability, some styling, and then a list of the available rooms. This portion of the HTML should be dynamically generated from the mapping.

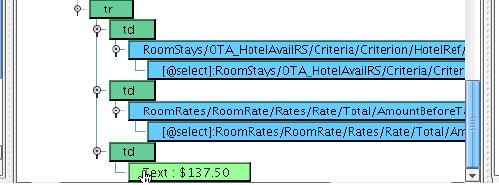
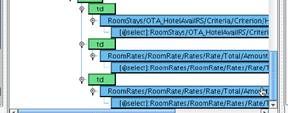
If you scroll through the mapping, you’ll begin to see sections where table rows are created with each of these values.
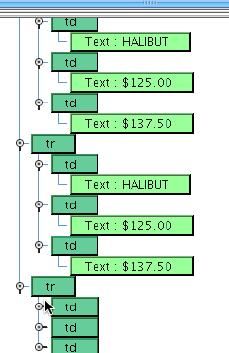
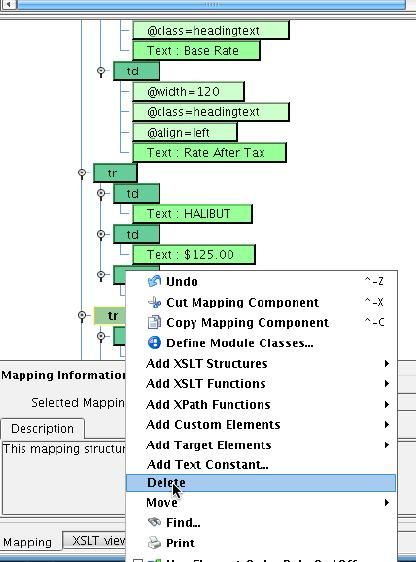
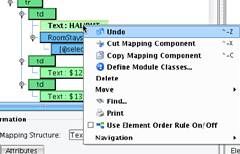
First delete all but one of these rows. Left click on the tr element, right click and choose delete. Repeat this process for all but one of the table tr rows.
You now have the table row that you want to populate with dynamic values. Again, you’ll want to create a row for each RoomStay available. Click on the XSLT structures tab, and the Flow Control sub-tab. Again, you’ll want to use the for-each structure. Drag the for-each icon directly above the “tr” table row.
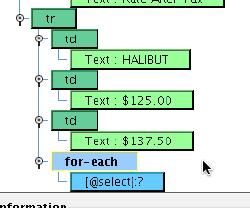
Now, to indicate that you want to repeat this section for each RoomStay, drag the RoomStay element on top of the for-each. You also need to ensure that the table row is underneath the for-each. Drag the table row element on top of the for-each to ensure the table row is a child of the for-each structure. You’ll now need to replace the static text values with dynamic values from the result. You’ll want to map the HotelCode from the HotelCode attribute underneath the Criteria expression.
To do this, drag the HotelCode attribute on top of the table division (td) that currently has the HALIBUT text element.
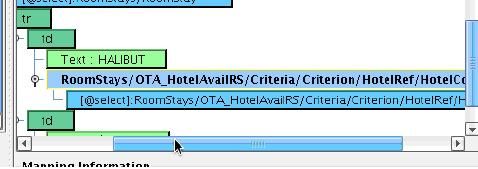
Delete the HALIBUT text element by left clicking on the HALIBUT text, right clicking, and then choosing Delete.
Since the HotelCode is not underneath your RoomStay element, you’ll need to provide a more direct XPath. Double click on the select attribute that appears underneath the td that’s going to be used to populate the HotelCode. You’ll see that you have a relative XPath that brings you all the way up to the Criterion expression. This XPath appears to be correct, so you won’t need to do anything further. Click Enter.

The next two values include the RateBeforeTax and the RateAfterTax. These map to those attributes from the Total element found underneath the Rate Total element. Drag the AmountBeforeTax attribute onto the table division for the pretax number. Left click on the static text, right click and choose delete from the context menu.
Do the same with the AmountAfterTax on the next table division.
You’ve now completed your mapping from your HotelAvailabilityResponse message into your HTML page. You can save your mapping and return to the console. Click the Save Current Mapping icon and provide the name HotelAvailRS2HTMLPage in the Save file dialogue and click OK.

Then click the Return to Console icon.

Your final stage is to configure the Transport. Click the Transport icon. In this particular interface, the original Listener was an HTML Form/POST Listener that was set to be synchronous, that is set to expect a response. This Transport’s job is to signal the Listener that the response is complete and the current data stream should be used as such. In the Transport type dropdow
n, select Synchronous Response.

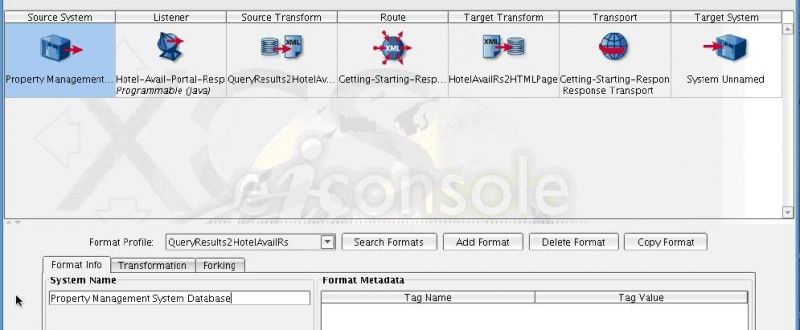
No further configuration of this Transport is required. Now that you’ve finished the topology for the Getting Started Response, you’ll add the Source and Target System metadata. Click on the Source System and add the System Name: Property Management System Database.
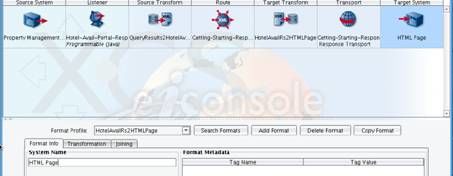
Click on the Target System icon and enter the name: HTML Page.
Under the File menu, select Save Current Route.
You’ve now completed the topology of your Getting Started interface. First, you’ll test this in testing mode. Under the Route menu, choose Switch to Testing Mode.
In this case, you’ll start your test with the Source Transformation and end it after the Target Transform. Click the Source Transform icon and then check the Start Test Here checkbox in the Stage Configuration.

Now click the Target Transform icon. Select the last object from the selected stage and check the End Test After Here checkbox.
Now, when you click the Execute Test button…
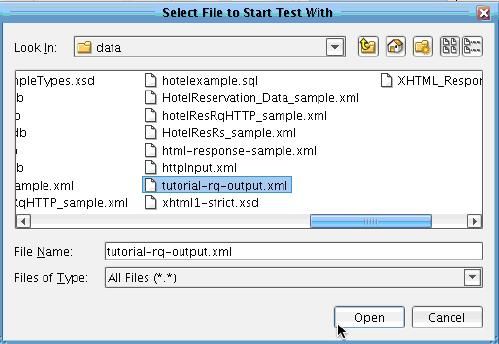
You’ll be prompted to select a file to start with. You’ll want to use the same database results XML file that you saved earlier. Choose the Tutorial Request output XML file and click Open.
As each stage completes the question mark will turn into a check mark. You can now view the data at each stage. Clicking the View button in the Stage Configuration section while Source is selected will show you the sample data as it came in.

You can then select the XSLT associated with the Source Transform, double click it
(select the Source Transform Stage and then click on XSLT within the Objects within selected stage grid) and see the generated OTA_HotelAvailRS message. You’ll see that three rates were found.

You can now move to the Target Transformation and double click the XSLT to see the XHTML output (XSLT line underneath the Objects within selected stage box).
Since everything looks good, go to the File Menu and choose to save the current route. You can now test the request and response routes together through another testing tool called the XCS eiPlatform Emulator. Under the Route menu, select Local EIP Emulator.

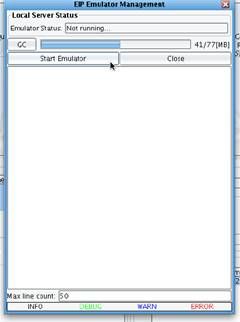
The EIP Emulator Management dialogue will appear. The EIP Emulator is a simulation of the eiPlatform server environment where these interfaces are the highest-level of visible abstraction within eiconsole. any given>Interface is defined by one or more Routes. ” class=”lexicon-term”>interfaces might be deployed. Clicking the Start Emulator button will start all routes in your local working directory. Click this button.
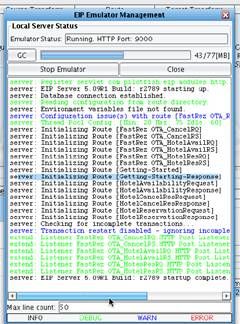
Logging information will appear in the text area below. You can see that both your Getting Started interface and your Getting Started response have been initialized.
Now, to test the interface from end to end you’ll again need to open up the HTML page associated with your request. Open the Tutorial Source HTML file in the Web Directory of your XCS eiConsole distribution. Fill this out just as you did when you were testing during the XCS eiConsole Getting Started Tutorial. Choose a Hotel, Check-in Date, Check-Out Date and a Guest Count. However, this time you’ll be doing your test in the EIP Emulator, so check the Using EIP Emulator checkbox and click Search.
You’ll note that the HTML response that’s returned does not look properly formatted. You’ll see that sometimes the XCS eiPlatform Emulator can catch problems that you won’t notice during Test Mode. In this case, the HTML is not rendered properly because you included a prefix for the XHTML namespace. You’ll need to remove that from your Response Data Mapping.
In the XCS eiConsole, click Stop Emulator and then click the Close button. In the Route menu, switch back to editing mode. Click on the Target Transformation. Click Edit in the XSLT configuration section to reopen the Data Mapper.

You’ll notice that all of your XHTML elements are prefixed with the prefix 0.
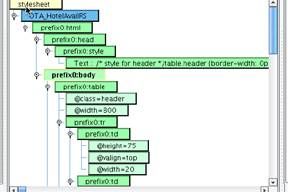
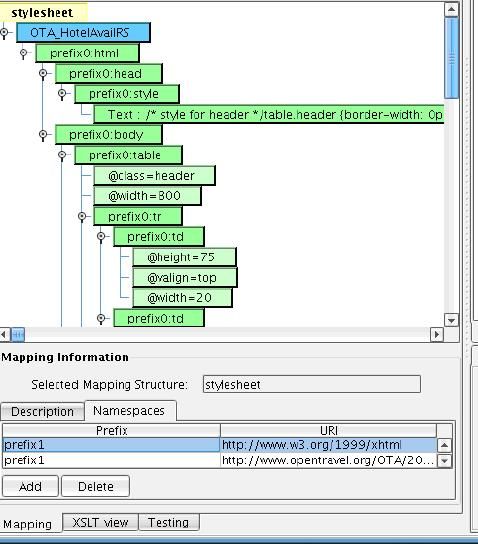
You’ll want to remove this prefix from your output. To do this, click on the Stylesheet element (at the top) and then click on the Namespaces tab in the Mapping Information area. Double click on prefix 0 and make the space empty. Click Enter. Click the Save Current Mapping button and the Return to the eiConsole button in the toolbars.
Under the Route menu, choose local EIP Emulator and restart the Emulator by clicking the Start Emulator button. Return back to the Web Browser and click Search. This time the HTML response will be properly styled in your browser.

You can test this with another case by clicking back in your browser and choosing another hotel. You can see that the values populated here are dynamic.

Now that you’ve completed your testing, you can return to the XCS eiConsole, stop and close the Emulator window.
Under the File menu, choose Save Current Route to save your work and then select File Management from the menu to return back to the Route File Management dialogue.
You’ve now successfully created the Getting-Started-Response interface to handle the results of the original Getting-Started interface. If you are a licensee of the XCS eiPlatform, this pair would then get deployed to an XCS eiPlatform server where it could run in an automated environment. This concludes part 2 of the Getting Started tutorial for the XCS eiConsole OpenTravel FastRez bundle.