eiConsole v.21R1
Documentation
eiConsole Tutorial Basic
Using Transports (Adapters)
In the eiConsole, a “Transport” is another type of adapter. The role of the Transports is to accept a transaction, send it (to file, to HTTP, or to whatever communications form they use), and then mark that transaction as completed. Transports are the eiConsole components that are used to transmit data using a variety of protocols to the desired Target systems. Transports are configured in exactly the same manner as Listeners. Generally, the transport types are about the same as the Listeners. There are, however, a few Transports for which there are no corresponding Listeners, and vice-versa, generally, they come in pairs.
Note: to view all the eiConsole Transports, click Available Transport Types.
Using Transports
To configure a Transport, you must have a corresponding Target system defined. To add a Target system where one doesn’t exist, click the Add Target icon.

Next, to configure a Transport, click the cell or icon in the grid labeled Transport.

Once highlighted, the Transport Configuration panel will appear below.

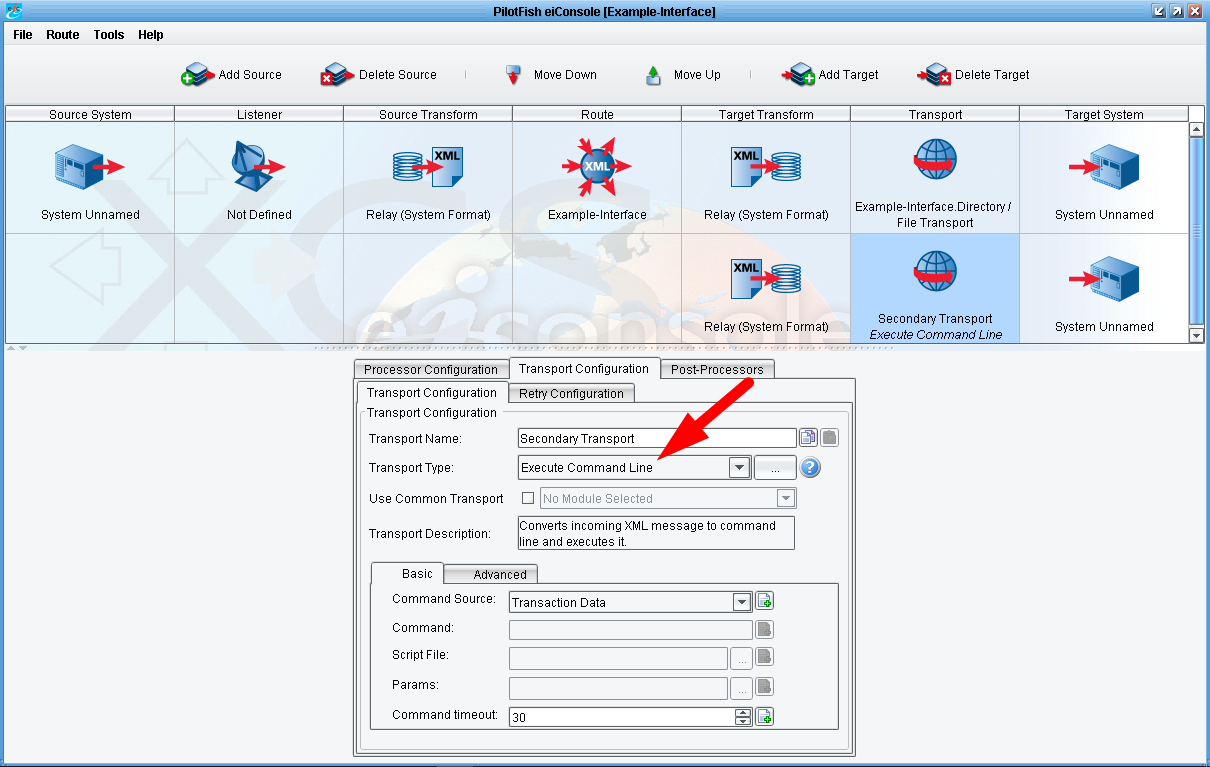
Select the desired Transport Type from the Transport Type drop-down.
The Transport Name is given automatically, but you have an option to change it. The Transport name should be something user-friendly that helps you to understand what the Transport accomplishes. We recommend using the name provided.

In the next step fill in the configuration details in the Transport Configuration panel below.
Tabs and configuration options will vary based on the module selected in the Transport type drop-down.

To add additional Transports click the Add Target button at the top. Repeat the previous process and select a Transport Type from the drop-down menu. Here we selected Execute Command Line. Enter a name in the Transport Name field.

To delete a Transport click the Transport icon for the Transport you would like to delete, click the Delete Target button at the top and click Yes in the Confirm Target Deletion window.

Each Transport Type has its own corresponding configuration. You can find more information about specific transports following the linked sub-sections below.
For a complete list of available Transport types, click the link below.
eiConsole II – Adapters – Types of Transports (Documentation)
If you have a requirement for a Transport Types not listed, please contact us at support@pilotfishtechnology.com.