eiConsole v.18R2
Documentation
eiConsole Tutorial Basic
Routing Modules
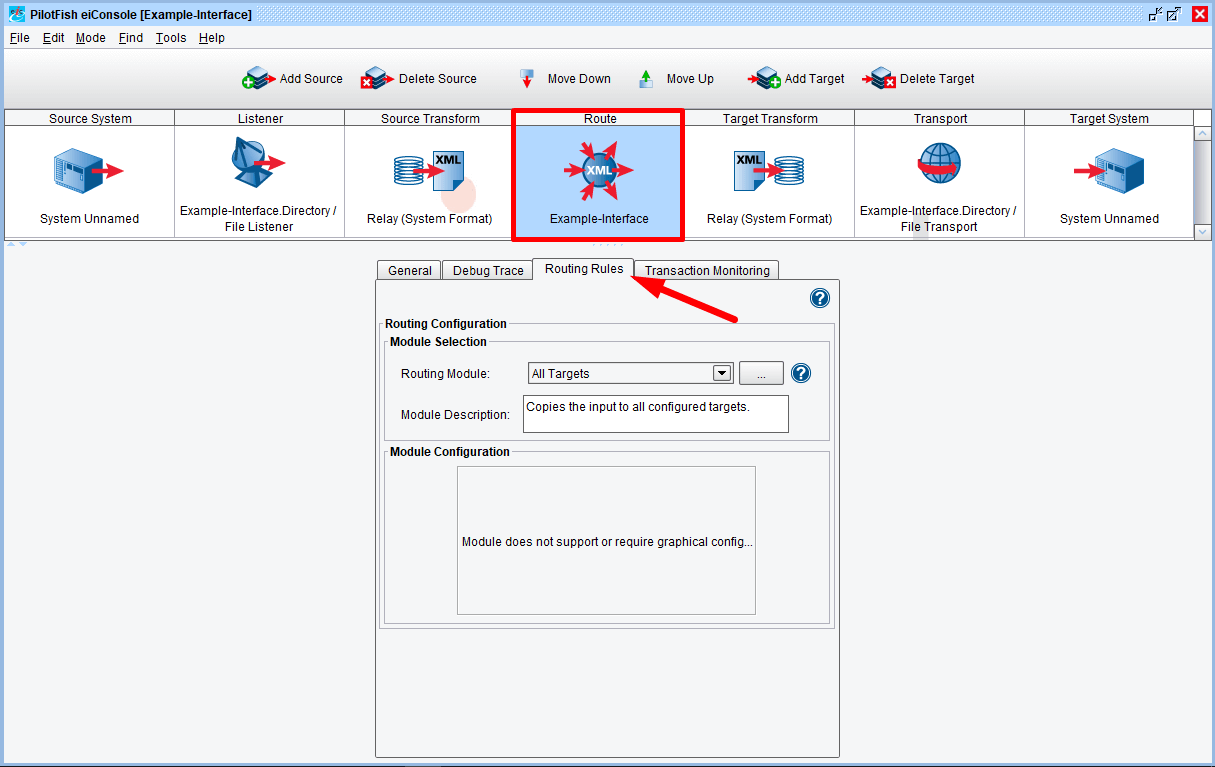
In the eiConsole, Routing Modules are used to send a message to some sub-set of defined target systems. To configure a Routing Module, start by selecting and opening an existing interface. Double click your interface to open the main route grid.
Click the route icon in the main route grid and select the Routing Rules configuration tab.
The eiConsole comes bundled with three out-of-the-box Routing Modules. The simplest of these, and the default, is the All Targets. This Module will take any inbound message and send it to each defined target system.
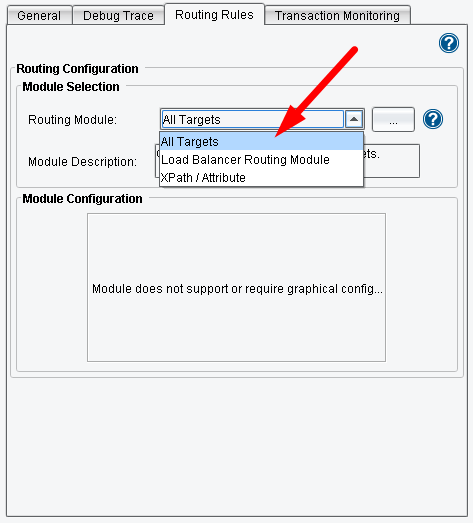
The second included Routing Modules is the Load Balancer Routing Module. It balances the load of the target transports by successively calling all target systems. One target system is called for one transaction.
Note, that some of the transports may not be able to work properly with simultaneous connections or will be limited to some number of them.
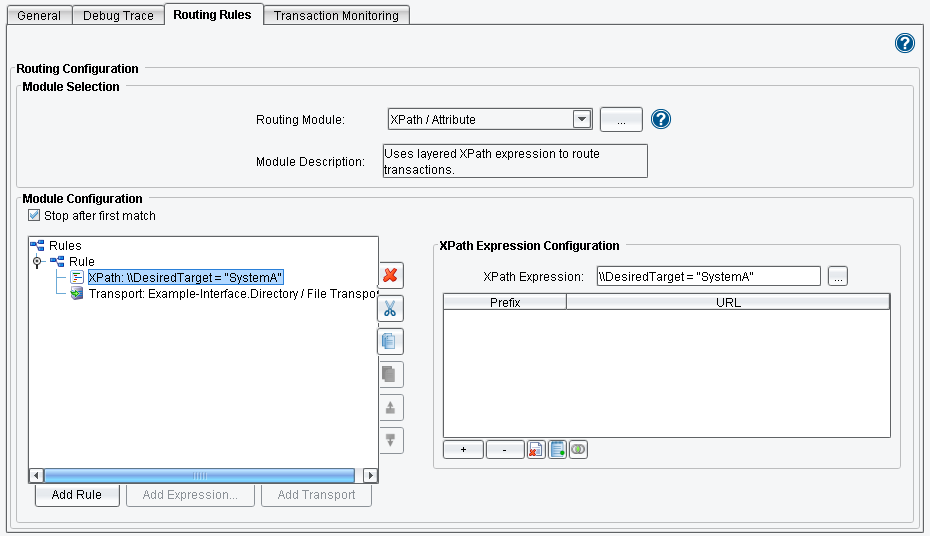
The third is the XPath Routing Module. Most commonly, when you want to route a transaction to some sub-set of the defined target systems, you will use the content of the message or the metadata associated with the message to determine what data needs to be sent to which target systems. XPath is the most typical mechanism for querying this data.
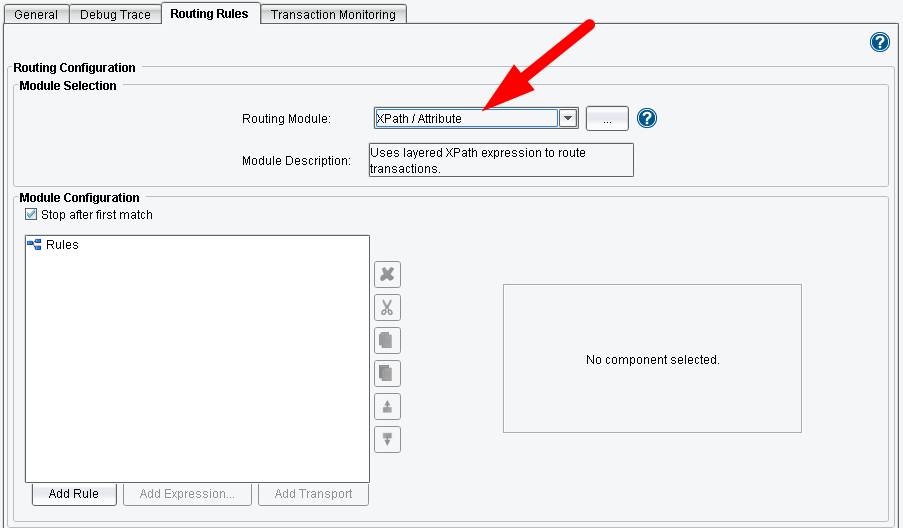
To configure an XPath based Routing Module, select XPath/Attribute from the Routing Module dropdown. In the Module Configuration area, a tree will appear. At first this tree will only contain a rules node.

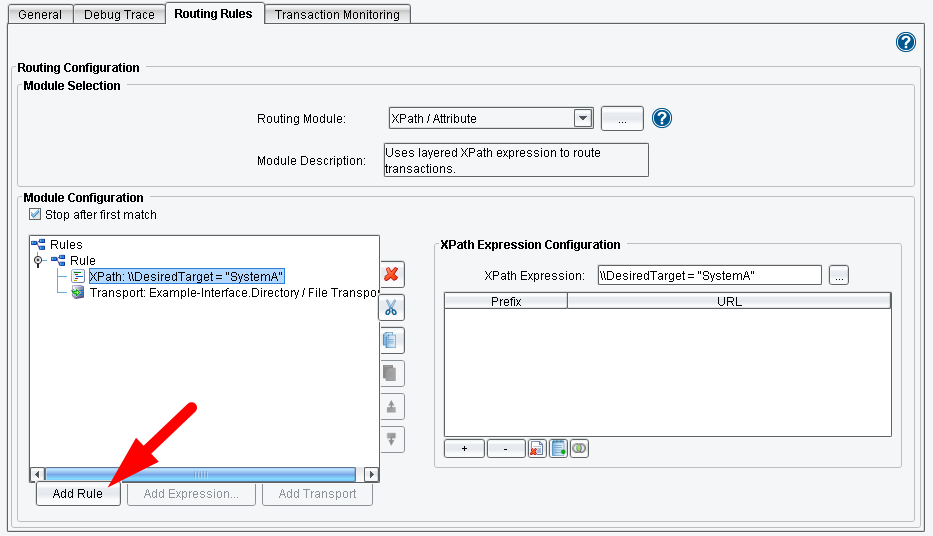
You will build this tree with all of the rules that you need to determine what information needs to be sent to which target systems. Select the Rules node by left clicking and click on the Add Rule button to add a rule (or right click on the node).

Click the Add Rule.
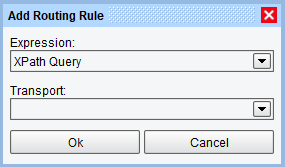
The Add Routing Rule dialog will appear.
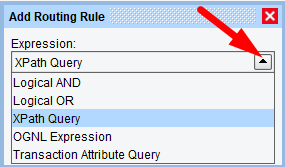
There are several ways to associate expressions with rules. Most commonly you will use an XPath Query.
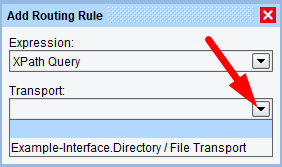
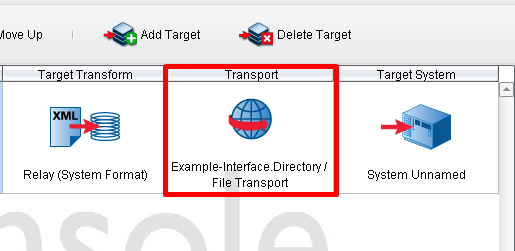
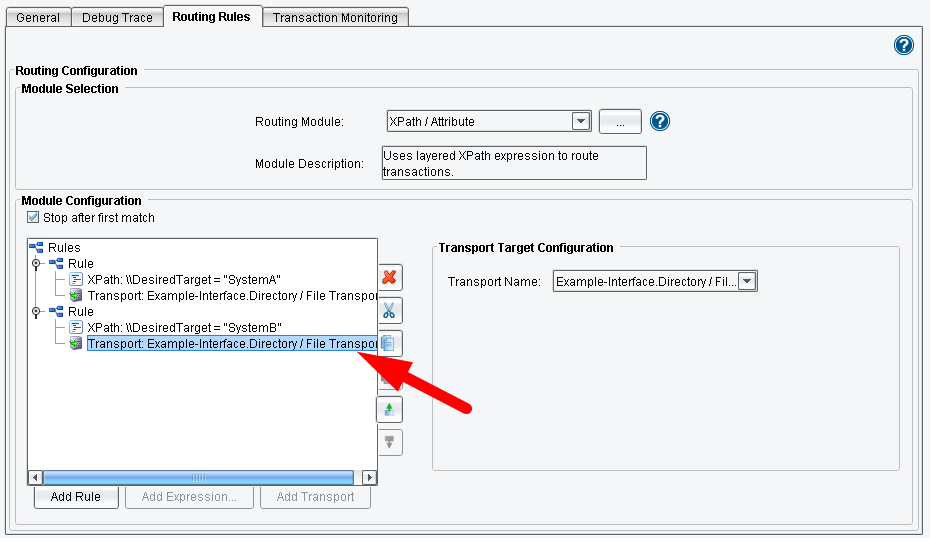
After XPath Query is selected from the dropdown menu, you will associate a target system with this Rule. Select Transport Target. You’ll be able to select from all of the fully configured transports. In our case it is only Example-Interface.Directory Transport.

Click OK.
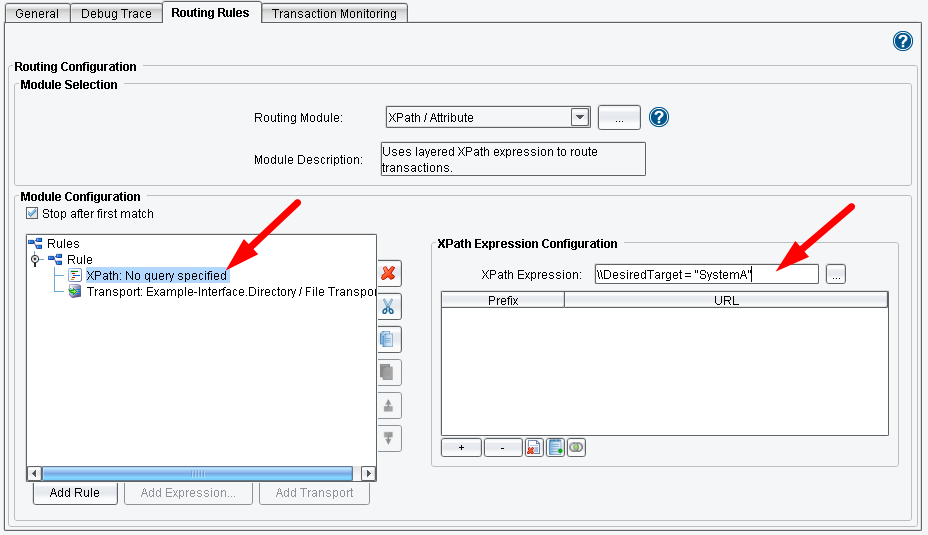
Now, when this Routing Module is executed any time that the Desired Target equals System A (as seen in the diagram below) you will send the data along to this defined Transport.
You can add additional rules by clicking the Add Rule button again (or right clicking the Rules node) and continuing in the manner that you did before.
Rules can also be combined using Boolean operators. This can be done by clicking the Add Expression selecting an expression type as a Logical AND or Logical OR rather than an XPath Query.
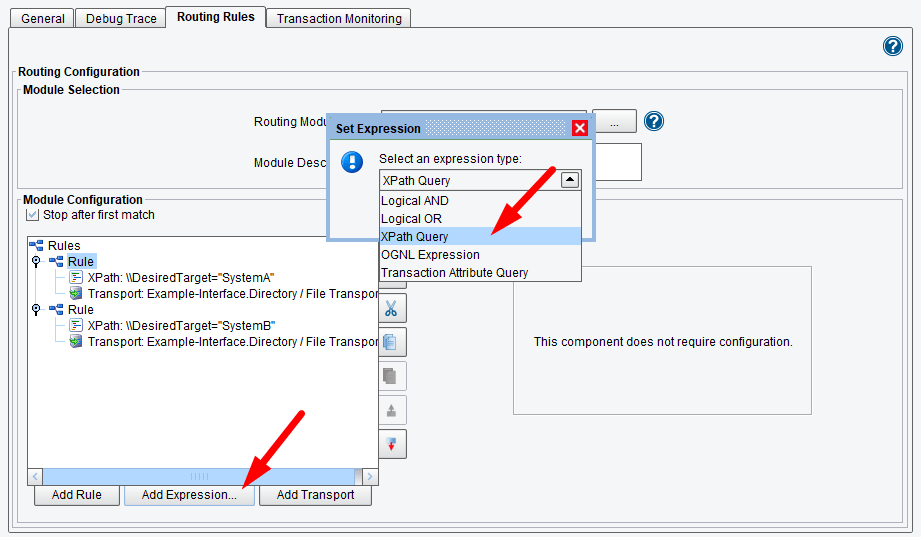
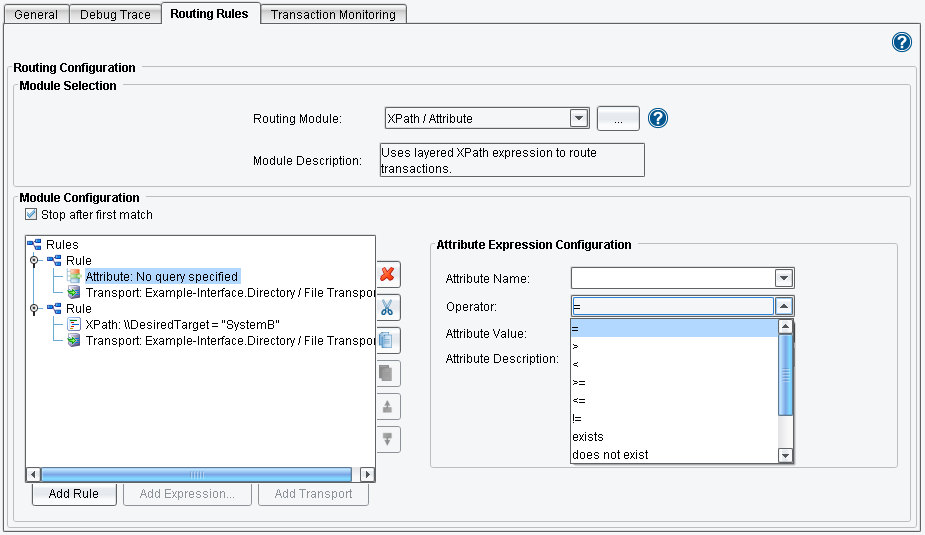
You can also query Transaction Attributes associated with a message using the Transaction Attribute Query option.
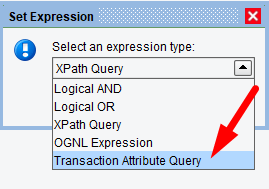
Attribute queries will allow you to inspect an Attribute associated with a transaction, apply an Operator and compare it to a particular Attribute value.
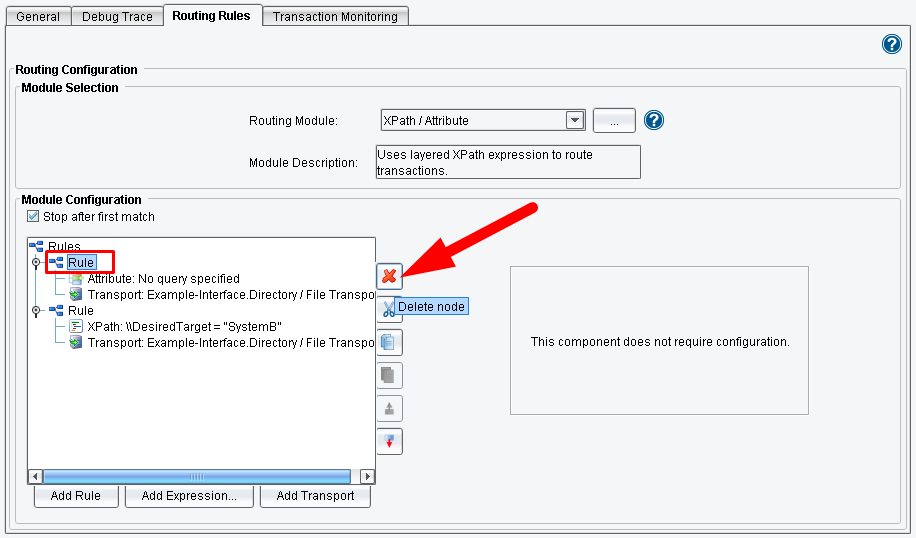
Rules can also be deleted and moved through the tree with control buttons (or right click).
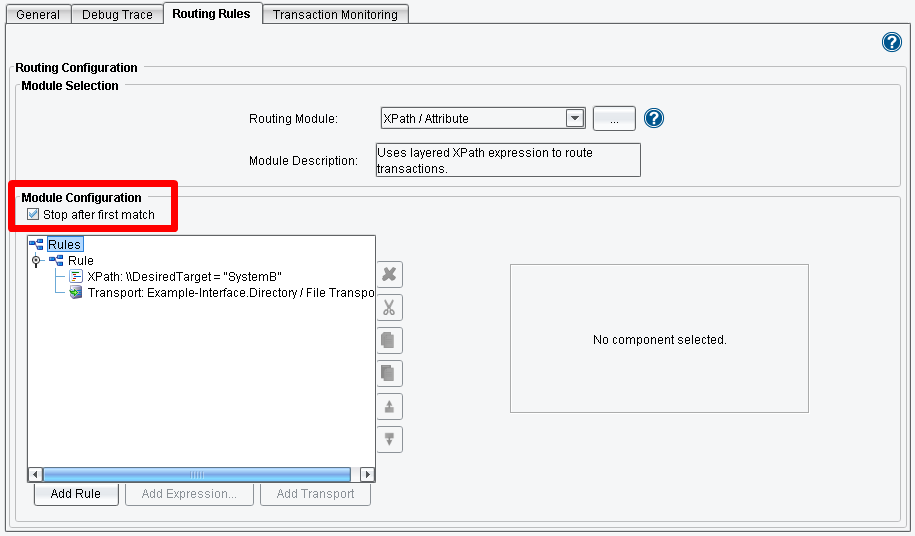
When the route node of the Module configuration tree is selected, you’ll see that you have the option to stop after the first match. If you wish for the data to be sent to multiple target systems, you will want to uncheck this. This means that all XPaths will be evaluated and all XPaths that are returned true will have their transports invoked. When this is left checked, only the first rule that returns true will be invoked. Only that transport will be used.
If you would like more information about using the eiConsole’s Routing Modules, please contact us at support@pilotfishtechnology.com.