eiConsole v.25R1
Documentation
Using SOAP Web Service Listeners
Overview
The “SOAP Web Service” Listener is a derivative of the “HTTP Post” Listener. It is designed to accept SOAP-enabled messages of any specification (currently 1.1 or 1.2), unwrap them, and create an eiPlatform transaction from the contents. Because many SOAP clients require a WSDL to be able to “consume” a SOAP service, the Listener may be configured to provide an existing WSDL to users, or one can be constructed using a simple, built-in editor.
This tutorial will briefly cover configuring a SOAP Web Service Listener to accept SOAP messages and provide a WSDL when requested. Additionally, messages will be structurally validated against that WSDL. Messages received will be processed and arbitrarily modified before being returned synchronously to the original caller. This pattern is appropriate for most web services and should be adaptable to most situations.
Configuring the Route
We’ll start by creating a new Route and configuring the basic topography. This will include setting up the Listener, a very simple transformation, and a single Transport. This will be sufficient for users to send messages using a simple HTTP client or without expecting or using specific SOAP bindings. The following section will show how you can open the WSDL Editor to edit an existing WSDL or define a new one.
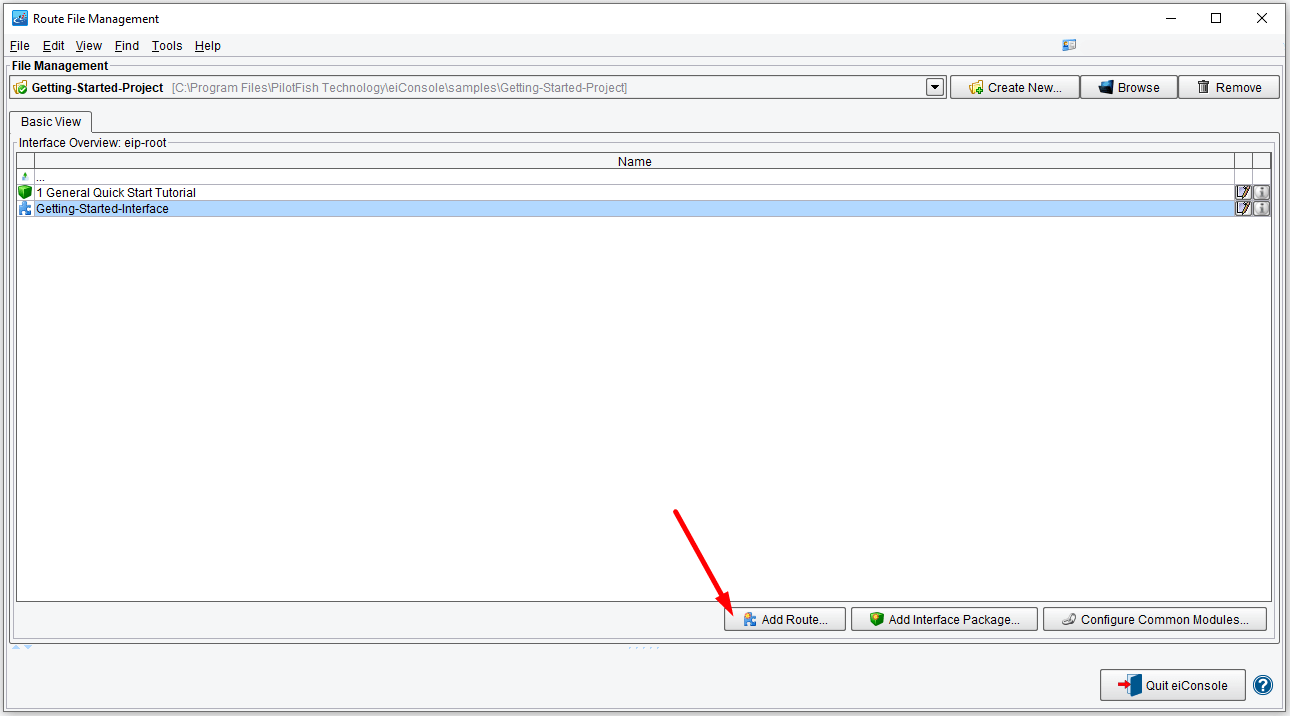
To begin, open the eiConsole or return to the File Management Dialog if it is already open. We’ll first create a new Route, which can be accomplished by clicking the “Add Route” button, shown highlighted in red below:
A dialog will be raised for you to provide the name of the new Route. For this tutorial, we’ll call this “SOAP Web Service“:

After clicking the “OK” button, the Route should be visible in the Routes listing. To open it, double-click it in the list or, alternatively, right-click it and select “Edit Route“:

This will open the main eiConsole screen:

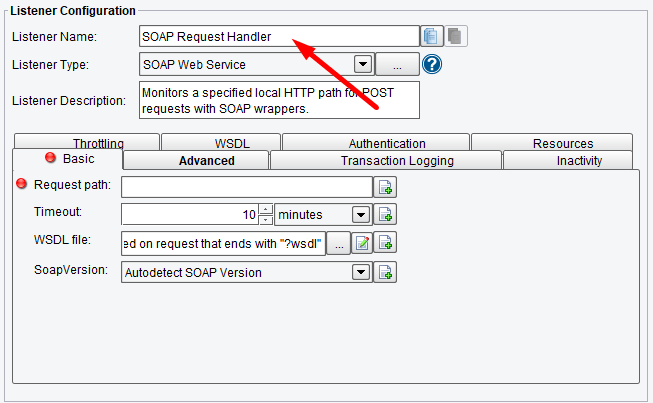
Select the Listener stage and choose the “SOAP Web Service” Listener from the Listener Type drop-down:

The eiConsole will automatically provide a Listener name based on the Route name and the Listener type, but it’s usually a good habit to name Listeners according to their function. We’ll rename ours to “SOAP Request Handler“:
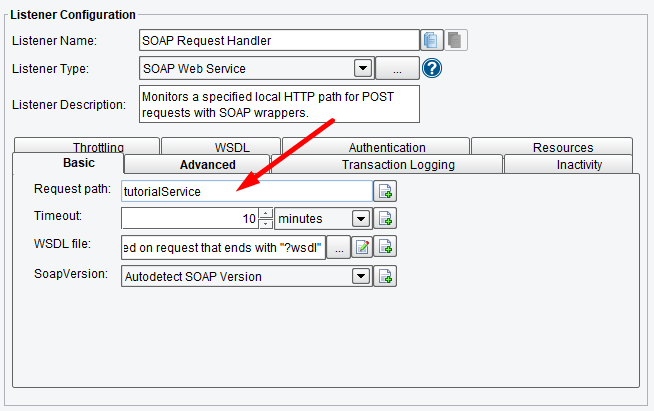
There are really only two options we’re concerned with immediately: the Request Path (under the “Basic” tab) and the Synchronous option (under the “Advanced” tab). We’ll return to the WSDL File field in the next section.
Request Path is a path relative to the eiPlatform or eiConsole web context. Depending on eiConsole settings, the exact port may vary, while the eiPlatform deployment mechanism will greatly affect the total path used. For example, a default eiConsole installation might provide a base URL of http://localhost:8080/eiConsole/http-post, while an eiPlatform deployment could be https://localhost:8443/web/eip/http-post. The Request Path field allows you to specify the path after that base URL.
For this tutorial, we’ll define this as “tutorialService“:
Next, select the Advanced tab. Again, there are a variety of available options here, but we’re only interested in the “Synchronous” checkbox. This option specifies if this Listener expects a type of Transport called “Synchronous Response” to exist somewhere downstream. If left unchecked, as is the default, the system will provide a “canned” success response to SOAP requests. If checked, then once a Transaction reaches a Synchronous Response Transport, the contents of that message will be passed back to the original SOAP sender as the SOAP response.
Check the Synchronous box:

We’ve now provided everything we need for our Listener to be configured. As of yet, it will not provide a WSDL to requesting SOAP clients, though it will be fully capable of receiving SOAP messages of any valid structure. Because SOAP merely provides an XML wrapper to HTTP post messages as well as particular HTTP headers, any standard HTTP client should now already be able to communicate with our Listener. However, as many software clients are unable to utilize such services without an explicit WSDL provided, we will return to this Listener configuration in the next section.
Configureing the Transport

We’ll now wish to select the Transport stage and select the “Synchronous Response” from the Transport Type drop-down:

While this type of Transport requires (and does not make use of) any configuration, it is nonetheless a good idea to rename it. We’ll call ours “SOAP Response“:

As configured, our Route will now accept SOAP messages, unwrap them, and then send the unwrapped body content to the SOAP client as-is. Next, we’ll want to change the actual data so that, even though it is for test purposes, a user of our service will receive something different than they sent it. This will require two parts:
First, a transformation to alter the content or a Processor. We’ll use a Processor to convert the message to a Base64-encoded version for simplicity’s sake.
Second, we’ll need to provide the correct SOAP structure. We can do this using another Processor called the “SOAP Wrap” Processor.
For both of these steps, we’ll need to go to the “Processors” tab of our Transport stage:

Next, click the “Add Processor” button and select the “Base64 (Output)” Processor from the list. We’ll name ours “Base64 Encoder“:

After clicking the “Add” button, we’ll see our Processor on the list. It requires no configuration, so we can now go ahead and add the “SOAP Wrap” Processor. Click “Add Processor” again, select the appropriate Processor, name it, and click “Add” again:

Your Processor list should now look like this:

The SOAP Wrapper does allow some configuration. You can specify the SOAP version you wish to use as a wrapper and if the content (provided it is XML) needs to be escaped. You can use a dynamic expression to determine the correct SOAP encoding based on the message received, but for now, leave it as-is.
We may now test our service, even though we have not provided a WSDL. You can use any standard HTTP client for this, such as soapUI. We’ll be using a very basic HTTP client here, which is used internally by PilotFish for diagnostics. To start testing, save your Route (using the File menu or the “Control + S” shortcut), then switch to the Testing Mode:

By default, the eiConsole’s Testing Mode will select the first Listener as the starting test stage. Since we only have one Listener, this is sufficient for our purposes. Next, click the “Execute Test” button:

Provided everything is configured correctly by this point, you should get a testing dialog that looks something like this:

You will notice that the endpoint URL we’ve defined is provided. The “Request Path” that we configured – “tutorialService” – is at the end of the base path (http://localhost:9000/eiConsole/http-post in this example). Remember that, depending on configuration and deployment, this URL might vary.
We’ll now send a simple test message to the Route using our HTTP client. For that purpose, download the archive and unpack it. Windows users may execute the HTTPMonster.bat file and MAC users – HTTPMonster.sh.
NOTE: the JAVA should be installed in your system beforehand.
We already have the URL. The Message field could be filled with the following code:
<?xml version="1.0" encoding="UTF-8"?>
<SOAP12:Envelope xmlns:xsi="http://www.w3.org/2001/XMLSchema-instance" xmlns:xsd="http://www.w3.org/2001/XMLSchema" xmlns:soap12="http://www.w3.org/2003/05/soap-envelope">
<SOAP12:Body>
<Person>
<Name>
	<First>Cinderella</First>
	<Middle>B</Middle>
	<Last>Jacquiline</Last>
</Name>
<Address>
	<Line-1>2256 E Aurelio St</Line-1>
	<City>Bluewater</City>
	<State>NM</State>
	<Zip>87005</Zip>
</Address>
</Person>
</SOAP12:Body>
</SOAP12:Envelope>
Monster HTTP Client:
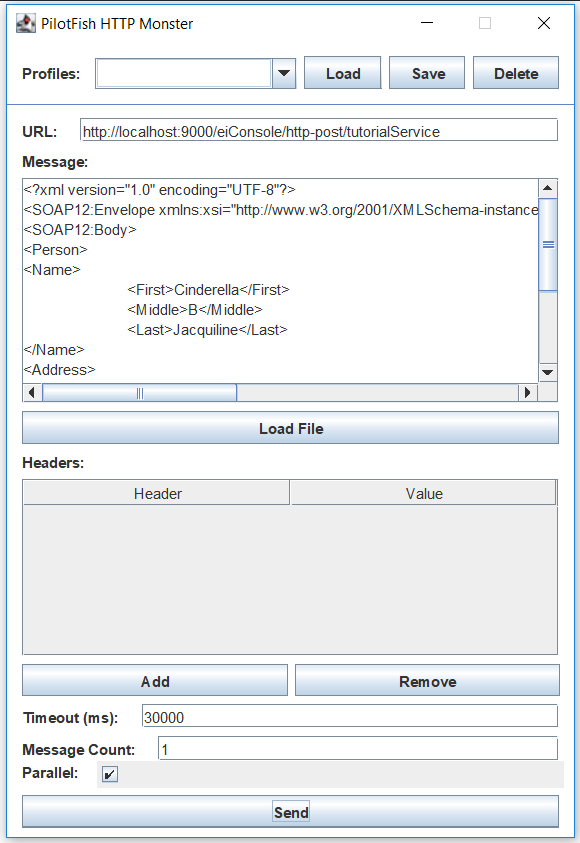
There are two characteristics that make a message “SOAP” rather than simply HTTP: the “Envelope,” “Body,” and various other (optional) structural elements, and the declaration of particular HTTP headers, such as “SOAPAction.” Because we’re not making use of the SOAPAction parameter in this Route, we’ve chosen to leave it undefined in the client.
We’ll click “Send” to send the message, and we’ll receive a dialog of the response once one is received:
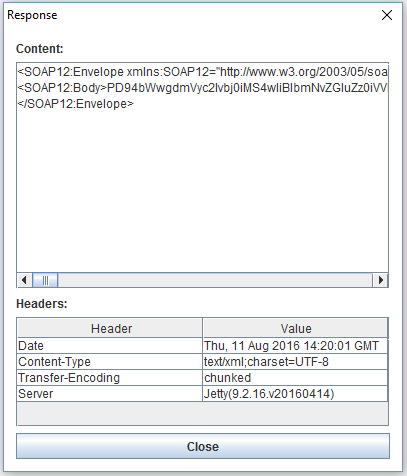
We can see that the response “Body” element contains our Base64-encoded data. Returning to the eiConsole, we can now go from stage to stage and view the Transaction as it moved around:

We now have the topography defined and can perform any transformation against the received message. We could route or make use of a SOAPAction header, forward the message based on WS-Addressing elements – really anything we want. Creating a SOAP-enabled service is fairly trivial.
In the next section, we’ll briefly visit creating a WSDL so that systems requiring one can query the URL path of our Listener endpoint to get one.
Providing a WSDL
To begin defining a WSDL, return to Editing Mode (File Menu/Route/Editing Mode). Select the defined Listener stage, and then click the Basic tab:

You can browse to an existing WSDL file or type in the name here. The path provided is relative to the current Route folder, so if you wish to provide an existing one, you can copy it into the Route’s folder alongside “route.xml.”
However, if you’d like to create a new WSDL, the eiConsole provides a basic WSDL editor. To edit a selected WSDL or create a new one, select the In System Editor button:

This will open the WSDL Editor, shown below:
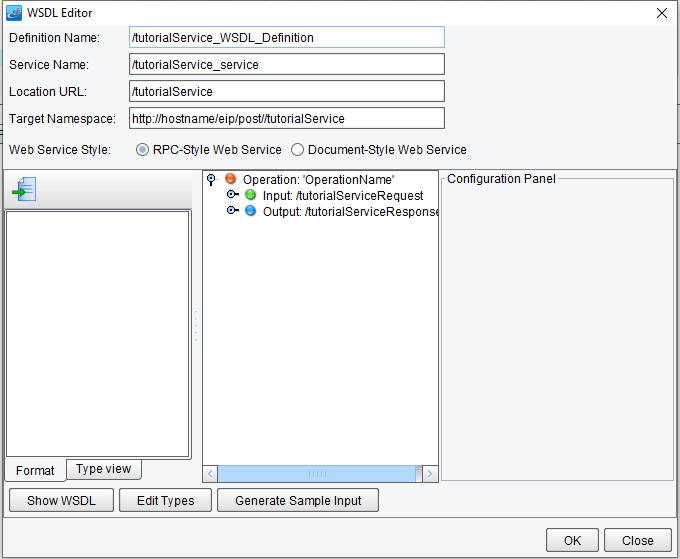
By default, the WSDL Editor will provide you with a basic set of parameters and even a simple Operation with Inputs and Outputs. Of course, you can change the Definition Name, Service Name, Location URL, and Target Namespace if you so desire, but we’ll leave these at their defaults.
WSDLs are defined in terms of Operations with Input and Output definitions. For basic purposes, the default provided should be suitable.
To save the automatically generated WSDL, click “OK” and choose a location to save it. For this tutorial, we’ll recommend putting it in your Route folder:

You may optionally select the “Validate at the Listener Level” in the WSDL tab if you wish the Listener to structurally validate incoming messages against the WSDL. While this can be useful if you want to enforce strict conformance, it is not generally recommended. This is because the support for the WSDL standard within a given user’s environment may vary considerably.
With the WSDL defined, any time a user would like a WSDL, they need only append “?wsdl” to the end of the URL endpoint for your Listener. For example: http://localhost:9000/eiConsole/http-post/tutorialService?wsdl
This concludes the tutorial.