eiConsole v.20R1
Advanced Tutorial & Interface
SQLXML – Inserting and Updating Rows
Overview
This interface and related tutorials demonstrate and explain the use of SQLXML, a database-agnostic, XML-based language used in the eiConsole to query and update databases. In this tutorial, we expand on SQLXML basics and introduce the “Update” and “Insert” instructions for updating and inserting rows in a database table. This tutorial expands on concepts covered in “SQLXML Selecting Rows,” so users should be familiar with that material.
How to Use This Example
Click the links below for the files you will need for this tutorial, then download the INTERFACE to get started. (Once logged into the eiConsole it immediately shows up in your “PIE” inbox for use.)
Note: If you are not logged in to the eiConsole or have arrived at this page via a browser, you will be prompted to log in before the Interface downloads into your eiConsole “PIE” inbox. Or if you have not downloaded and installed a FREE eiConsole Trial you will have the opportunity to register after you click the Interface Download link. Once you are logged in the interface will automatically download into your “PIE” inbox. First, you’ll see a screen pop up indicating that a new product is ready for download. Select the Download Now button. Once you’ve downloaded the Interface you can drag it into your current Working Directory and begin.
Next, follow the tutorial and walk through it step-by-step. You may check your work against the provided Route (Sample Data).
Clearing the Rows
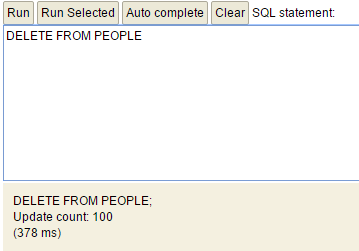
We’ll start by clearing the rows from our existing “People” database table. Execute this query against it:
DELETE FROM PEOPLE
You should get a message indicating that rows have been affected:
Creating a New Route
We’ll continue by creating a new Route called “SQLXML – Inserting and Updating Rows,” adding and configuring a Directory Listener to check a folder for “people.xml” files, and adding a “Database SQL Transport”:
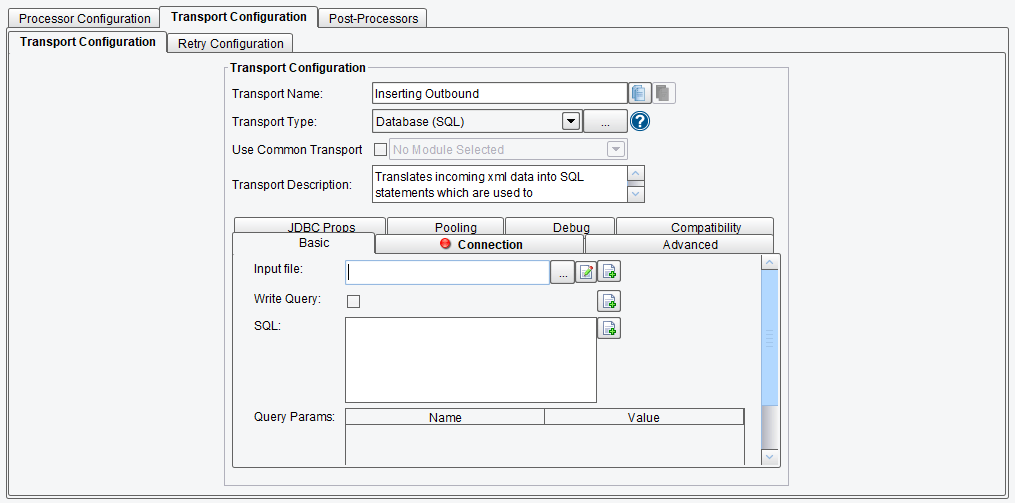
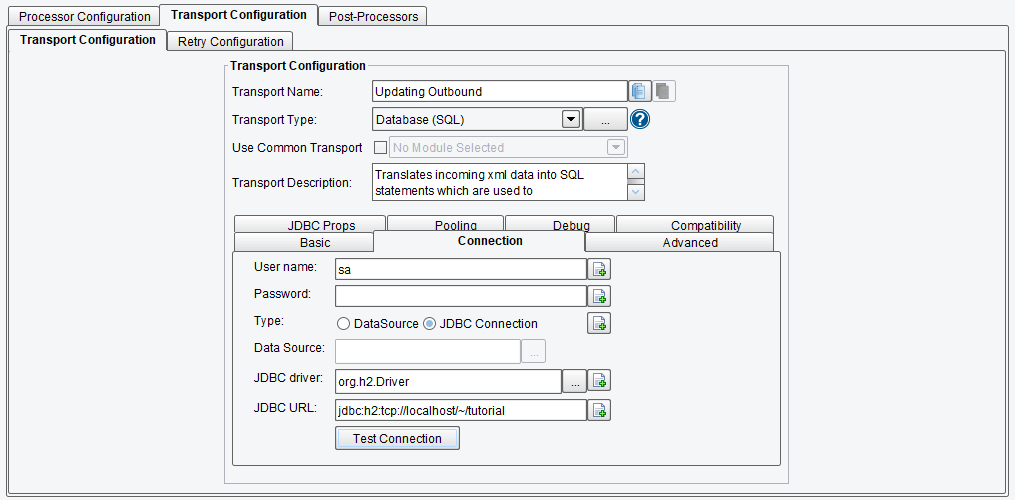
We’ve chosen to name this particular Transport “Inserting Outbound,” as we’ll later be creating a second to handle updates.
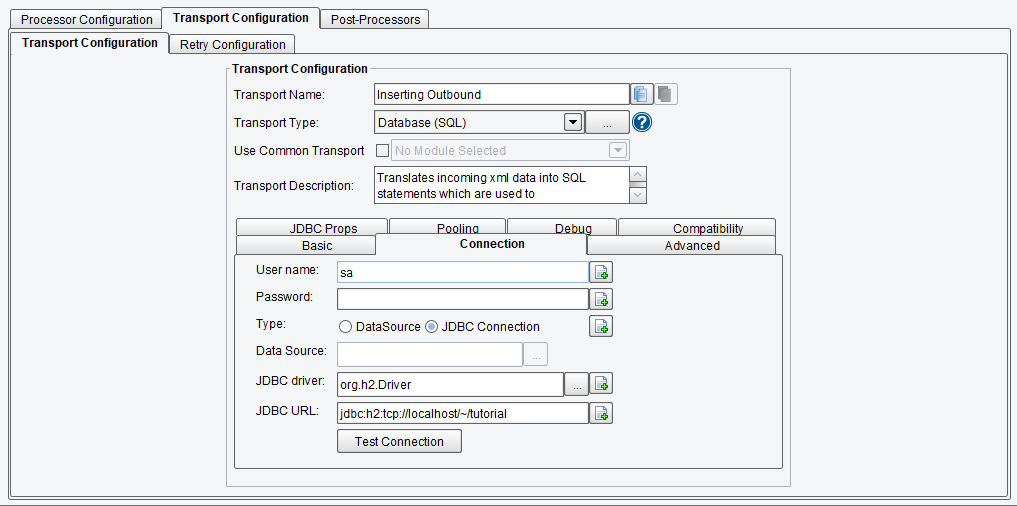
Configure the “Connection” tab using the credentials and information from the previous tutorial:
Username: sa
Password:
Driver: org.h2.Driver
URL: jdbc:h2:tcp://localhost/~/tutorial
Then click the “Test Connection” button to verify it all works correctly:
Configuring an XSLT Document
In the previous tutorial, we configured a Listener using the “Input File” field to provide the SQLXML to be used. For this Transport, we’ll do things a bit differently. Since we’re expecting the “people.xml” sample to be picked up by our Listener, we’ll want to make use of that data. We can, therefore, configure an XSLT document to transform the “people.xml” format to SQLXML, which in turn will be executed by the Transport.
On the Target Transform stage, add a new Format called “People XML to Inserts”:
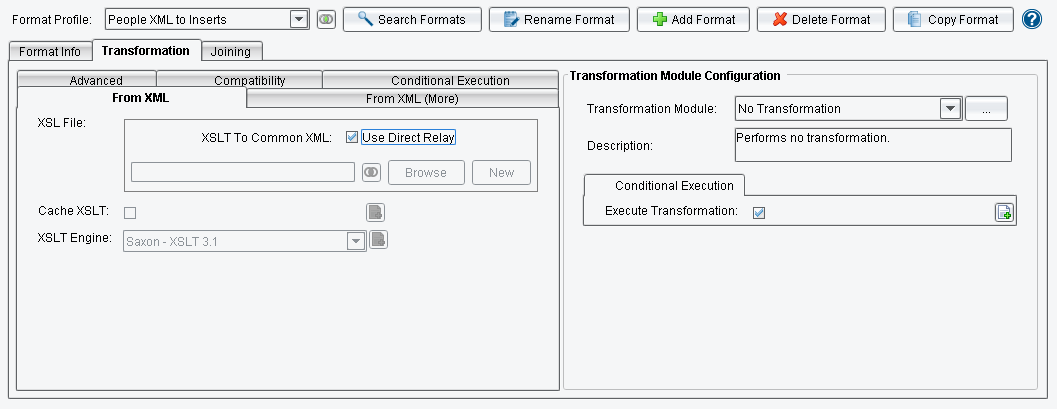
Uncheck the “Use Direct Relay” checkbox and click “New” to open the Data Mapper. Read “people.xml” in for the Source Format:
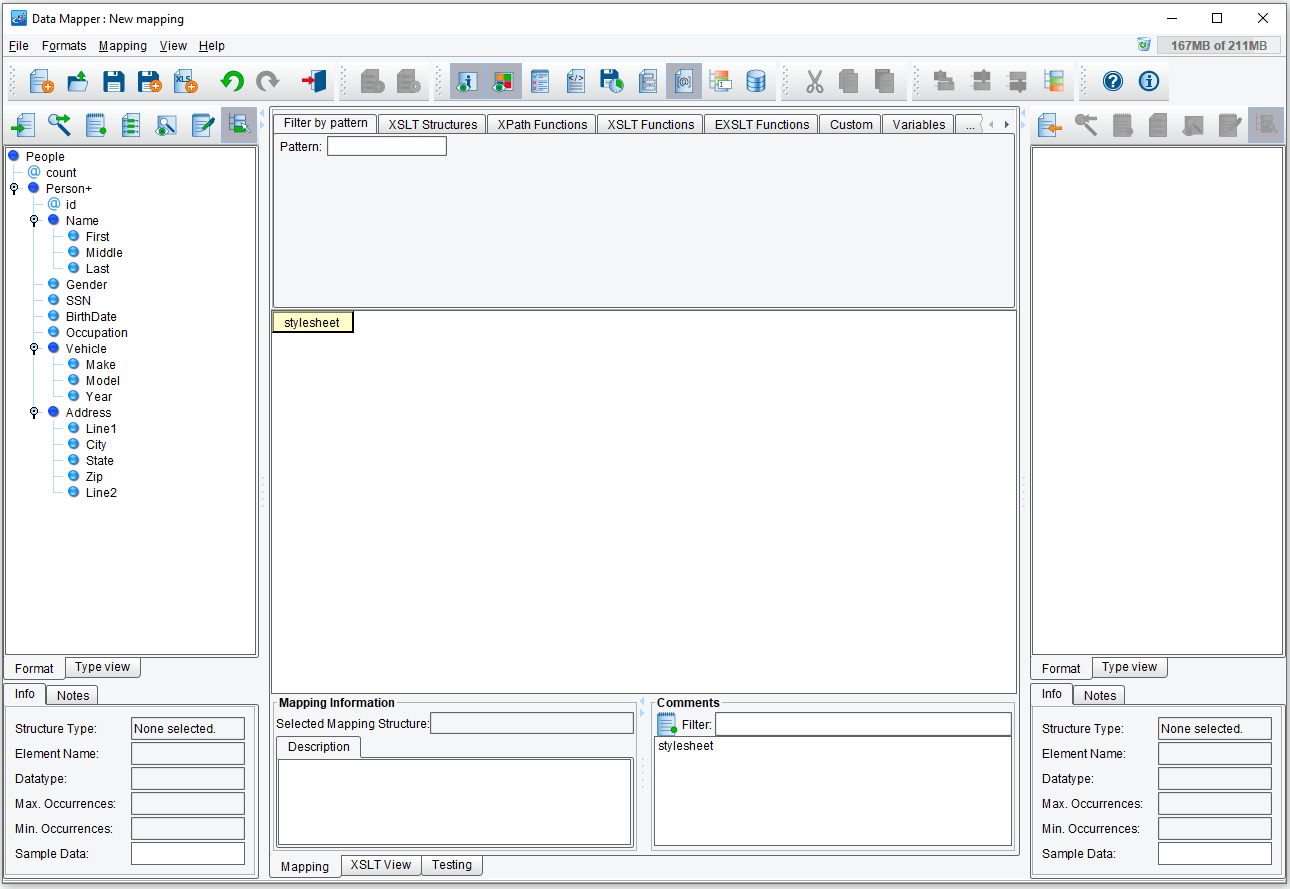
Reading in the Target Format
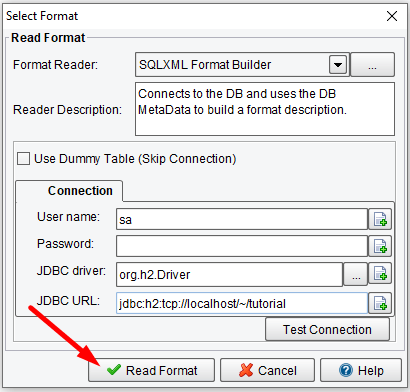
We’ll now want to read in the Target format, for which we’ll use a new type of Format Reader called the “SQLXML Format Builder”:

This dialog expects the same configuration values used by the Listeners and Transports we’ve covered. Provide the credentials and connectivity information, click “Test” to ensure they’re correct, then click “Read Format”:
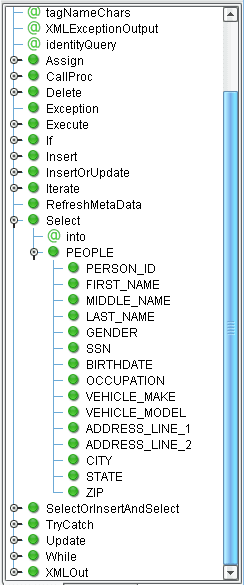
This will raise a dialog which allows you to select from a list of available database tables. Select “People” and hit “OK”:

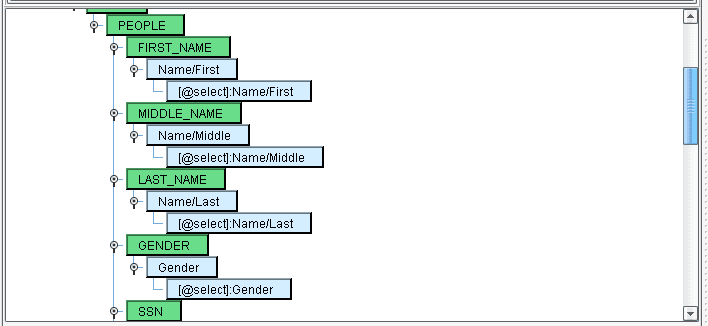
This will populate the Target format with a fairly complex structure:

The Target format is now a representation of the entire set of SQLXML structures. Underneath these, you’ll find your database-specific information, where applicable. For example, click on the “Select” we used for the last tutorial:
Working with this format is, therefore, a matter of dragging and dropping its items into the mapping panel while maintaining its provided structure.
Performing an Insert for Each Person
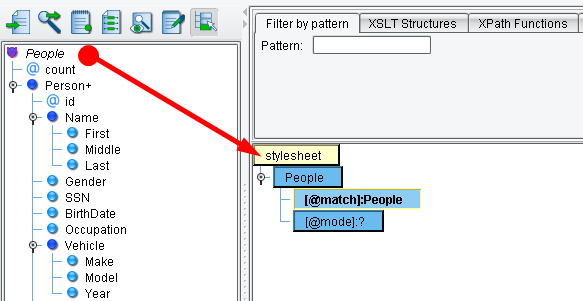
We’ll want to perform an insert for each Person in our Source, so begin by mapping “People” onto the “stylesheet” element:
Drag the “SQLXML” root from the Target onto the added People element:
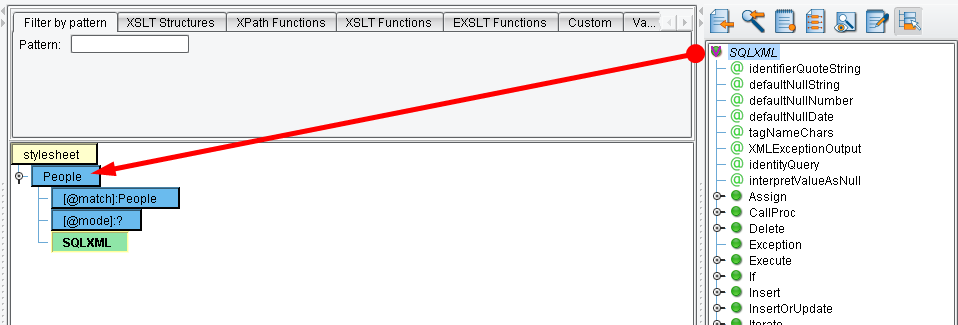
Drag XSLT Structures → Flow Control → for-each onto the added SQLXML element:
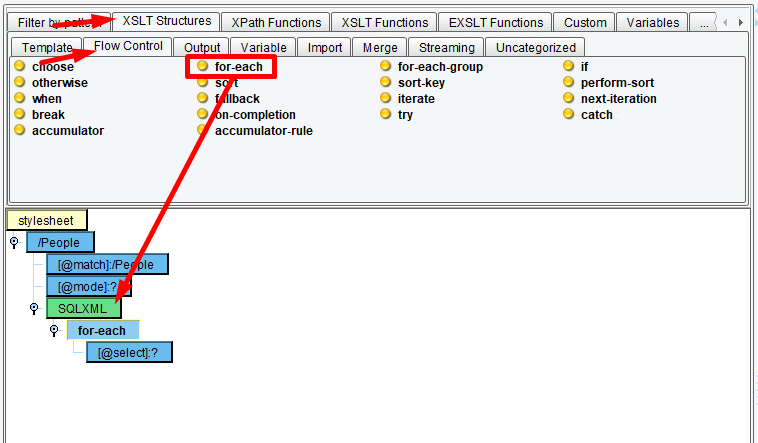
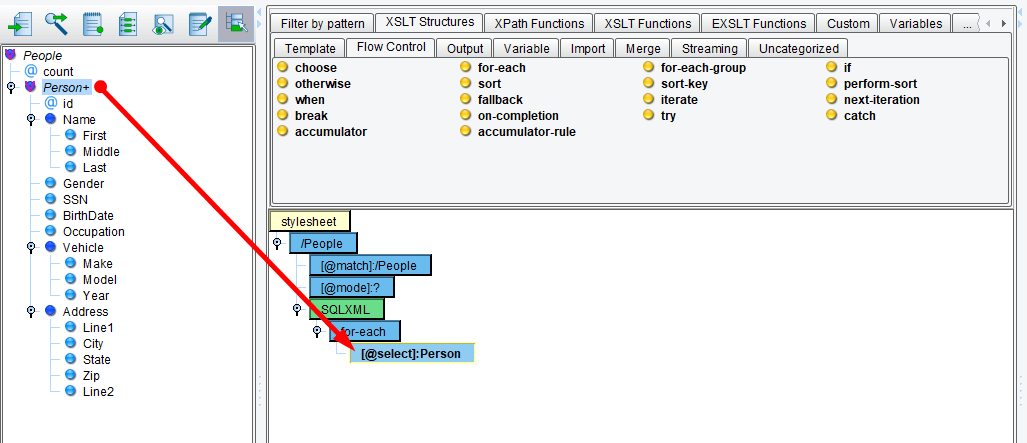
Drag the “Person” element from the Source onto the added “for-each”:
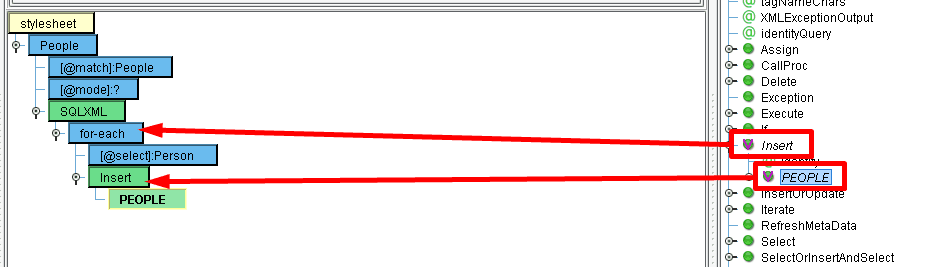
Next, drag the “Insert” element from the Target onto the “for-each” element, then the table name, “People,” onto that:
Mapping
Map each column name you’re interested in populating (all except “PERSON_ID”) onto the table name:

Now we just need to map each equivalent value from the Source onto these values:
We’ve now mapped our “people.xml” to SQLXML, creating an “Insert” instruction for each “Person” in the source document.
Testing
Return to the eiConsole, switch to the Testing Mode, and run the “people.xml” file all the way through:

View the Stage Output at the Listener Stage

Here we can see the original “people.xml” contents. In the Target Transform stage, view the output after the XSLT stage:
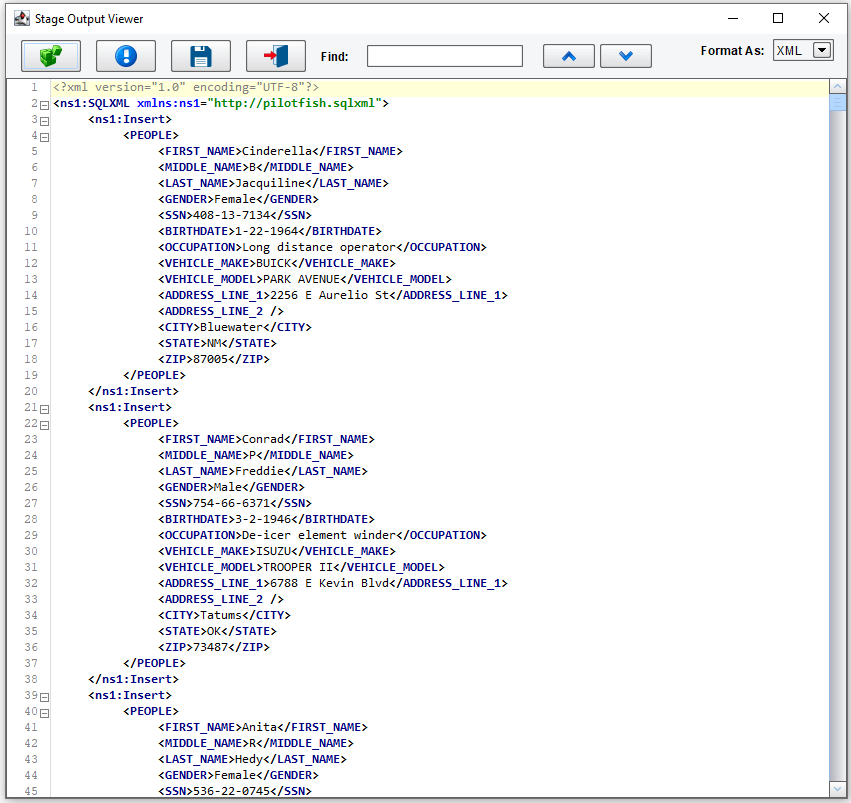
We can see the SQLXML generated. If you then look at the Transport stage, you’ll see that it has executed successfully. There’s no output to view, but we can go query our database with:
SELECT * FROM PEOPLE
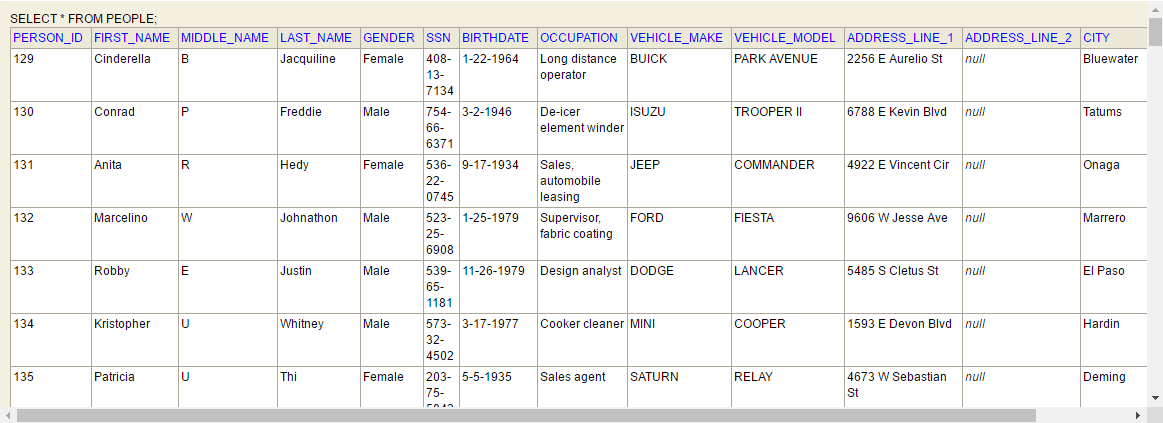
We can see that our Insert statements worked successfully.
Let’s now explore the “Update” instruction. Add and configure a new Target similar to the first, naming this one to indicate it’s intended for updates:
Add a new Format to this Target’s Transform stage, this time called “People XML to Updates”:
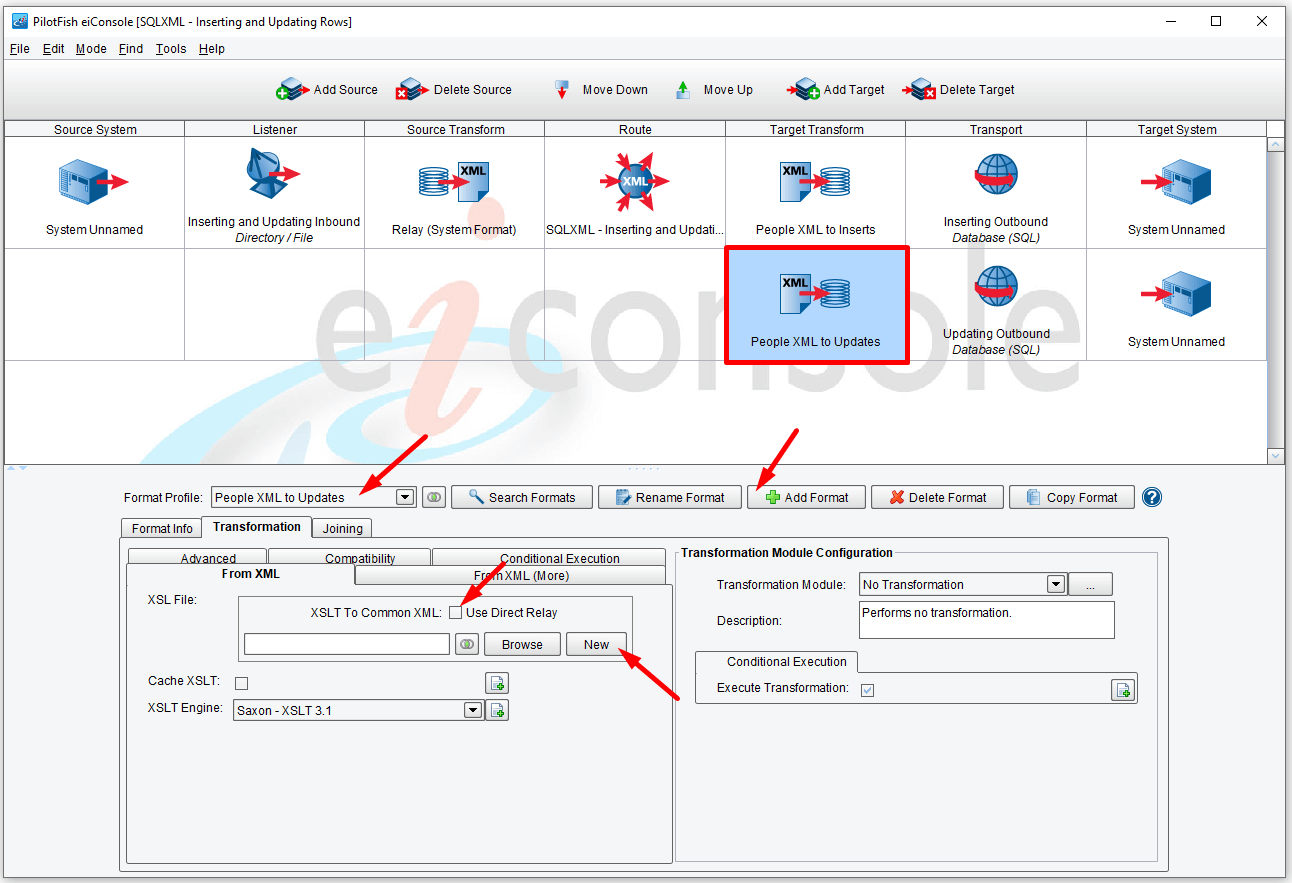
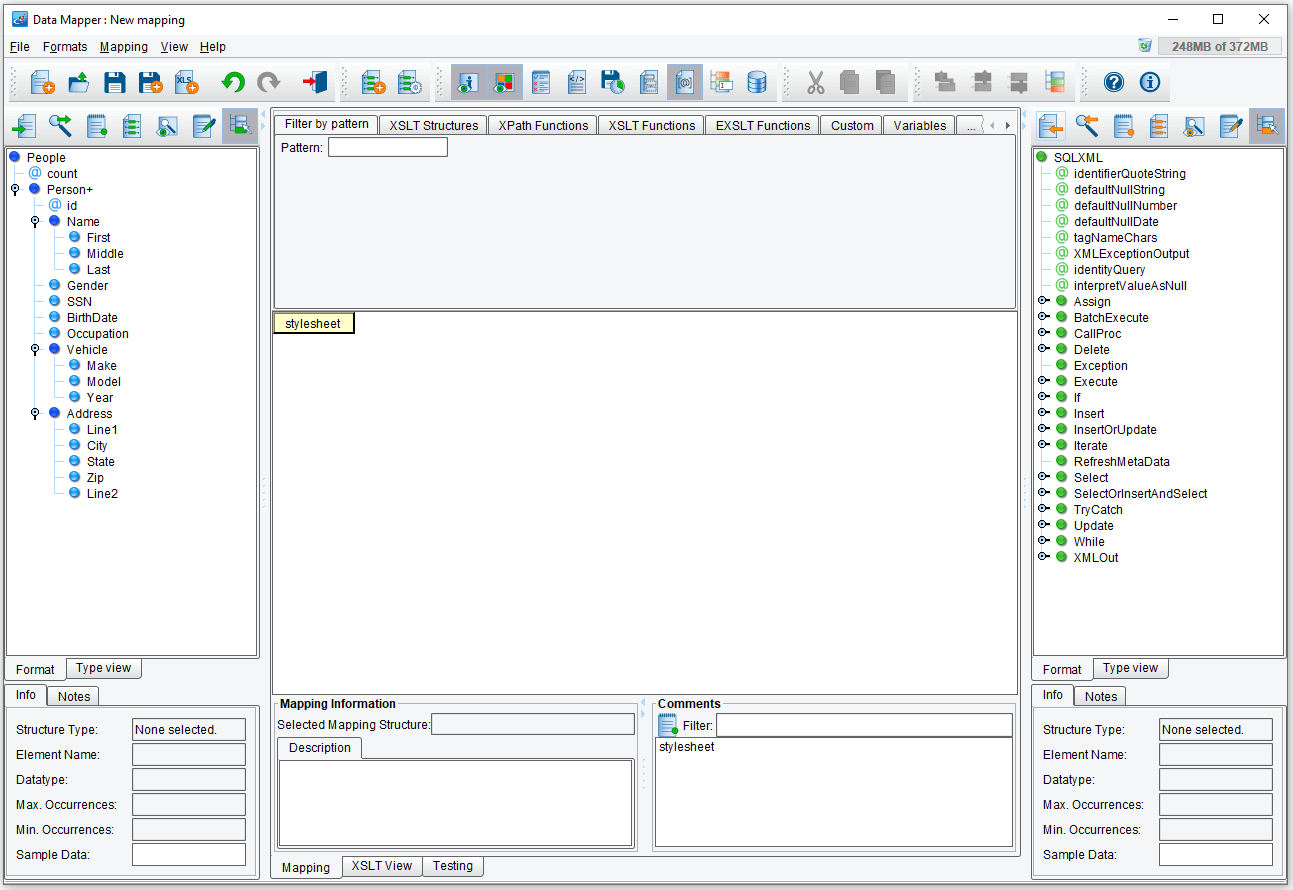
Open the Data Mapper once again and read the same Source and Target formats in:
For this mapping, we’ll just provide one Update (not under a “for-each”):
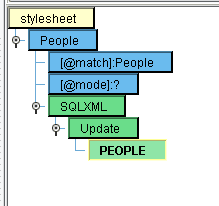
We’ll update each row with a “GENDER” value of “Female” to have a “FIRST_NAME” value of “Updated.” Add both columns to the mapping:
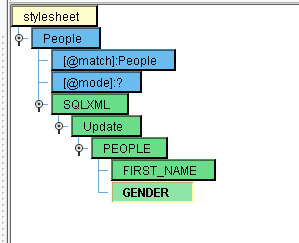
Add a XSLT Structures → Output → text value to “FIRST_NAME” with the value “Updated,” add an “attribute” to “GENDER” with the name “key” and a “text” value of “true,” and then add a “text” value to “GENDER” of “Female”:
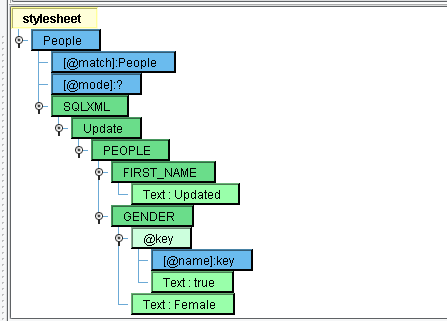
This will now update all PEOPLE records where “GENDER” is “Female” with a “FIRST_NAME” of “Updated.”
Save the mapping, switch to the eiConsole Testing Mode, and run the “people.xml” just through the new Target Transform onward:

Once again, we’ll confirm our updates by querying the database directly. Try this query:
SELECT * FROM PEOPLE WHERE GENDER = 'Female'
You’ll see that each such entry now has a “FIRST_NAME” of “Updated”:

If the results match the above you are all set. This concludes this tutorial.