eiConsole v.19R1
Tutorial & Interface
SQLXML – Selecting Rows
Overview
This Interface and related tutorial demonstrate and explain the use of SQLXML, a database-agnostic, XML-based language used in the eiConsole to query and update databases. In this tutorial, we cover SQLXML basics and the “Select” instruction, including creating and configuring a database and its tables and then selecting data from it. We cover using SQLXML to query a database table for rows. The tutorial expands on basic eiConsole topography and configuration, so users should be familiar with those concepts before beginning this tutorial.
How to Use This Example
Click the links below for the files you will need for this tutorial, then download theINTERFACE to get started. (Once logged into the eiConsole it immediately shows up in your “PIE” inbox for use.)
Note: if you are not logged in to the eiConsole, or have arrived at this page via a browser, you will be prompted to log in before the interface downloads into your eiConsole “PIE” inbox. Or if you have not downloaded and installed a FREE eiConsole Trial you will have the opportunity to register after you click the Interface Download link. Once you are logged in the interface will automatically download into your “PIE” inbox. First, you’ll see a screen pop up indicating that a new product is ready for download. Select the Download Now button. Once you’ve downloaded the Interface you can drag it into your current working directory and begin.
Next, follow the tutorial and walk through it step-by-step. You may check your work against the provided Route (Sample Data).
Preparing the Database
We’ll start by preparing a database for this and other SQLXML-related exercises. You can use any database which is accessible via JDBC drivers, though we’ll be using “H2” since it is extremely simple to get up and running and requires no configuration. If you do not have H2 installed, you can find it here: http://www.h2database.com/html/main.html.
NOTE: Download only a stable version of H2.
Once H2 is installed, launch it (typically with a shortcut named “H2 Console”) and it should open a new browser window which looks like this:
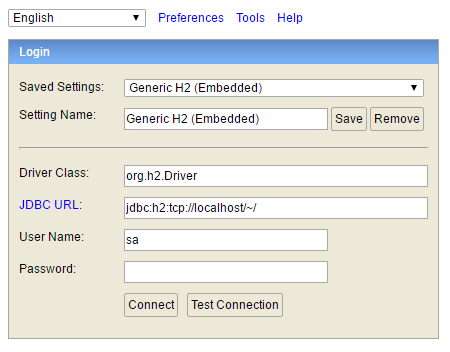
We can provide values for the user name and password if we wish to change them, but for this tutorial, we’ll leave them at their defaults (“sa” and blank). The one field we’ll need to modify is the “JDBC URL,” which is the unique URL and name for our database instance: jdbc:h2:tcp://localhost/~/tutorial
We’ll create one called tutorial.
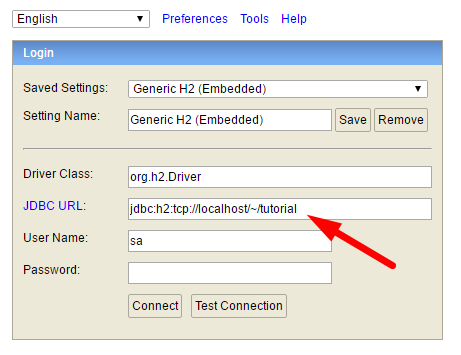
Click “Connect” to launch the main H2 screen.
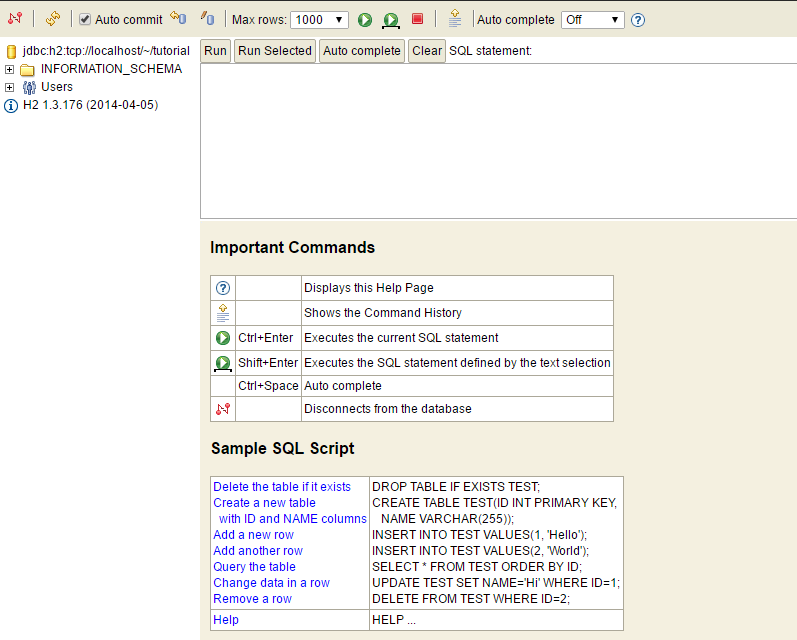
We can enter SQL commands into the text area and then click the “Run (Ctrl + Enter)” button to execute them. To start, we’ll use the content of the “create_people.sql” file to create a “PEOPLE” table:
         CREATE TABLE PEOPLE(
 PERSON_ID INTEGER PRIMARY KEY AUTO_INCREMENT,
 FIRST_NAME VARCHAR(100),
 MIDDLE_NAME VARCHAR(100),
 LAST_NAME VARCHAR(100),
 GENDER VARCHAR(20),
 SSN VARCHAR(15),
 BIRTHDATE VARCHAR(15),
 OCCUPATION VARCHAR(100),
 VEHICLE_MAKE VARCHAR(20),
 VEHICLE_MODEL VARCHAR(20),
 ADDRESS_LINE_1 VARCHAR(100),
 ADDRESS_LINE_2 VARCHAR(100),
 CITY VARCHAR(40),
 STATE VARCHAR(4),
 ZIP VARCHAR(10)
 );
Once executed, we should have a table definition visible:

Populating our Table
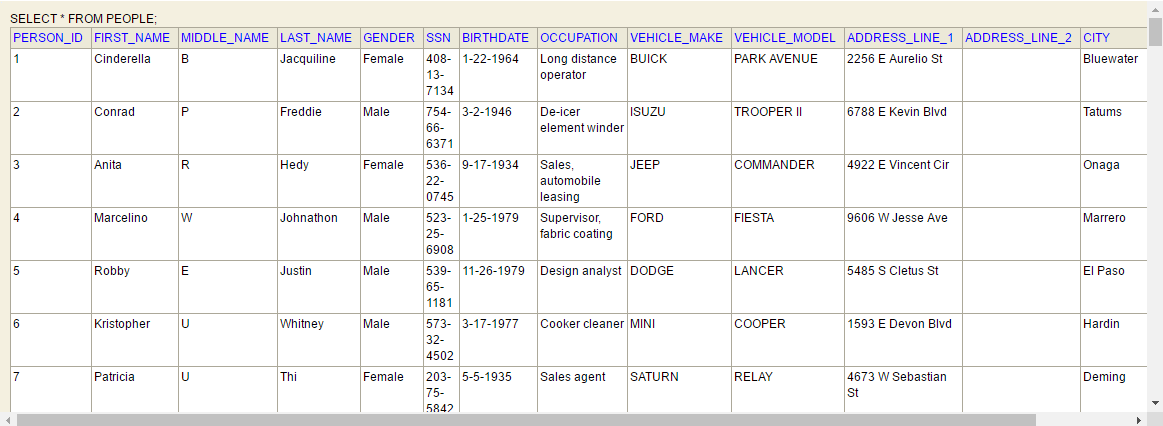
Now we’ll wish to populate our table with PEOPLE entries. The file “insert_people.sql” contains 100 such entries. Copy its contents to the text area and execute it. Afterward, run this SQL command to verify the output:
SELECT * FROM PEOPLE
You should get ~100 rows back.
We’ll now want to copy a few pieces of information for subsequent use: the URL, driver, username, and password. Copy these to a simple text editor for reference. Here are our values:
Username: sa
Password:
Driver: org.h2.Driver
URL: jdbc:h2:tcp://localhost/~/tutorial
You can find the URL at the top left of the H2 browser.
Creating a new Route
We’ll now create a new Route in the eiConsole called “SQLXML Selecting Rows”.

To interact with our database, we have a few standard components available to us: the “Database Polling SQL Listener,” the “Database SQL Transformation Module,” and the “Database SQL Transport.” Each of these uses a PilotFish language called “SQLXML,” which can be summarized as an XML-based, database agnostic set of SQL instructions.
Each module can be configured using an “input file” referencing a file containing SQLXML or, if this is not provided, by assuming that the contents of any transaction reaching that module is SQLXML. In either case, the SQLXML received will be interpreted and executed against a configured database connection, which can be a “Data Source” or JDBC-driven.
Configuring a Basic “Database Polling SQL Listener”
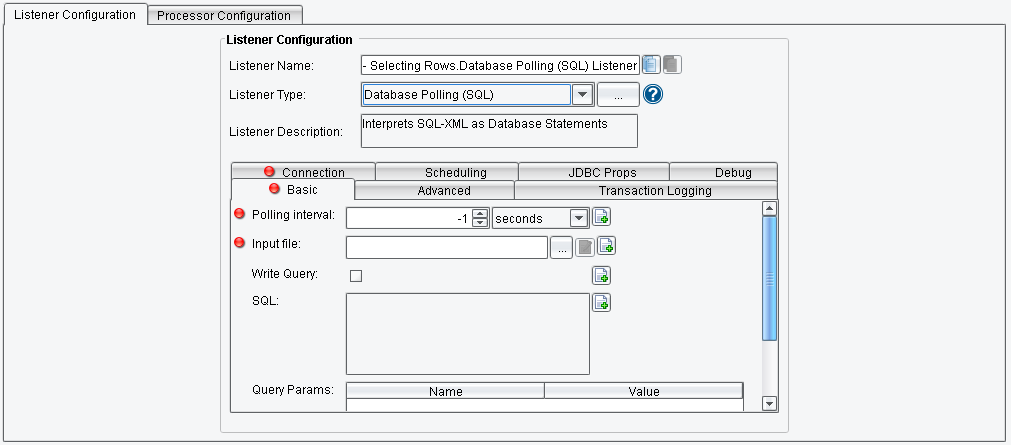
We’ll start by configuring a basic “Database Polling SQL Listener.” Add a new Source and select that Listener from the Listener Type drop-down:
Start by changing to the Connection tab and providing our previously copied values.
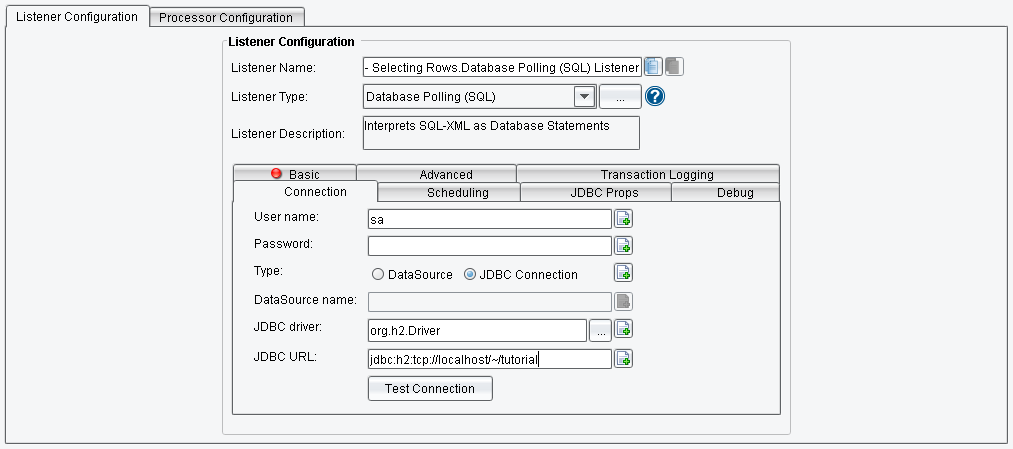
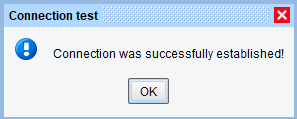
Click the “Test Connection” to ensure that our values are correct and that our database is functioning.
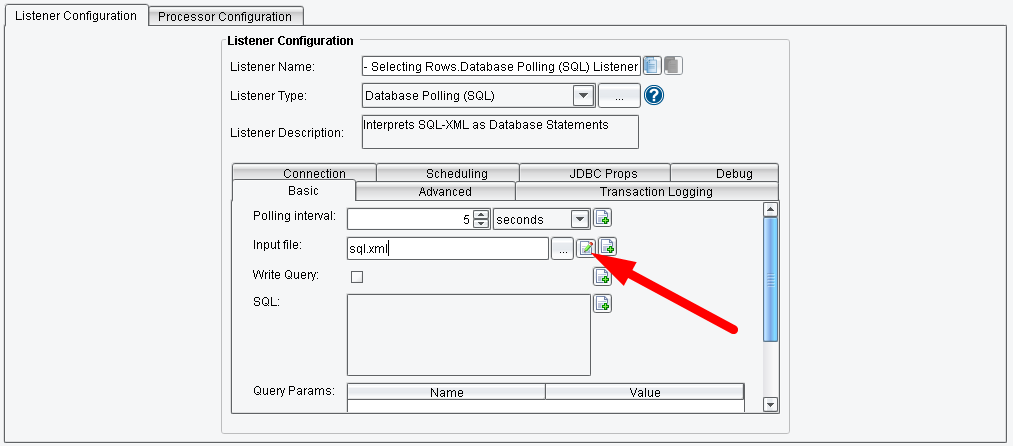
Back on the “Basic” tab, we’ll need to first provide a “Polling Interval,” which is how often our SQLXML is executed against the provided database connection. Since this is a tutorial, we’ll assume 5 seconds is sufficient.
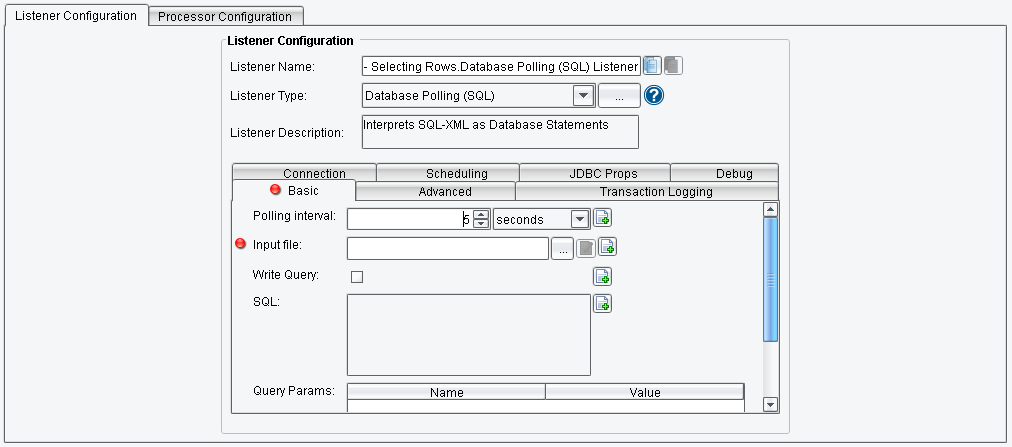
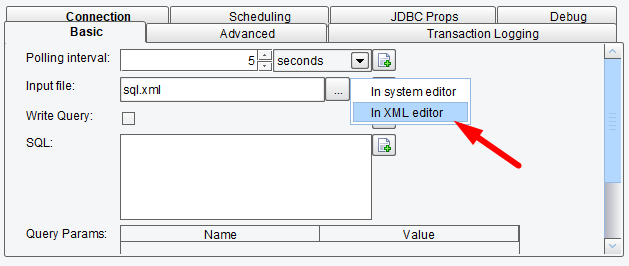
Next, we’ll need to create our SQLXML file. Type “sql.xml” into the Input File field, then click the “Edit” button.
And select “In XML Editor”
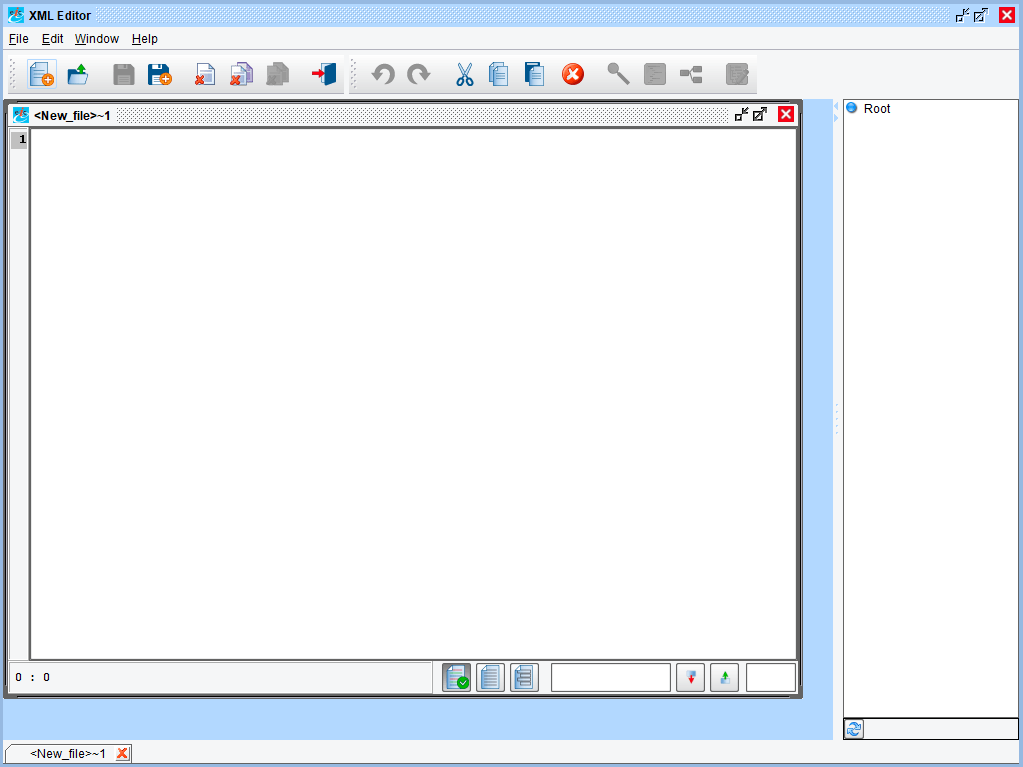
This will open the XML Editor. Here we can write out the body of our SQLXML.
Writing out the Body of Our SQLXML
As this is an XML file, we’ll start by providing the basic XML header:
<?xml version="1.0" encoding="UTF-8"?>
Our next line will be the root element, “SQLXML.” There’s a particular namespace associated with SQLXML, so we’ll define that using the “xmlns” attribute:
 <SQLXML xmlns="http://pilotfish.sqlxml">
  </SQLXML>
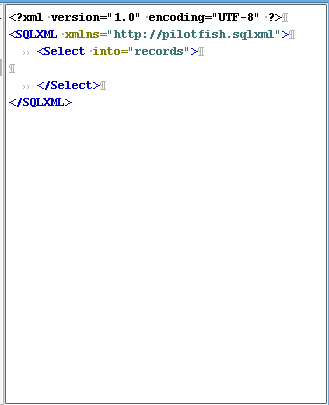
We can now provide a number of different SQLXML instructions inside the SQLXML body, including Execute, Select, Insert, Update, and Delete. We’ll start with Select. The Select element has a required attribute called “into” which will specify the name of a variable for the selected rows to be placed in. We’ll call ours “records”:
 <Select into="records">
  </Select>
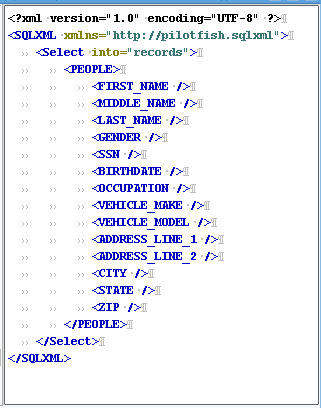
Our output should look something like this so far:
The structure of the Select instruction is pretty simple; it expects a single child element sharing names with the table to select from. Please note that different databases may impose different restrictions on case sensitivity. Underneath the table name element, we’ll provide empty tags matching the names of columns we’re interested in retrieving. We’ll provide all of them:
 <?xml version="1.0" encoding="UTF-8"?>
 <SQLXML xmlns="http://pilotfish.sqlxml">
  <Select into="records">
  <PEOPLE>
  <FIRST_NAME />
  <MIDDLE_NAME />
  <LAST_NAME />
  <GENDER />
  <SSN />
  <BIRTHDATE />
  <OCCUPATION />
  <VEHICLE_MAKE />
  <VEHICLE_MODEL />
  <ADDRESS_LINE_1 />
  <ADDRESS_LINE_2 />
  <CITY />
  <STATE />
  <ZIP />
  </PEOPLE>
  </Select>
 </SQLXML>
Our output:
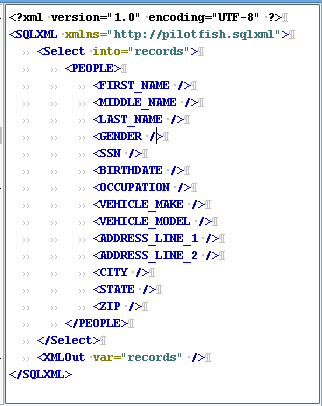
The Select instruction should now create a SQL query fetching the various provided columns from the PEOPLE table. The results will be stored in a variable called “records.” Now we simply need to output this variable to XML. To do so, we’ll add another instruction next to Select called “XMLOut” with an attribute called “var” specifying our “records” variable:
<XMLOut var="records" />
Our output:
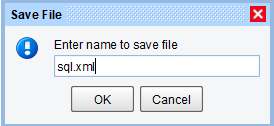
Now to save our file. Click the “save” button and save the file there as “sql.xml” then close the XML Editor.
There’s one more configuration value we’ll change, located under the “Advanced” tab. Enable the “Use Single Output Stream” option:
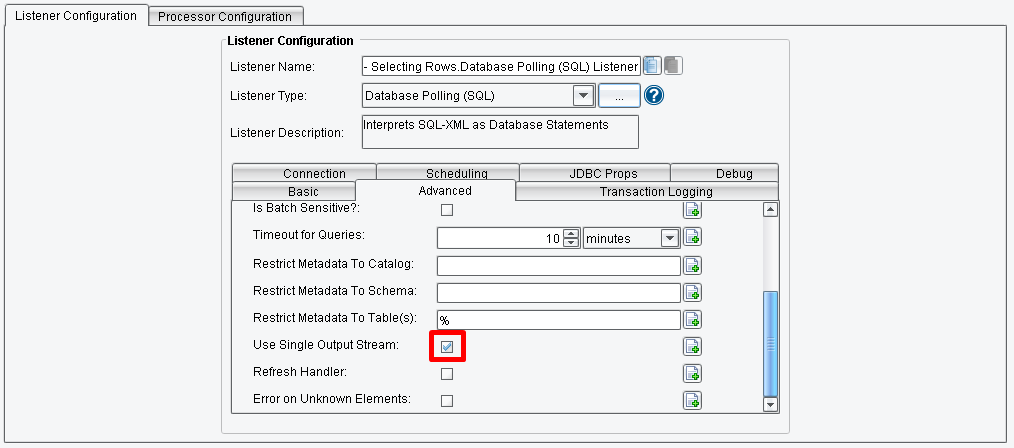
This will cause all selected rows to come back in a single eiConsole transaction. Unchecked, and by default, the Listener will produce a separate transaction for each row selected.
Save the route and switch to the eiConsole’s Testing Mode and execute the test at the Listener stage,
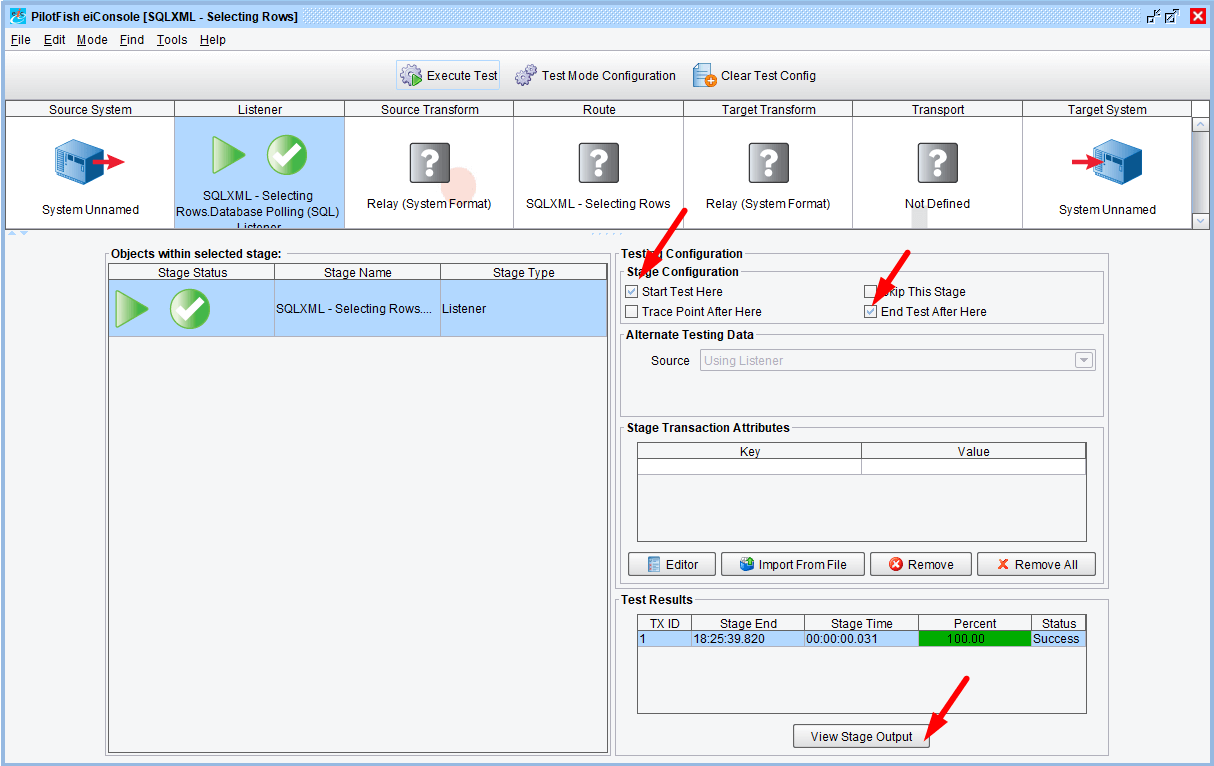
Then view the output.
Execute the Test
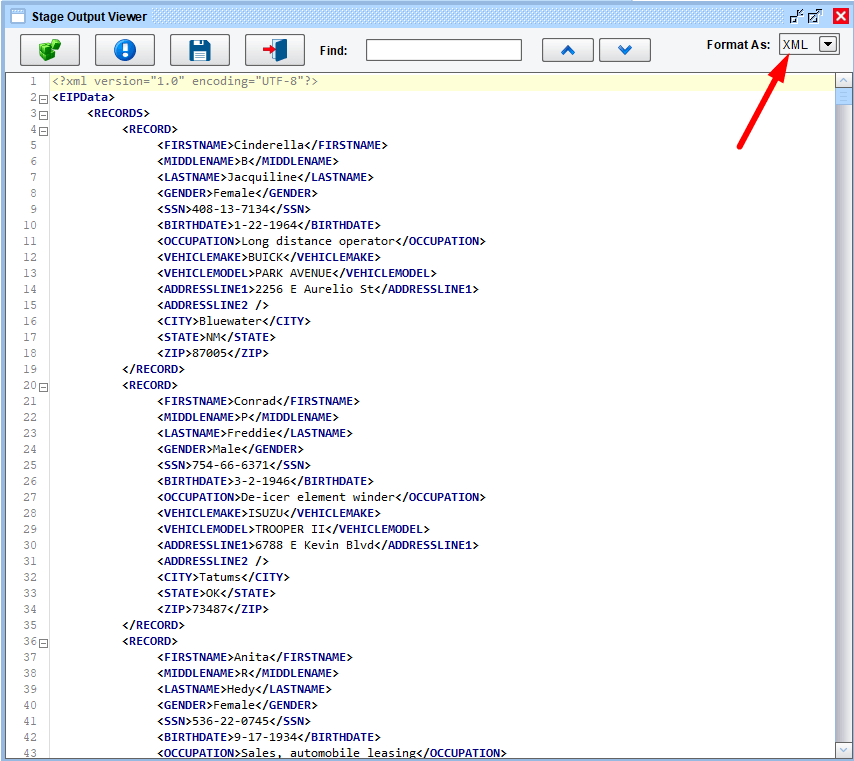
The Select instruction created a root element called “EIPData.” We then have a “RECORDS” tag, created from our variable name (“records”). Each row then becomes a “DATA” element with the corresponding columns underneath.
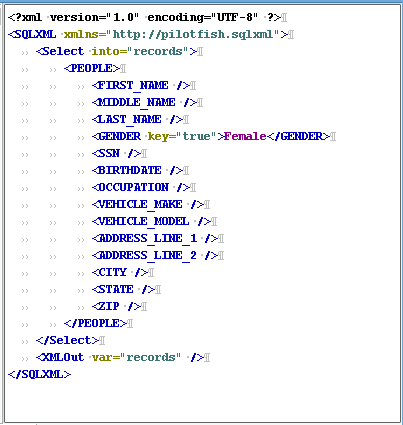
Suppose we need to specify the equivalent of a SQL “where” clause. That is, we need to select only particular rows. Return to your “sql.xml” file in the XML Editor. To use a column in such a way, you’ll need to provide a “key” attribute set to “true,” as well as the value to check against as the column text. Modifying the query to grab only those PEOPLE rows with Gender = “Female”:
<GENDER key="true">Female</GENDER>
Our output in the XML Editor:
Once again, execute this as a test and review the output.
Review the Output

If you review the results, you’ll see all entries have the “GENDER” value as “Female.”
If it does, that’s it. You’ve successfully finished this tutorial.