eiConsole v.19R1
Tutorial & Interface
Using Templates
Overview
This interface and related tutorial demonstrate the use of the Data Mapper in Route configurations to transform between XML Formats. In this particular exercise, an existing Route (from “Data Mapping – Using Conditions”) is modified to use templates to transform a “PeopleA” XML format to the “PeopleC” XML format. This tutorial covers the use of named and matched templates, as well as parameters.
In this tutorial we’ll cover the use of templates in the Data Mapper and XSLT. This tutorial expands on concepts demonstrated in “Data Mapping Using Conditions,” so users are expected to be familiar with that content. We’ll show how to use templates as “callable functions,” as well as how to structure XSLT somewhat less linearly.
How to Use This Example
Click the links below for the files you will need for this tutorial, then download the INTERFACE to get started. (Once logged into the eiConsole it immediately shows up in your “PIE” inbox for use.)
Note: if you are not logged in to the eiConsole, or have arrived at this page via a browser, you will be prompted to login before the interface downloads into your eiConsole “PIE” inbox. Or if you have not downloaded and installed a FREE eiConsole Trial you will have the opportunity to register after you click the Interface Download link. Once you are logged in the interface will automatically download into your “PIE” inbox. First, you’ll see a screen pop up indicating that a new product is ready for download. Select the Download Now button. Once you’ve downloaded the Interface you can drag it into your current Working Directory and begin.
Next, follow the tutorial and walk through it step-by-step. You may check your work against the provided Route (Sample Data).

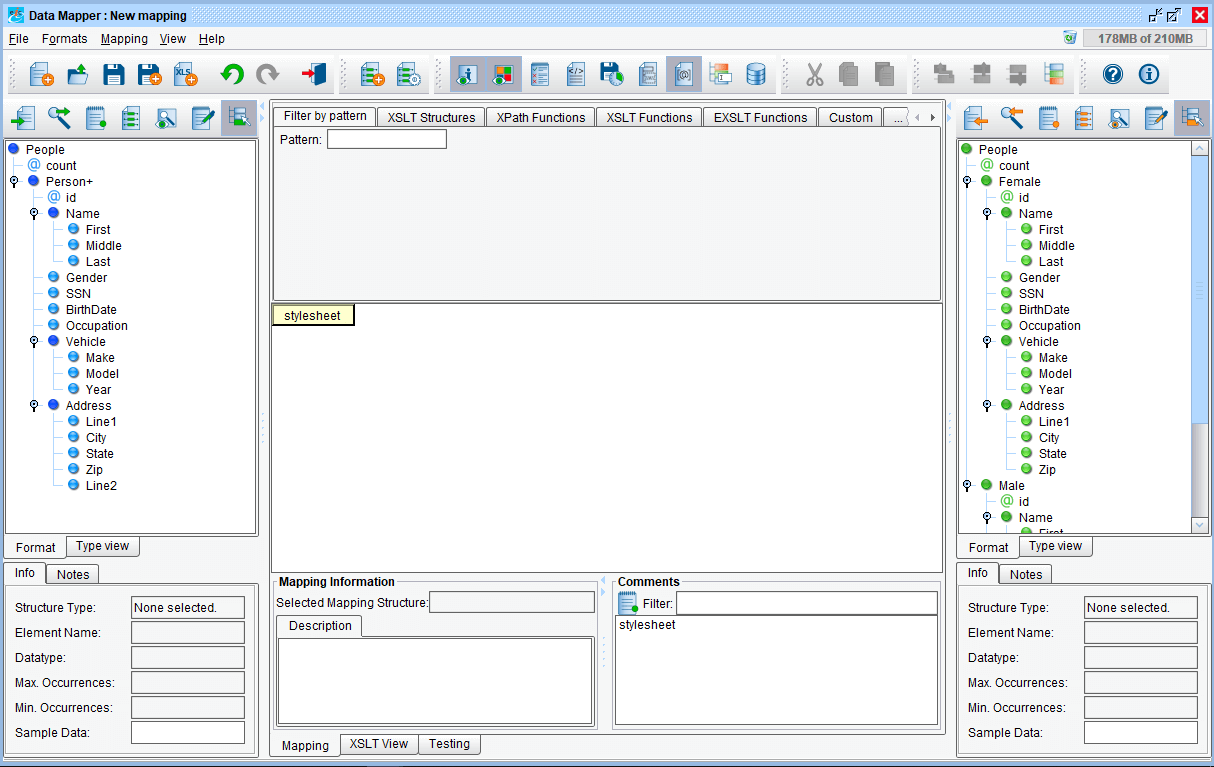
Click “New” to open the Data Mapper. Load in “PeopleA.xml” as the Source format and “PeopleC.xml” as the Target format:
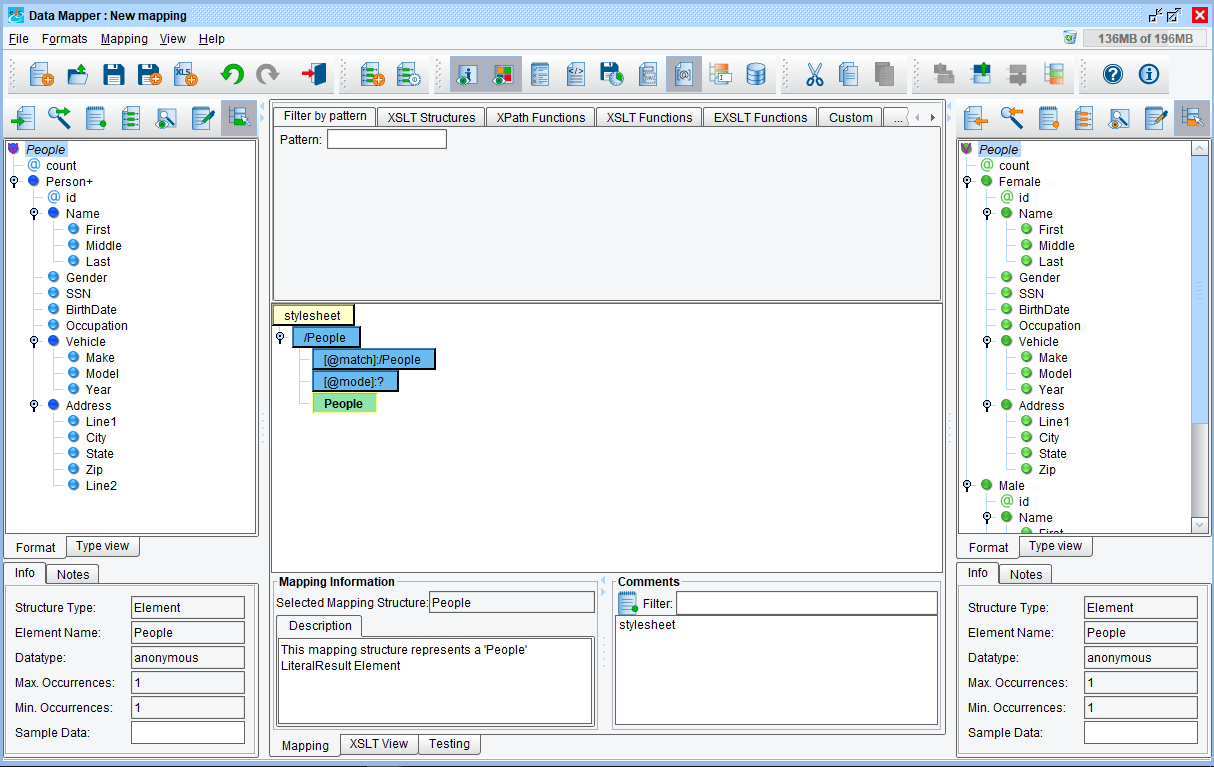
As usual, begin by mapping the root element from the Source onto the “stylesheet” element, and then the root element from the Target onto that:
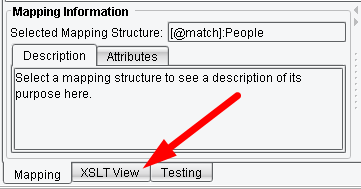
In previous tutorials, we’ve immediately starting mapping items from the Target format, sometimes directly and sometimes using constructs such as “for-each.” We’ll do things a bit differently this time. Click the “XSLT View” tab:
If you look at the XSLT we’ve thus far generated using the graphical mapping view, it should look something like this:

When we dragged the Source element, People, onto “stylesheet,” it created an XSLT instruction called “template” with a “match” attribute. In XSLT, a template is a handler for a particular XPath expression. In this case, we’re handling root-level elements named “People,” of which there should only be one. This template is therefore evaluated only a single time, producing a single “People” element in the result document (line 4). Most of our mapping so far has taken place inside this template. However, there’s another, more modular approach to XSLT, which is to use templates to break your XSLT into portions which call one another.
Using templates to break your XSLT into portions
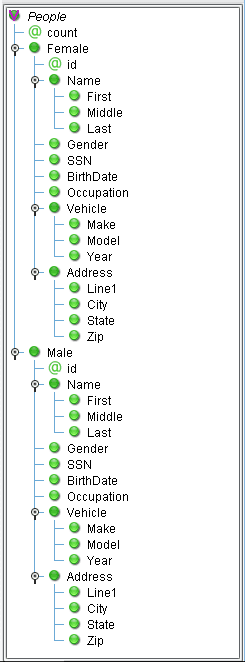
If we examine our Target format, we can see that the Person elements from the Source are replaced with individual instances of genders: “Male” and “Female”:
In previous tutorials, we handled this by creating two separate for-eaches or using a single for-each with a choose/when/otherwise block. But let’s suppose we want to do this using templates. Return to the graphical view:

This time, drag “Person” from the Source onto the “stylesheet” element:
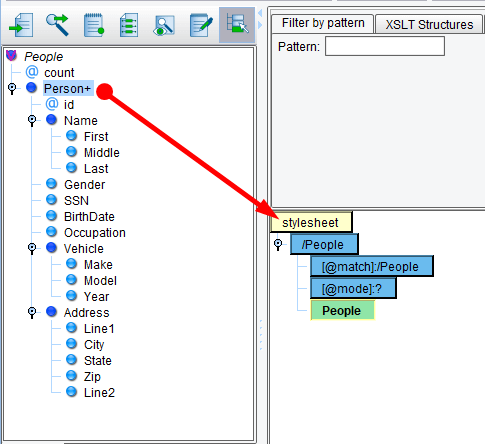
This will create another “template” element, which in the graphical view will show up as a blue “Person” element, sibling to “People”:

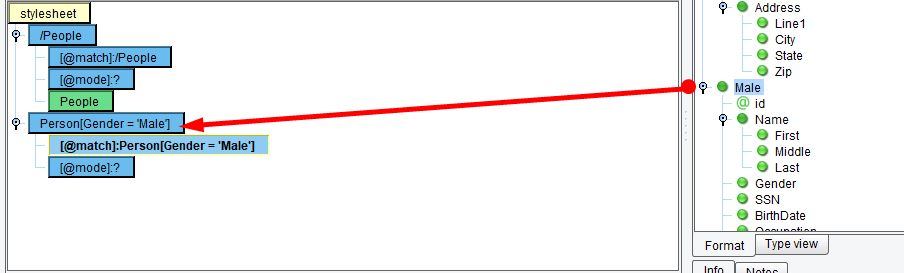
However, let’s alter the template match. Double-click on the Person element and change it to read:
Person[Gender = 'Male']
Remember to hit enter / return to save the changes. We’ve modified the expression so that, instead of just grabbing Person elements, it only grabs Person elements where that Person’s “Gender” element is equal to the literal value “Male.”
The [ ] brackets define what is known in XPath as a “predicate” – a condition.
Now, drag “Male” from the Target onto the Person element:
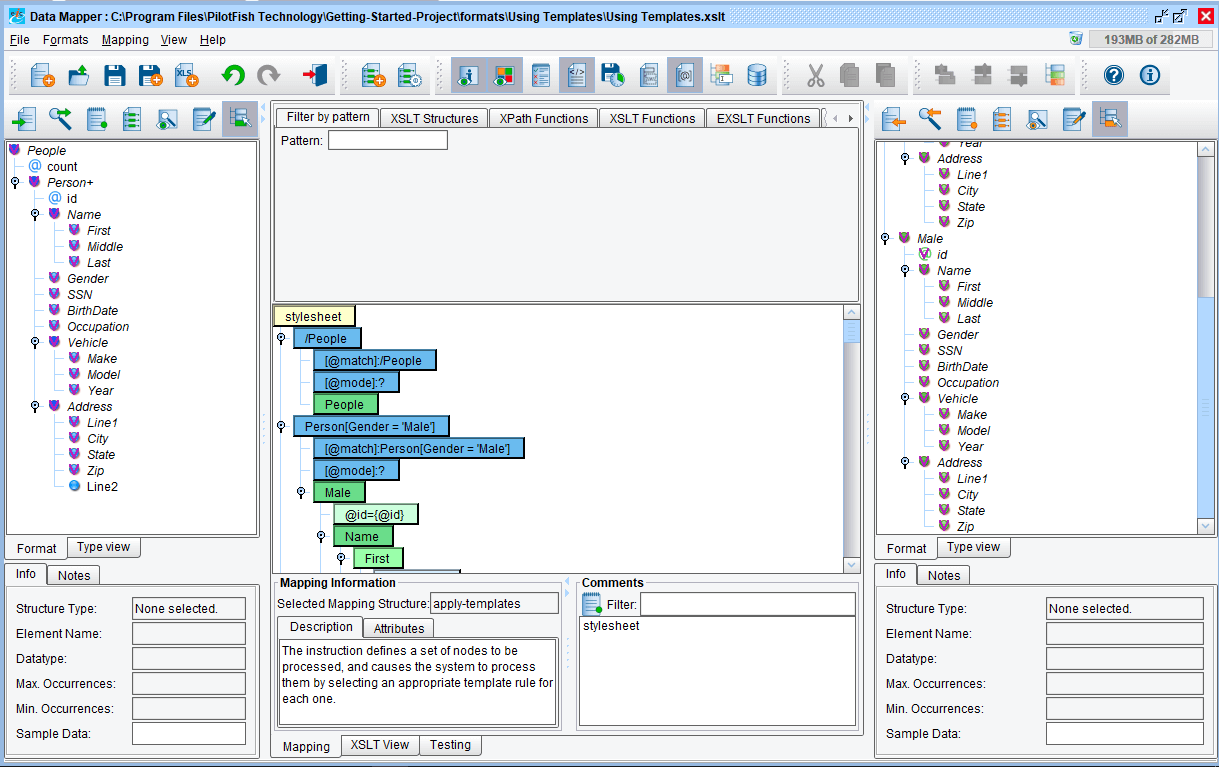
Using the same rules as previous mappings, map the contents of Person from the Source onto the contents of Male from the Target:
Repeat the exercise with the Female element; map another Person, change its expression so that the predicate checks for “Female,” and then map Female and its values from the Source and Target.
Adding a call for new template
Now, as-is, this mapping won’t make use of the new template we’ve added. The first template which matches is evaluated. We need to add a call for our new template. Drag XSLT Structures → Template → apply-templates onto the green “People” element in our mapping:
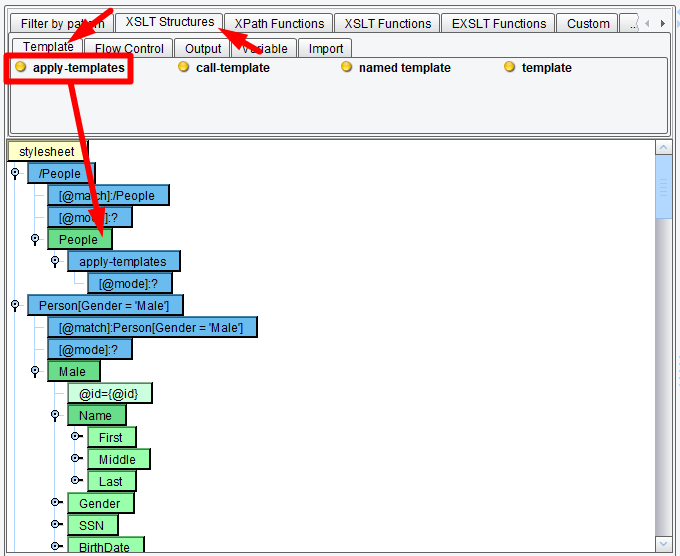
This will create the necessary call for XSLT to evaluate the current context elements against existing templates. Incidentally, apply-templates can also be invoked with a “select” attribute to restrict which elements are evaluated against templates.
Arbitrarily mapping the Gender field
We’ve now recreated a previous mapping exercise using templates. However, templates can also be used another way: as named “functions.” Let’s suppose that we want to arbitrarily map the Gender field from Male/Female to M/F. In previous tutorials, we handled this through conditions, tabular mappings, etc. For this case, we’ll do it through conditions and also through a template.
Start by dragging XSLT Structures → Template → named template onto “stylesheet”:
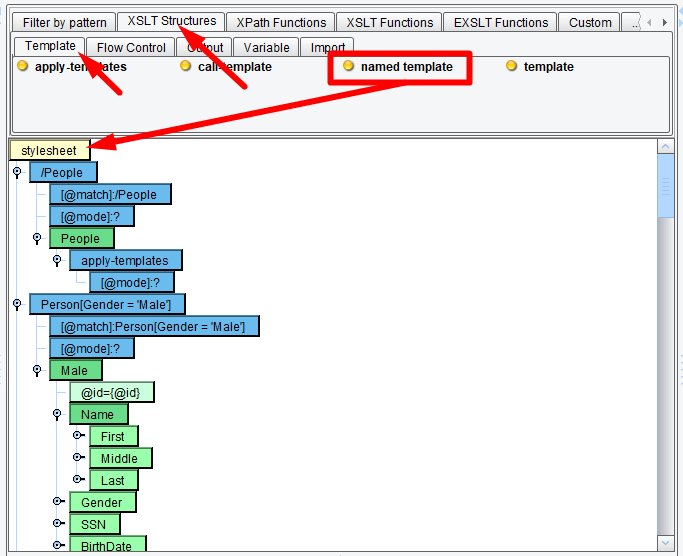
It looks like that:

Double-click on the created template and name it. We’ll call ours “genderMapping”. And again, remember to hit enter / return to save the changes.

Providing a parameter
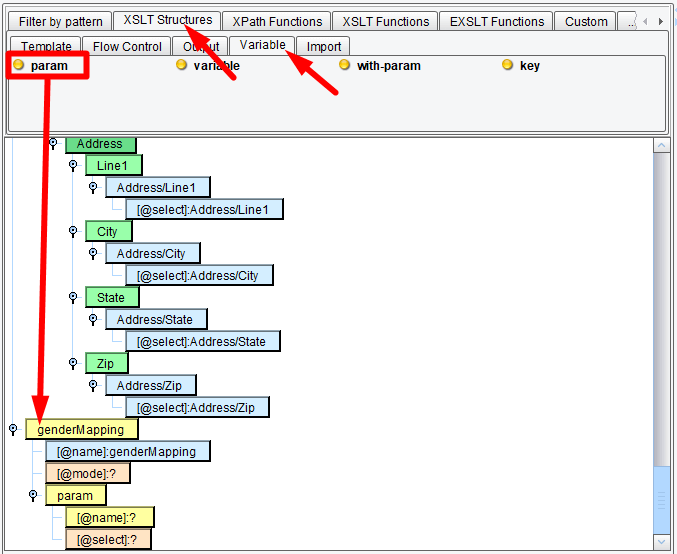
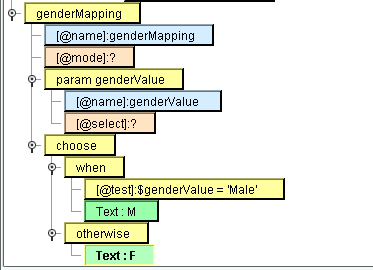
Next, we’ll provide a parameter to our named template. Parameters are variables for which the values are provided when the template is called. Drag XSLT Structures → Variable → param onto our newly created template:
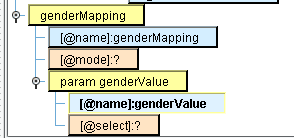
We’ll need to provide a “name” value for our parameter. We can ignore the “select” attribute; this is the default value for this, if no other is provided. We’ll name the parameter “genderValue”:
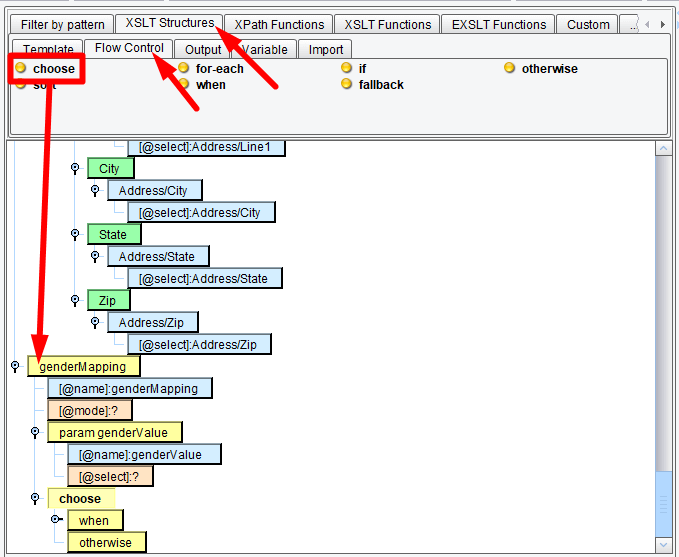
Next, we’ll use a choose/when/otherwise block to test the value of “genderValue.” First, drag the block onto the genderMapping. Then populate the test field with the condition: $genderValue='Male'
We can use XSLT Structures → Output → text to output M or F:
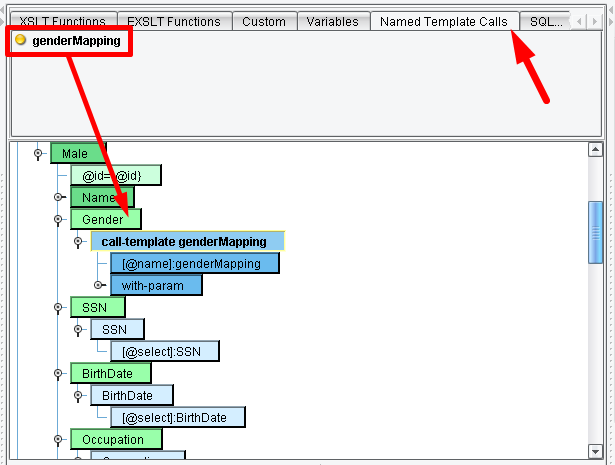
That completes our template definition. To invoke it, we can make use of a convenient tool in the Data Mapper: The “Named Template Calls” tab. Start by clicking one of the mapped Gender elements:
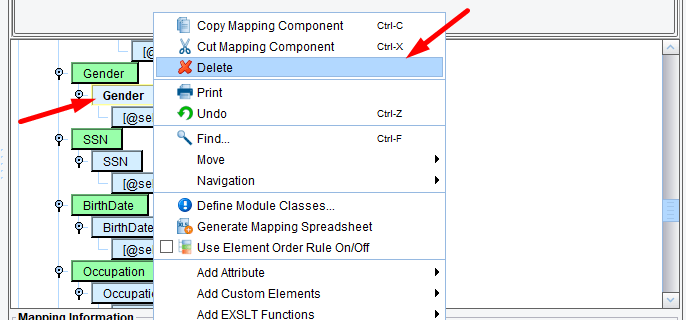
Delete the mapped “Gender” value (the one in blue), then drag “genderMapping” from the “Named Template Calls” tab onto the Gender node.
Note: the “Gender” (the one in green) node should be selected, otherwise the “genderMapping” will be hidden.
Next, drag “Gender” from the Source onto the newly mapped “with-param”’s “select” attribute:
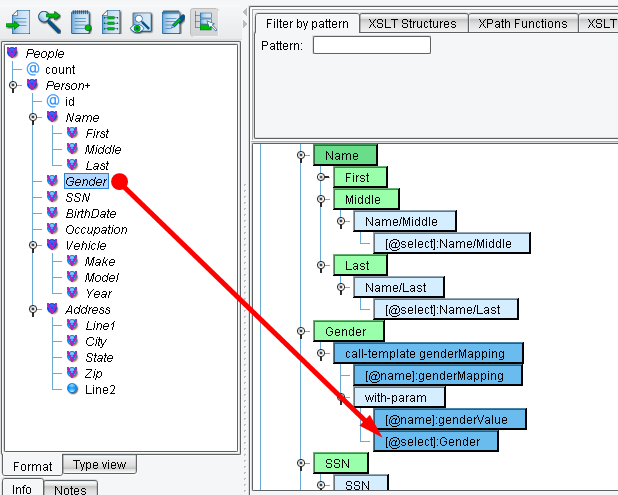
Repeat the “Named Template Calls” part for the Female element, then test the transformation. You should see the “Male” and “Female” values mapped correctly:

That’s pretty much all there is to it. You can use templates both as ways to break up and modularize XSLT as well as to produce reusable mappings.
This concludes this tutorial.