eiConsole v.21R1
Documentation
eiConsole Tutorial Basic
eiConsole Building a Web Service
In the Route File Management dialog, create a new Route by clicking the Add Route button, shown highlighted in red below:
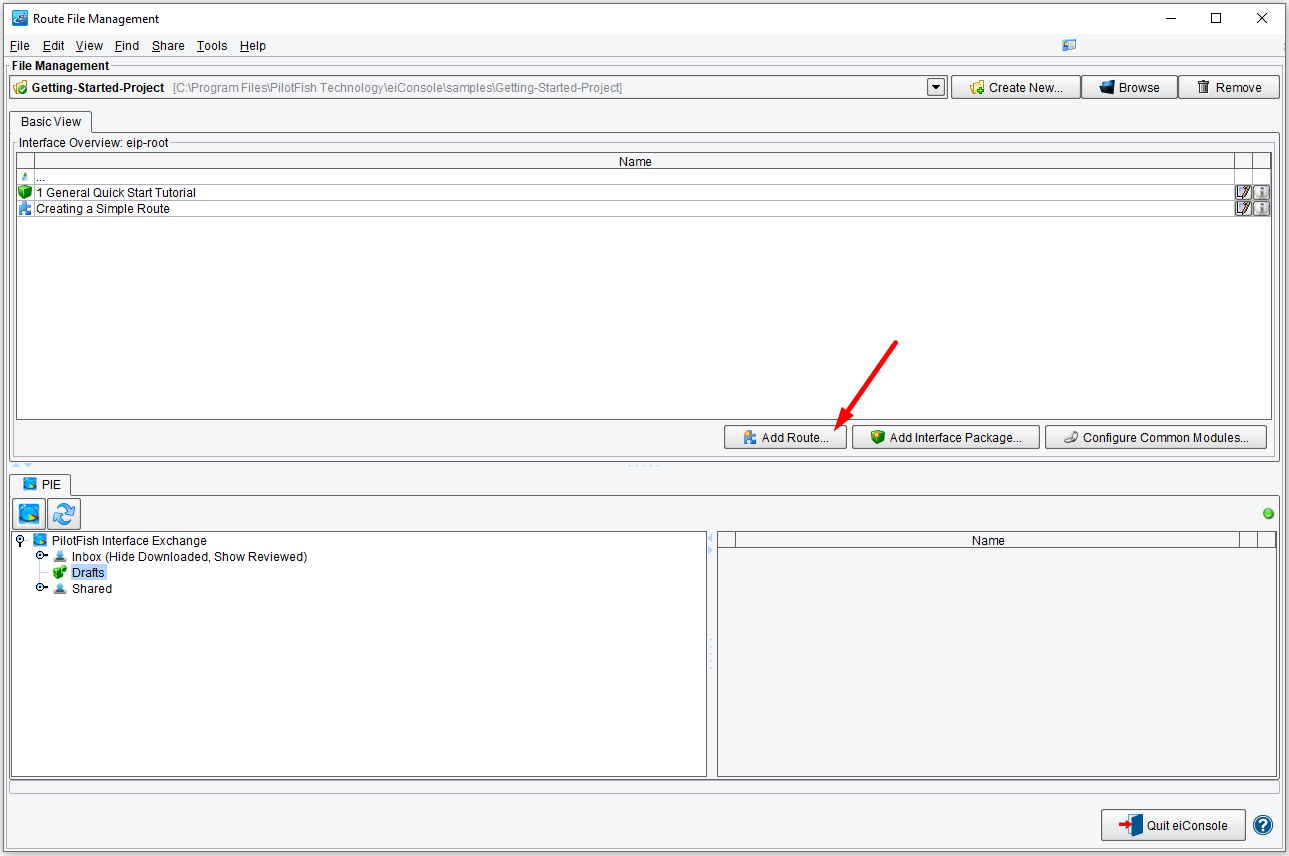
Enter in a name for the new Route in the provided dialog and click Ok. For this tutorial, we’ll use Simple Web Service:

Select the newly created route Simple Web Service in the Basic View Interface Overview panel and double-click to edit.

Your main eiConsole Grid should resemble this below:
Note: The default settings for both the Source Transform and Target Transforms are Relay (System Format).

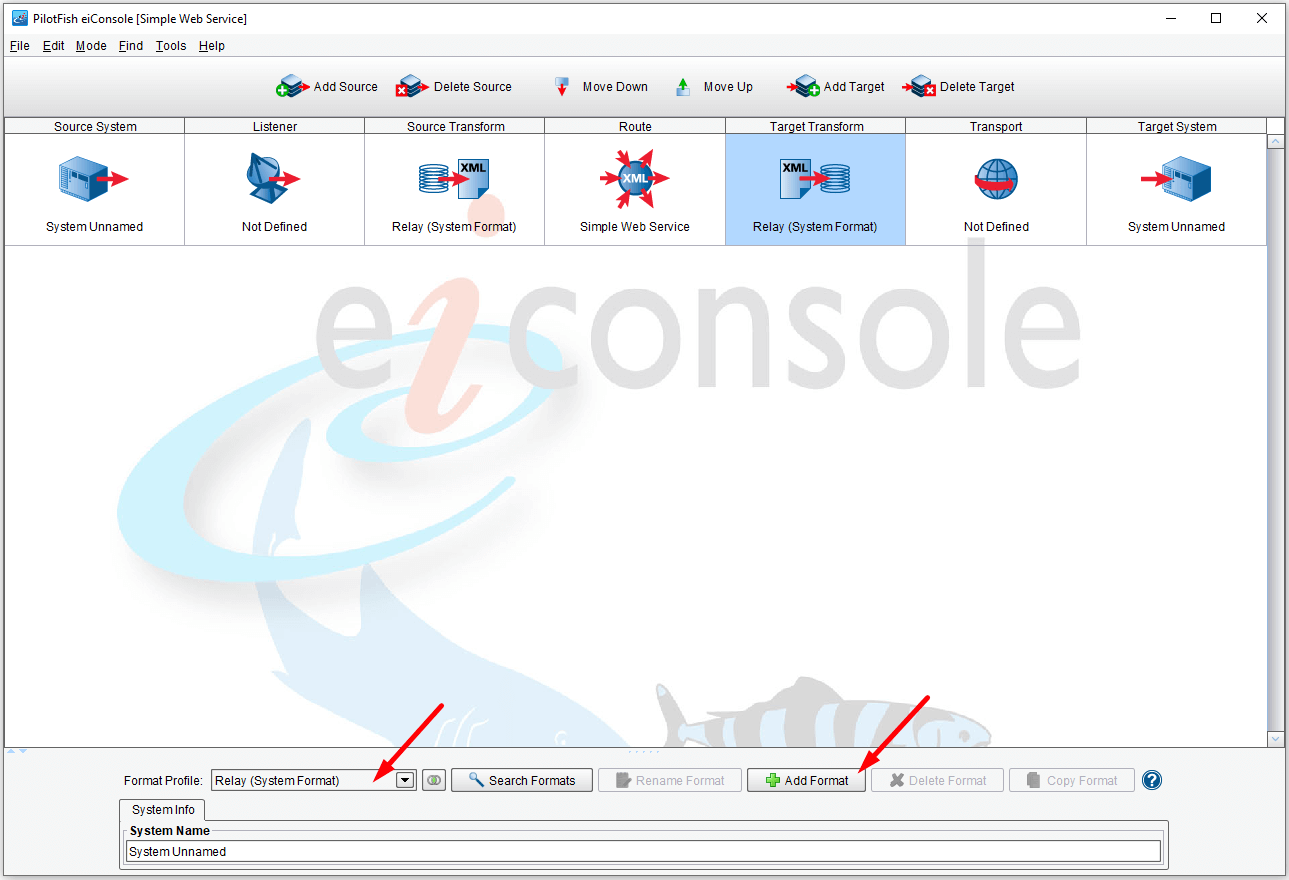
We’ll want to define an arbitrary, non-transforming Format. Select the Source Transform, as highlighted below:

We’ll want to leave it set to the default, Relay (System Format).
Note: the panel at the bottom allows us to select Formats or add new ones. If we wanted to add a new one, we’d click the Add Format button and enter the name of a new Format.
Next, select the Target Transform, shown highlighted below:

You’ll want to leave the Format at Relay (System Format). If you wanted to change the format you would select the Target Transform icon, click the Add Format button, or select from the drop-down via the Format Profile list box.
With our Source and Target Formats set, we can now proceed to the Listener to configure the web service. Select the Listener stage, shown below:

The first thing to do is select the Listener’s type via the Listener Type list box. Select the Document-Style Web Service from the list, as shown below:

The eiConsole will provide a name automatically, which it will derive from the current Route name and selected Listener type. We’ll ignore this field for now. We have one particular configuration item we need to fill out, however – Service Name:
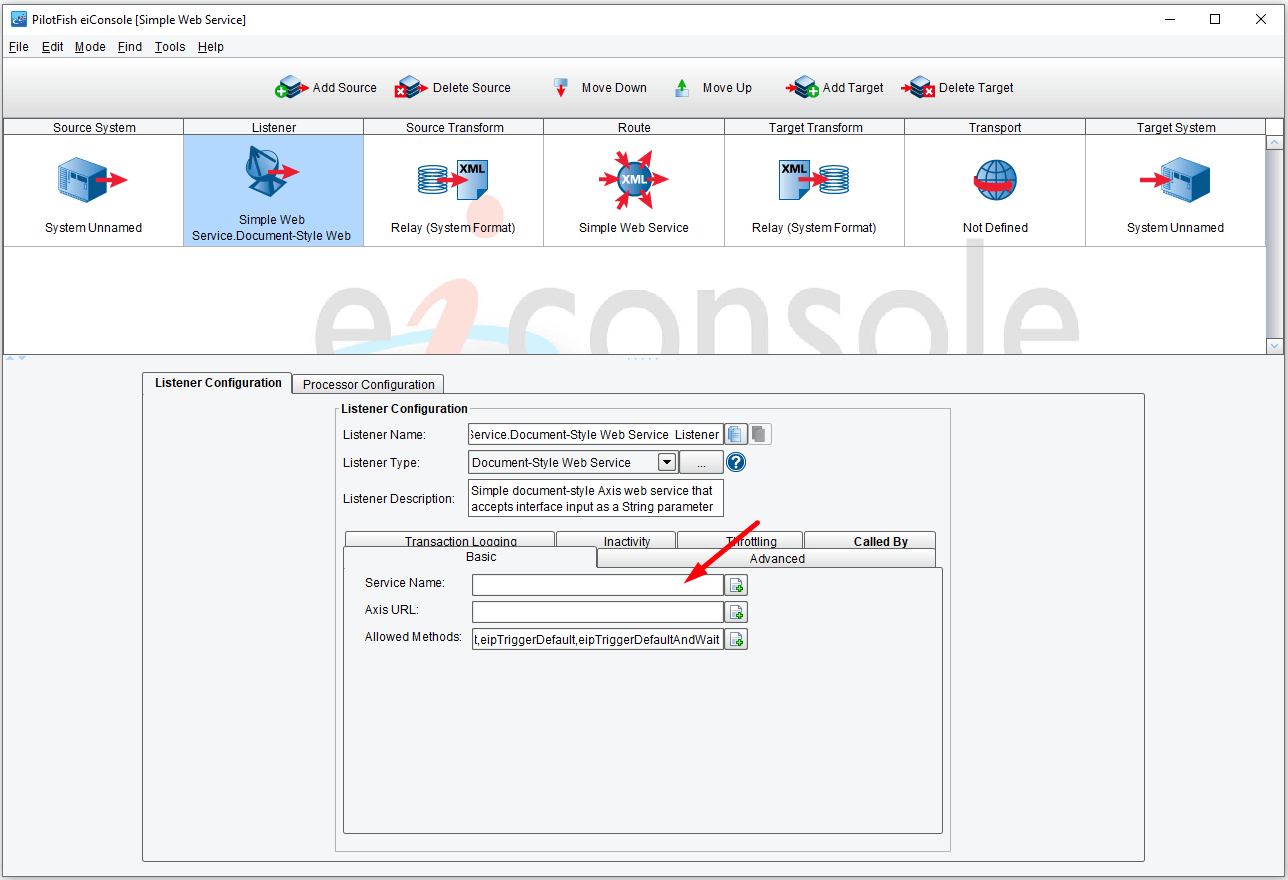
Service Name defines the name of the service you want to create and host. For our example, we’ll supply it with exampleService.
The next field, Axis URL, allows you to redefine the relative path for the underlying service hosting mechanism. You should leave this blank unless you have a particular reason for specifying otherwise.

In the Advanced tab, we’ll need to provide the port number the service listens under via the Port configuration item, shown below:

Port will need to match the port that the Axis service is hosted under. In the eiConsole testing and emulator modes, this will probably be 9000. In an Apache Tomcat environment, the default port will be 8080. Specify 9000 for now.
That’s all that’s required for the web service end of things. We’ll proceed to the Transport now, shown highlighted below:

In the Transport Type list box, select the Directory / File Transport, as shown below:

The Directory / File Transport only needs three of its items filled out in order to function: Target directory, Target file name and Target file extension. For our example, we’ll write out straight to the C:\out drive with a file named “test.txt”.
Mac users, we’ll write out straight to the Macintosh HD with a file named “test.txt“.

The Route itself is now configured and should be complete. We’ll need to save the Current Route.

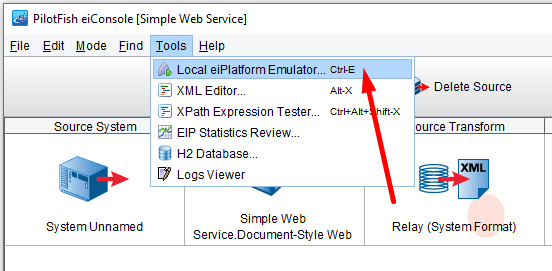
We’ll need to test this configuration via the emulator mode, which can be accessed via the Tools menu Local eiPlatform Emulator shown below:
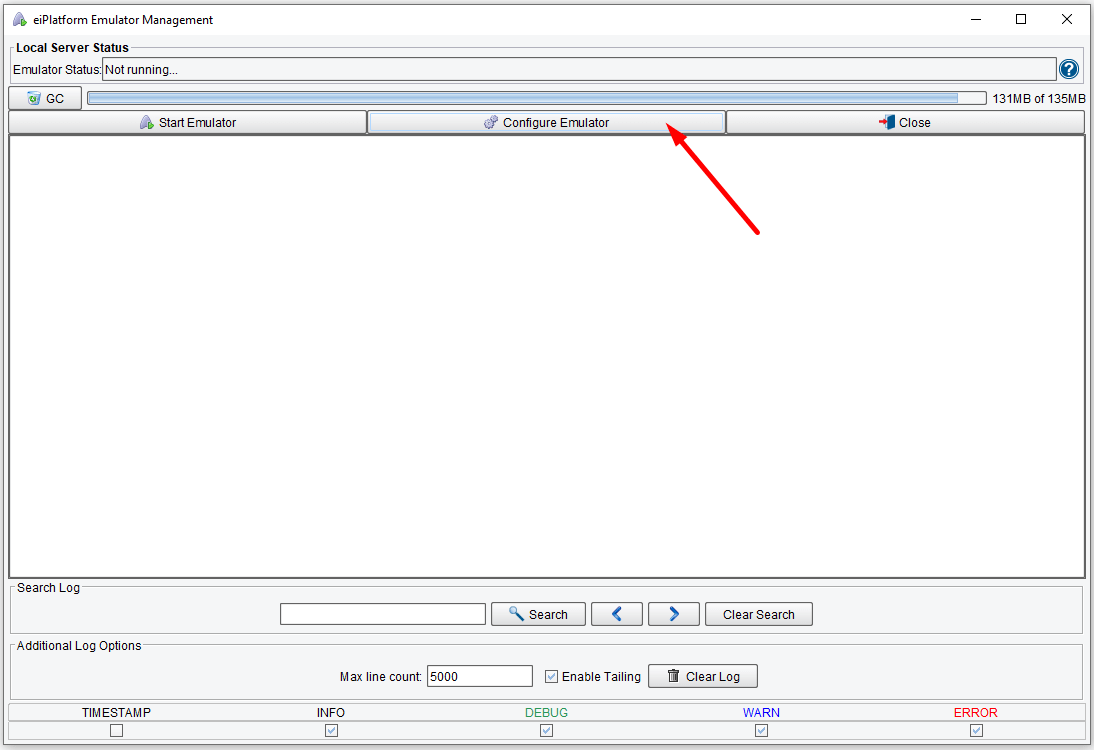
This will raise the EIP Emulator dialog, shown below. Click on the Configure Emulator button:
Choose the Simple Web Service route, apply and close the dialog.
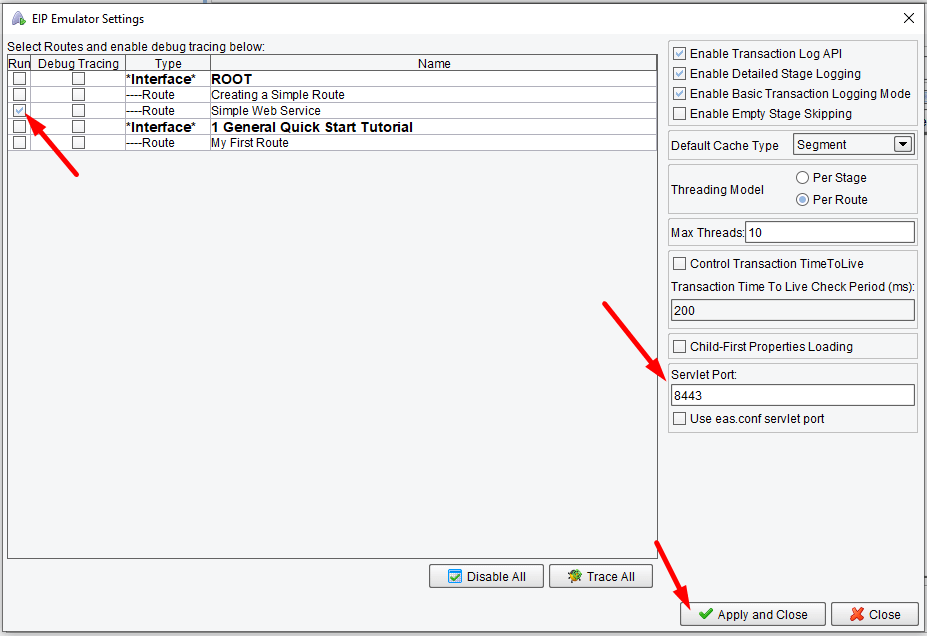
Click Start Emulator to start the eiPlatform emulator:

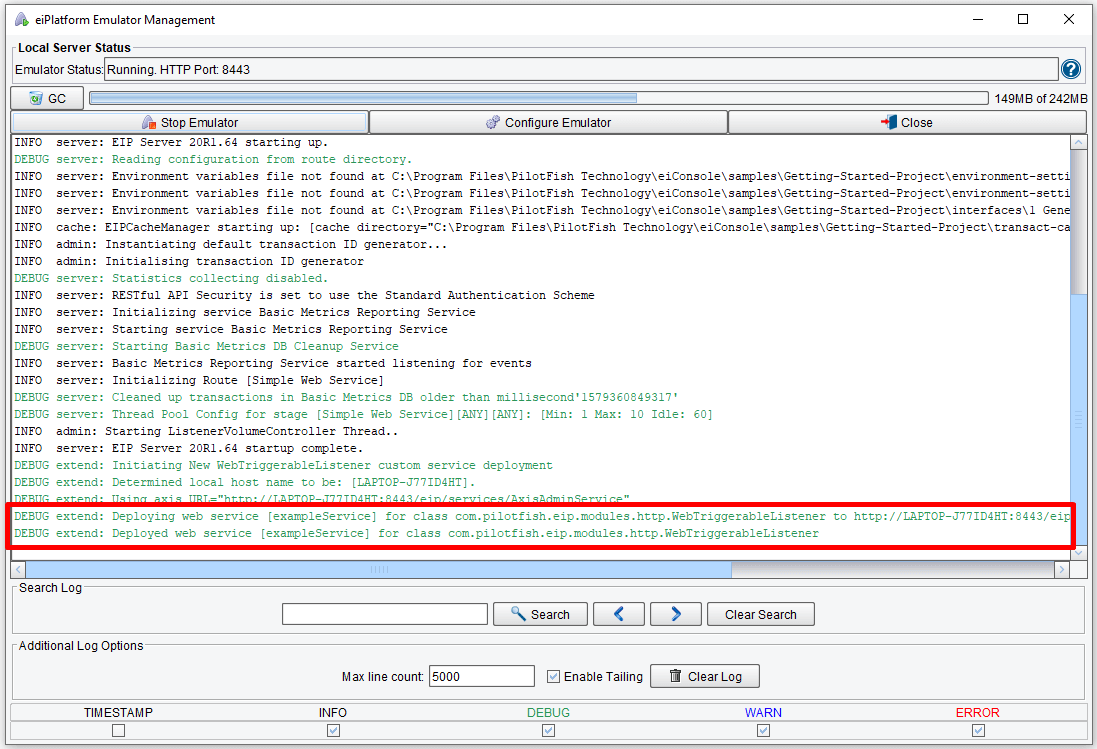
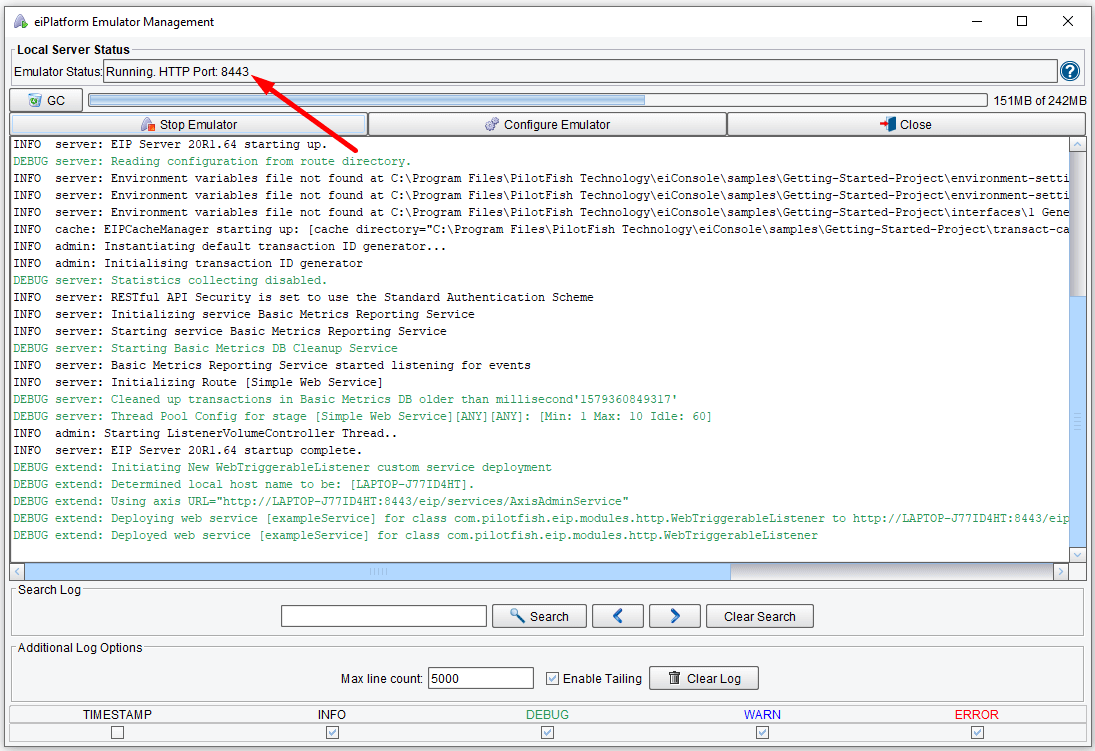
You should see some logging information appear in the dialog. It takes up to 1.5 minutes (90 seconds) for web services to deploy correctly, so wait for this interval and you should see lines in the dialog log similar to those highlighted below:
We’ll now open up our web browser and navigate to the eiPlatform emulator’s services page, typically located at http://localhost:9000/eip/services. But you should check what port is used in your emulator. In our case, it is 8443.
We edit the path to http://localhost:8443/eip/services. You should see the service you added shown (highlighted below):
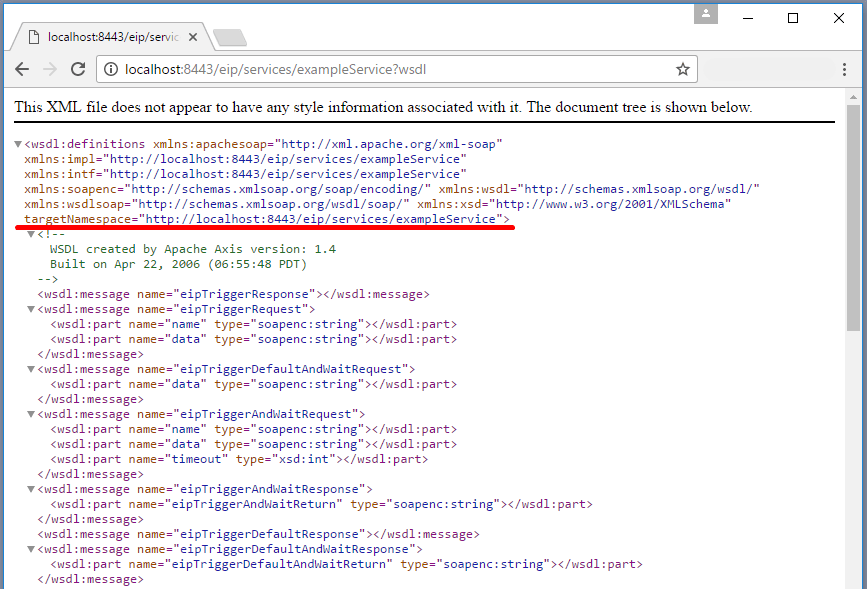
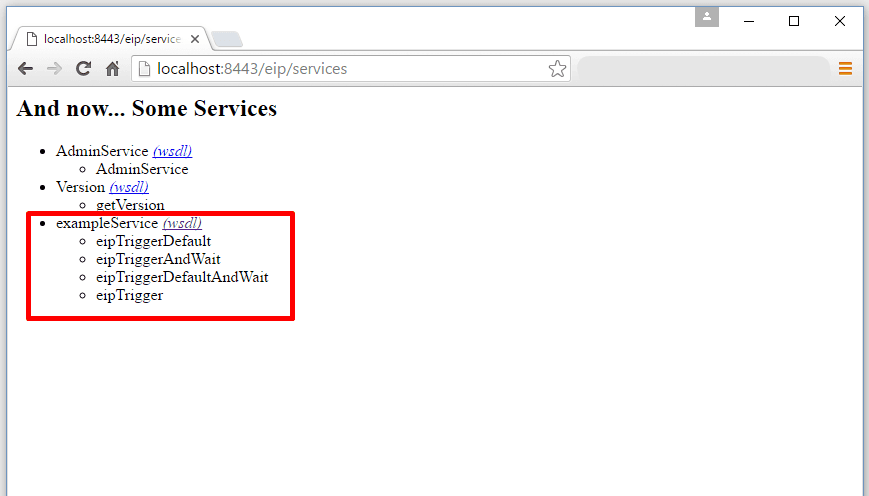 You can access the WSDL for your service by selecting the provided link:
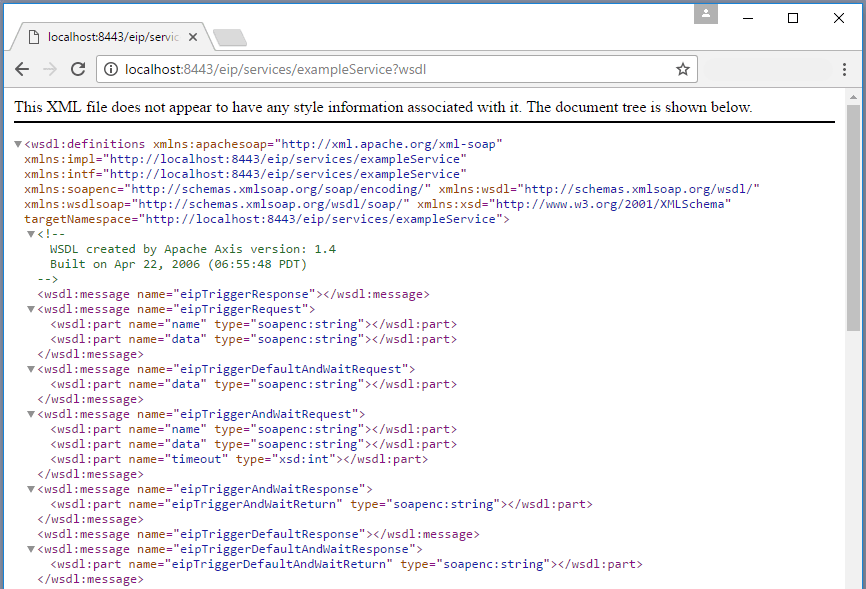
The “targetNamespace” attribute in the WSDL will provide a full-service path, as highlighted below: