eiConsole v.18R2
Documentation
XML to Fixed-Width Files
Here are the basic steps to create an interface to convert XML to fixed-width. These instructions will convert the attached people.xml file into a fixed-width text file.
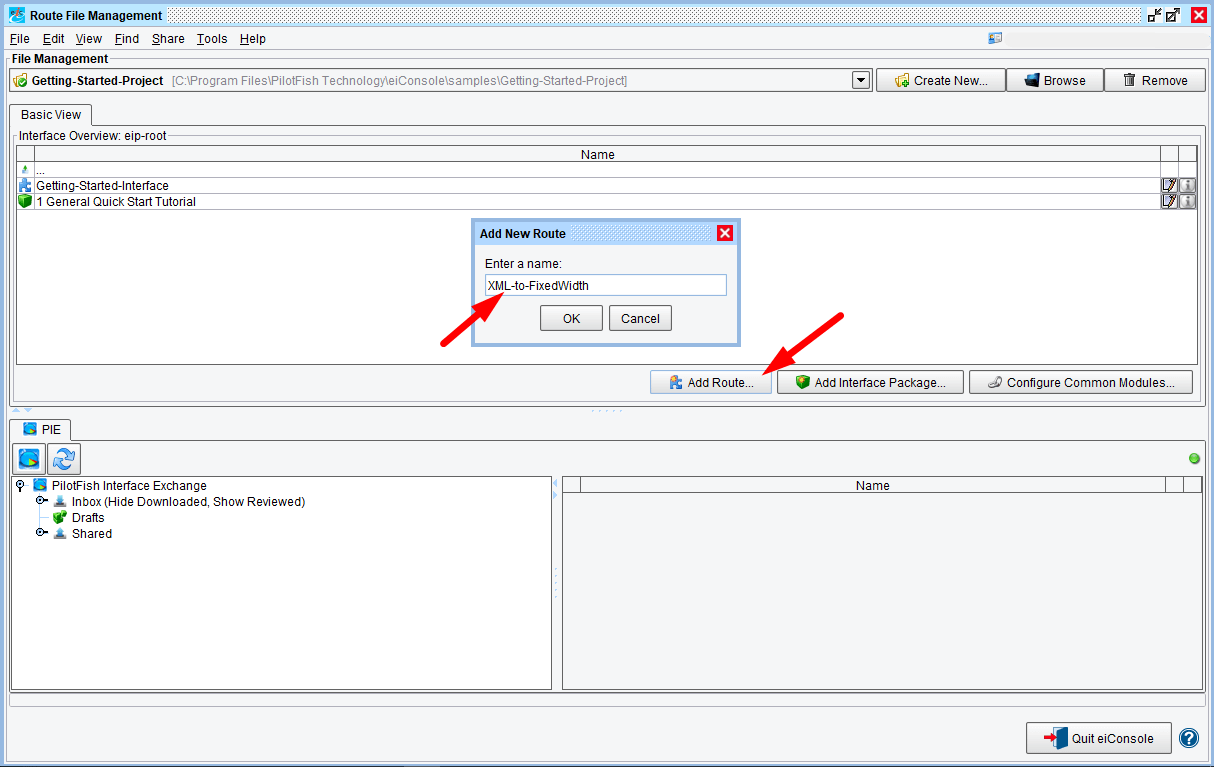
1. Create a new route by clicking on the Add Route button and entering in a name for the route XML-to-FixedWidth
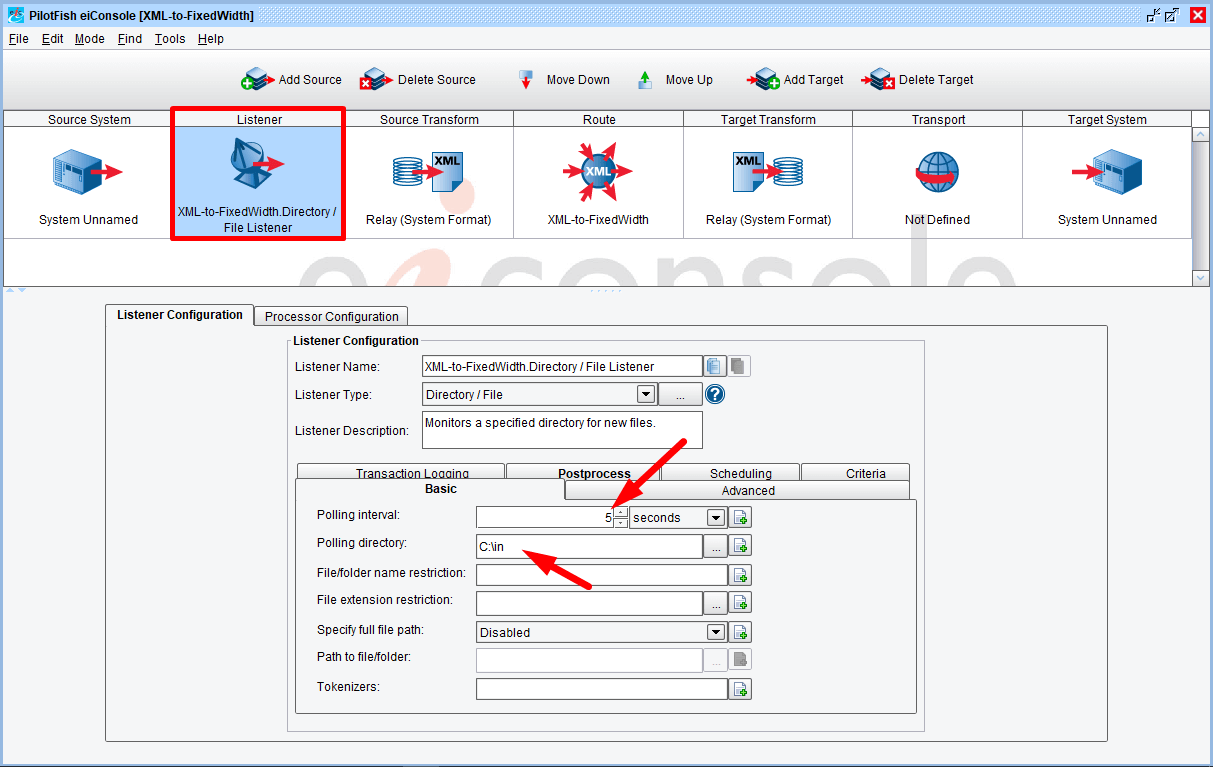
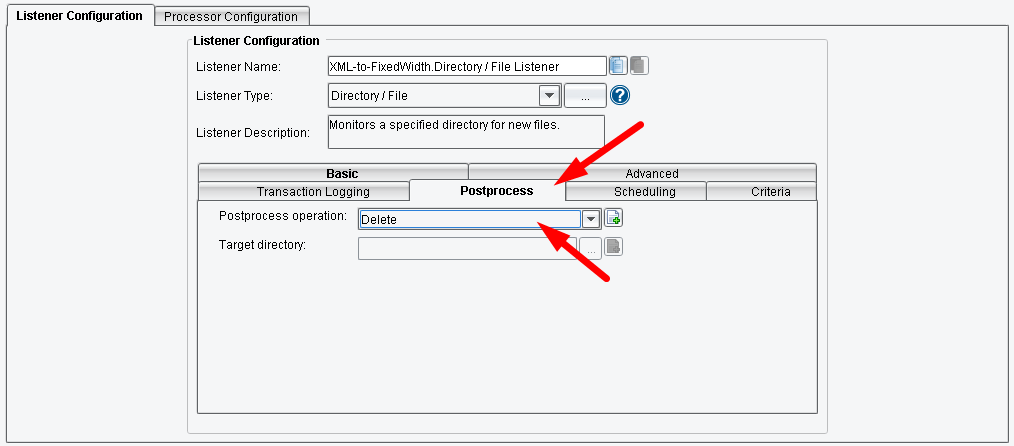
3. Setup a directory listener: Click on the Listener stage. Set the Listener Type to Directory / File. Set Polling interval to 5 seconds and Polling Directory to directory where it will pick up the XML files. In our case is C:\in
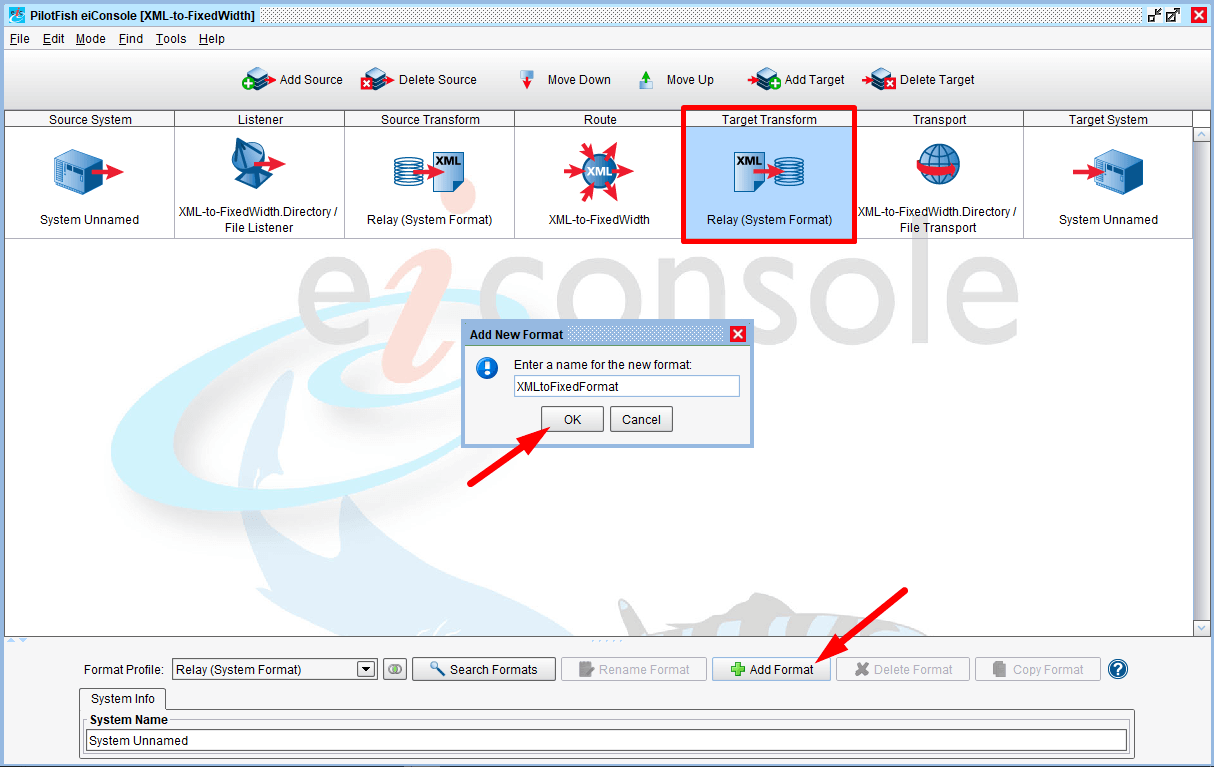
6. Create a new format: Click on the Target Transform stage. Click on Add Format. Enter a name for the new format XMLtoFixedFormat and click OK.
7. Under Transformation Module Configuration, set the Transformation Module to Delimited and Fixed-Width File and click on the Edit button.
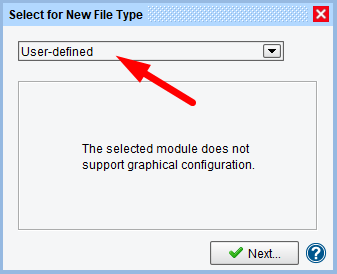
8. For the new File Type, select the User-defined and click Next.
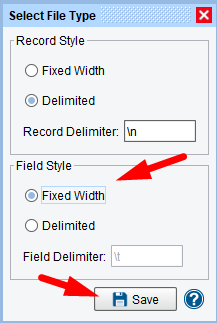
9. For Field Style, select “Fixed Width” and click Save.
10. In the Results preview, click the “open file” icon and open a sample xml file that you will be reading.
11. For this example, open the attached people.xml file.
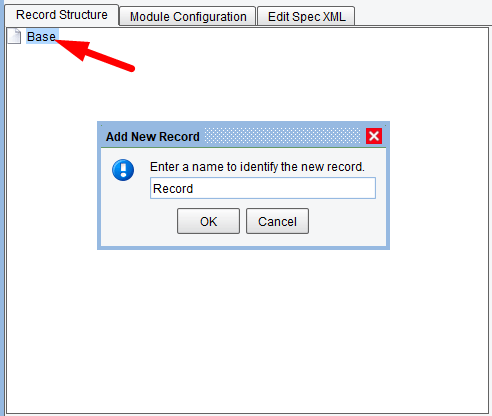
12. Start building out the structure of the Fixed-width file by right-clicking on “Base” in the Record Structure tab select Add New Record, and enter the name “Record”.
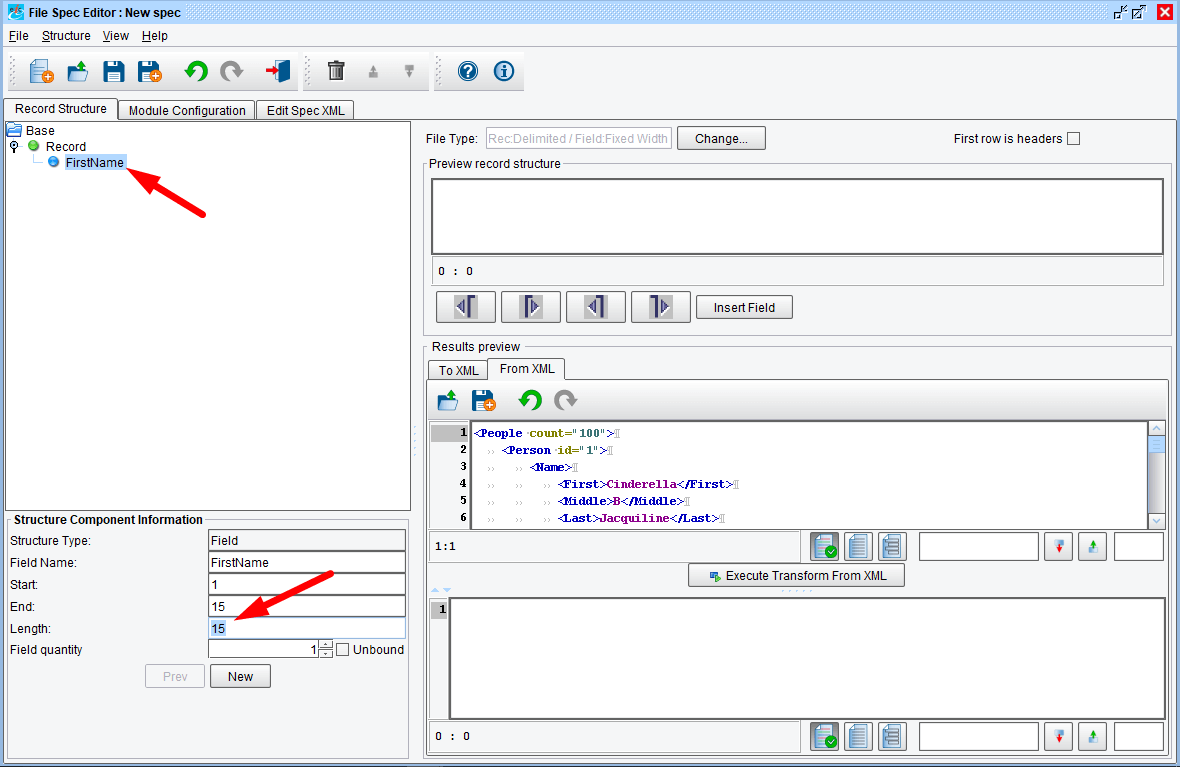
13. Start listing the fields in each record of the txt file: Right click on Record, select Add New Field. Set the field name to FirstName and click OK. Set the length of this field to 15.
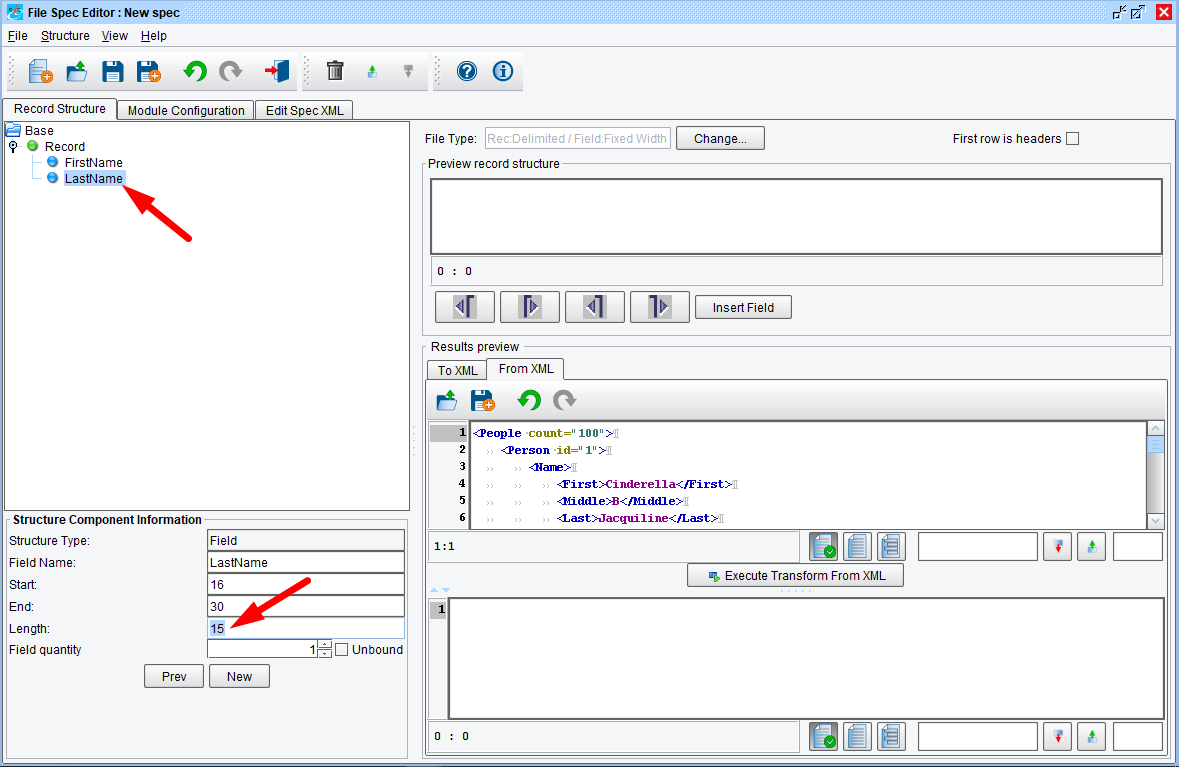
14. Repeat step 12 to create another field called LastName. The length of this field is also 15 characters.
You could repeat the previous step to create all other fields that you want to be added to the fixed-width file.
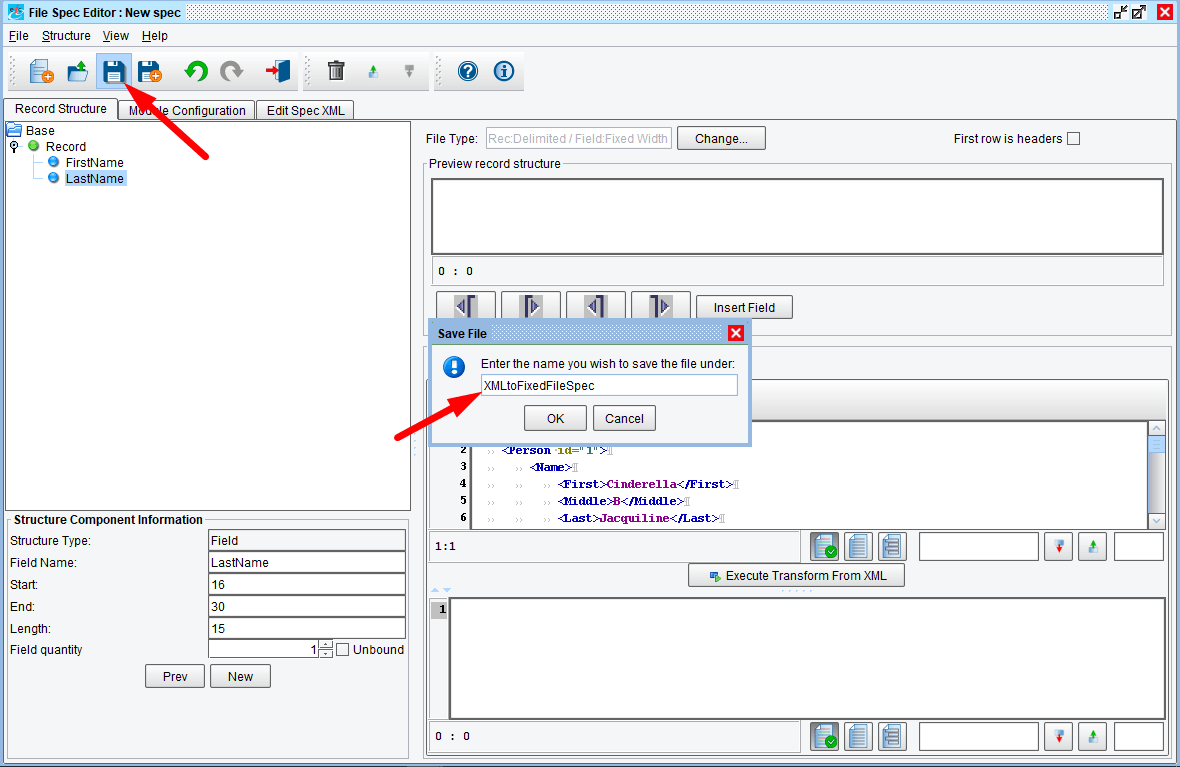
15. Save the file spec by clicking on the Save icon and setting the name to “XMLtoFixedFileSpec”.
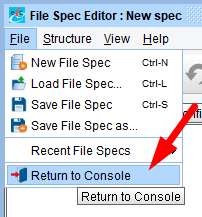
16. Return to the eiConsole by clicking File, then clicking Return to Console.
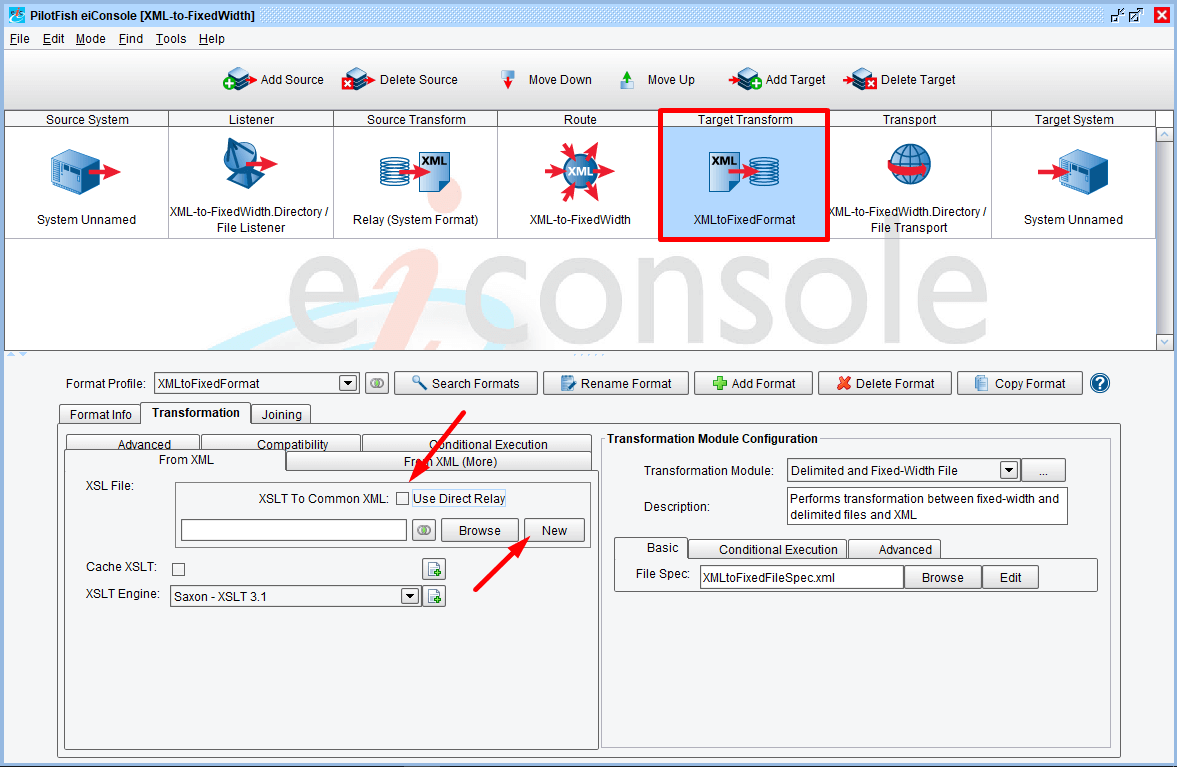
17. We will now want to use the Data Mapper to convert the incoming XML into the simple XML needed by our transformation module. Uncheck “Use Direct Relay” and click on the “New” button.
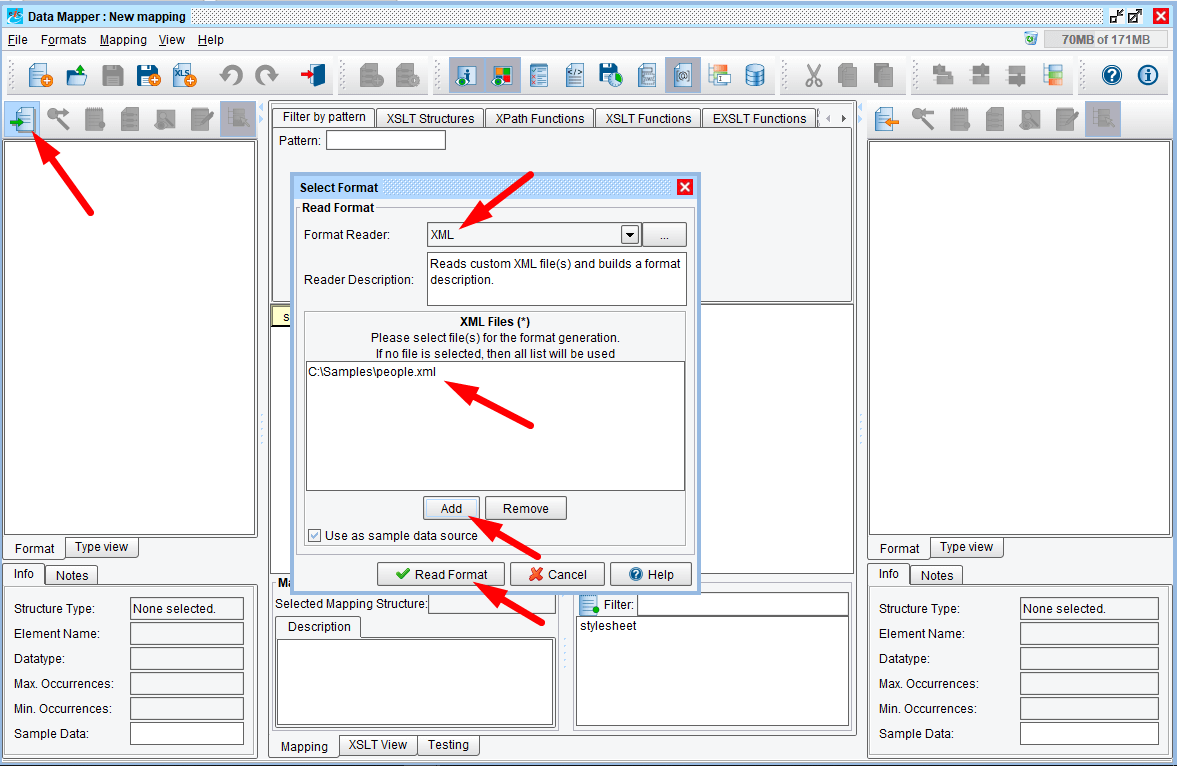
18. Set the Source format by clicking on the Open source format button. Select the XML format builder. Click on the Add button. and add the same people.xml file that this interface will be reading. Then click the Read Format button.
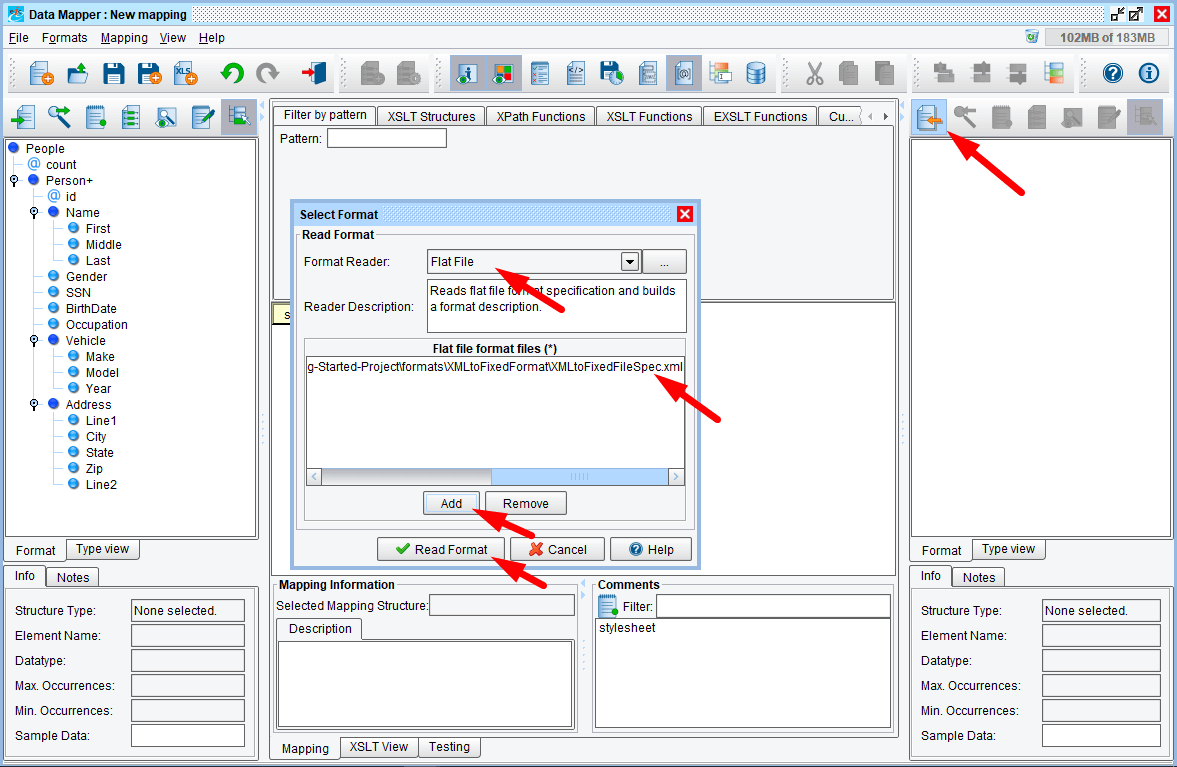
19. Setup the Target format by clicking on the Open target format button. Set the format reader to Flat File format builder.
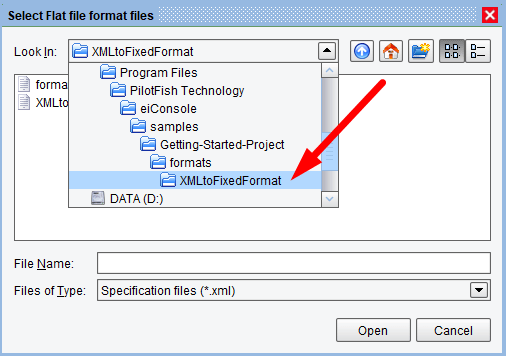
20. Add the file spec created in step 10 – XMLtoFixedFileSpec.xml – which will be in your interfaces/format/XMLtoFixedFormat directory. Then click the Read Format button.
Map the source format to the target format: Each of these steps involves dragging elements from one of the side panels into the Mapping view which is the center panel.
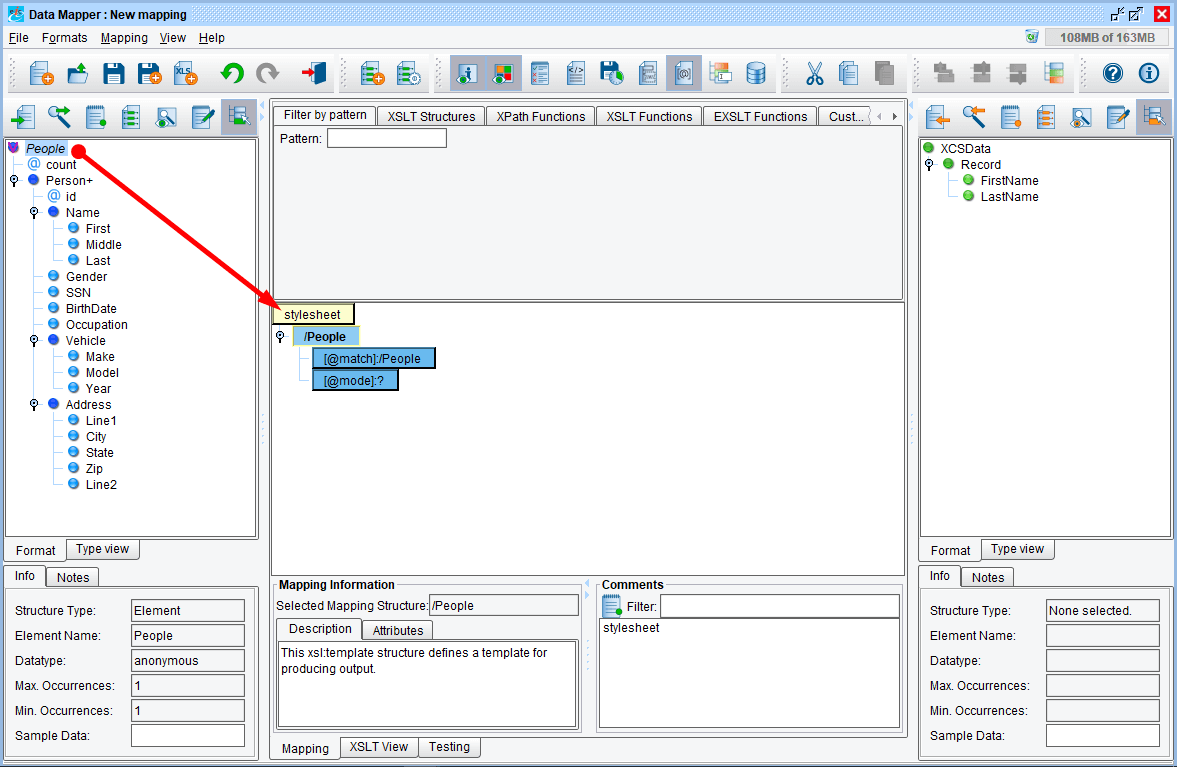
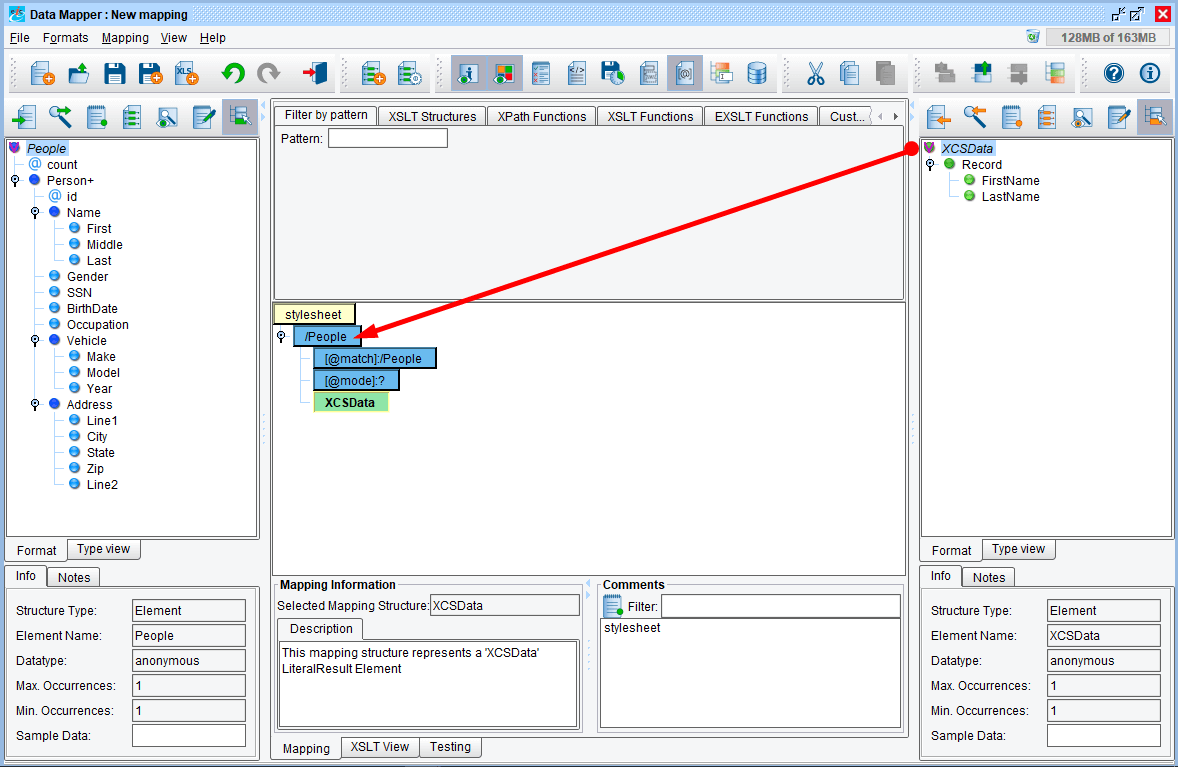
21. Drag People from the source format onto “stylesheet” in the mapping view.
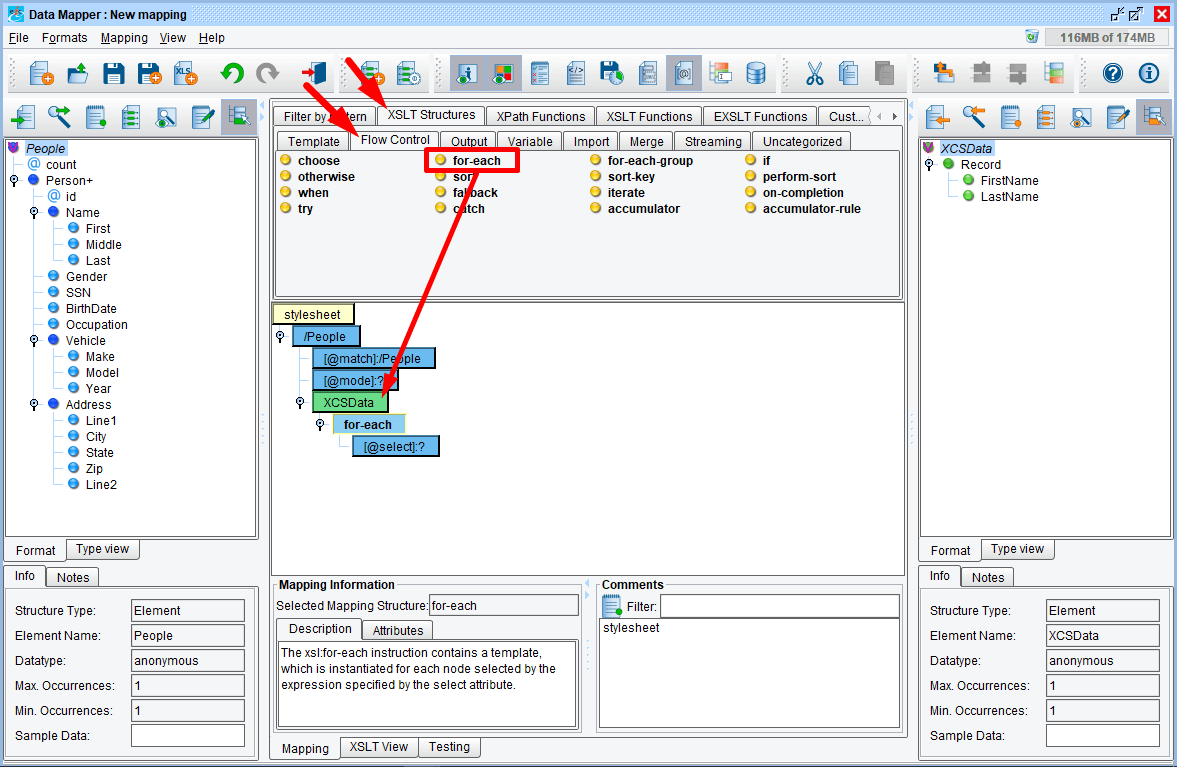
23. In order to iterate through all of the Person elements in the source, go to the Flow Control functions and drag for-each onto the XCSData element in the mapping view.
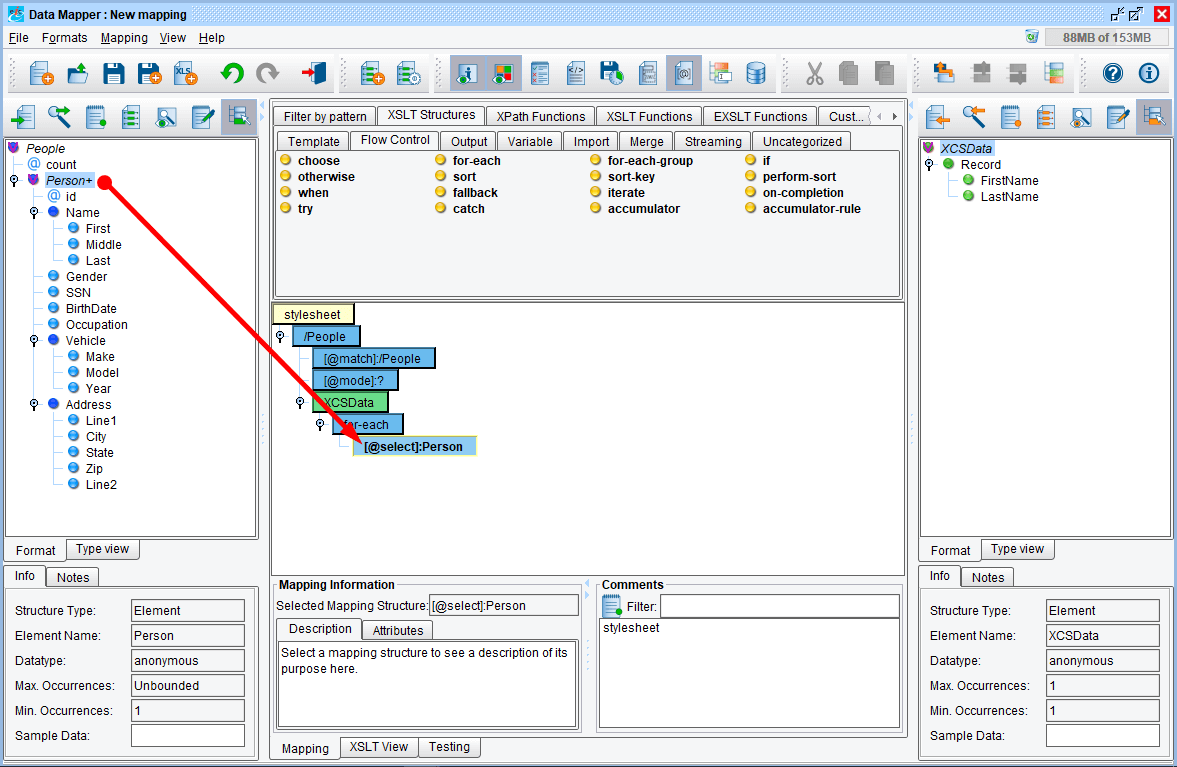
24. Drag Person+ from the source format onto the for-each element’s “select” attribute in the mapping view.
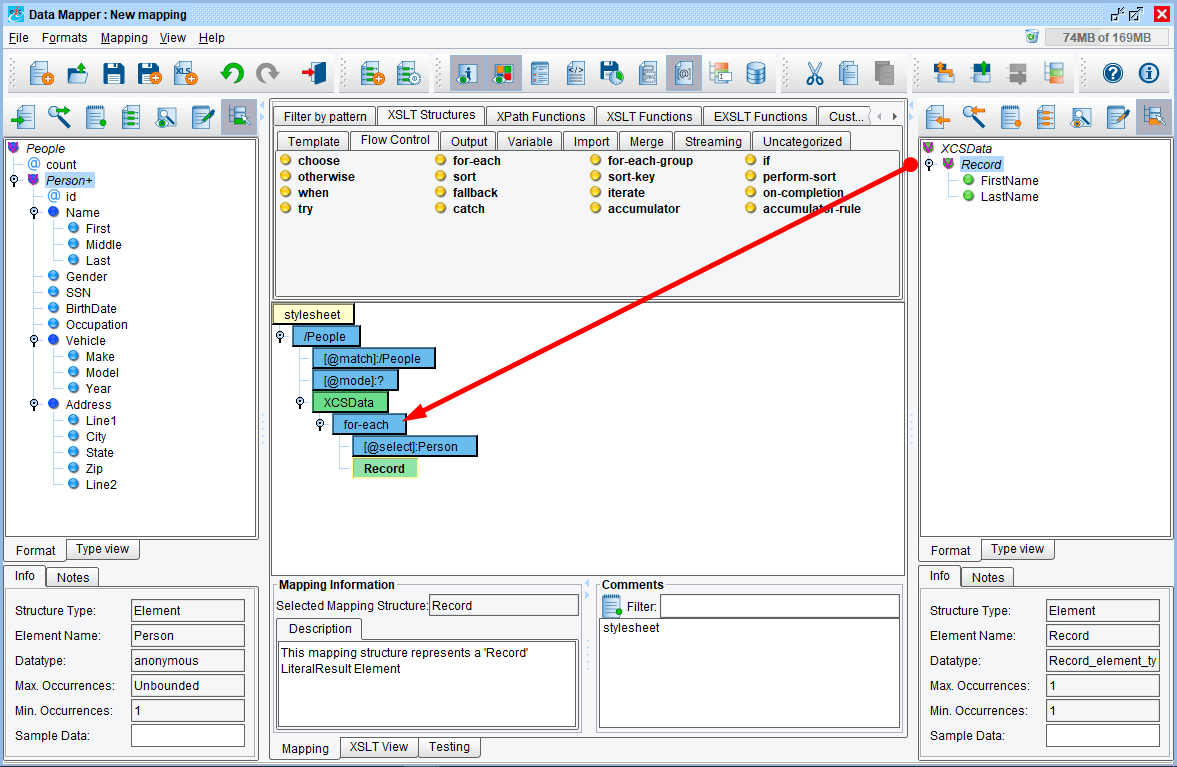
25. Drag Record from the target format onto the for-each element
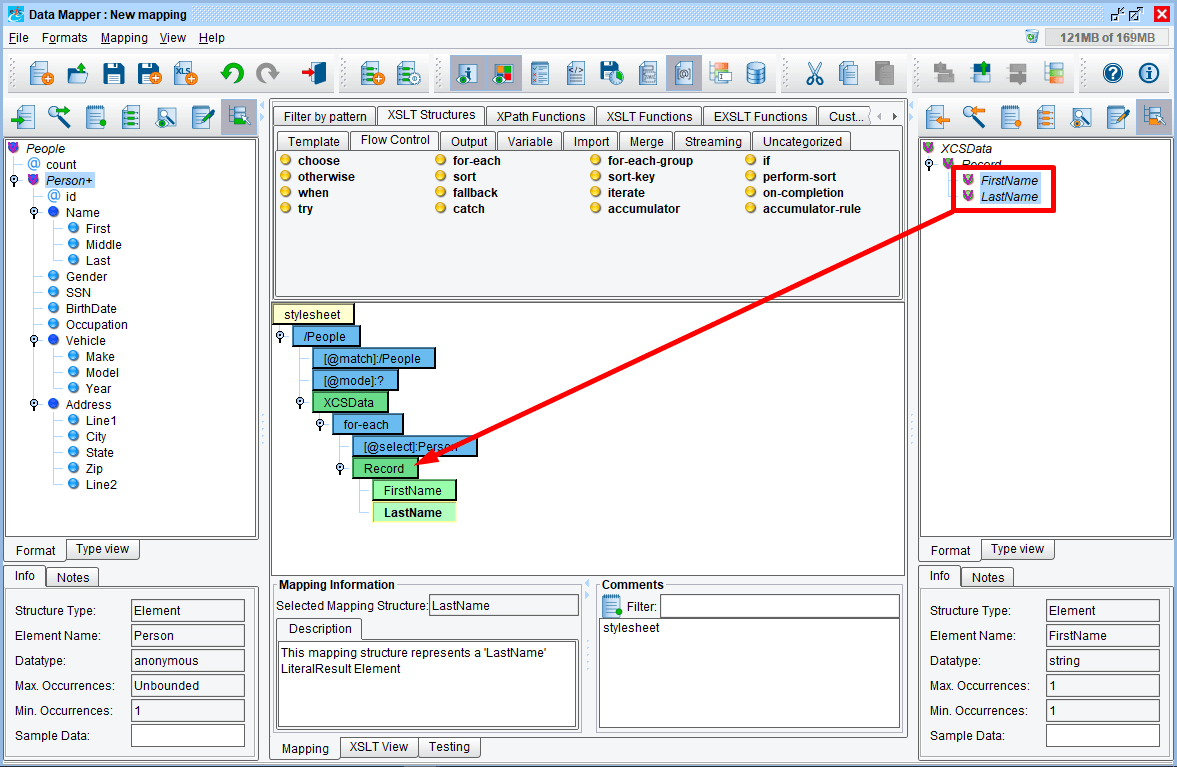
26. Drag the FirstName and LastName elements from the target format onto the Record element in the mapping view.
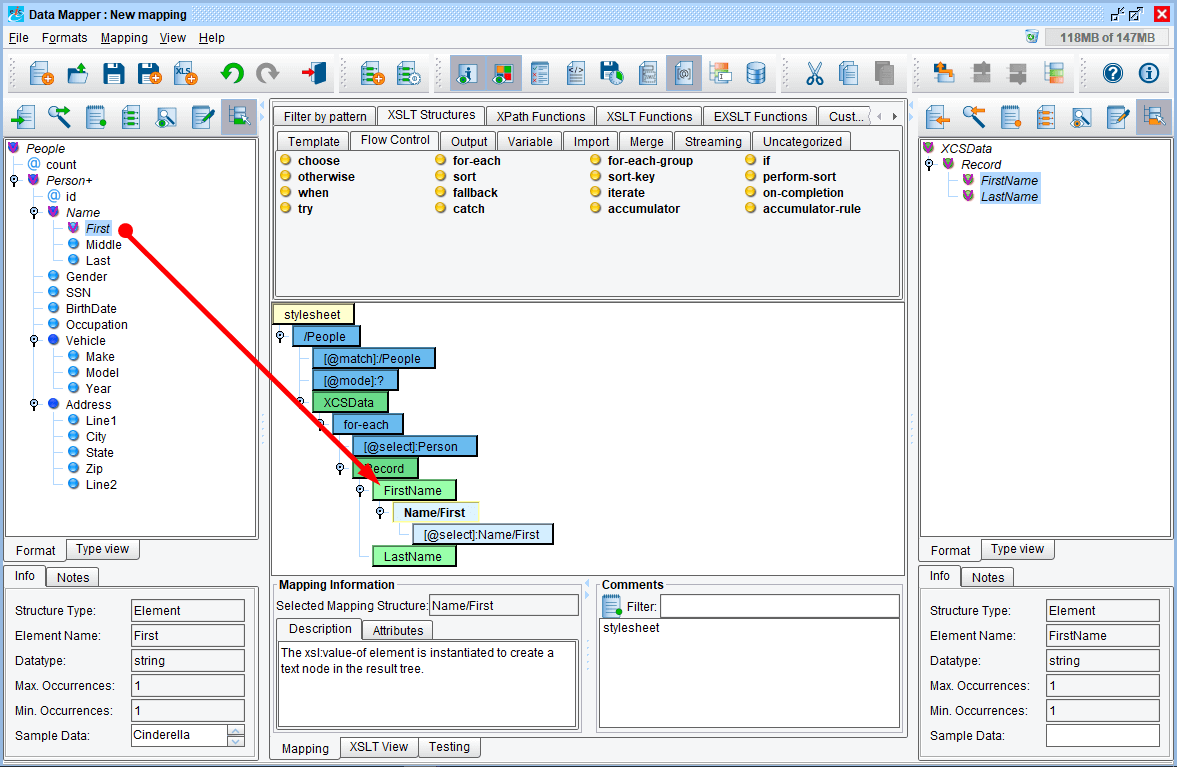
27. Drag the First element from the Source format onto the FirstName element in the mapping view
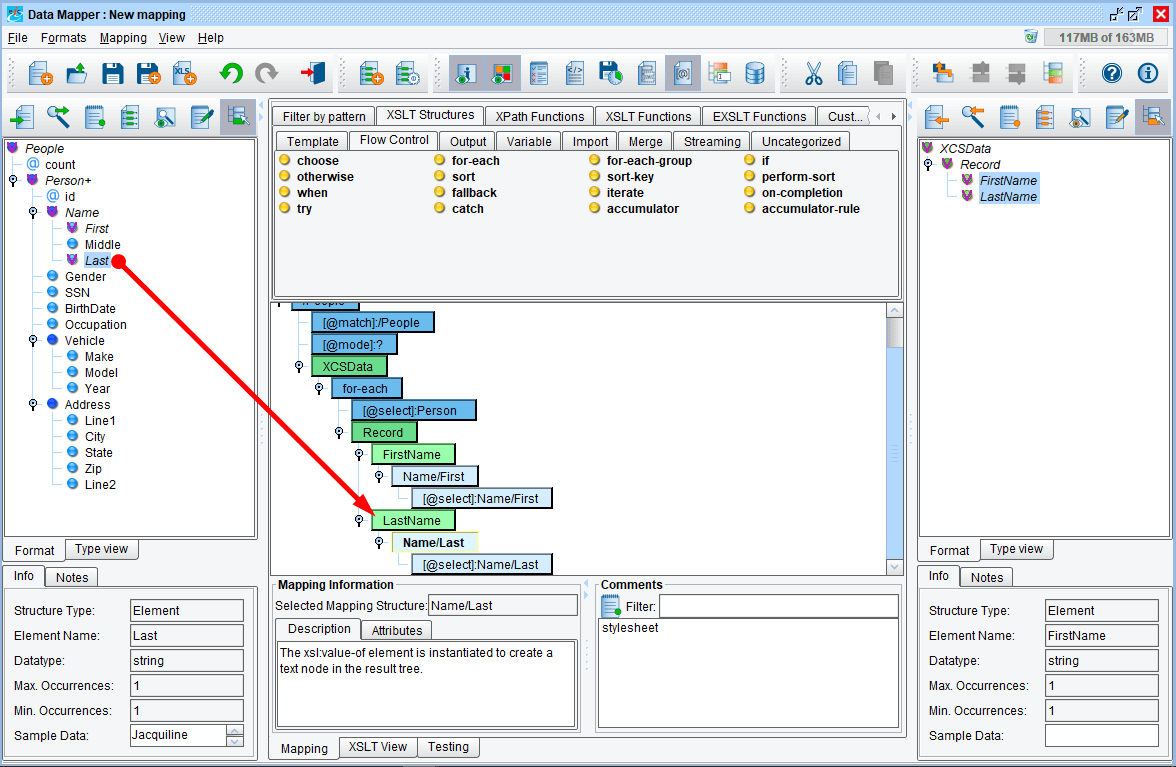
28. Drag the Last element from the Source format onto the LastName element in the mapping view.
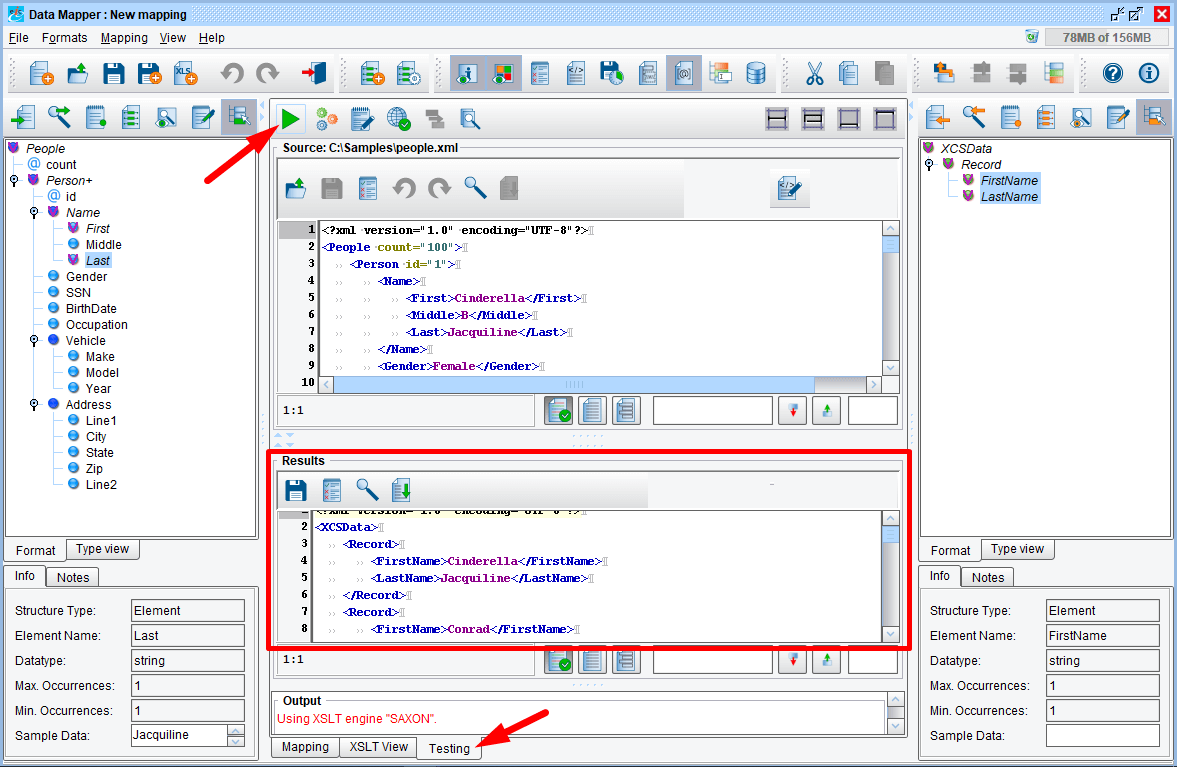
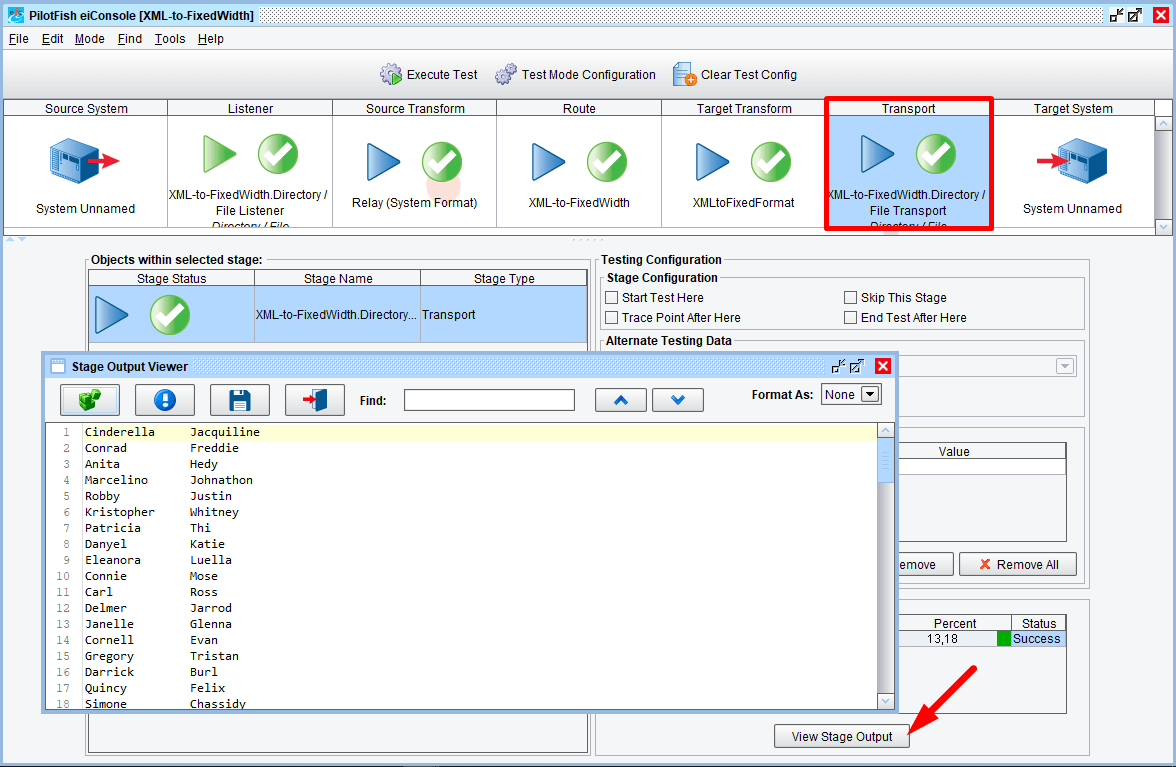
29. Go to the Testing tab, click on the Execute Transformation button, and verify that the results contains records and values as shown here.
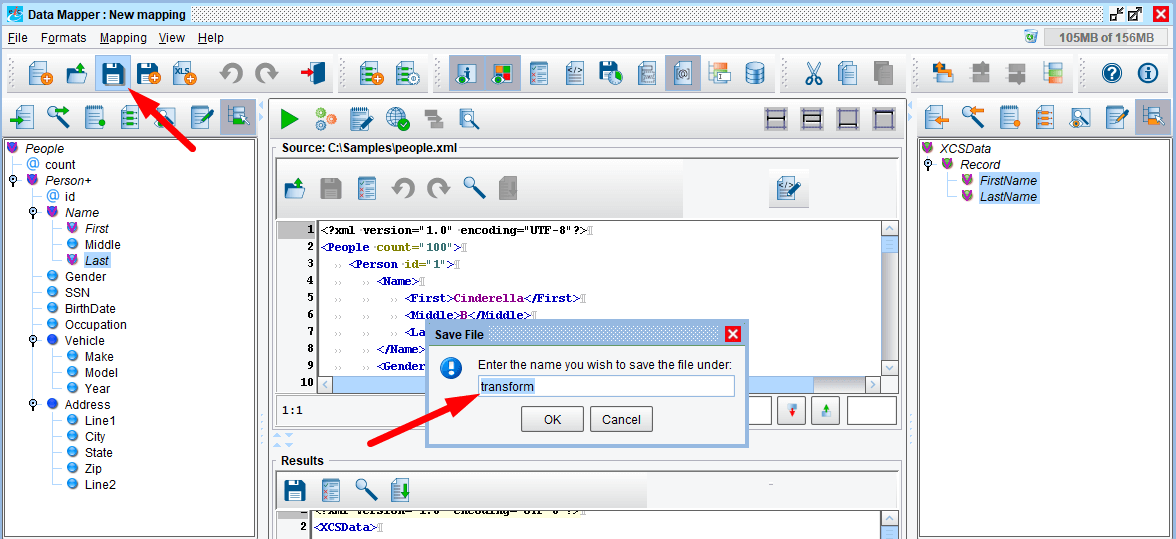
30. Save the transform by clicking on the Save icon, entering the name transform and clicking OK.
31. Return to the console by clicking the File menu and clicking on Return to Console.

