eiConsole v.25R1
Tutorial & Interface
eiConsole – Advanced Topics
Handling Delimited Files
Note: The Quick Start, Foundation, Topology and Data Mapping & Transformation tutorials should be completed before proceeding with the Data Mapping & Transformation Tutorials.
Overview
In this Interface and related tutorial, we’ll demonstrate the use of the File Specification Editor in Route configurations to convert between delimited Formats and XML. In this particular exercise, an existing Route (from “Training – Creating a Simple Route”) is modified to transform a delimited representation of People into a well-structured XML format. In this tutorial, we’ll cover using the “Delimited and Fixed-Width File” Transformer and the related File Specification Editor to convert a delimited file into XML. This tutorial assumes you’re familiar with the concepts demonstrated in “Using Transformers” and extends them by introducing an additional Transformer.
Before You Begin
Working Directory
Download the Handling-Delimited-Files-Working-Directory.zip file with the sample Working Directory and unzip it on your computer to a convenient place. In our case, it’s c:\Users\{USER _NAME}\PilotFish eiConsole Working Directories\Handling Delimited Files where {USER_NAME} is the user’s name.
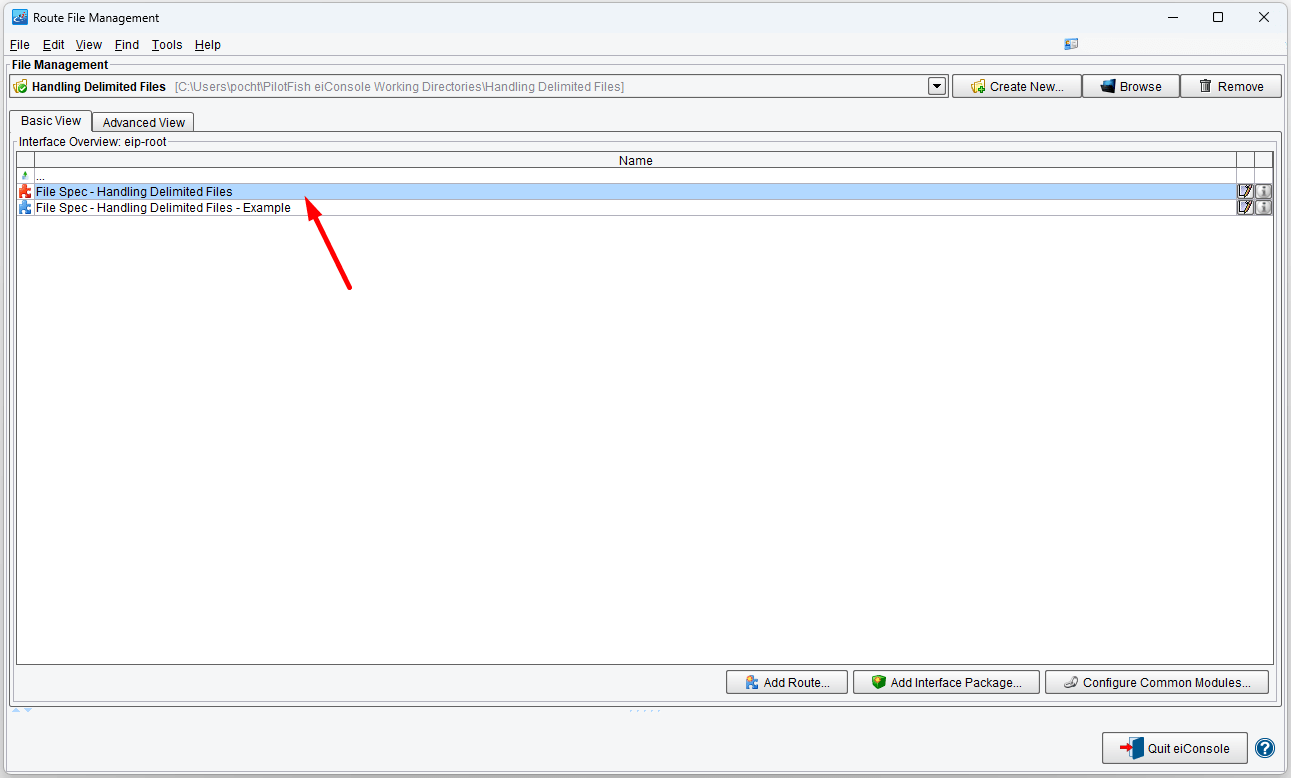
Open the eiConsole, browse to your Handling Delimited Files directory, and open it. The fully configured File Spec – Handling Delimited Files – Example route is included in the Working Directory. Your Route File Management screen will open, as shown below.
Next, follow the tutorial and walk through it step-by-step. You may check your work against the provided Route (Sample Data).
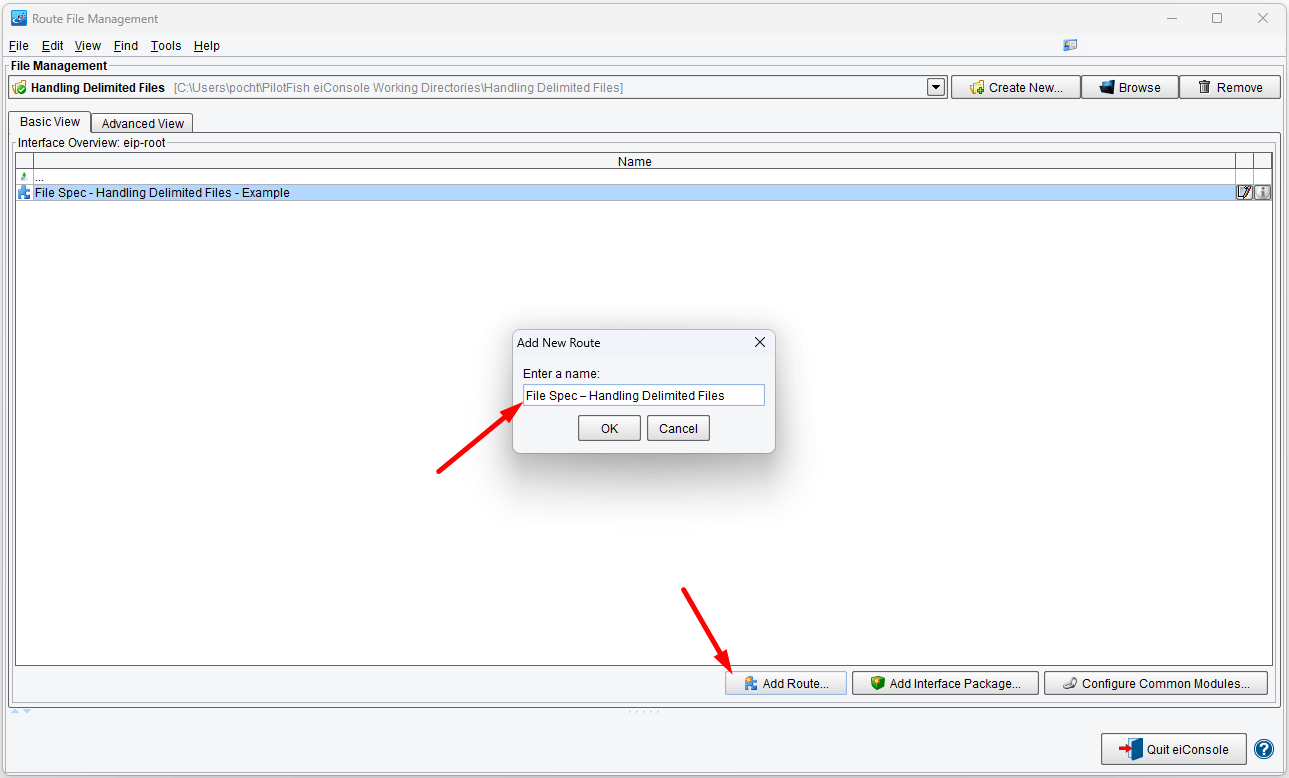
Create a New Route in the eiConsole
We’ll begin by creating a new Route similar to that used in Creating a Simple Route. We recommend naming it File Spec - Handling Delimited Files to fit with the title of this exercise.
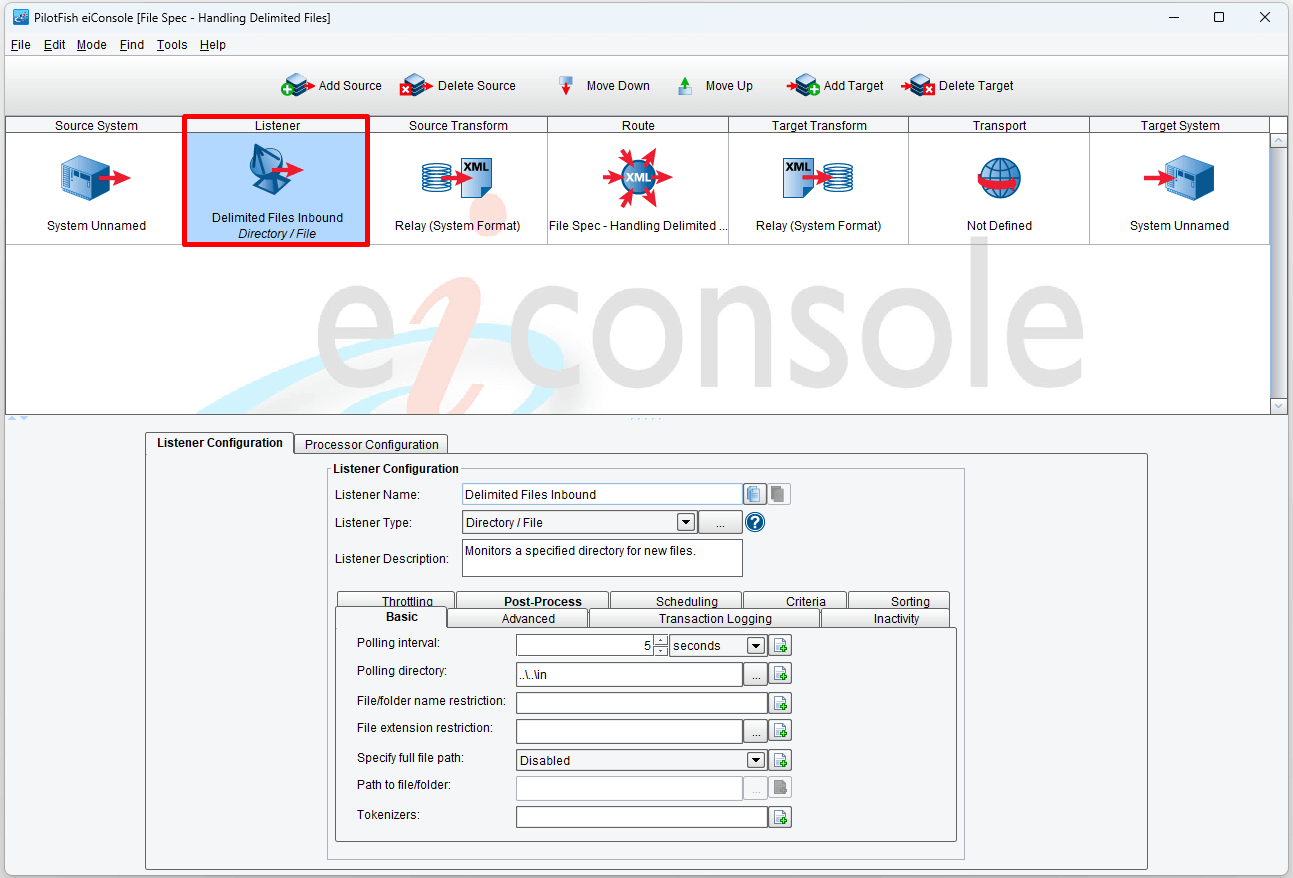
Double-click on the File Spec - Handling Delimited Files
Set up a Directory/File Listener. Enter the string ..\..\in in the polling directory field
The polling directory can be found in:
c:\Users\{USER _NAME}\PilotFish eiConsole Working Directories\Handling Delimited Files\in
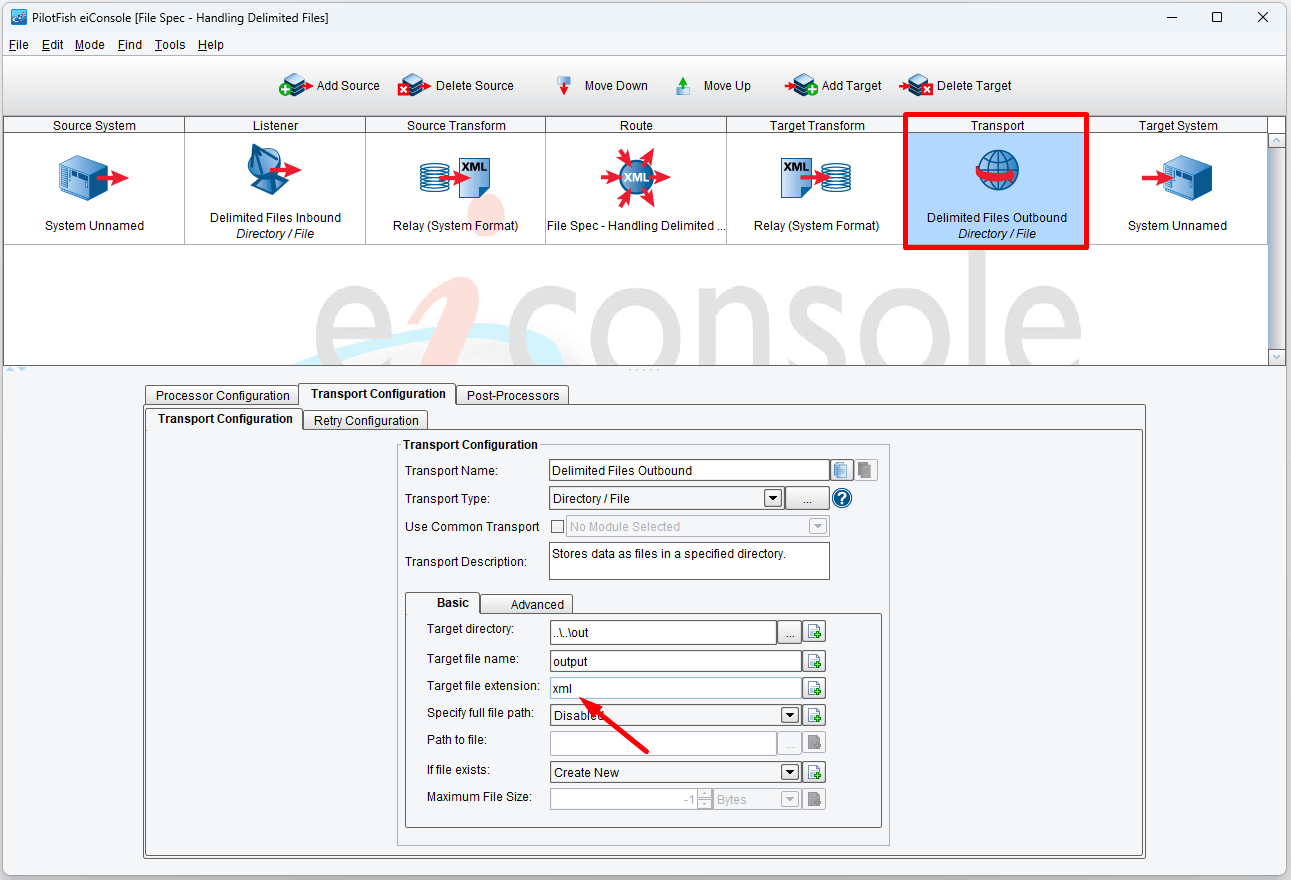
Set up a Directory/File Transport. Enter the string ..\..\out in the polling directory field.
The transport directory can be found in:
c:\Users\{USER _NAME}\PilotFish eiConsole Working Directories\Handling Delimited Files\out
The one modification we’ll make is to change the Directory/File Transport’s extension to xml:
Add a Format
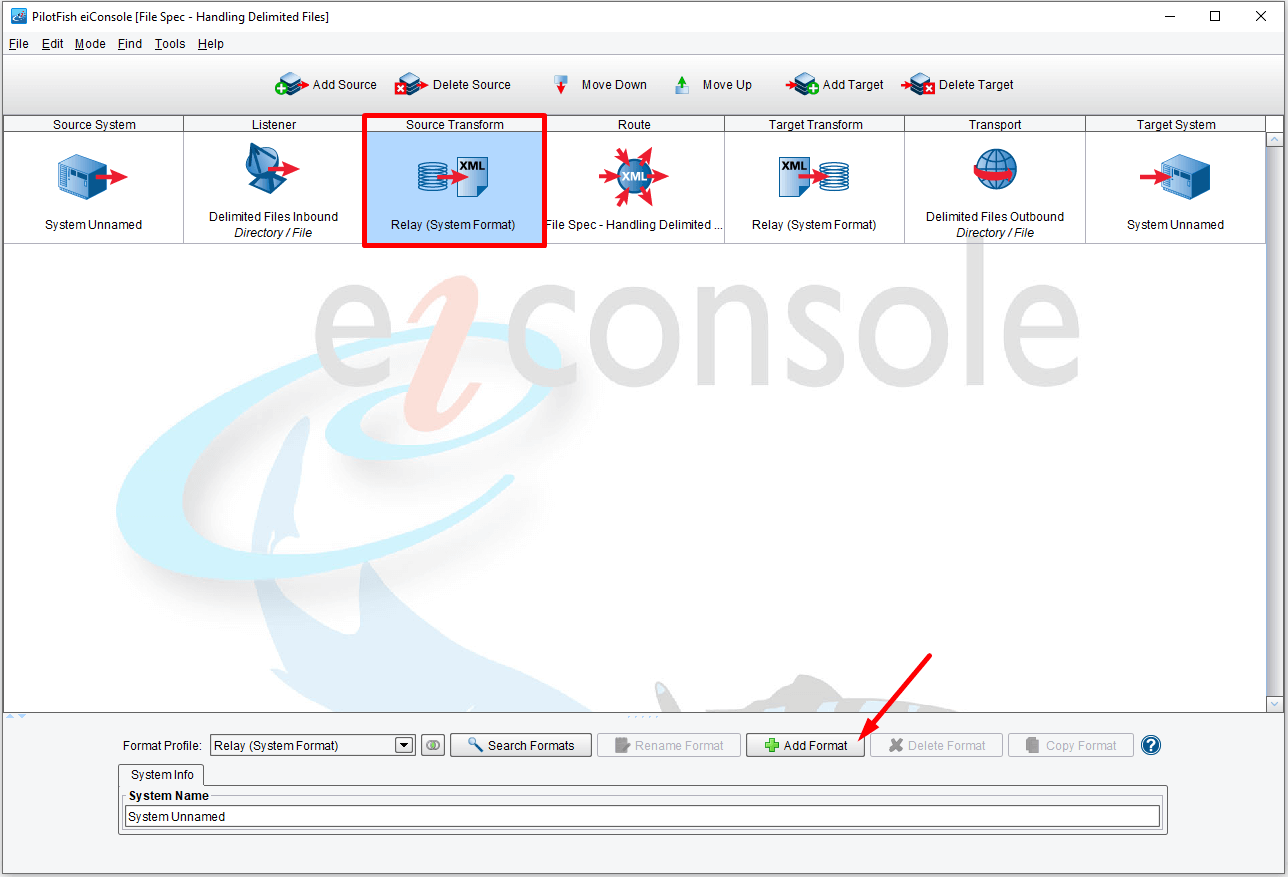
We’ll now need to add our Format. One important concept to note is that the direction of a transformer is determined by where it appears in the Route. If we configure our Transformer on the Target Transform stage then it will expect XML as input and convert that to the described delimited format. Conversely, configuring the Transformer on the Source Transform will assume delimited input and produce XML output.
Because we wish to convert from a delimited format to XML, we’ll want to add our Format on the Source Transform stage. Click that stage, then click Add Format:
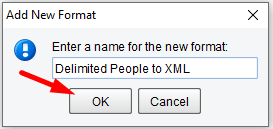
We’ll name the Format based on the transform direction and the name of the structures. We’ll be using a sample called people_delimited.txt, which should have been provided with this tutorial, so the Format will be named Delimited People to XML.
Name the Format
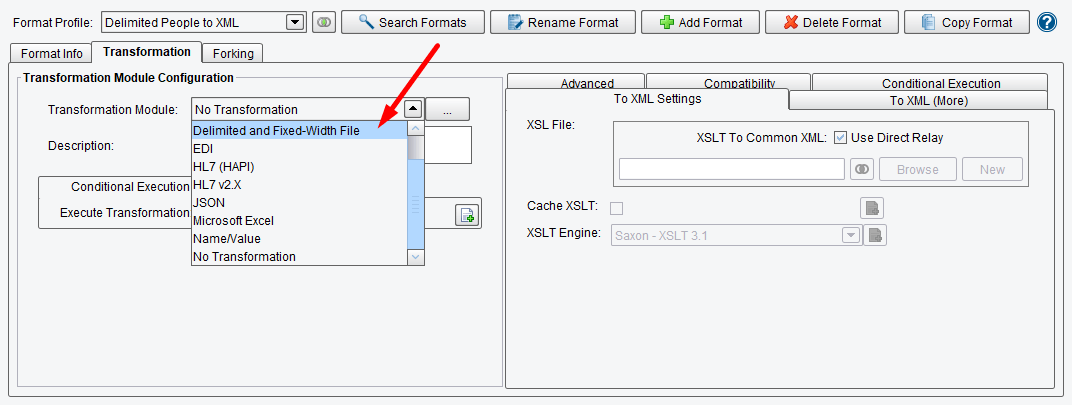
With the Format added, the bottom half of the eiConsole screen changes to reflect the Format configuration. Once again, we’re interested in the Transformation Module. Selected Delimited and Fixed-Width File from the Transformation Module drop-down:
With the Delimited and Fixed-Width File Transformer selected, you should see a configuration panel like the following:
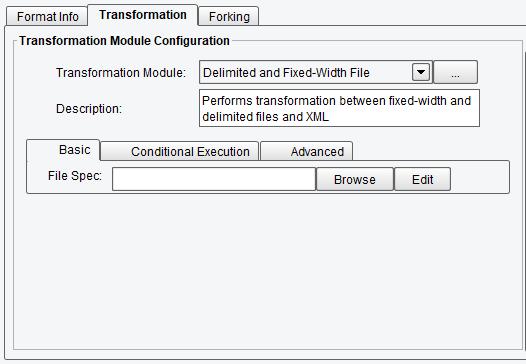
This particular Transformer makes use of an XML format informally called a File Specification. The configuration item specifies the name (and relative location) of such an XML description. If you had such an existing file, you could click “Browse” and select it, which would then copy it to the appropriate location. For this tutorial, we’ll assume that we’re starting fresh. Clicking the Edit button without any File Specification selected will open the File Specification Editor; do so:

The File Specification Editor is a graphical tool used for defining the structure of a file format. When first opened, you will be presented with a dialog asking you how you wish to begin:
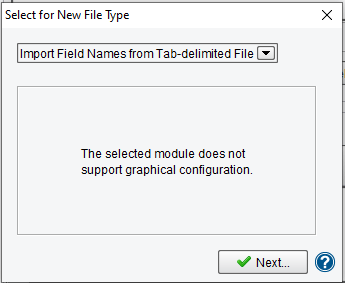
The various options in this drop-down are ways to automatically build or import the structure of a File Specification. For example, you could read in definitions from a CSV file, a Cobol Copybook, or import various industry-specific formats (depending on what eiConsole version you have).
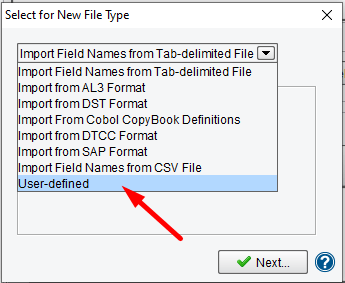
Building a File Specification from Scratch
If you wish to build a File Specification from scratch, you’ll want to select User-defined:
Click Next and you’ll be presented with this dialog:
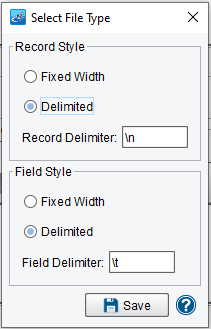
This dialog asks you to describe the style of Records and Fields. A File Specification is made up of Records with additional Records and Field as children. In most formats, Records are delimited, meaning that some character or set of characters separates each Record. In our people_delimited.txt sample, each line in the file represents a Person, which is a type of Record.
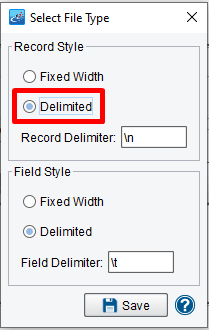
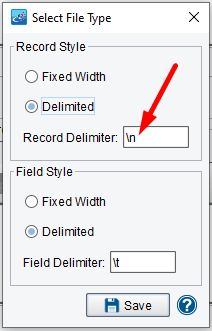
Select Delimited under Record Style:
The next item is Record Delimiter, which specifies what separates each Record. The default value, “\n,” represents a “line feed.” The convention used for escape characters is that used for Java (and most languages). Most formats use either a single line feed or a “carriage return” (\r) and a line feed (\r\n). Our sample file uses only a line feed, so set the Record Delimiter to “\n”:
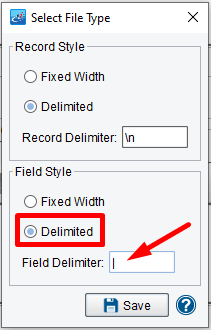
Next, we’ll need to define the style of Fields. In our sample file, each Field within a Record is separated by a pipe (“|”) character. Delimited files typically use tabs (“\t”), commas (“,”), pipes, and other such characters. Fields may also be Fixed Width, meaning that each field has a specific length. For example, the First Name field might be exactly 10 characters long.
Because our sample file is delimited by pipes, select Delimited and set the Field Delimiter to the “|” pipe character:
Finally, click the Save button to open the main File Specification Editor window.
Reviewing the File Specification Editor
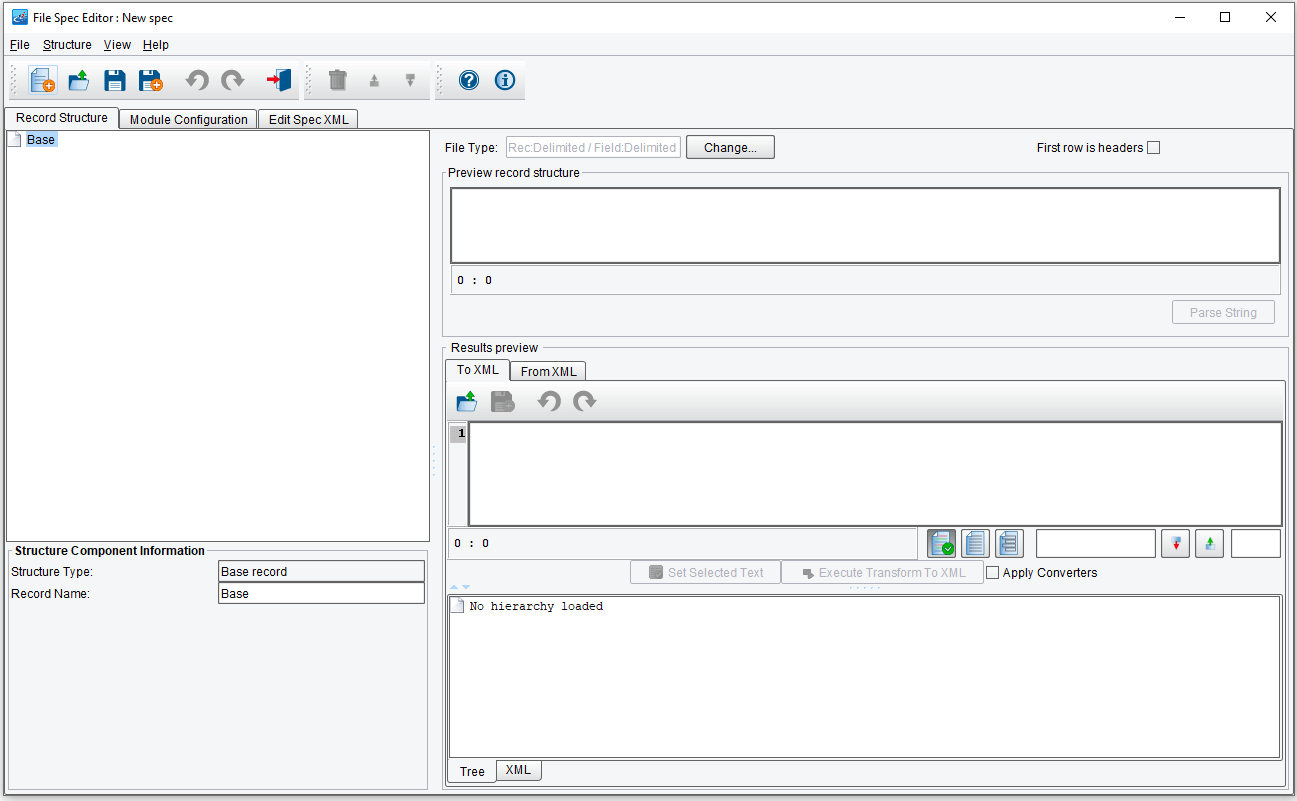
There are a lot of panels and areas for the File Specification Editor, but we’ll review each of these in turn to explain them.
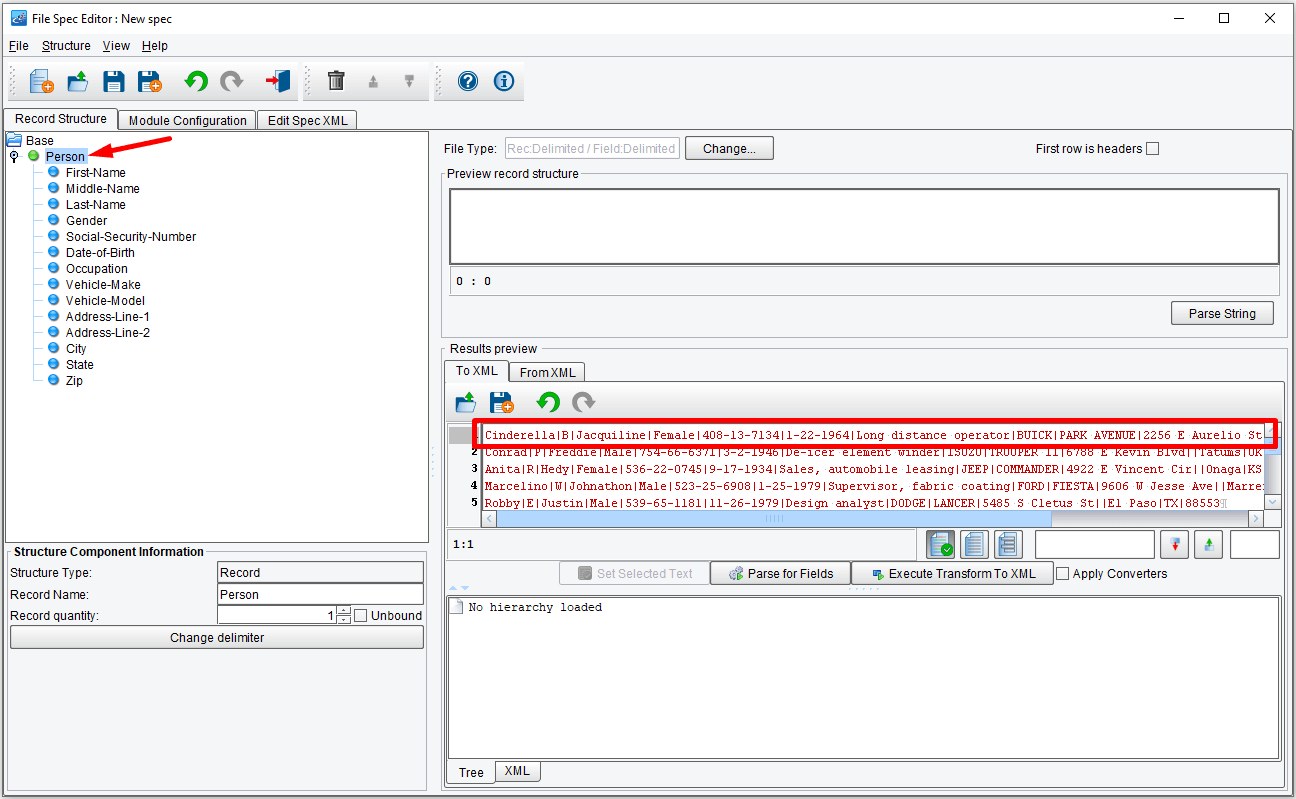
On the left side of the screen is the Record Structure panel:
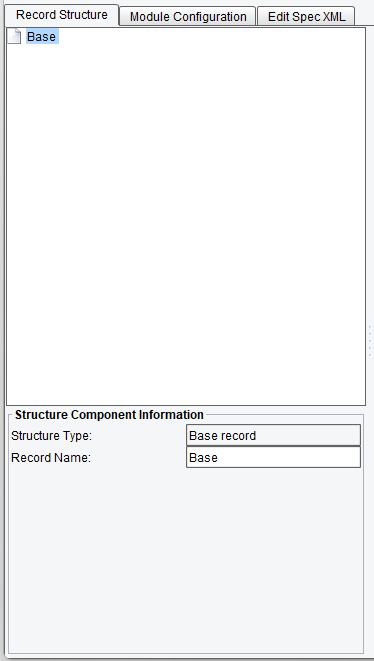
This panel contains the structure (so far, it’s empty) of the File Specification, defined as a hierarchy (a tree) of Records, sub-Records, and Fields. The bottom half of the panel is used to provide information and configurations for the selected Record or Field.
The top-right panel is used to show currently loaded sample data with highlighting for a selected Record:
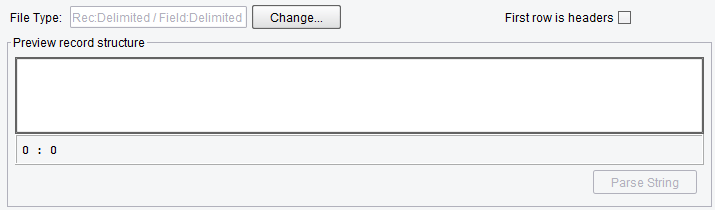
Until we have a structure defined and a sample file loaded, this will be empty and fairly uninteresting.
Finally, the Results Preview panel:
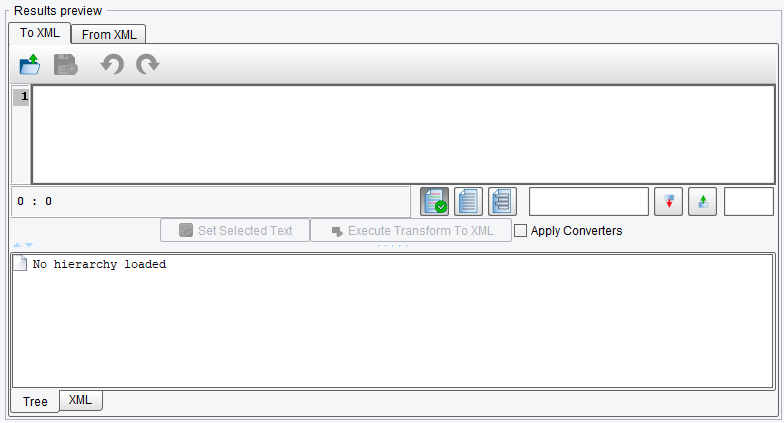
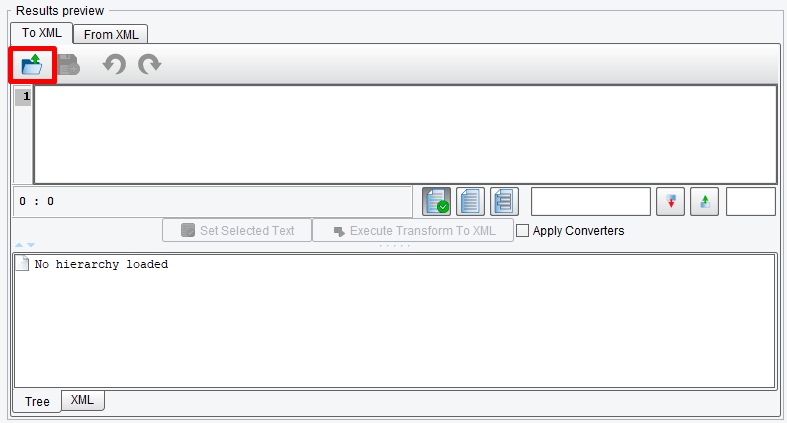
This panel is used to load and / or edit a sample file, transform it, and see the results. We’ll start here. Click the Load icon and select people_delimited.txt. The file can be found in:
c:\Users\{USER _NAME}\PilotFish eiConsole Working Directories\Handling Delimited Files\data
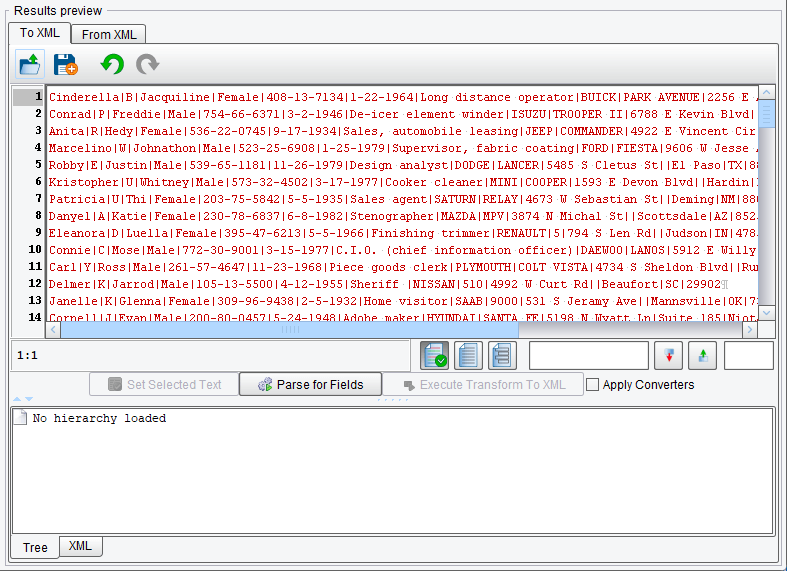
With the sample file loaded, the sample file panel should resemble the following:
Defining Our Structure
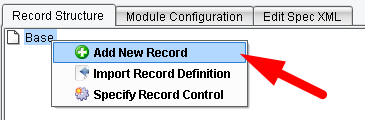
We’ll now need to define our structure. We can start by defining a Record to represent each “Person” in our sample file. Right-click on the root Node (labeled Base) and select Add New Record:
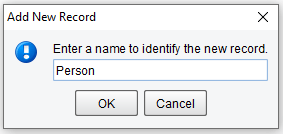
You will next be presented with a dialog where you are expected to name the new Record. Since this Record will represent a Person, we’ll name it accordingly:
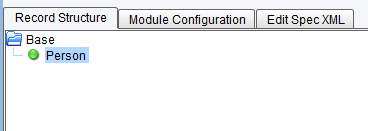
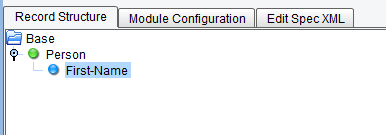
Click the “OK” button and you should see the Person record shown in the structure underneath Base:
We’ll now wish to start adding Fields to the Person Record. To do so, right-click on Person and select Add New Field.
Adding Fields to the Person Record
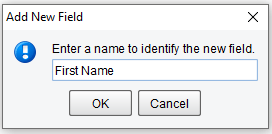
We’ll now wish to start adding Fields to the Person Record. To do so, right-click on Person and select Add New Field:

Once again, a dialog will be raised asking you to name the Field. Our first Field is the Person’s first name, so we’ll name the field First Name:
Click the OK button and you should see the Field displayed under Person:
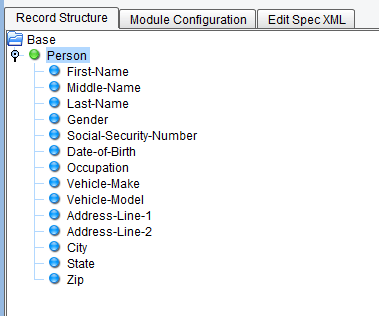
For defining the remaining Fields, you could continue to right-click on Person and select Add New Field or, with the First-Name field selecting, simply hit Enter/Return on your keyboard. The next field is Middle Name.
Continue adding Fields for each of the following:
- First Name
- Middle Name
- Last Name
- Gender
- Social Security Number
- Date of Birth
- Occupation
- Vehicle Make
- Vehicle Model
- Address Line 1
- Address Line 2
- City
- State
- Zip
When you are finished, the structure should look like this:
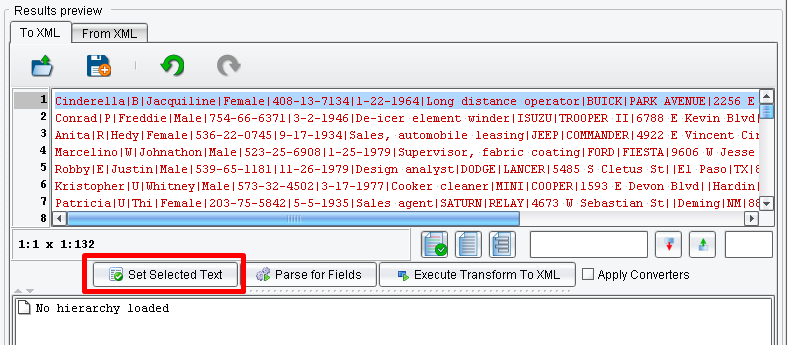
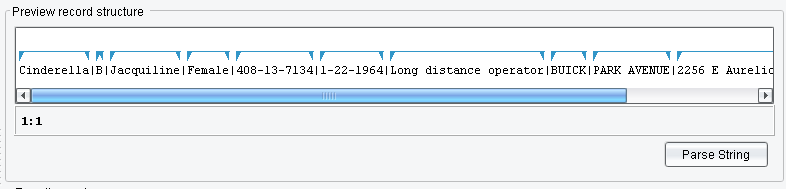
Our structure is now fully defined. Next, select the Person Record and then highlight a single line of the sample file (this might be easier if you click at the beginning of that line, hold Shift, and hit End):
Next, click Set Selected Text:
You’ll notice the top panel now has various fields shown, as well as blue arrows:
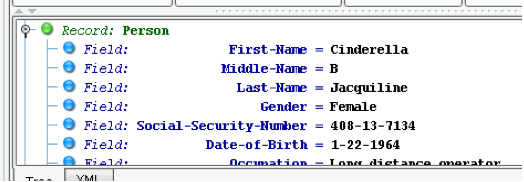
If you click on the various Fields in the structure, the appropriate field will be highlighted in this panel. For example, if we click Occupation, we’ll see “Long distance operator” highlighted:
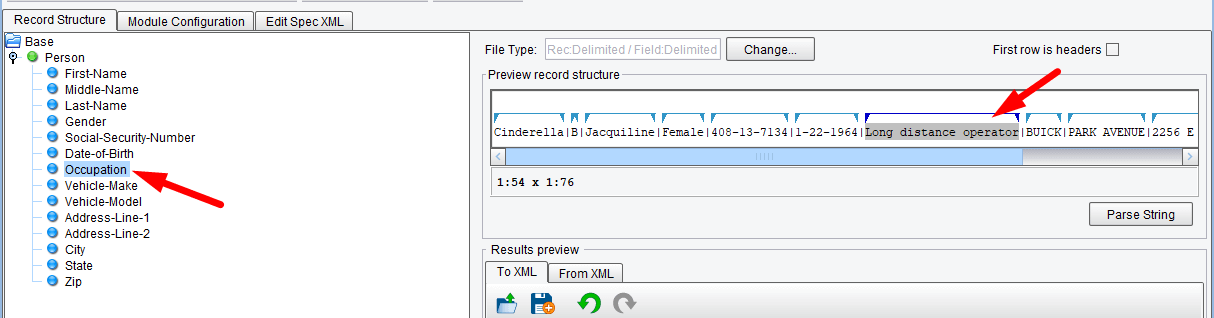
This panel allows you to visually confirm that your structure matches your sample (or vice-versa). While this is less important in delimited files, it can be an enormous time saver when dealing with fixed-width formats.
Testing Our Definition
Next, we’ll want to test our definition. Click the Execute Transform to XML button:
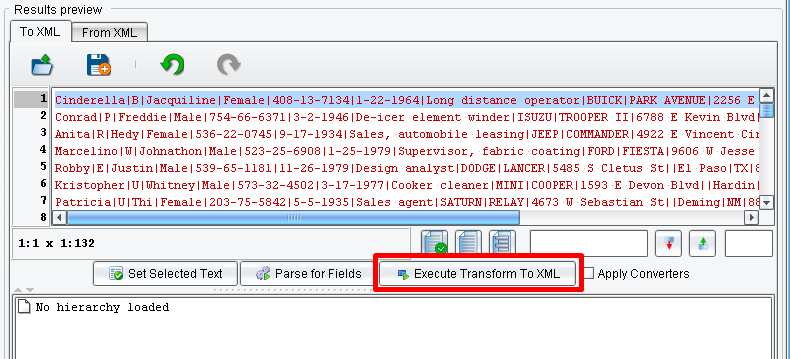
You should see various Person elements appear in the results panel:
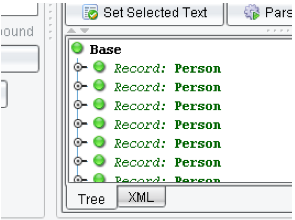
If you click to the left of these elements, it will expand them to show their respective child elements and values. For example, the first Person element should resemble this:
If you click the XML tab, you can also view how this would look in the resulting XML.
Our File Specification is now fully defined. One interesting aspect to note is that this specification will convert the “people delimited” format to XML or the resulting XML format back to the delimited format without any additional configuration or changes; File Specifications are inherently bi-directional.
Save your specification with the Save button.

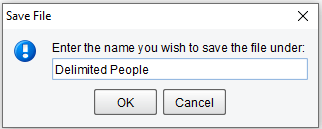
Provide any name you feel appropriate (we’ll use Delimited People):
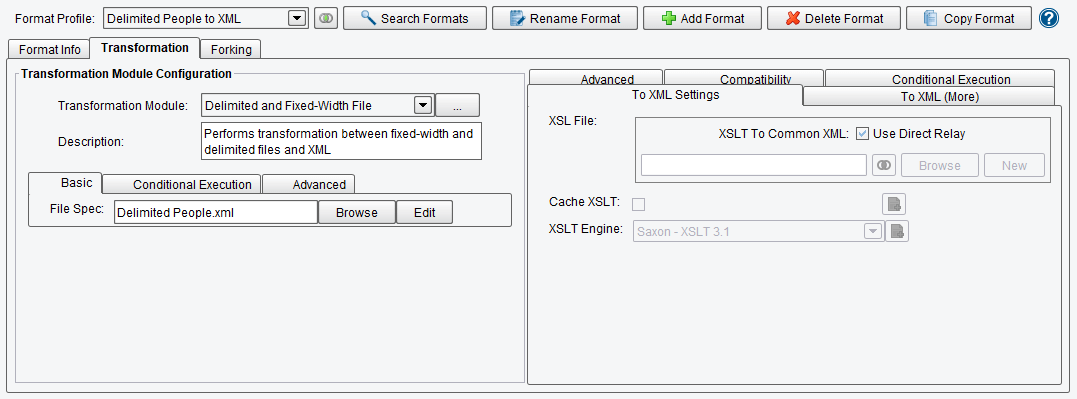
Finally, close the Editor to return to the eiConsole. Our Format configuration should now look like this:
Testing
With that, we’ve now completely configured our Route, as well. Switch to Testing Mode, place the people_delimited.txt sample file into the polling directory, and let the test run all the way through. This file can be found in:
c:\Users\{USER _NAME}\PilotFish eiConsole Working Directories\Handling Delimited Files\data
The polling directory is:
c:\Users\{USER _NAME}\PilotFish eiConsole Working Directories\Handling Delimited Files\in
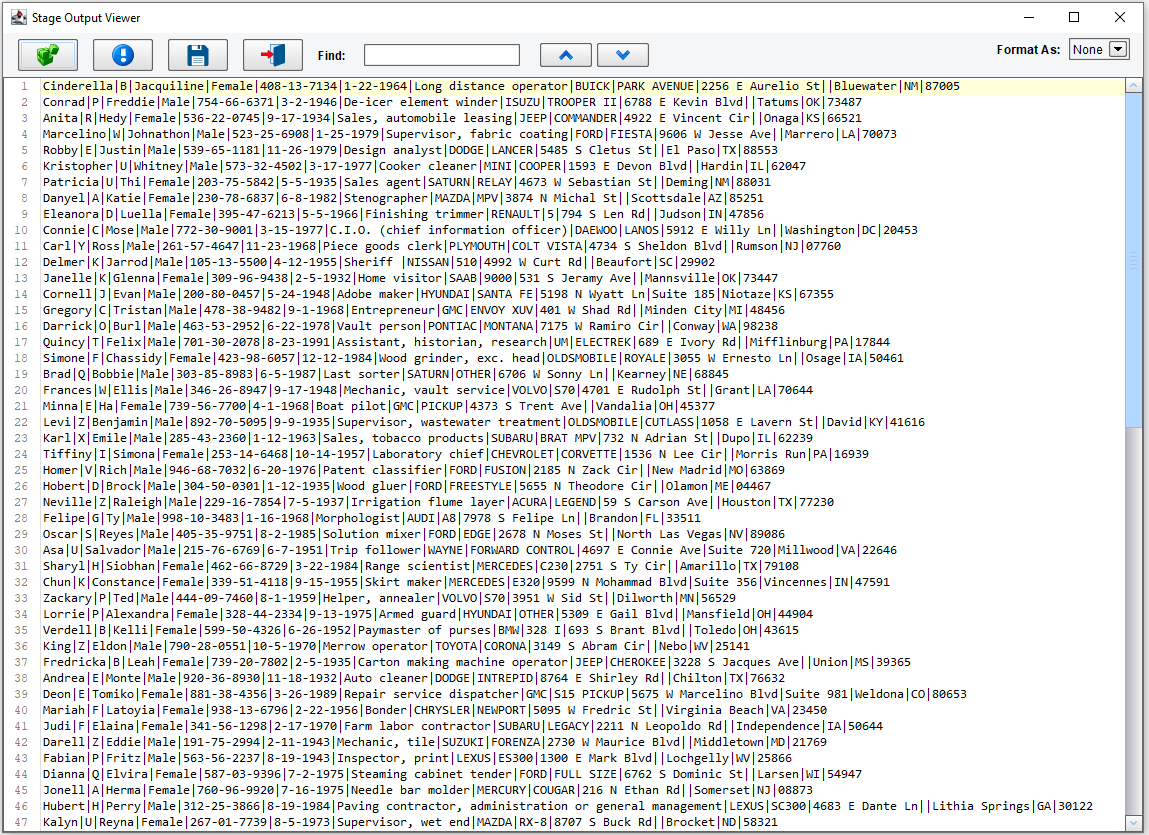
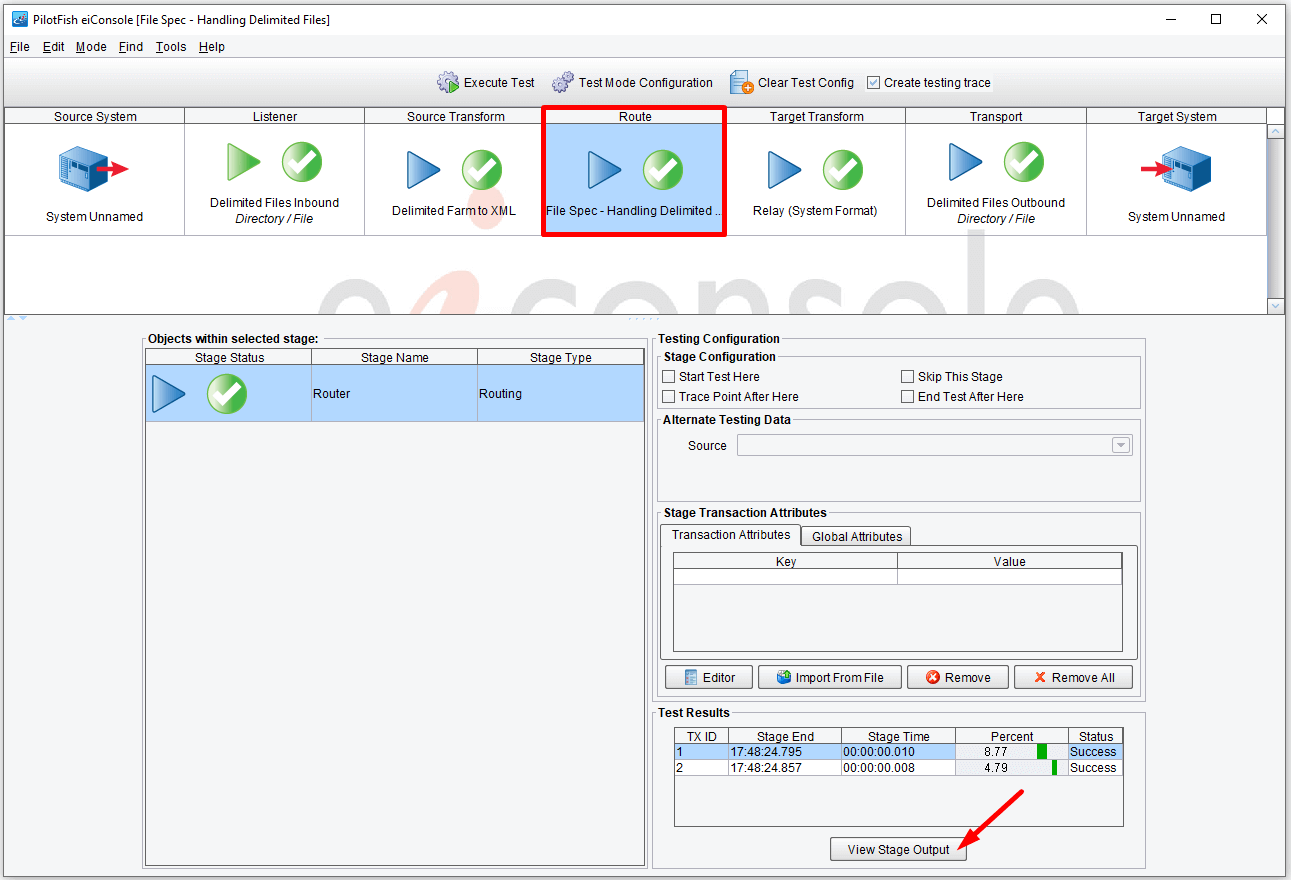
Click Execute Test. Select the Listener stage and view the stage output to see the format in its “before” stage.
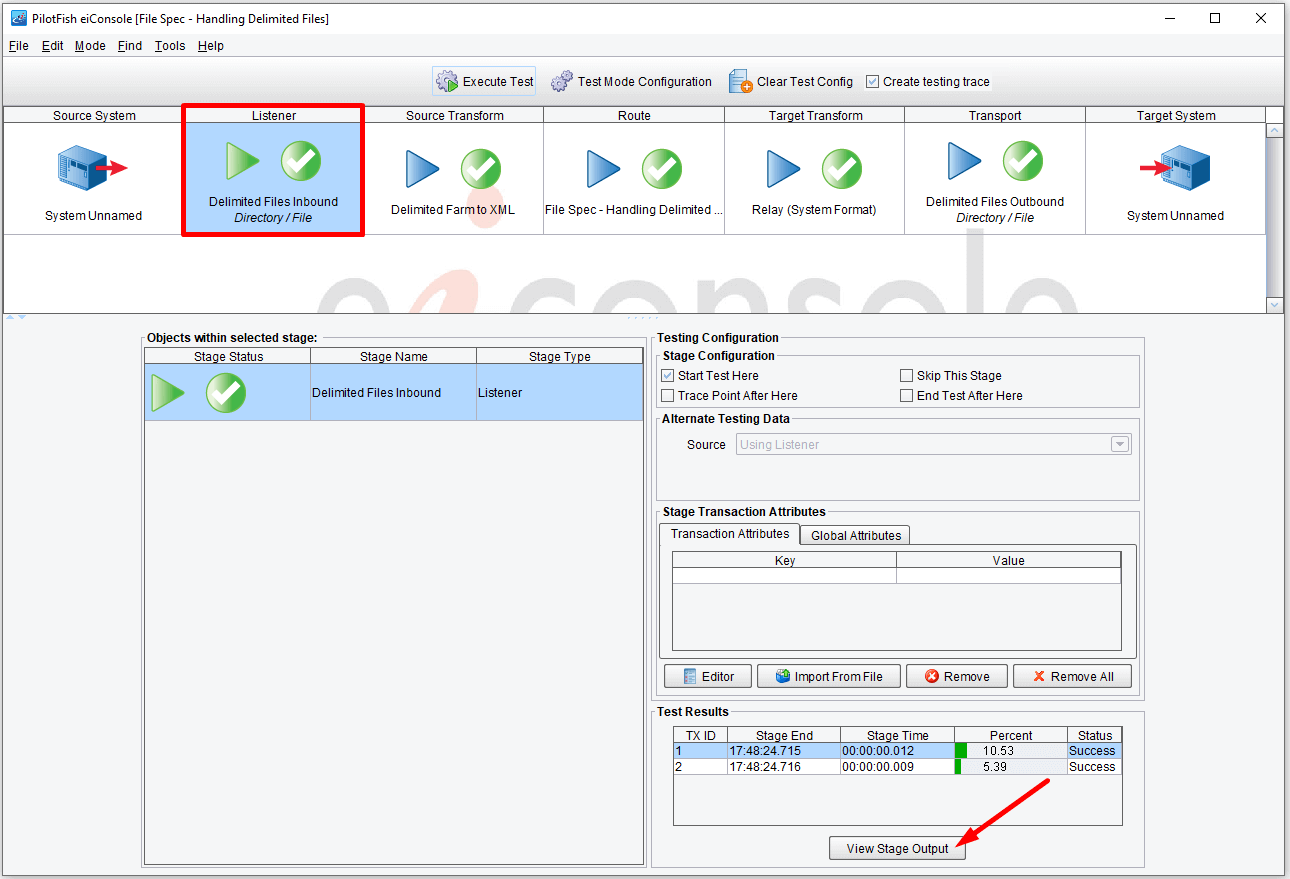
As you can see in the Stage Output Viewer, the file picked up matches our expected, delimited format:
Next, select the Routing stage (since it occurs after our transformation) and view its output:
You should see a nice, well-structured XML document:

You can compare the format before and after if you like, but that’s pretty much all that’s necessary to freely convert between delimited and XML formats.
Finally, check your output directory…
c:\Users\{USER _NAME}\PilotFish eiConsole Working Directories\Handling Delimited Files\out
…and view the resulting output.xml file.
You have now concluded this tutorial.