General Quick Start Tutorial
eiConsole v.25R1Working Directory
**This General Quick Start Tutorial is a prerequisite for all new users.** It is a simple interface where you’ll take a flat file from a directory and convert it to XML. In about 60 minutes, you will have configured an end-to-end interface with the eiConsole.
Before you begin the Quick Start Tutorial, we suggest you browse through the eiConsole Overview for a quick look at the overall interface configuration process. If you have not installed the eiConsole recently, click the following eiConsole Update link to download and install the latest slipstream release.
eiConsole Basic Terminology
Before we begin configuring an interface, let’s review some eiConsole terminology:
- A Working Directory (Workspace) is a project directory that contains, at a minimum, the 4 directories required by the eiConsole: data, formats, lib, and routes.
- An Interface is one or more routes.
- A Route is an interface or a part of the interface that defines how the data moves from any number of source systems to any number of target systems.
- An Interface Package (Interface Context) is a group of routes and interfaces that can be categorized by functional tasks. (An Interface Package can consist of any number of routes, a collection of interface templates, and partially or fully configured interfaces.)
Next, let’s expand on the Working Directory. In the eiConsole, a Working Directory is a set of directories and files utilized by eiConsole instances and a running eiPlatform. The directory structure dictates a hierarchy to determine which Routes and Formats belong to particular interfaces. If you select an empty directory, the eiConsole will ask if you wish to initialize it. In doing so, it will create the necessary directories – data, formats, lib and routes:
- The “data” folder stores user-defined and managed data, such as sample files for testing or documents describing interfaces.
- The “lib” directory may contain JAR files (files with a “.jar” extension), which are used for defining new types or newer versions of eiPlatform / eiConsole modules.
- Each “routes” folder (under “routes”) contains a “route.xml” file, which is where the definition of a particular Route is stored (including configuration settings and topology).
- Each “formats” folder (under “formats”) contains a “format.xml” file, which is where the definition for a particular Format is stored. This folder will also include XSLT transformations and File Specification Editor definitions (in XML).
For additional information on the Working Directory, visit the Module: Working Directory.
Before You Begin
Download the Quick-Start-Working-Directory.zip file with the sample working directory and unzip it on your computer to a convenient place. In our case, it’s c:\PilotFish\Quick Start\
Open the eiConsole and open a new working directory.
The Route File Management Window
Desktop Users View
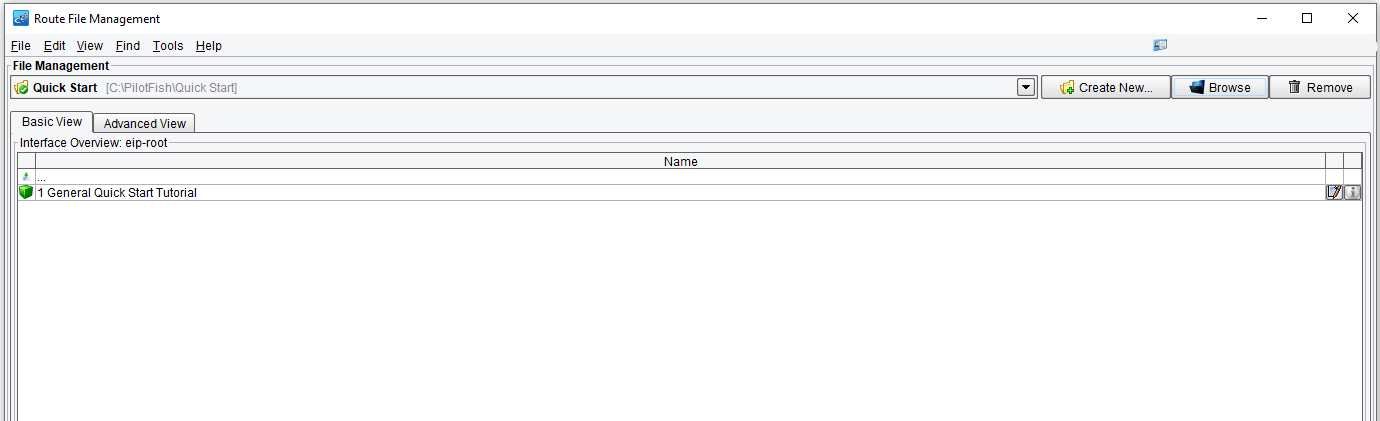
When you launch an eiConsole bundle, the Route File Management window opens. In the Basic View of the Interface Overview grid, you’ll see the 1 General Quick Start Tutorial package. In the eiConsole, packages are identified by a green cube icon.
Double-click the first row 1 General Quick Start Tutorial to begin configuring an interface.
Configuring an Interface
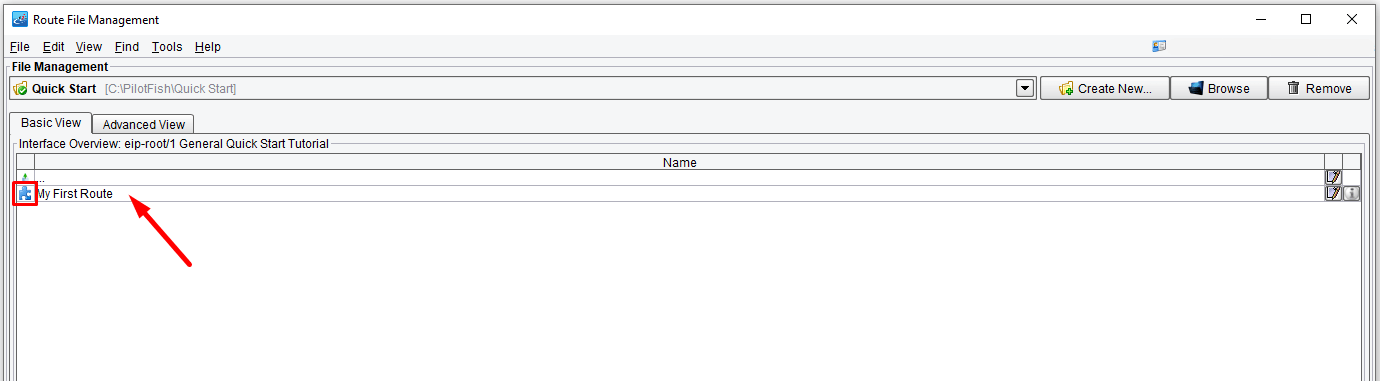
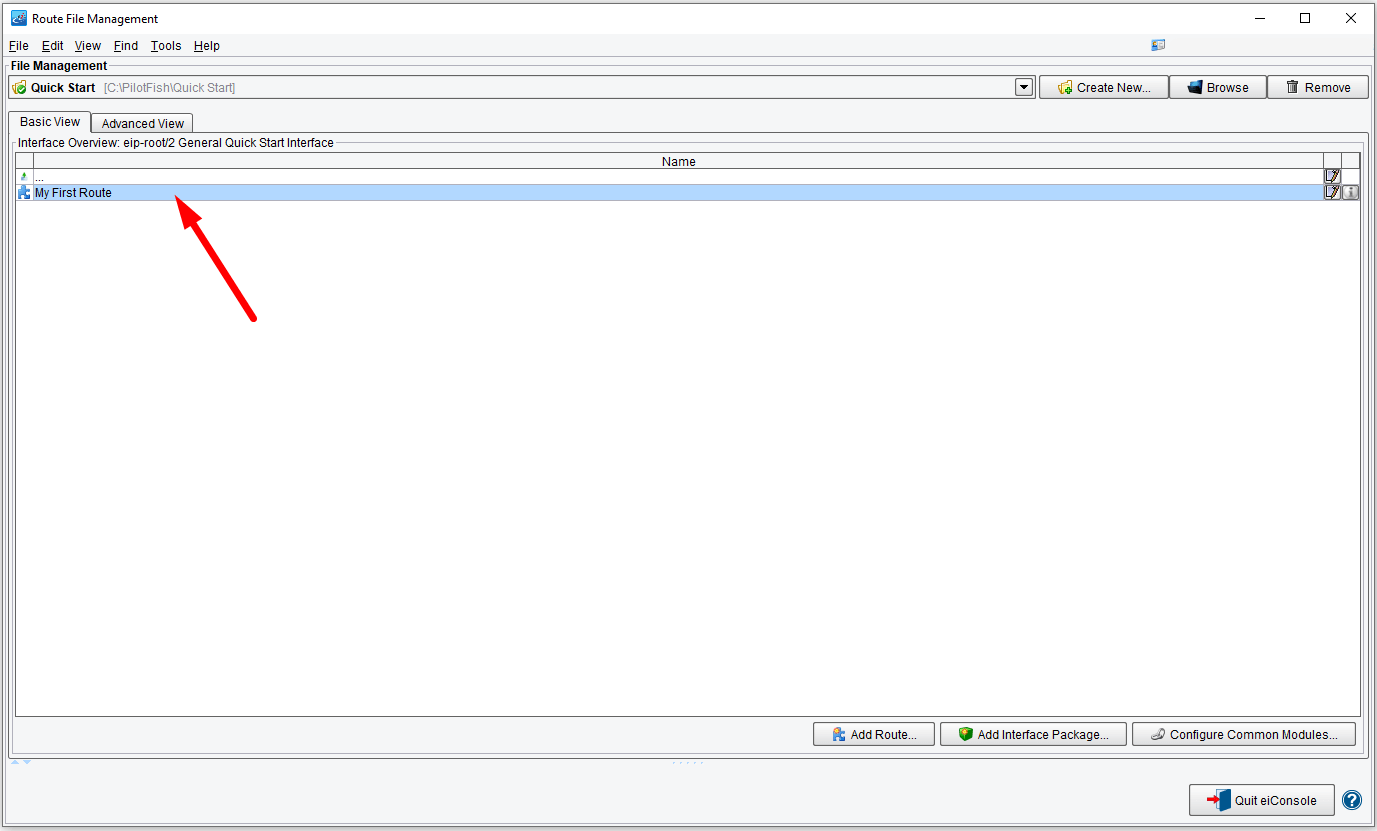
Double-clicking the package reveals My First Route, the example Route or fully configured interface (note the blue icon).
The sample files are located in your Working directory c:\PilotFish\Quick Start\data
Double-click anywhere in the row above My First Route to return to the main Working Directory (eip-root).
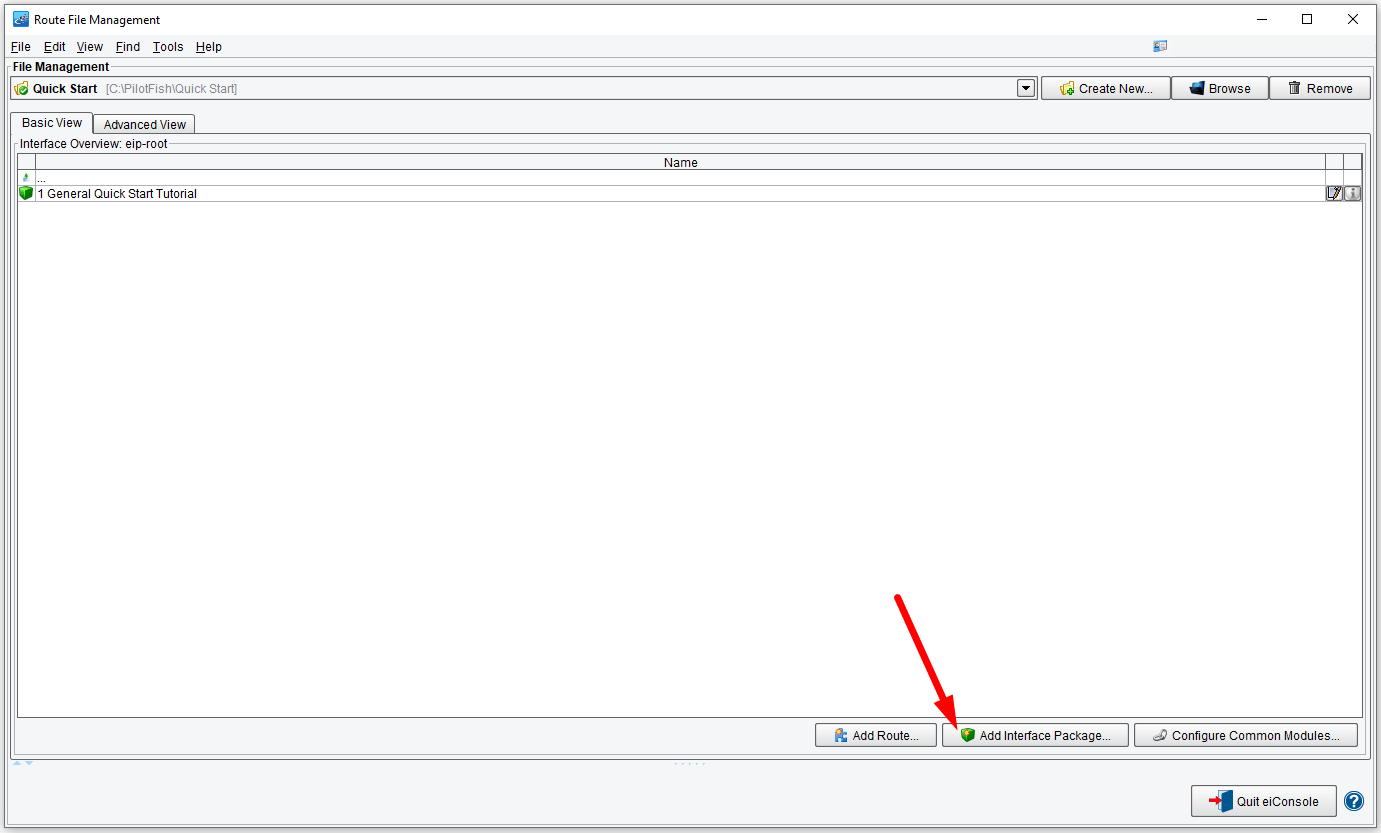
You’ll return the original Route File Management window, showing the 1 General Quick Start Tutorial package in the Interface Overview grid. The next thing you’ll want to do is to create a new Interface Package. Click the Add Interface Package button.
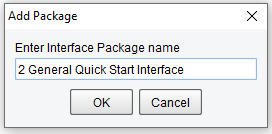
When the Add Package dialogue opens, enter “2 General Quick Start Interface” and click OK.
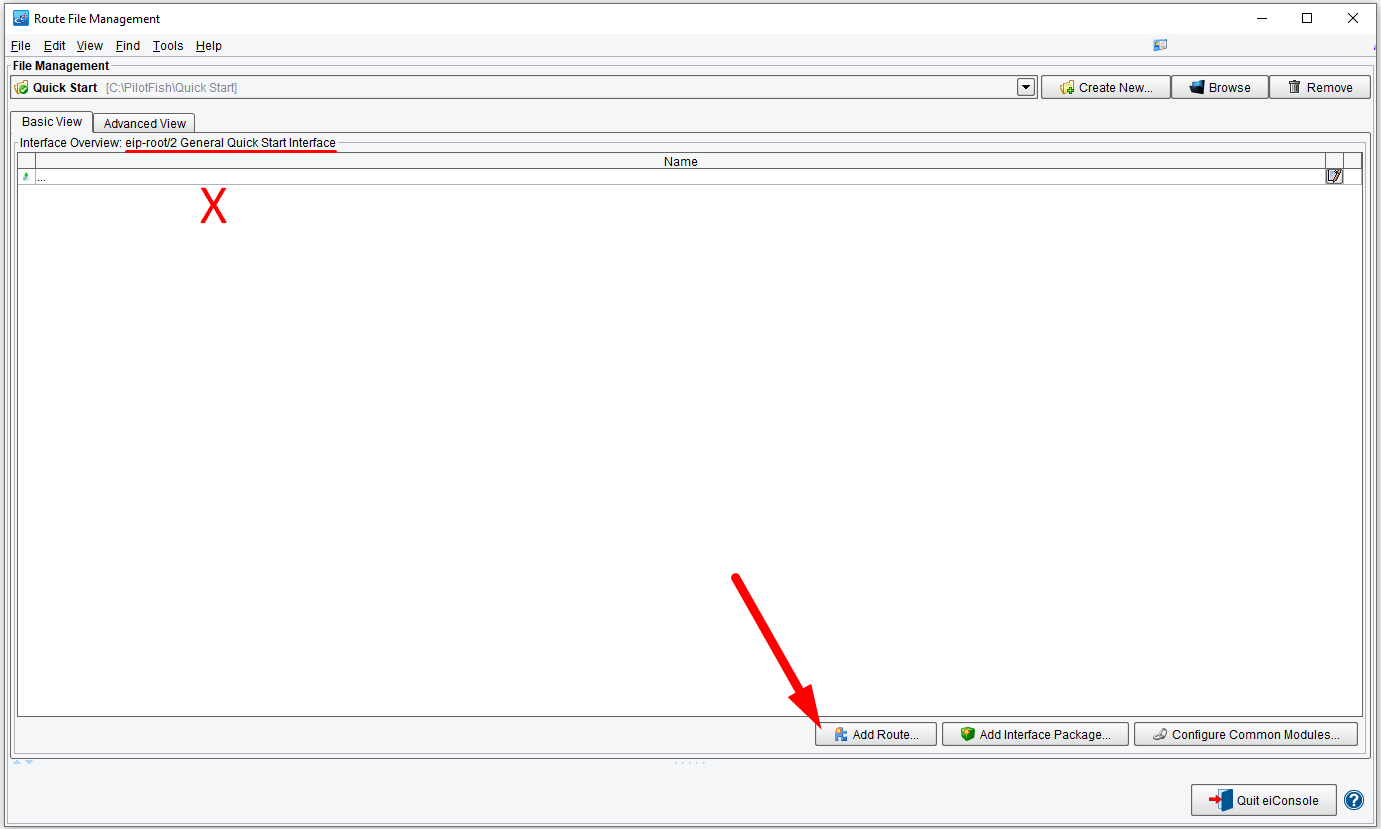
The Route File Management window opens. Notice the new Working Directory appears in the Basic View tab, Interface Overview: eip-root/2 General Quick Start Interface. You’ll also be presented with an empty Interface Overview grid.
To create a new interface or route, click anywhere in the interface Overview grid, then click the Add Route button.
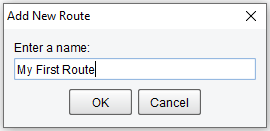
When the Add New dialogue opens, enter “My First Route” and click OK.
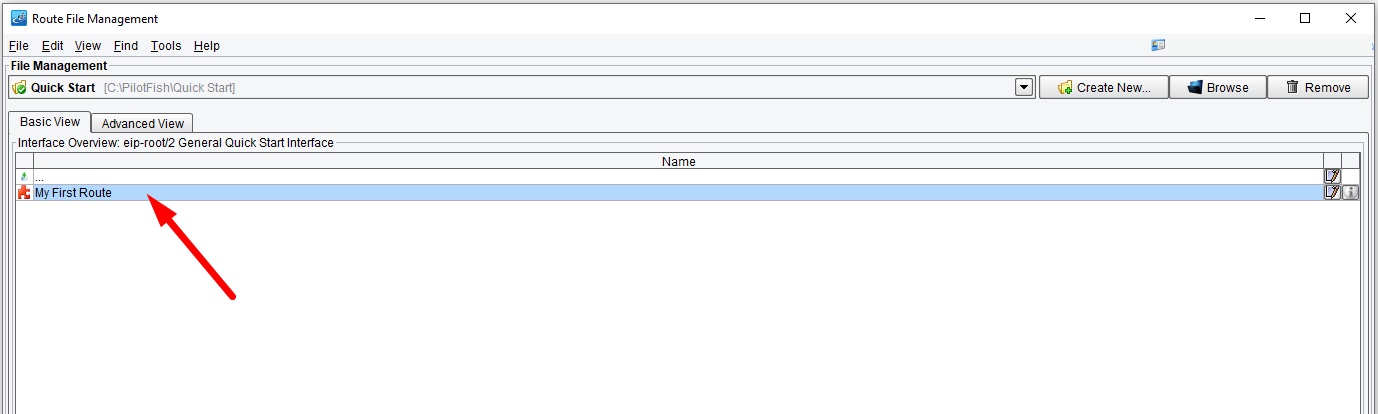
The newly created route will appear in the Interface Overview Grid.
Note: The red icon beside your route name indicates an unconfigured or incomplete interface.
Now, to edit the route and configure your interface, select the row My First Route in the grid and double-click.
eiConsole’s Main Route Grid
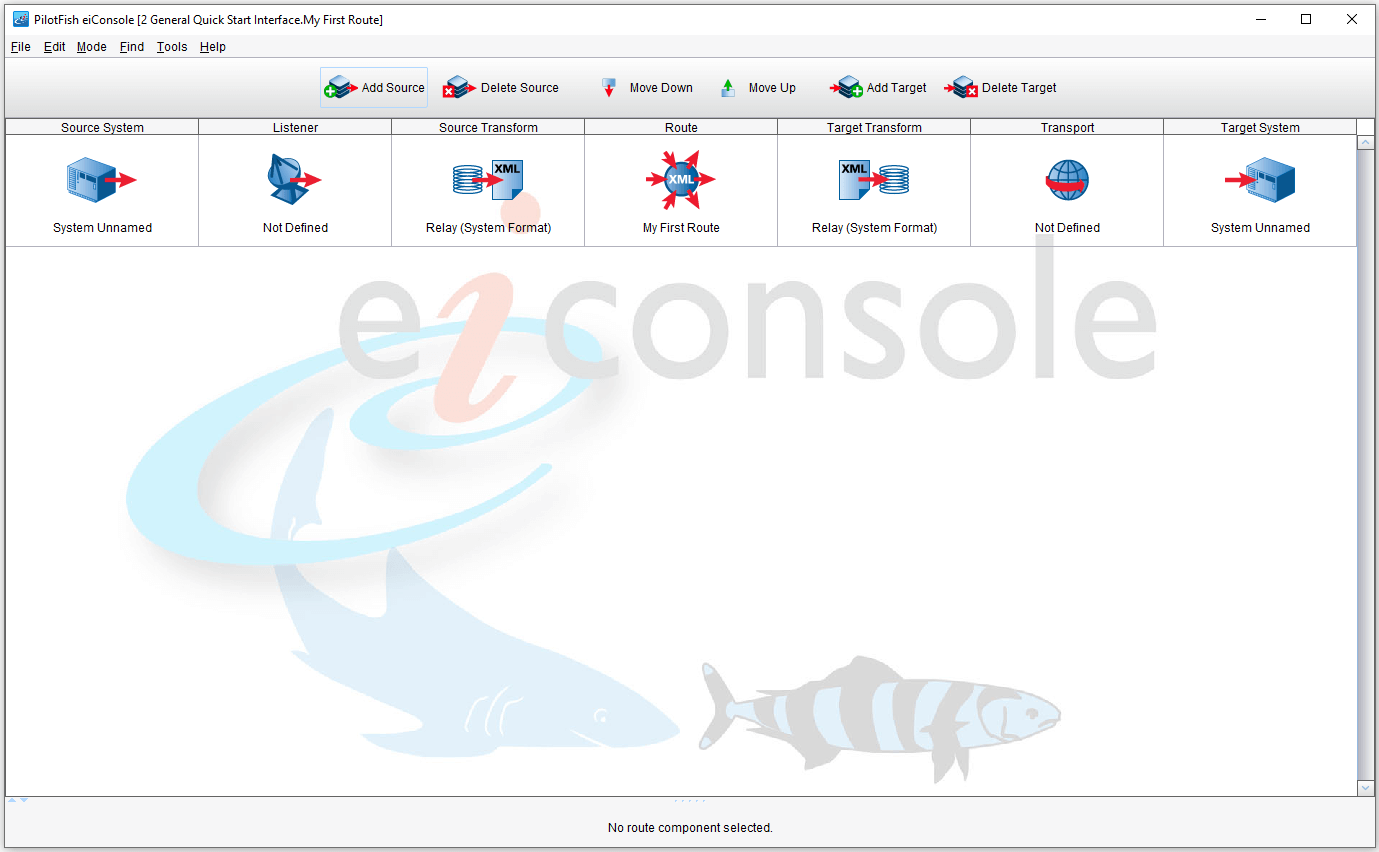
The eiConsole’s Main Route grid will open. Now, define a Source and Target for your route. For this first interface, the general idea is to pick up a flat file from a directory, convert it to XML, and then drop it in the Target directory. For this example, the route will use one Source and one Target.
Listener Stage
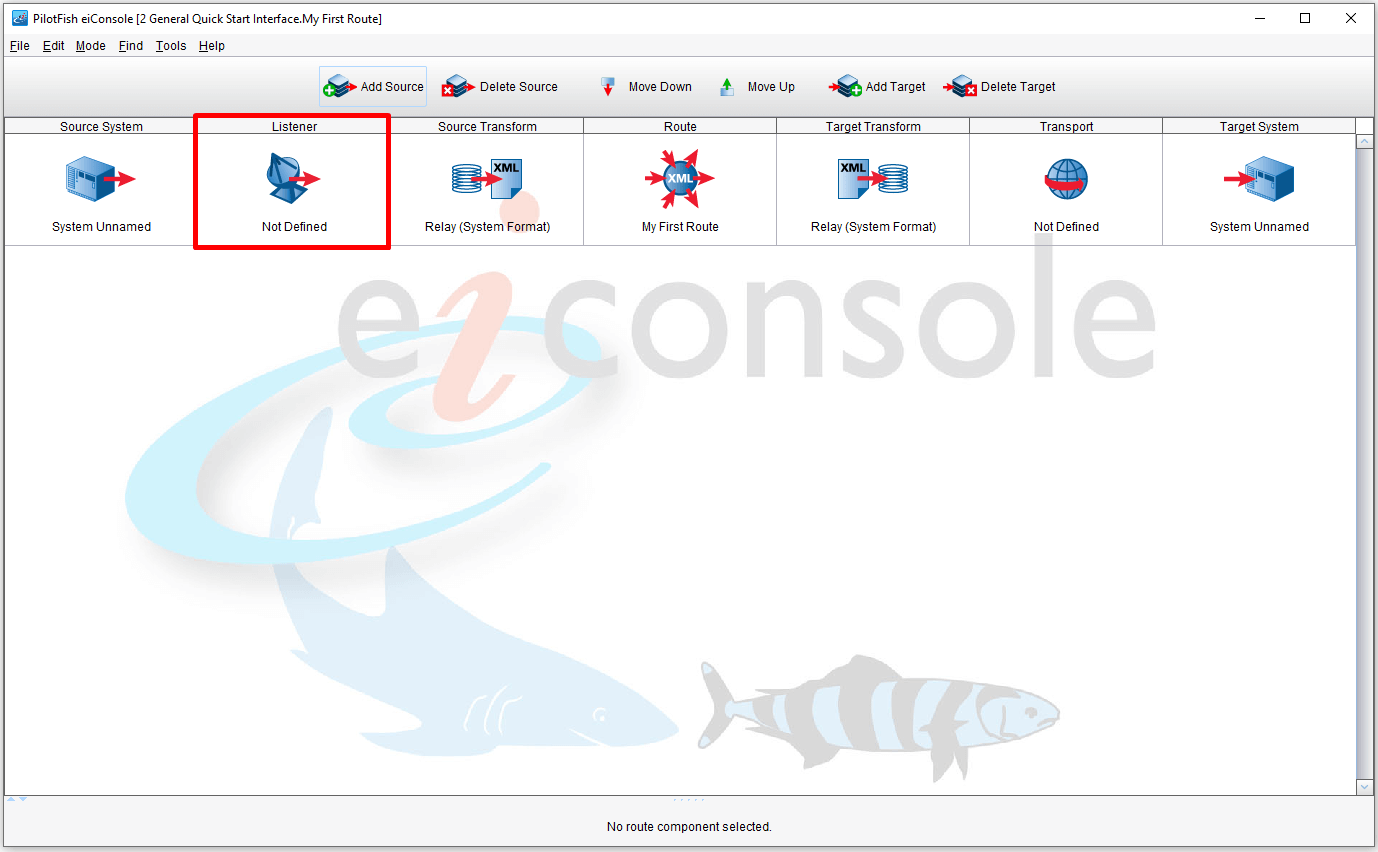
Click on the Listener stage.
The Listener configuration panel will appear.
Note: When you select a stage, a configuration panel for that particular stage will appear in the bottom half of the screen.
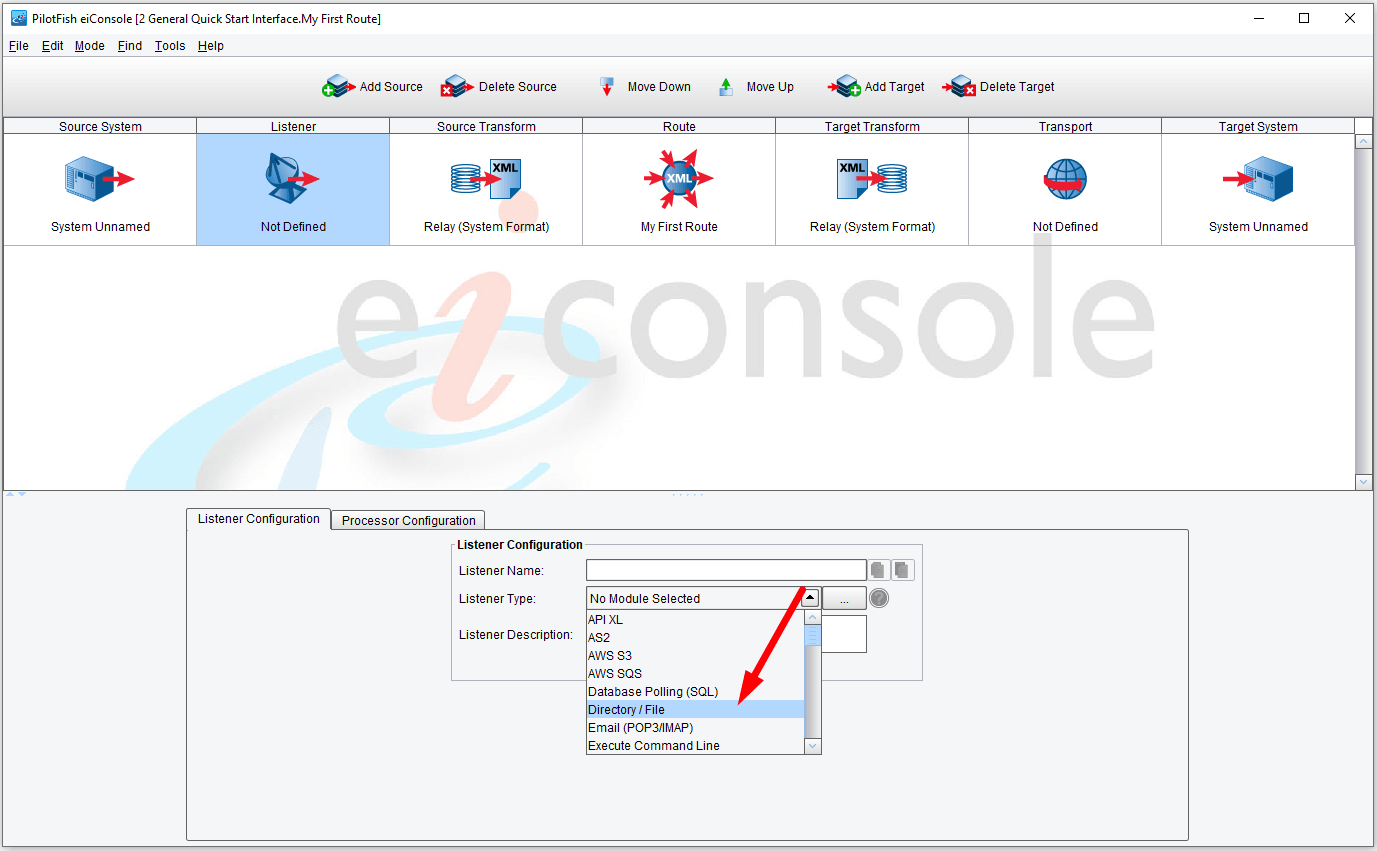
Next, select Directory / File from the Listener Type drop-down.

A set of configuration options for the Listener Module will appear.
Note: The eiConsole makes interface configuration very intuitive and provides the user with visual cues. In the panels, items marked with a red dot require configuration.
Enter “10” in the polling interval text box. (The drop-down lets you select minutes, hours, days or weeks for polling intervals.)
Note: After you have completed a required field and navigated away, the red dot will disappear.
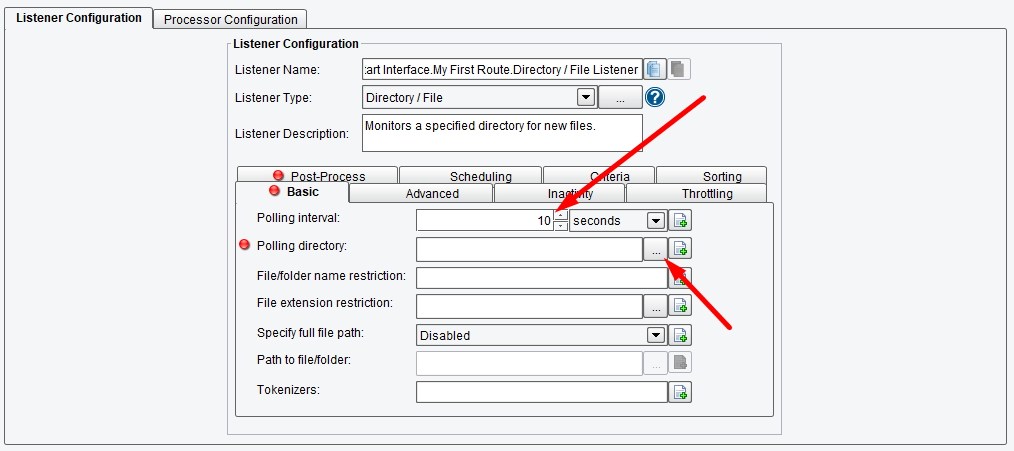
Next, configure the Polling Directory (the directory from which files will be taken). Click the Ellipsis button next to the Polling Directory configuration field.

Navigate to the root of your working directory (which is Quick Start in our case). Use the Create New Folder button and create a new folder.
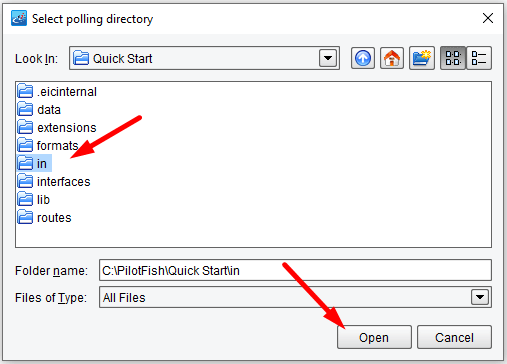
Select it and name it “in”. Select it again to highlight it and click Open.

The path to the “in” folder will appear in the Polling Directory configuration field. The red dot has now disappeared next to Polling Directory and since all required items have been filled in within the Basic tab, the red dot in the Basic tab is gone as well.

Set the Post-Process operation.
Note: As you fill in the configuration items marked with the red dots, all the red dots are gone, indicating that all the required fields have been filled out.
With the Listener stage configured, we’ll move on to the next stage, the Source Transform.
Source Transform Stage
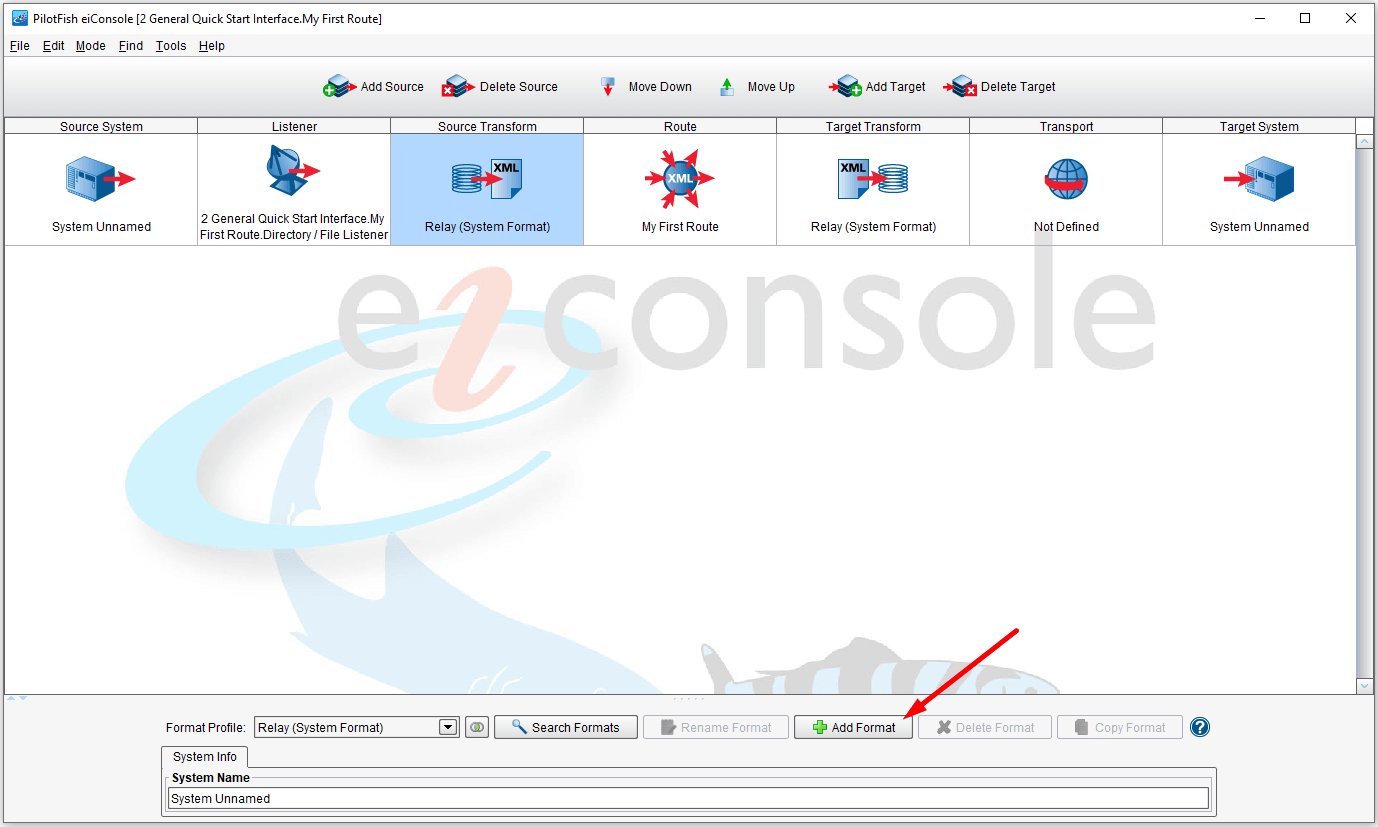
Next, click the Source Transform icon.
To create a new transformation, click the Add Format button.
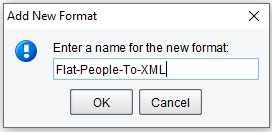
Our first transformation will be responsible for converting a flat file to XML. When prompted, add the format name “Flat-People-To-XML” and click OK.
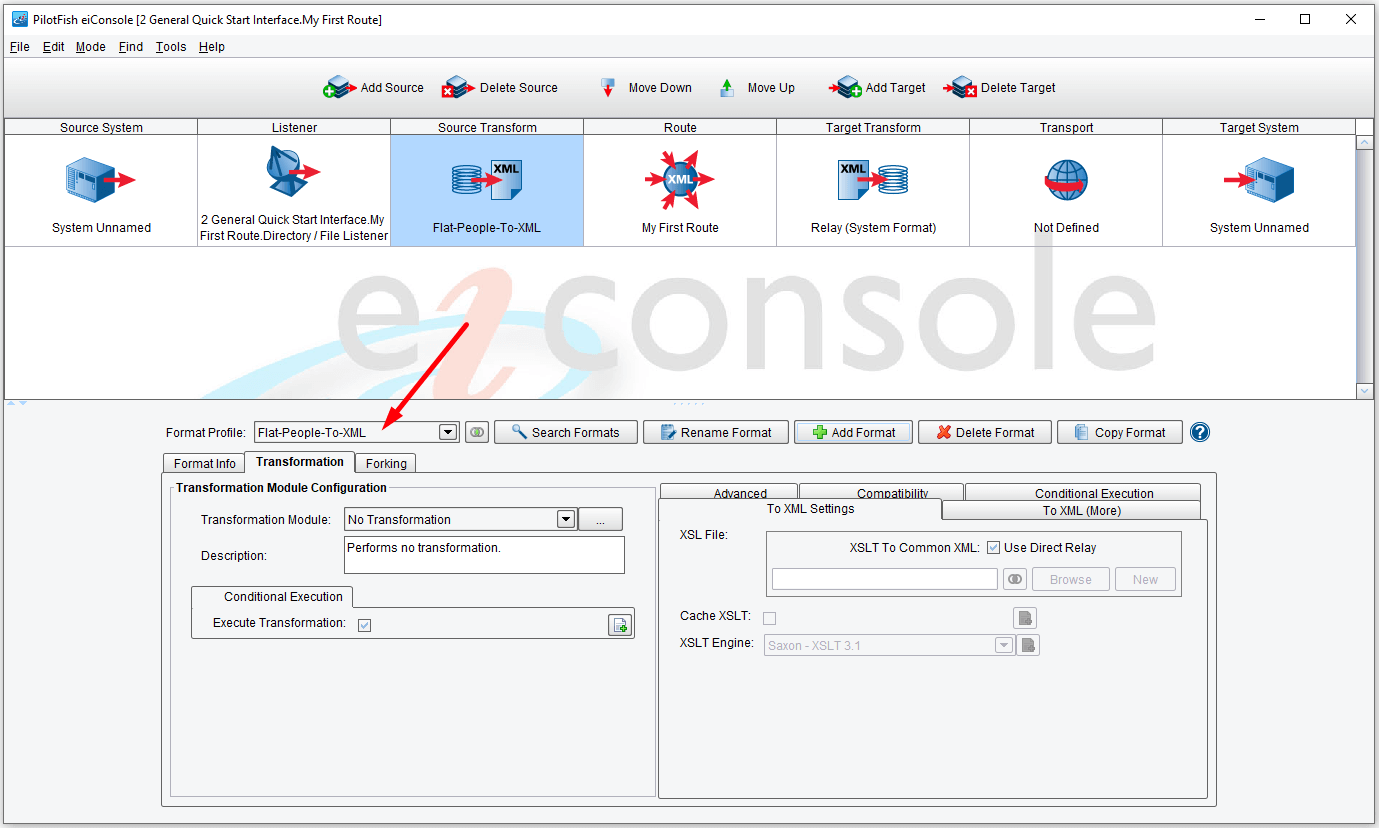
The “Flat-People-To-XML” will be selected in the Format Profile drop-down. And now, the Transformation Module and XSLT Configuration panels will appear. Configure both the Transformation Module and an XSLT data mapping.
Note: Transformation Modules are responsible for converting non-XML data into an XML format to be mapped later.
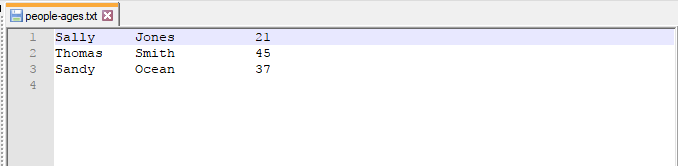
Our input document will be a text file, people-ages.txt, from the distribution data folder. This distribution data folder is your {eiConsole-installation-directory}/Quick Start/data. It contains a set of fixed-width records containing a first name, last name and age.
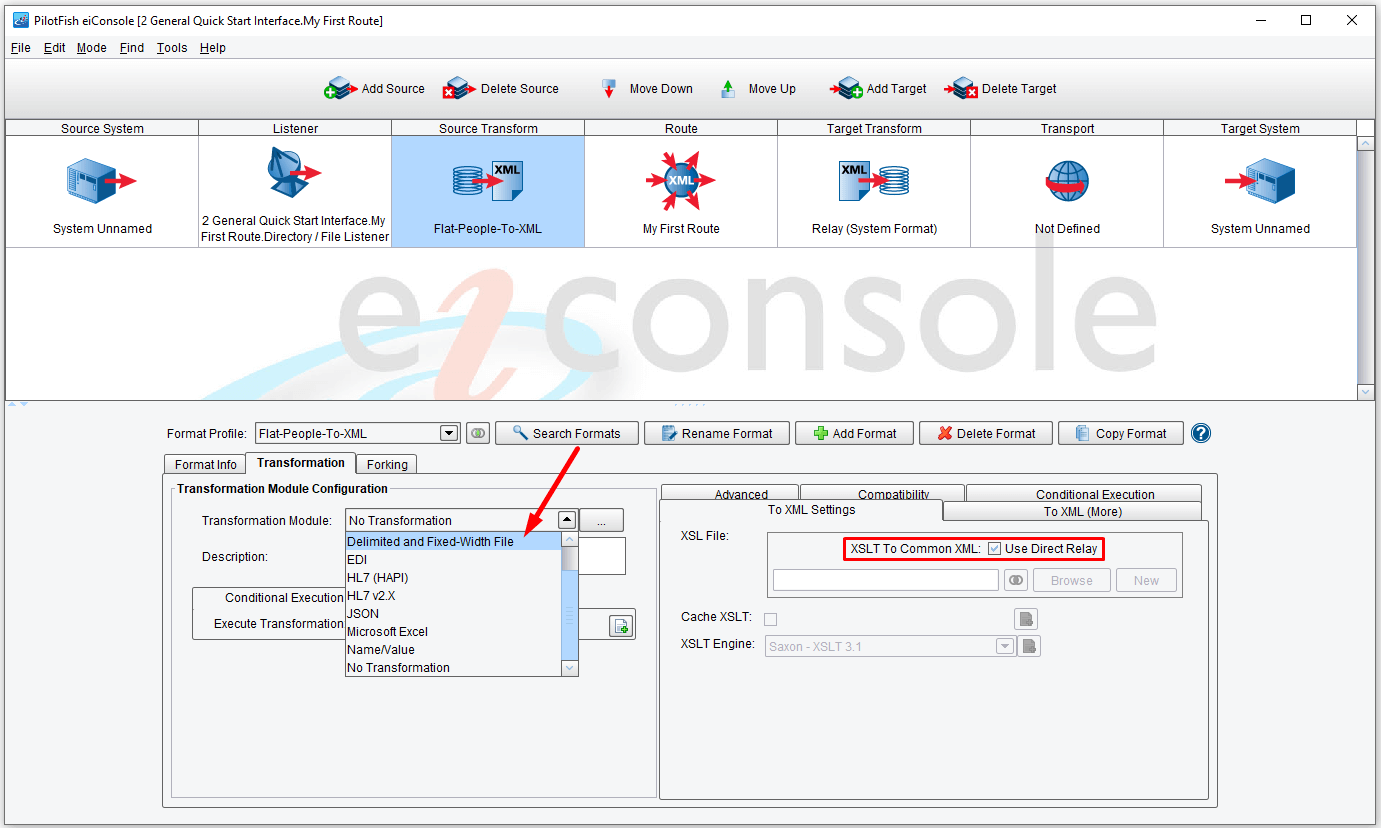
To work with this type of data, choose the Delimited and Fixed-Width File Transformation Module from the drop-down. Leave the Use Direct Relay box checked.
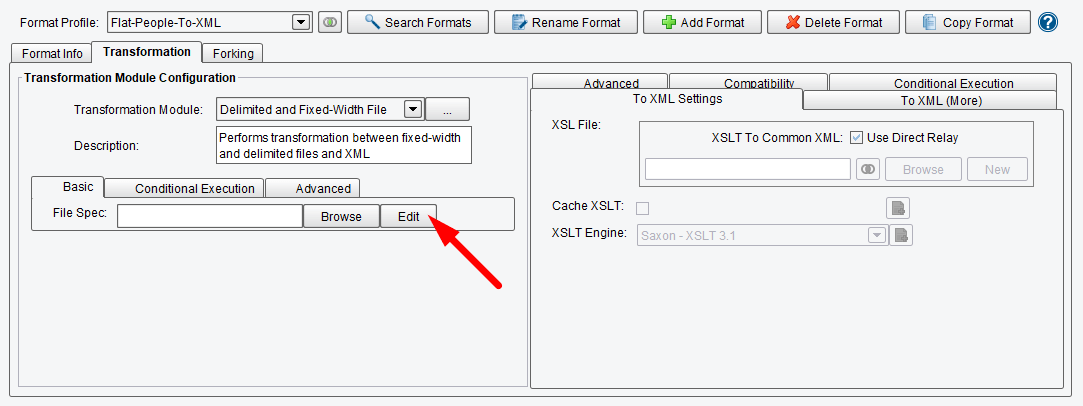
Next, click the Edit button in the File Spec configuration panel.
This will launch the File Specification Editor.
eiConsole File Specification Editor
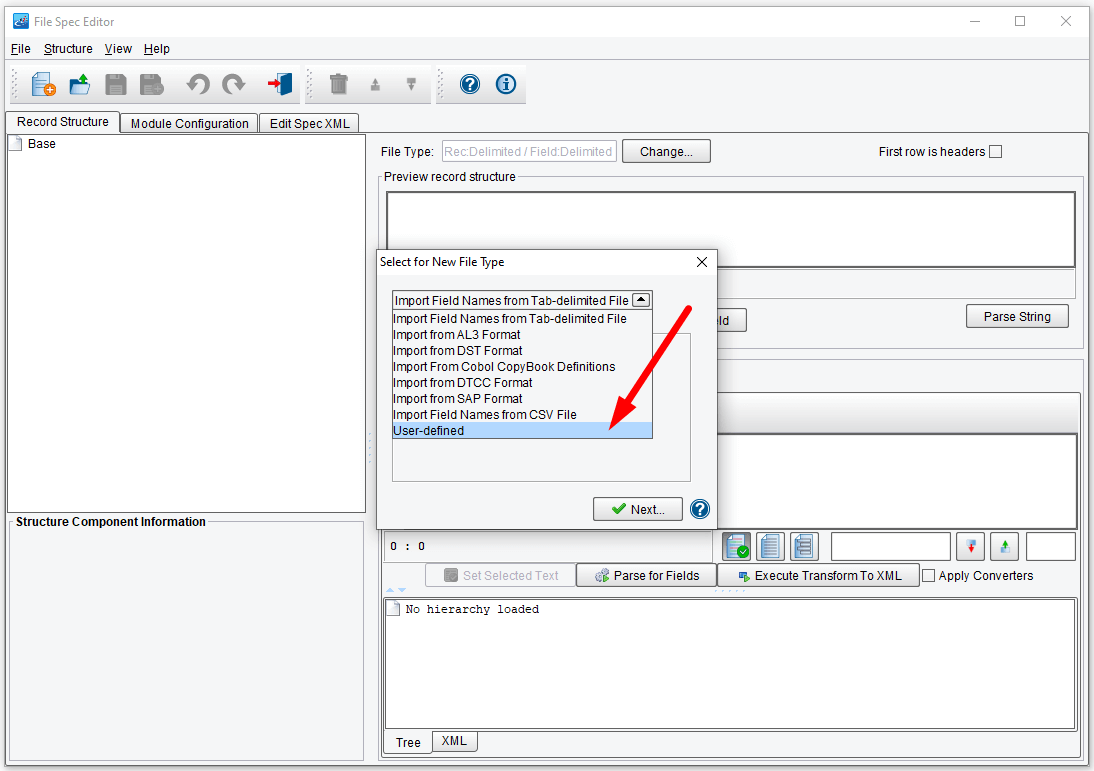
The Select for New File Type dialog box will appear. Select User-defined from the drop-down, and click Next.
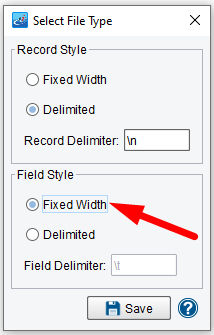
Now, describe the type of file the transformation module will be parsing. Since the file contains records that are delimited with newlines, leave that option as is.
However, our fields are fixed-width. So, select Fixed Width from the Field Style radio box and click Save.
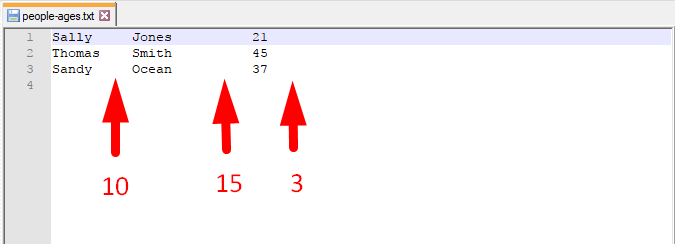
To describe the structure of the flat file that will be parsed, let’s take a look at the people.ages.txt file.
The first 10 bytes of each line will be the first name. The following 15 bytes are the last name. The final 3 are age.
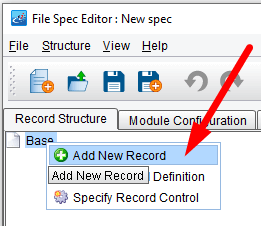
To configure this in the File Specification Editor, right-click the Base icon in the record structure panel, then click Add New Record.
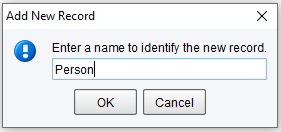
Since each record represents a person, enter Person in the Add New Record dialogue and click OK.
A green node will appear in the record structure tree.
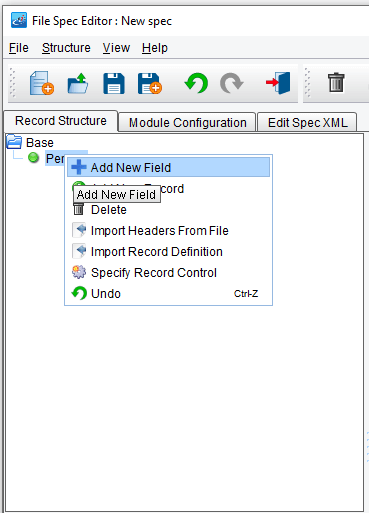
To describe each field in the Person record, right-click the Person node and select Add New Field.
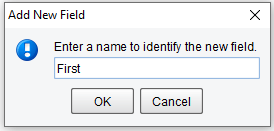
Provide the field name First in the Add New Field Dialogue, and click OK.
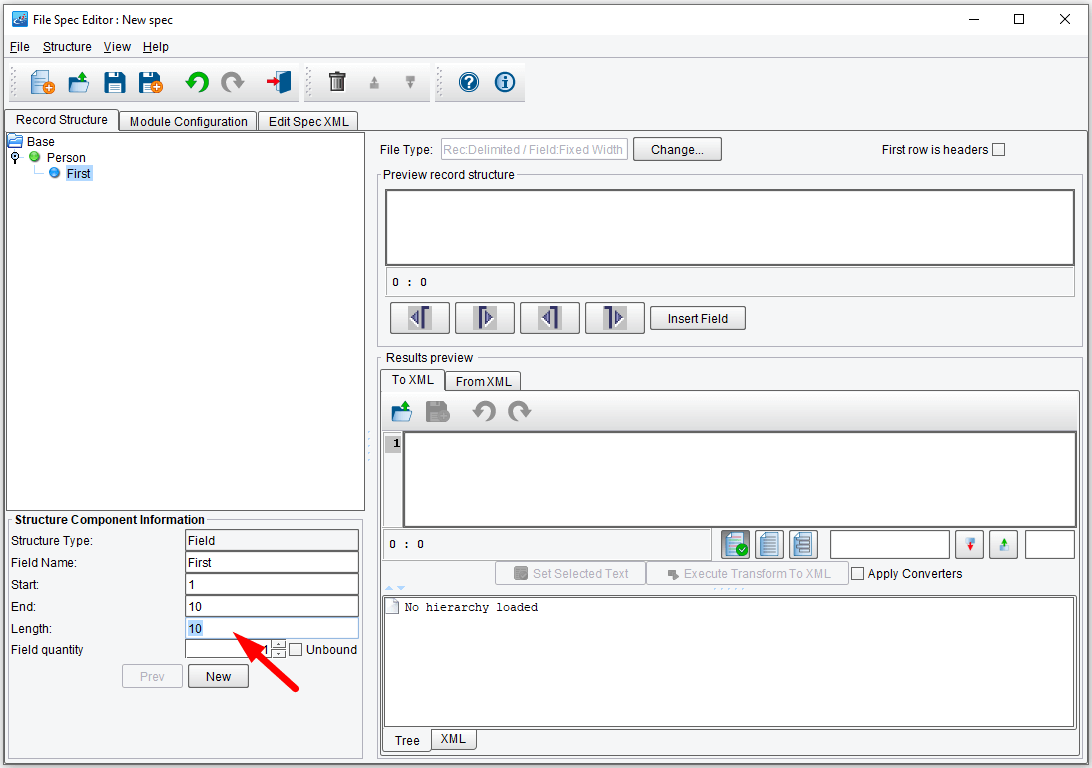
In the Structure Component Information area underneath the Record Structure panel, specify the start position, end position or length of the field.
Type in 10 bytes for length and click enter.
Note: The end positions are automatically updated based on the length entered.
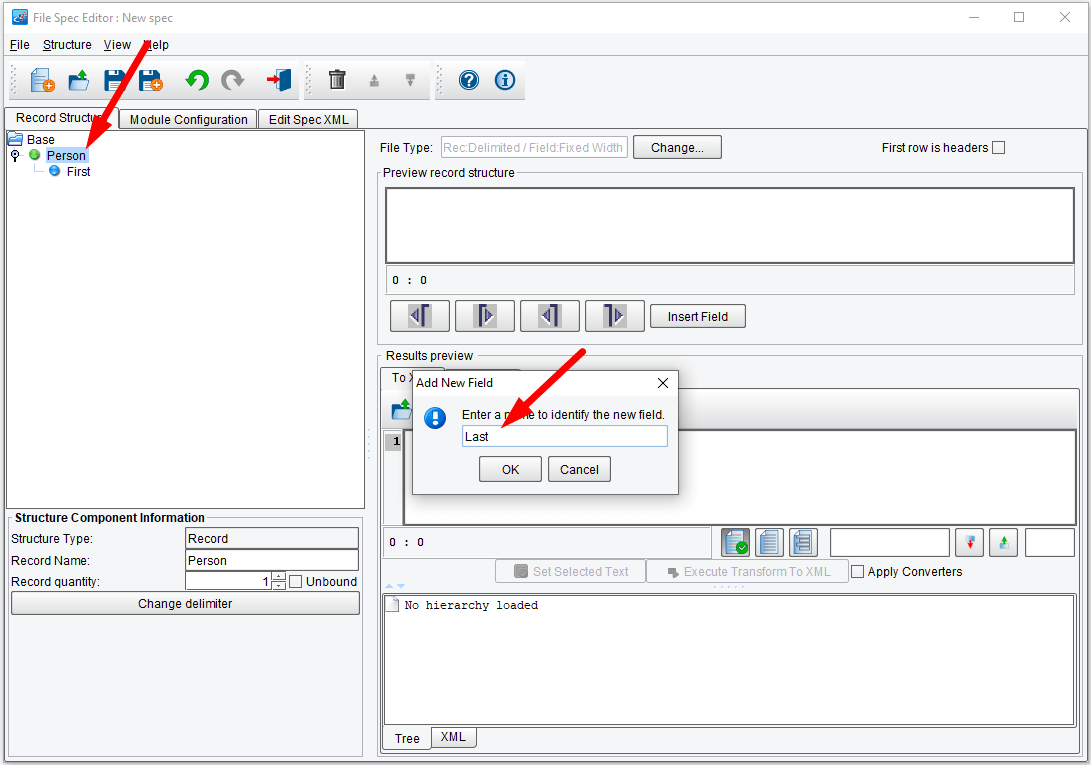
Right-click the person record and select Add New Field.
Type the field name Last and click OK.
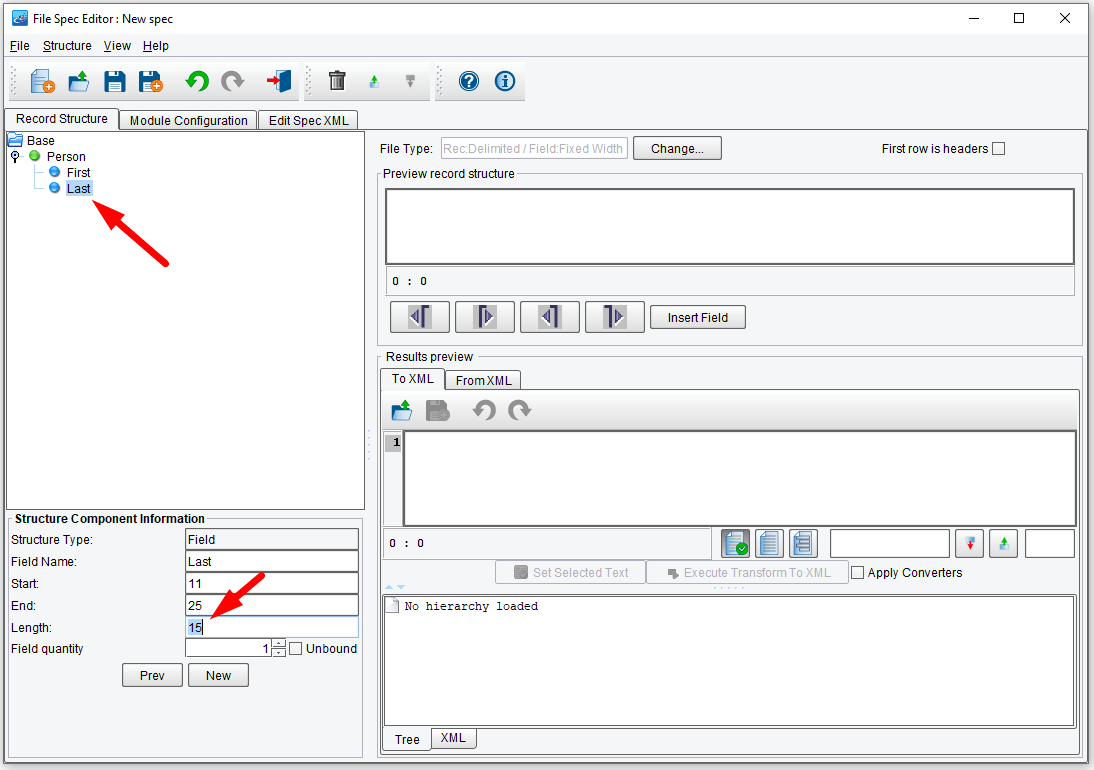
Select the Last blue node and type 15 into the length field.
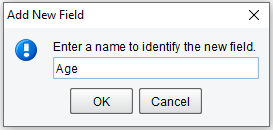
Finally, repeat the process one more time. Select the green Person node, right-click and select Add New Field, type in Age and click OK.
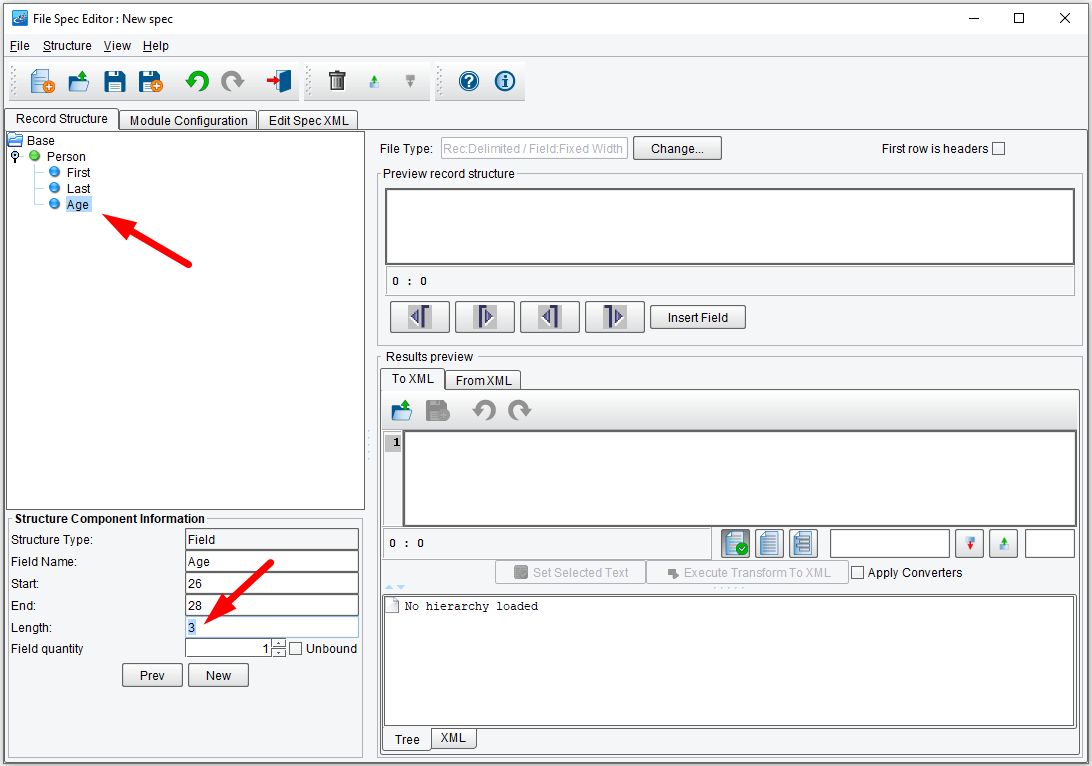
Next, select the blue Age node and type in 3 in the length field. Then click enter/return.
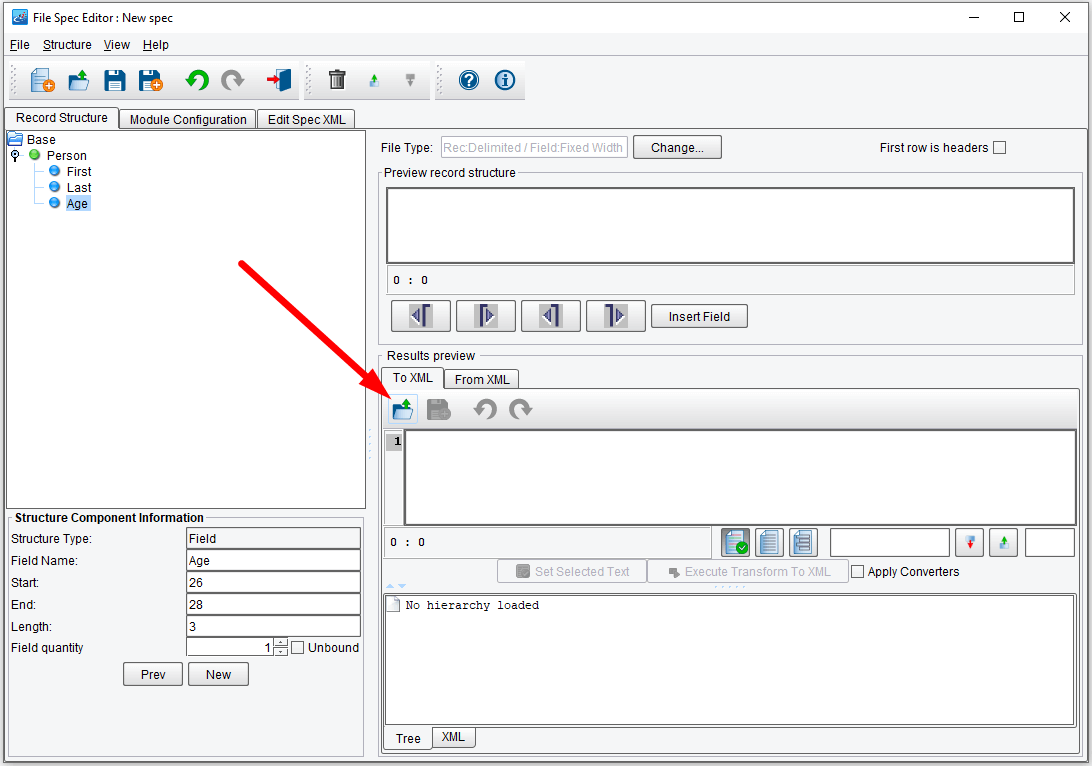
With our record defined, let’s test the parsing. To do this, load a sample file into the results preview area.
Click the Folder icon.
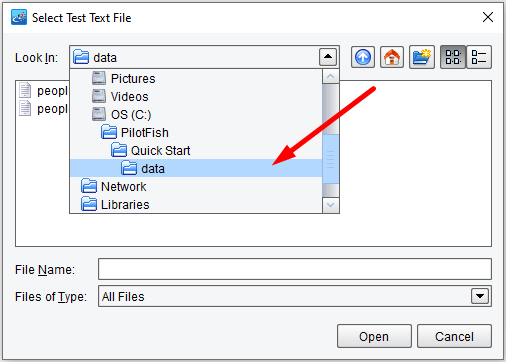
Navigate to the people-ages.txt file in the data folder of your distribution.
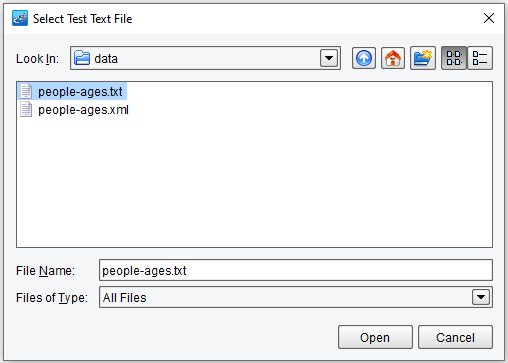
Click the Open button.
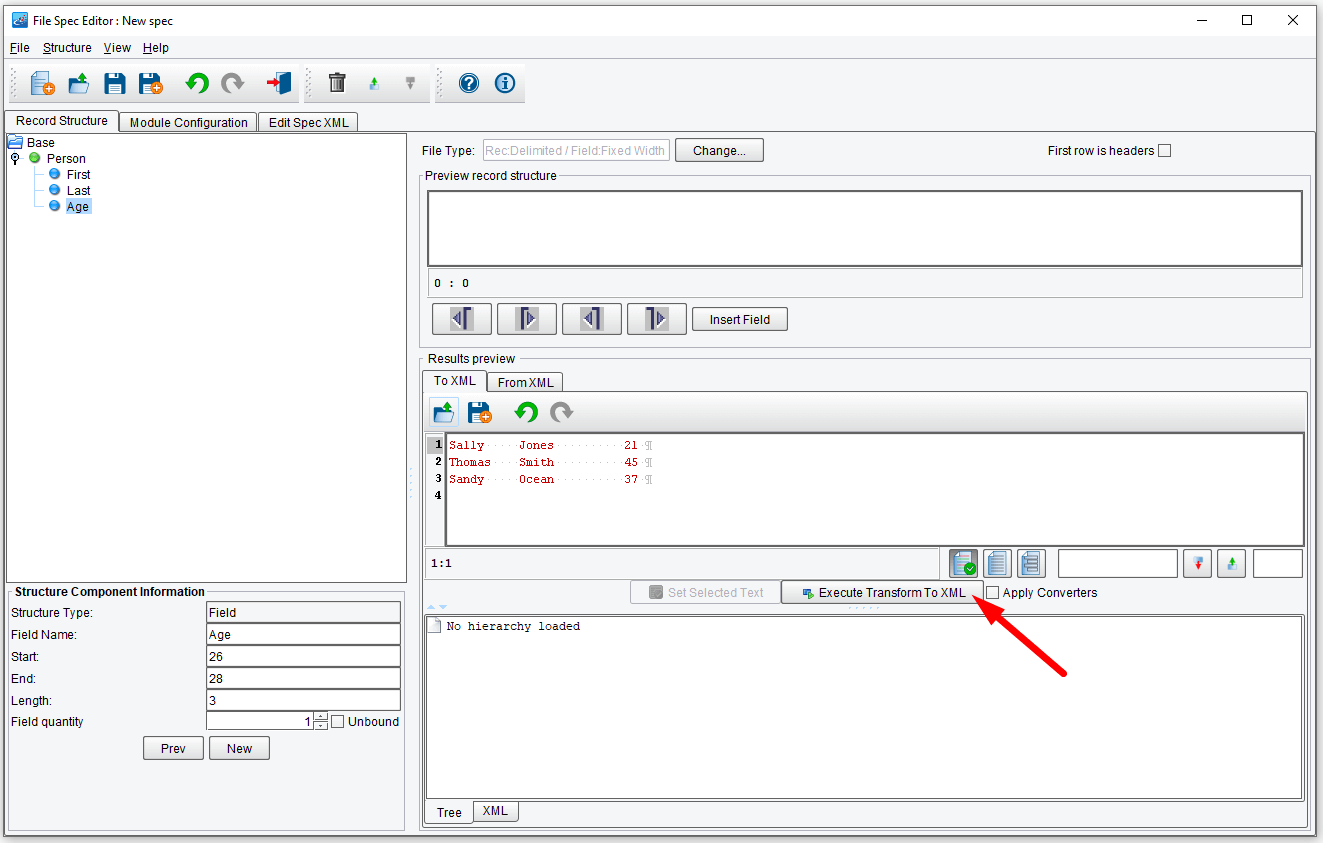
Finally, to test the XML transformation, click on the Execute Transform to XML button. The parsed representation of the data will be displayed.
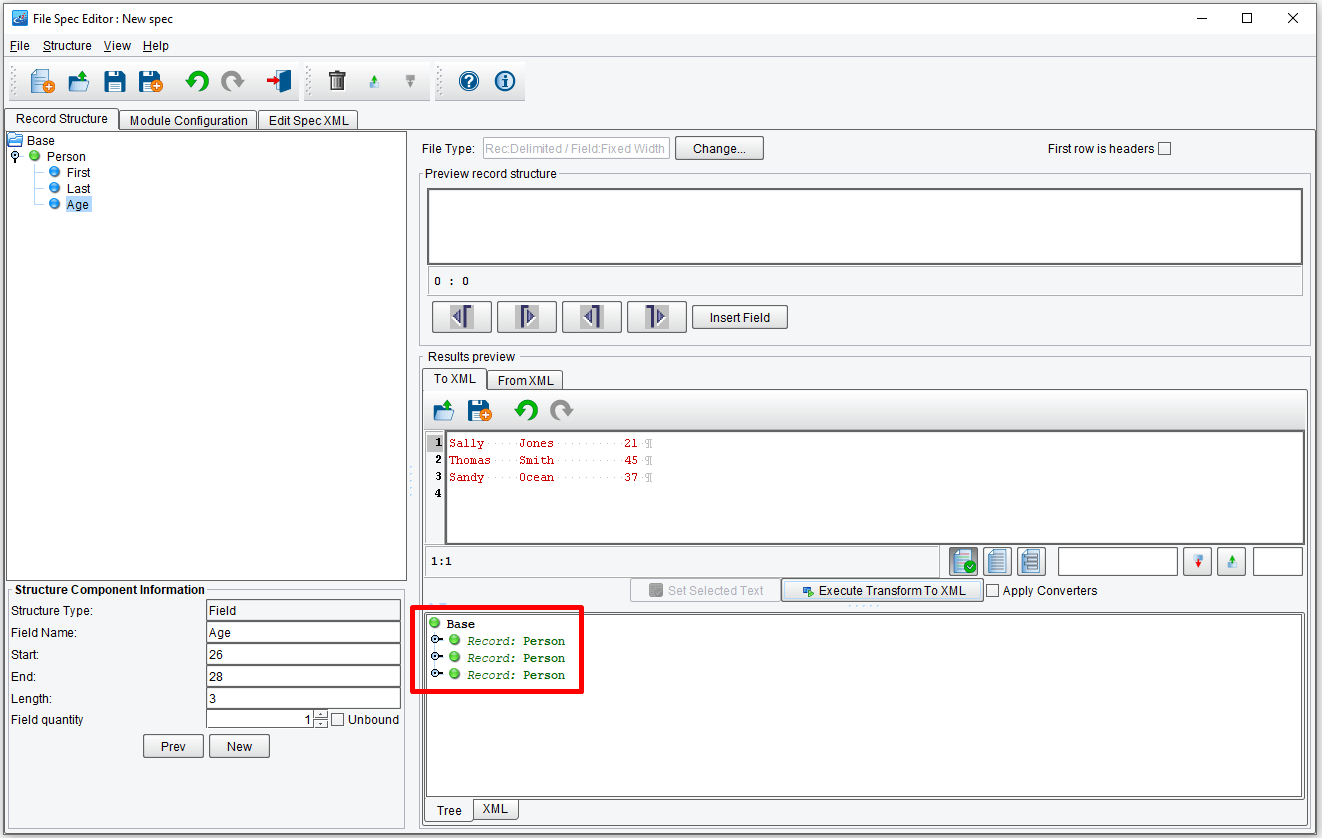
Displayed are all 3 person’s records from our sample file. If it doesn’t look like this, still go ahead and move on to the next step.
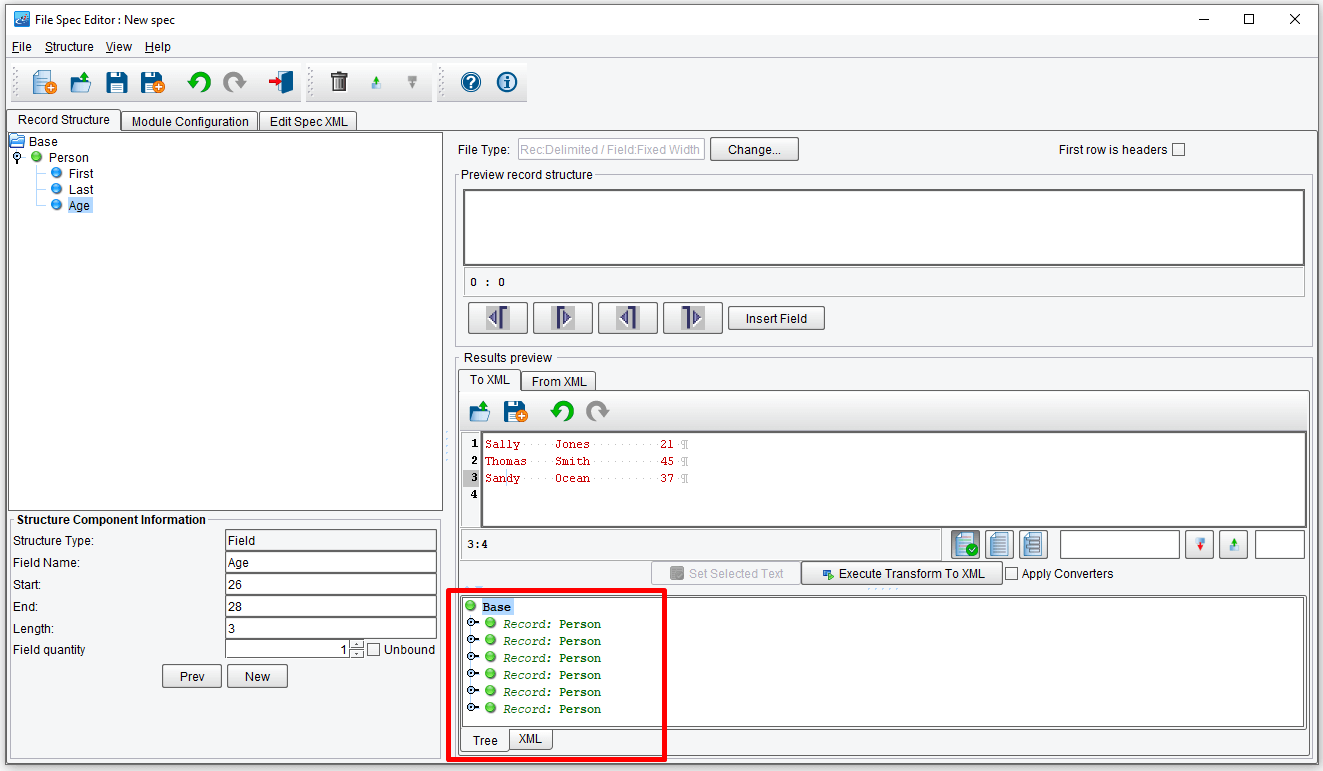
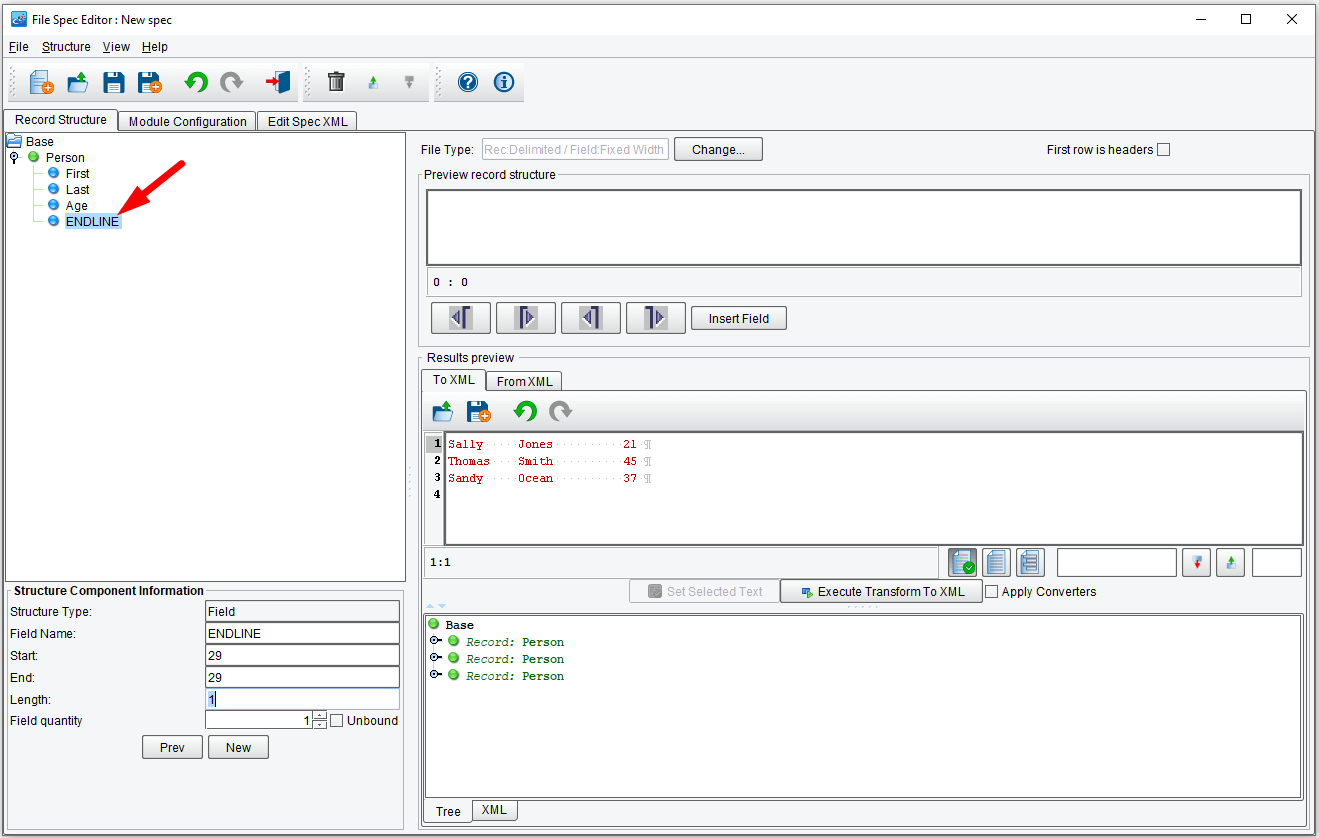
If your output looks like this instead, you’ll need to add one more step.
NOTE: Some filesystems use a 2-character endline sequence (carriage return + linefeed), whereas others use a single character. For this reason, you may be required to add an extra field to your record definition to consume the additional character. If empty records appear in your output, add an additional record called “ENDLINE” with a length of 1 byte. This should stop the empty records from appearing in your output.
Repeat the previous processes by selecting the green Person node. Right-click and select Add New Field, type in ENDLINE, and click OK. Leave the Length at “1”. Click enter, then click Execute Transform to XML.
Your output should now look like that above. You can now proceed to the next step.
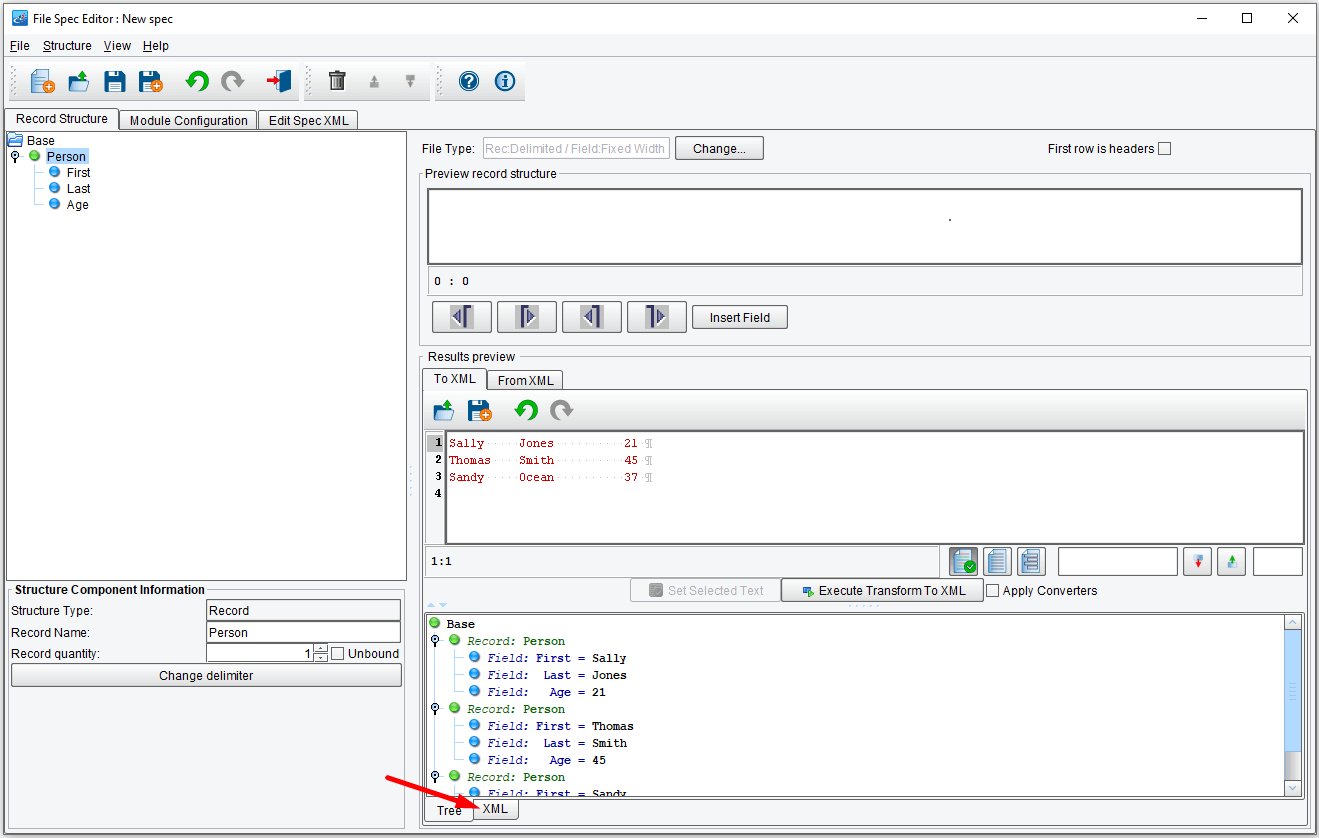
Click the nodes. You should see that each is correctly parsed, containing a first, last, and age field. To view the XML representation, click on the XML tab.
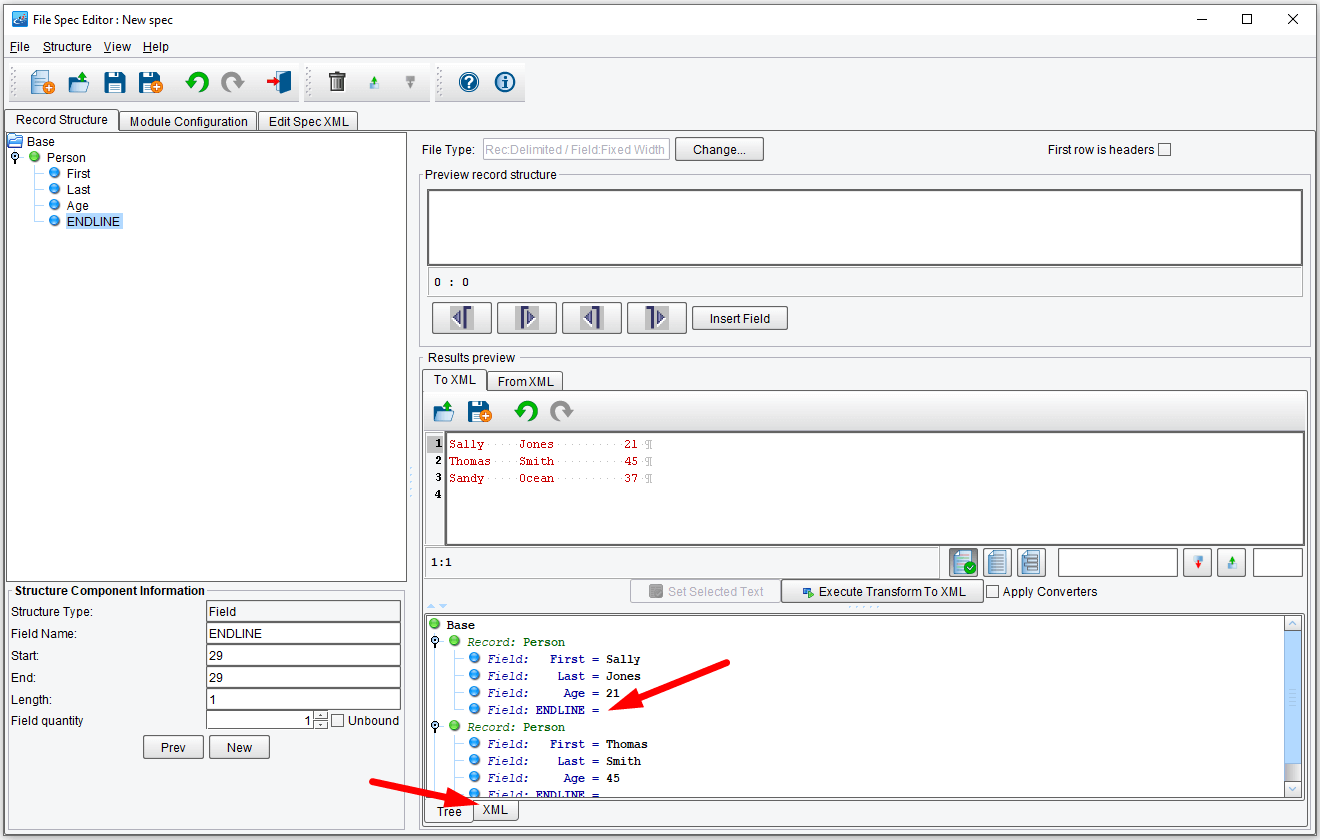
For those who added ENDLINE, clicking the nodes will reveal the output above. To view the XML representation, click on the XML tab.
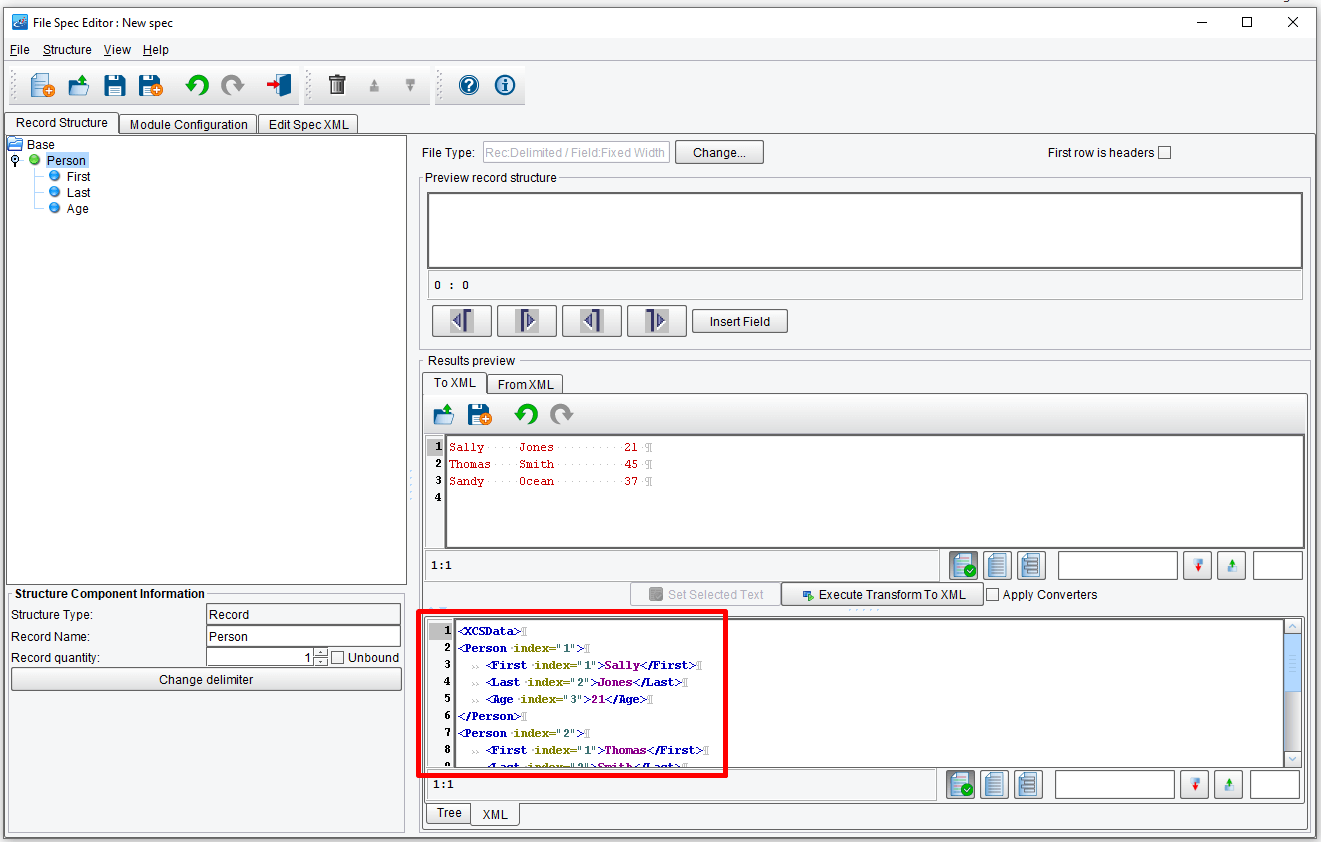
Use the scroll bar to view the XML.

And for those with the added field ENDLINE, your output will look like the image above.
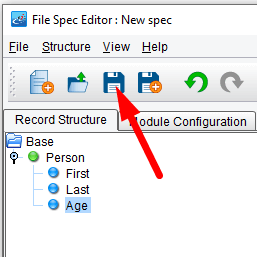
Our file specification is complete. Save it by clicking the Save icon.
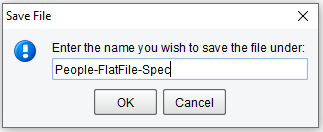
The Save File dialogue will appear. You’ll be prompted to enter a name. Type People-FlatFile-Spec and click Ok.
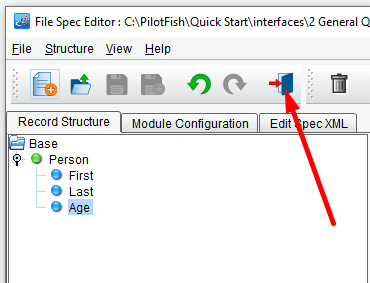
Next, click the Return to Console icon.
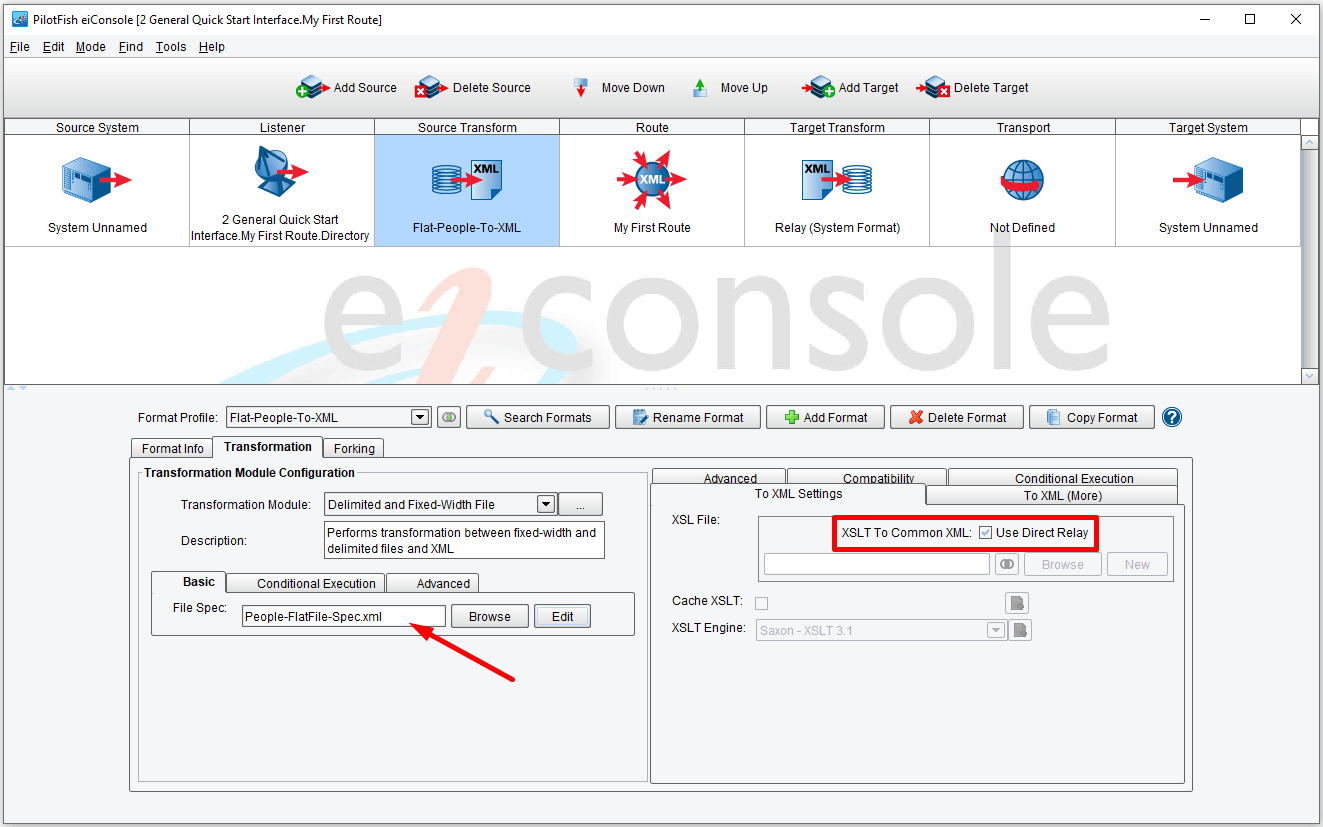
Note that the new file specification now appears in the Transformation Module Configuration area. Since there won’t be any additional transformation, leave the XSL File set to Use Direct Relay, checked.
Route Stage
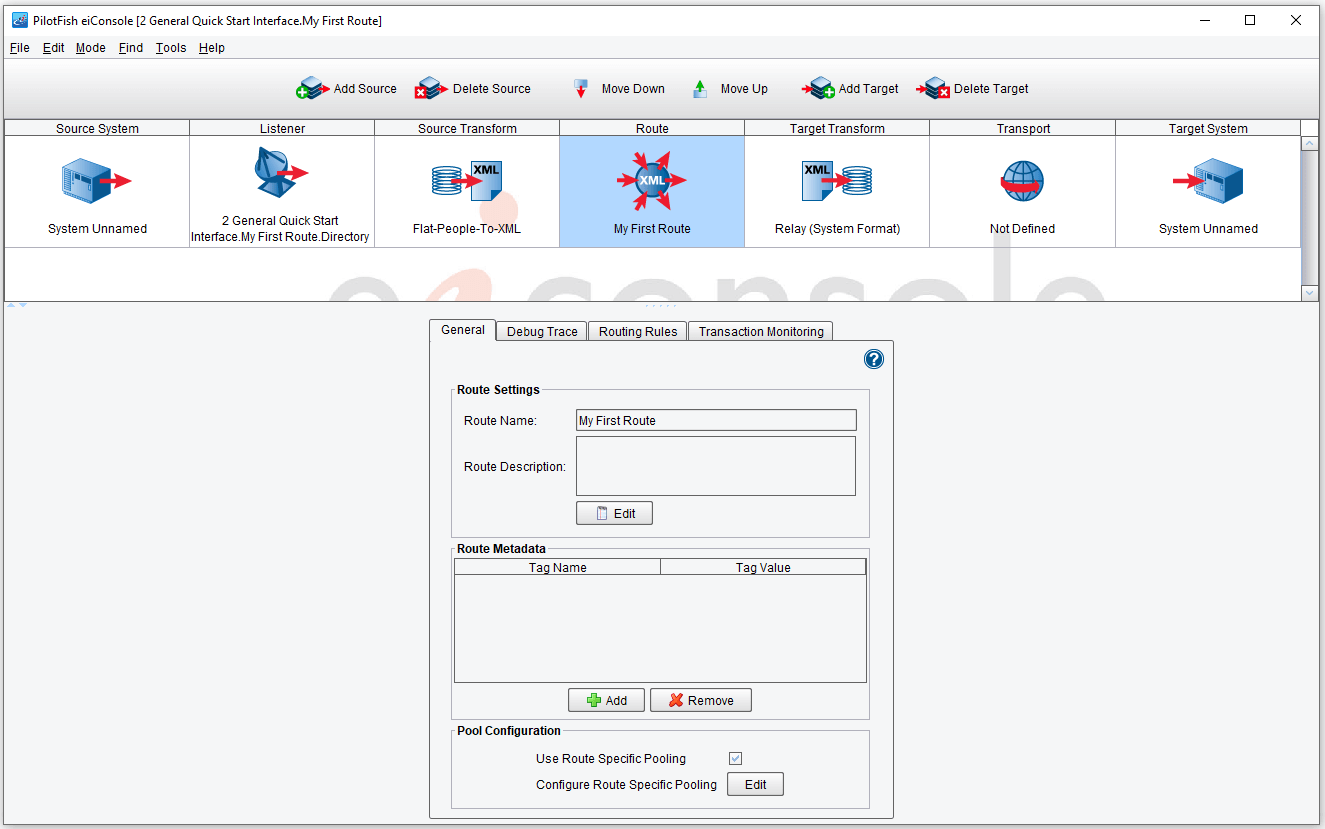
Click on the Route stage. The General tab will open with the configuration settings. Leave these settings as is.
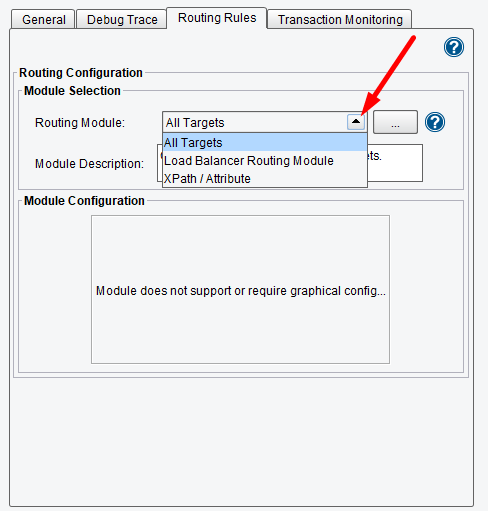
In the Route stage, we can optionally implement Routing Rules.
Select the Routing Rules tab. Note your options in the drop-down. In our case, we are sending all data from the Source to the Target System. So, the default Routing Module selection of All Targets applies. Leave these settings as is.
Next, click on the Target Transform stage.
Target Transform Stage

To add another format, click the Add Format button.
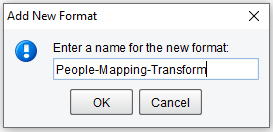
Once the Add New Format dialog appears, type People-Mapping-Transform and click OK.
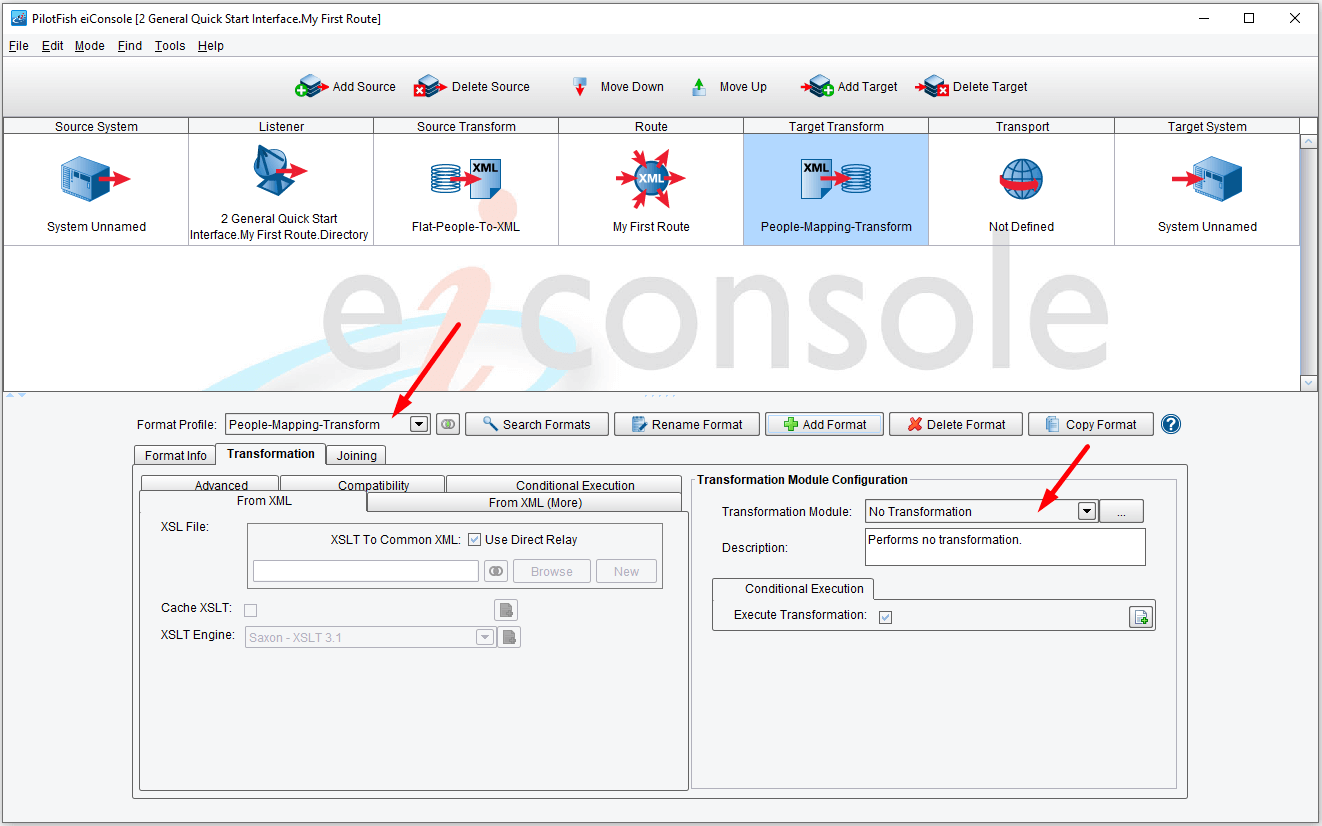
People-Mapping-Transform will be selected in the Format Profile drop-down. Leave that as is.
Next, configure the XSL File and leave the Transformation Module Configuration set at No Transformation.
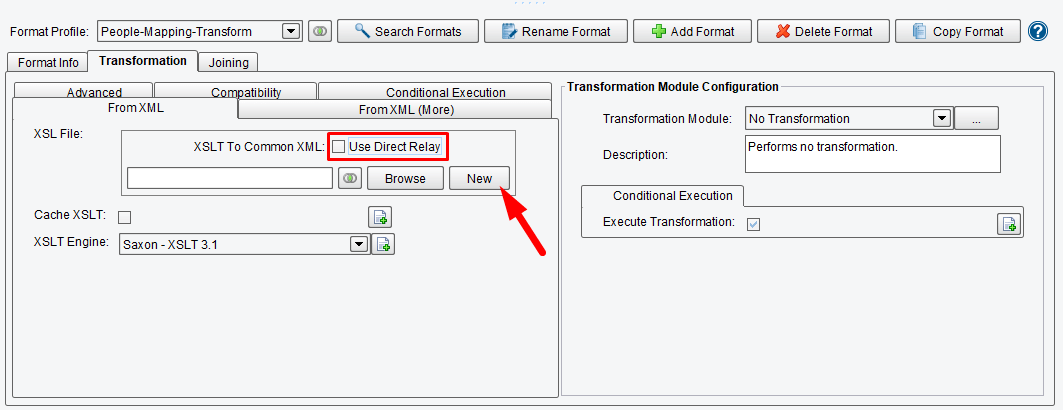
Uncheck the Use Direct Relay box in the XSLT Configuration panel. This will enable the Browse and Edit buttons in configuration items. Click the New button to launch the Data Mapper.
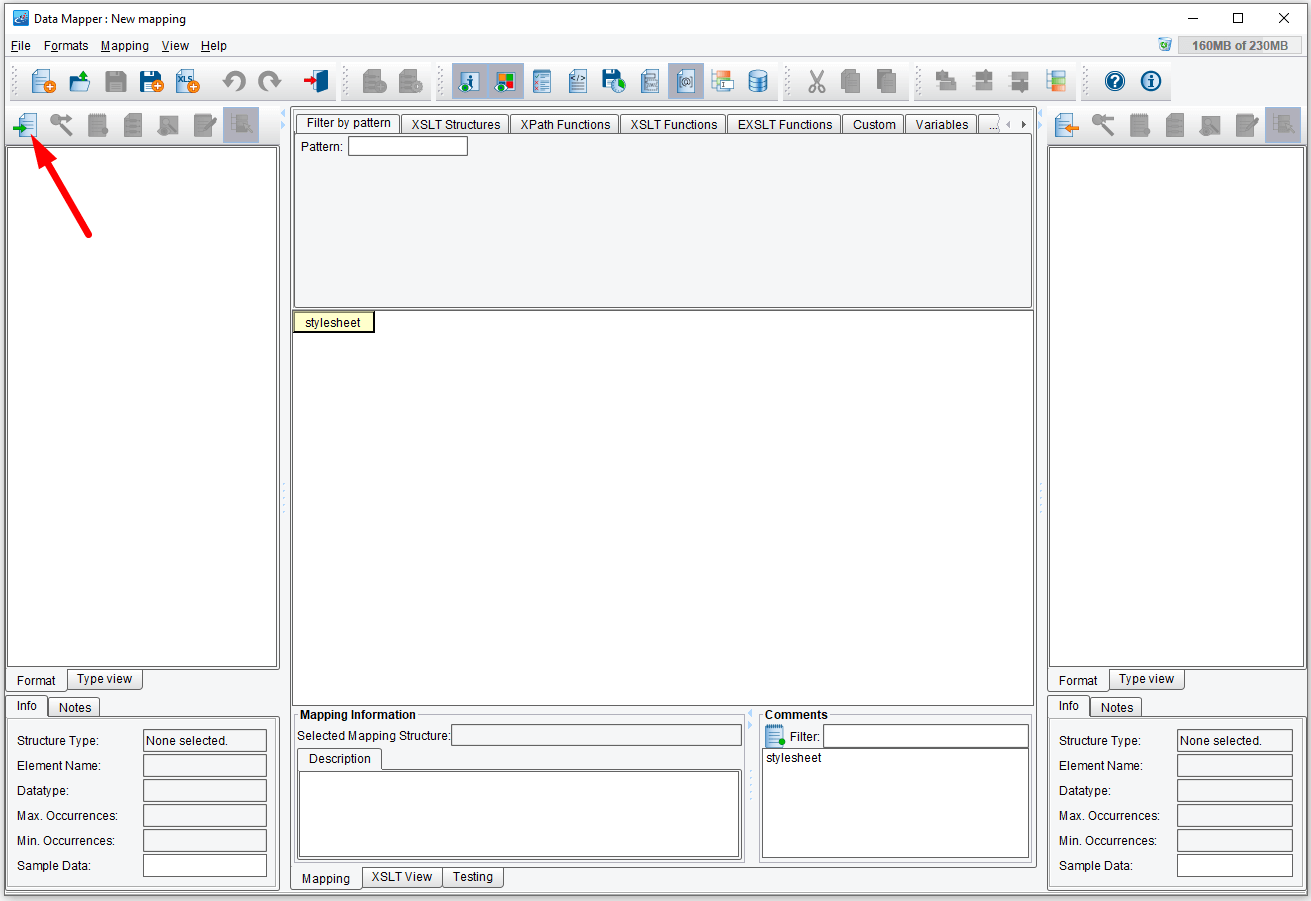
The Data Mapper screen will open. The Data Mapper is the eiConsole’s 3-pane mapping tool. It generates XSLT transformations and enables you to transform any data format to another. In the Data Mapper, you can load the Source Format, load the TargetFormat and then graphically map between the two.
Click the Open Source Format icon above the Source panel.
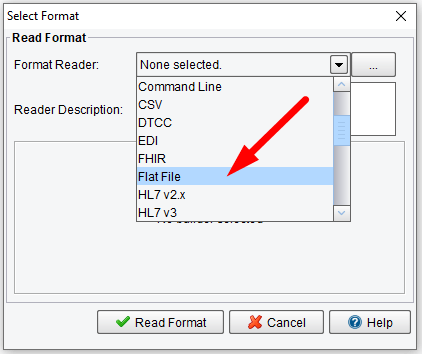
The Select Format dialog will open. To map from a flat-file format, choose Flat File from the drop-down.
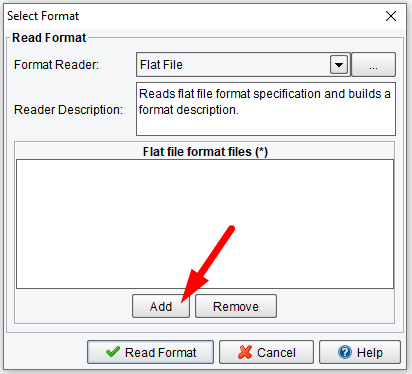
Then, click the Add button below the Flat file format files panel.
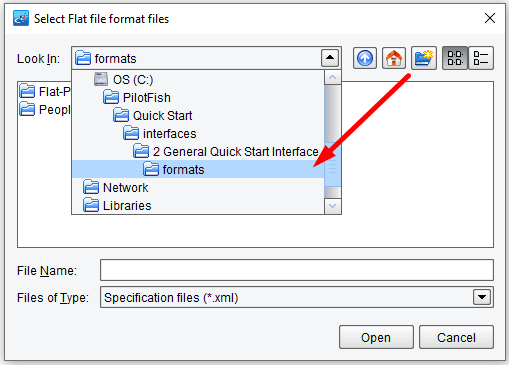
When the Select Flat file format files panel opens, navigate to the 2 General Quick Start Interface directory or your Working Directory, and double-click on the formats folder to open it.
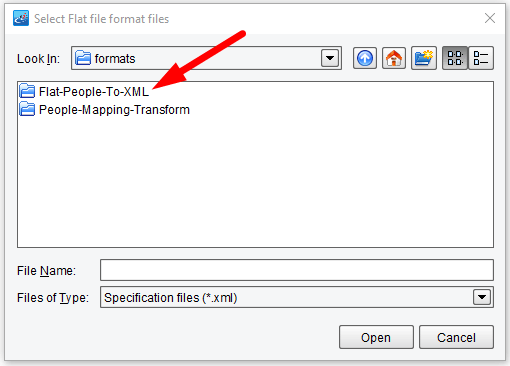
Select the Flat-People-To-XML folder and double-click to open it.

Inside that folder, you’ll find the file specification that was completed earlier. Select the People-FlatFile-Spec.xml file and click Open.
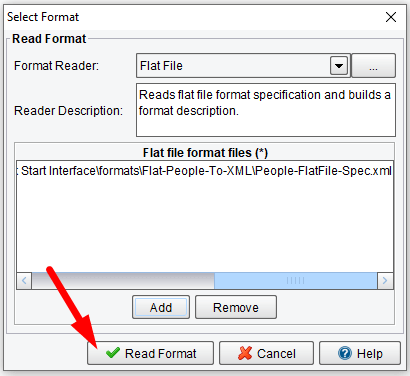
When the Select Format window opens, click the Read Format button.

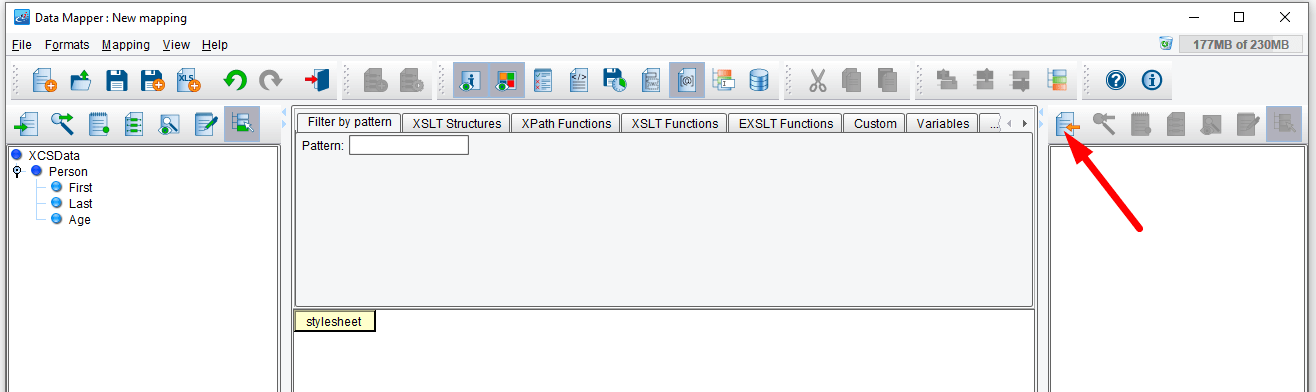
The structure of the flat file will now appear in the tree in the left panel of the Data Mapper. Click the node to expand the tree. On the right-hand side, load the Target Format. (Note, there might be the last element ENDLINE in the Source Format. It will only appear if it has been added in the File Specification step.)
Note: What is a “node” vs. an element? The terminology comes from the XML standard, where any object within an XML tree is called a “node.” “Elements” are nodes that have attributes (also nodes) and child nodes. Generally, they’re pretty interchangeable. A good analogy; you can think of it this way. A “node is like a fruit, and an element is like an apple. An apple is a kind of fruit; an element is a kind of node.”
Note: A node with a bullet to the left is expandable/collapsable and technically an element. But everything – attributes, XSLT instructions, tabular mappings, etc. are all “nodes”.
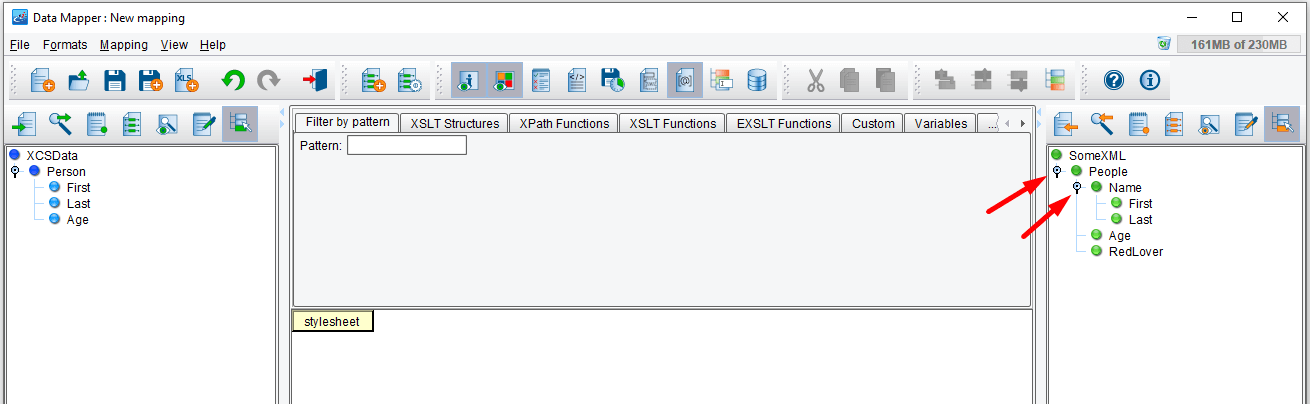
To load the Target Format, click the Open Target Format icon.
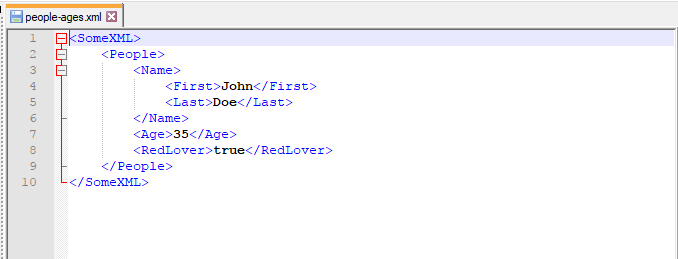
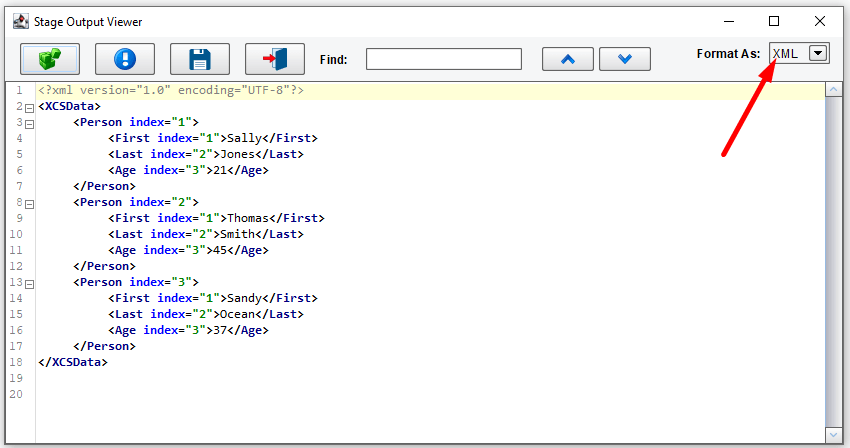
Take a look at the desired Target Format. It is this XML structure shown here. (The people-ages.xml file is in the distribution data folder.)
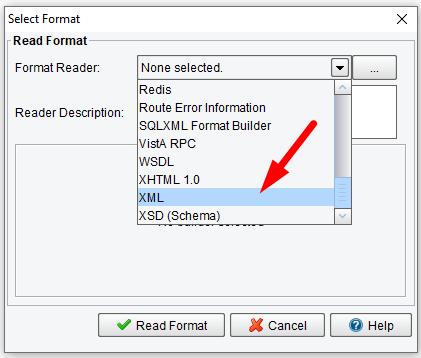
Since there is no schema and only a sample, choose the XML option from the drop-down.
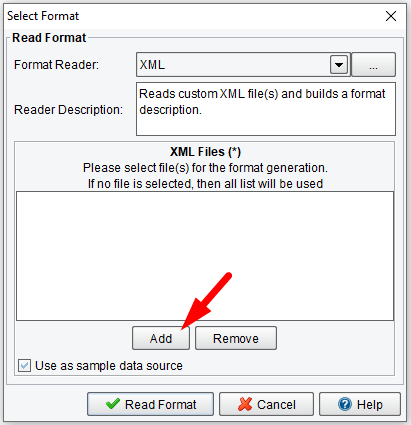
Next, click the Add button under the XML Files list.
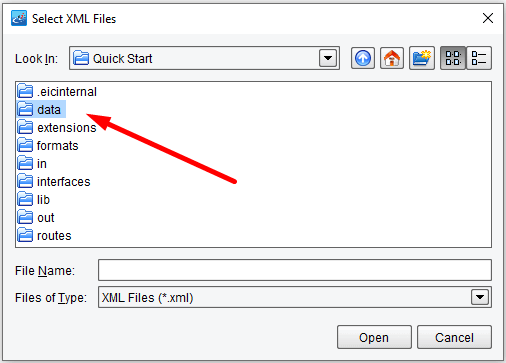
The Select XML Files window will open. Navigate to the distribution folder – /Quick Start/data. Next, select the data folder and double-click to open it.
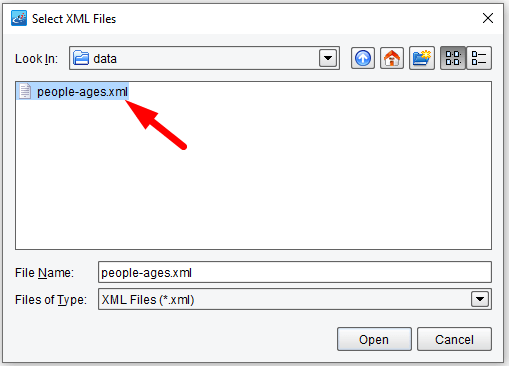
Next, select the people-ages.xml file and click Open.
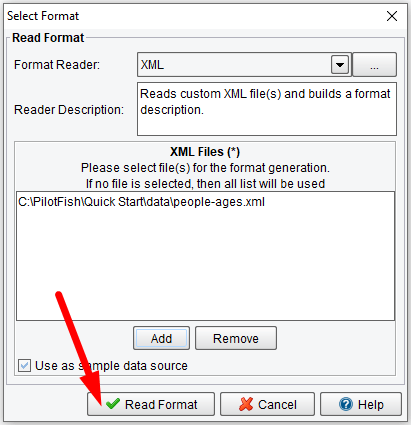
Then click Read Format.
Once the Source and Target structures are set, create a mapping from one to the other. Click the node to expand the tree.
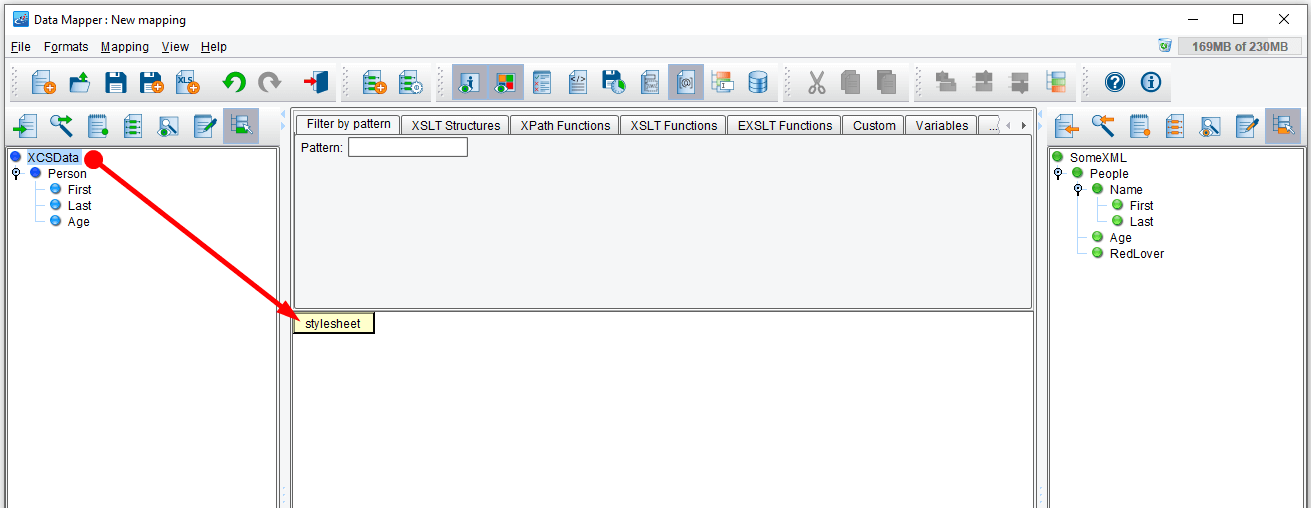
To begin our mapping, drag the root node of the Source Format onto the stylesheet.
TIP: Select the node, click and drag it on top of the style sheet element and release once the green circle with the + appears.
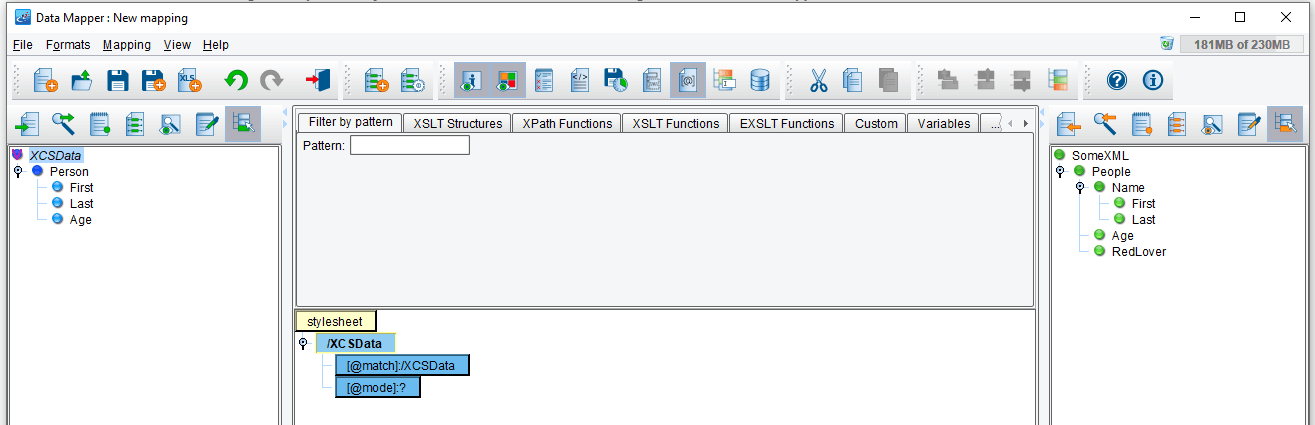
The blue XCSData element should appear under the stylesheet.
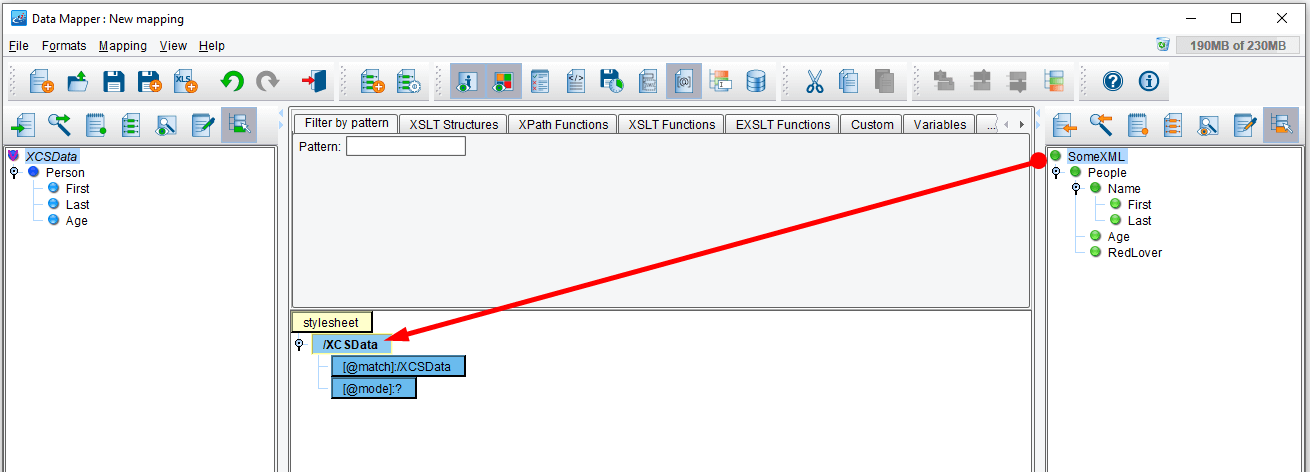
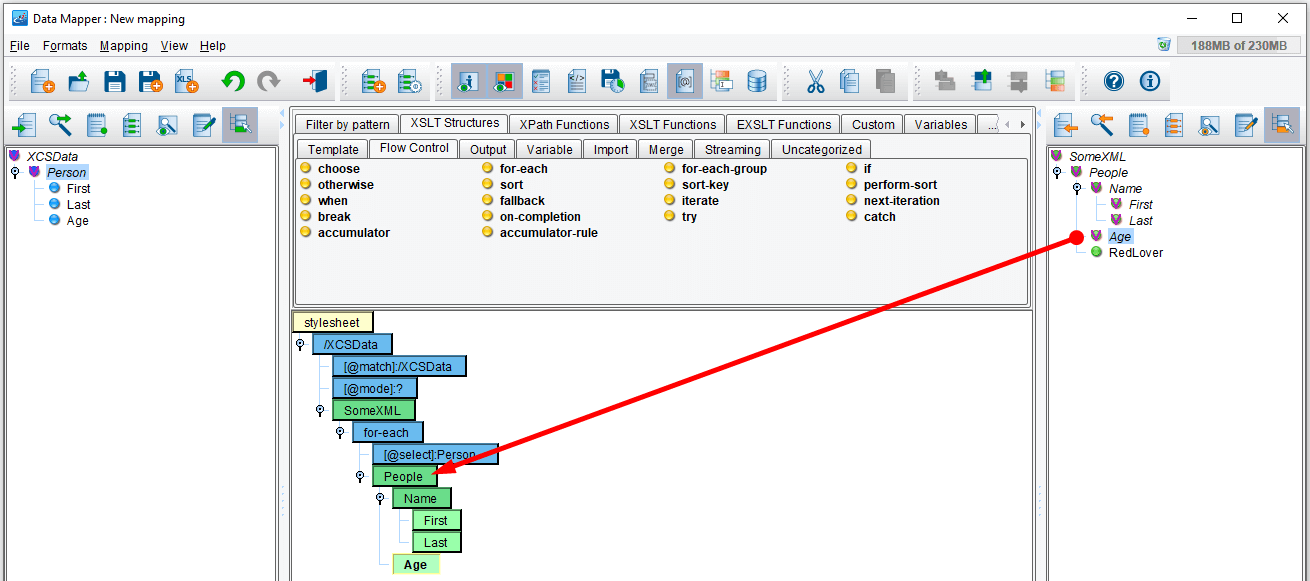
Next, drag the root node of the Target format onto your newly created XCSData node. This indicates that we’ll be creating a SomeXML tag each time we encounter an XCSData tag in our Source.
TIP: When dragging a node onto your mapping, release your mouse once the gray bar appears above the element in your mapping. This indicates the correct position.
Notice the red V that appears over the SomeXML node? This indicates it has been mapped.
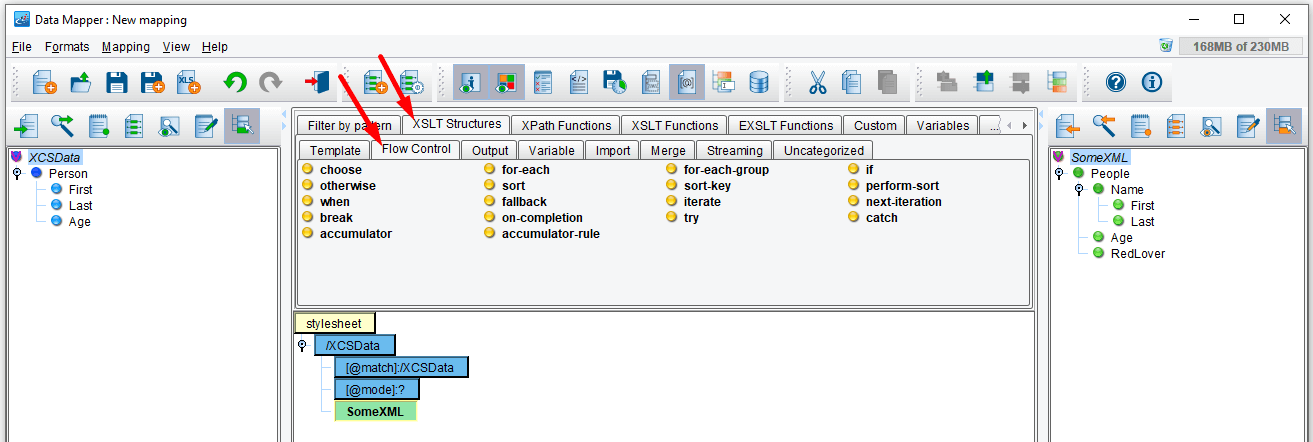
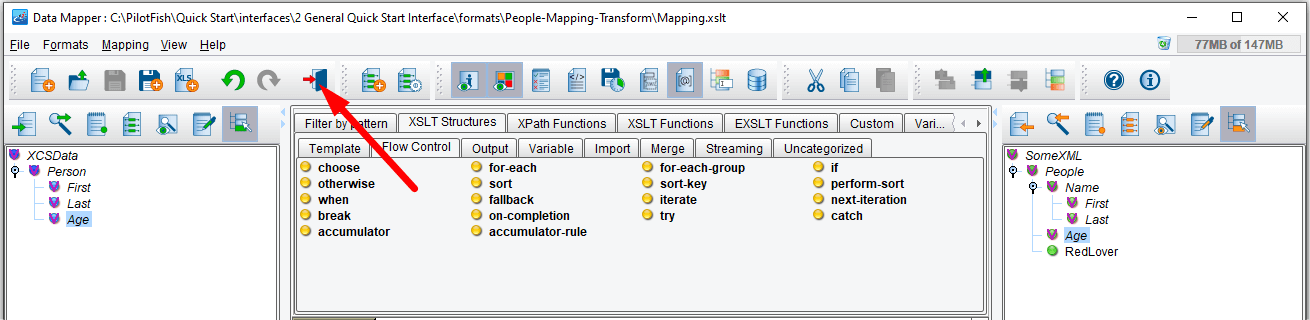
To output a People node for each Person in the Source, select the Flow Control tab in the pallet of XSLT Structures and functions above the mapping.
Note: The Data Mapper’s XSLT palette of structures and functions allows you to do anything you can do by programming via the eiConsole’s drag & drop process.
This tool palette provides a convenient location for all of these XSLT and XPath structures and functions. It allows users to drag & drop these directly into the mapping. Mousing over these palette tabs and their contents describes what each item does.
These structures allow users to perform many-to-one, one-to-many, or many-to-many mappings, manipulate string contents (concatenation, trimming, replacements), date formatting, and many other powerful operations that normally require users to write XSLT directly.

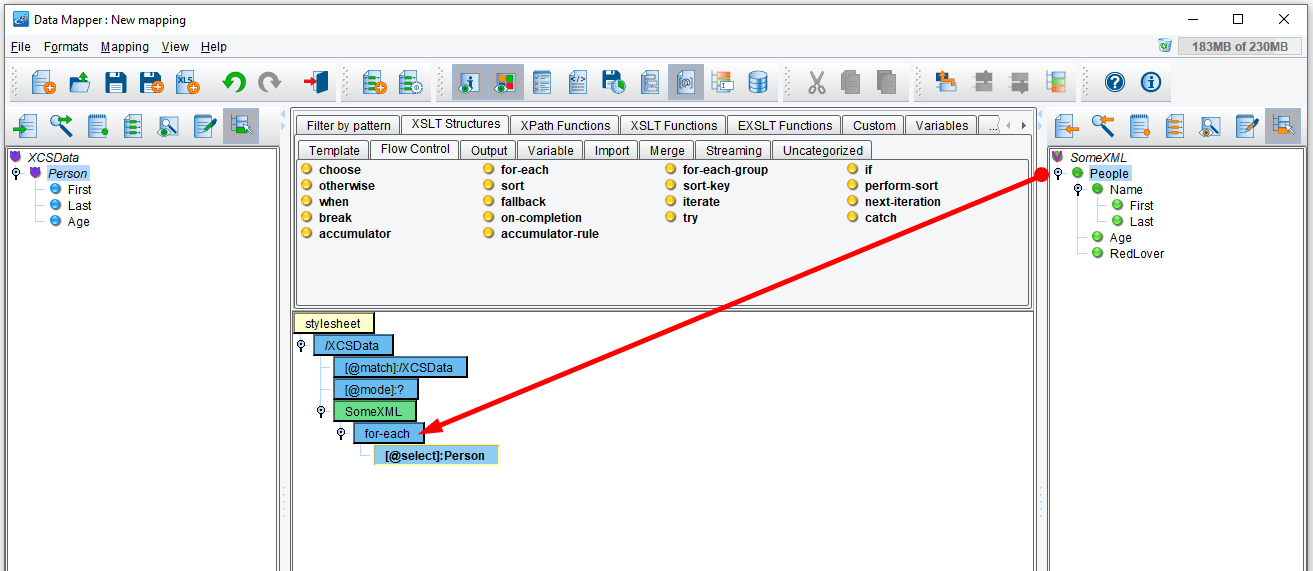
Under the Flow Control tab, select the for-each tool and drag & drop it on top of the SomeXML node. (Once the gray bar appears above SomeXML, it’s in the right location and you can release the mouse.)

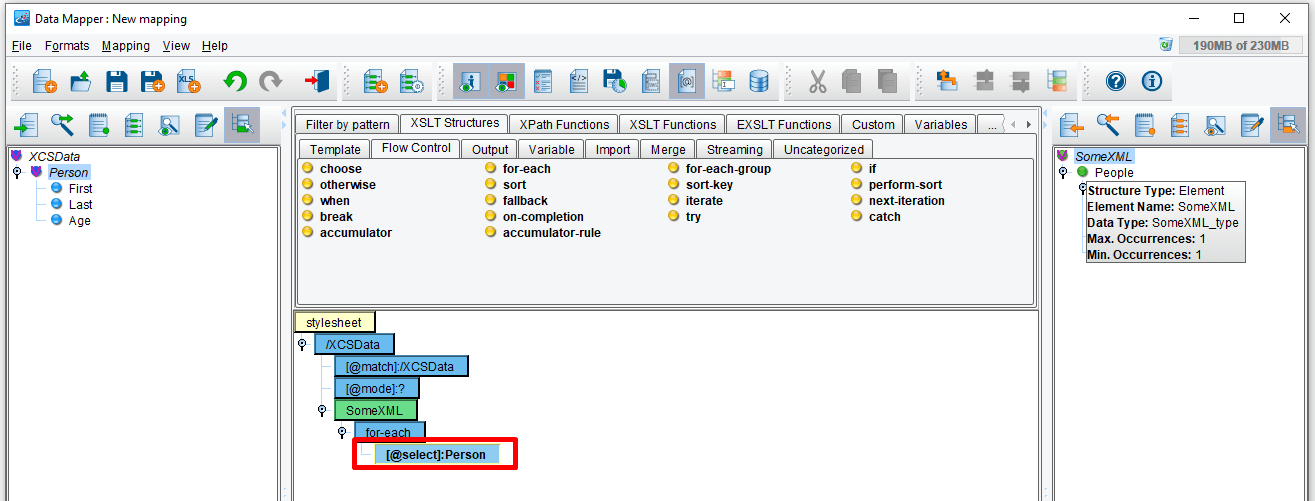
To iterate over each instance of Person in our Source, drag Person onto the select node underneath the for-each. Ensure the gray bar appears above the select node before releasing the mouse. This indicates that some structure will be created underneath SomeXML for each instance of Person encountered in our Source.
Mouse over the SomeXML node and click F1 to view the Help ToolTips.
To generate a People node, drag this on top of the for-each and release the mouse button.
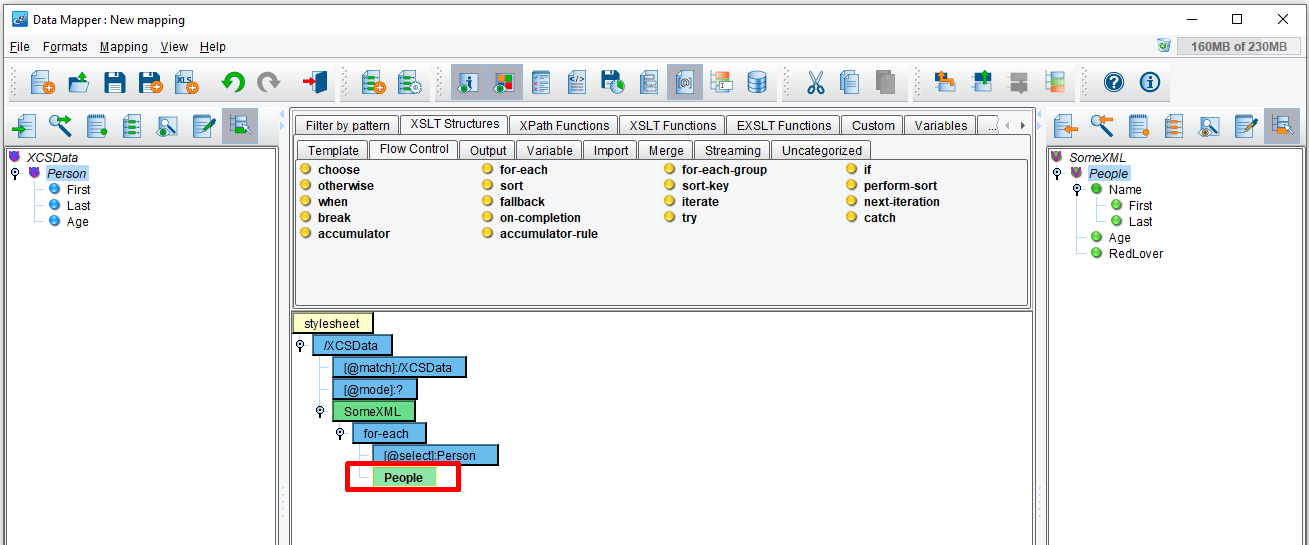
The green People node now appears in your mapping.
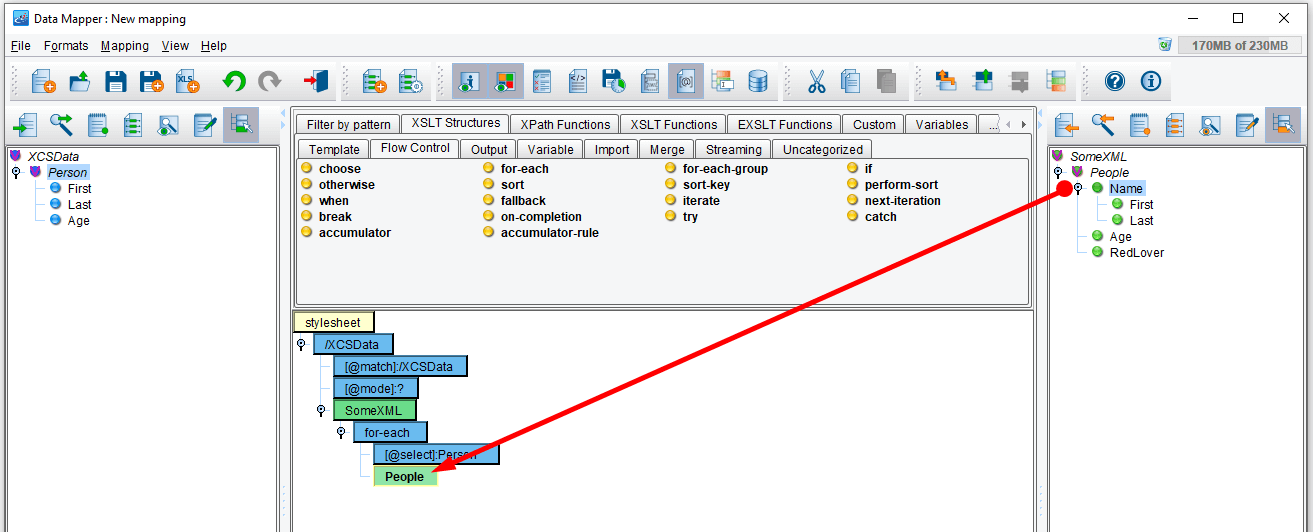
To create the Name, First, Last, Age and RedLover elements, do the following steps. Click the Name node to expand the tree and drag Name on top of People.
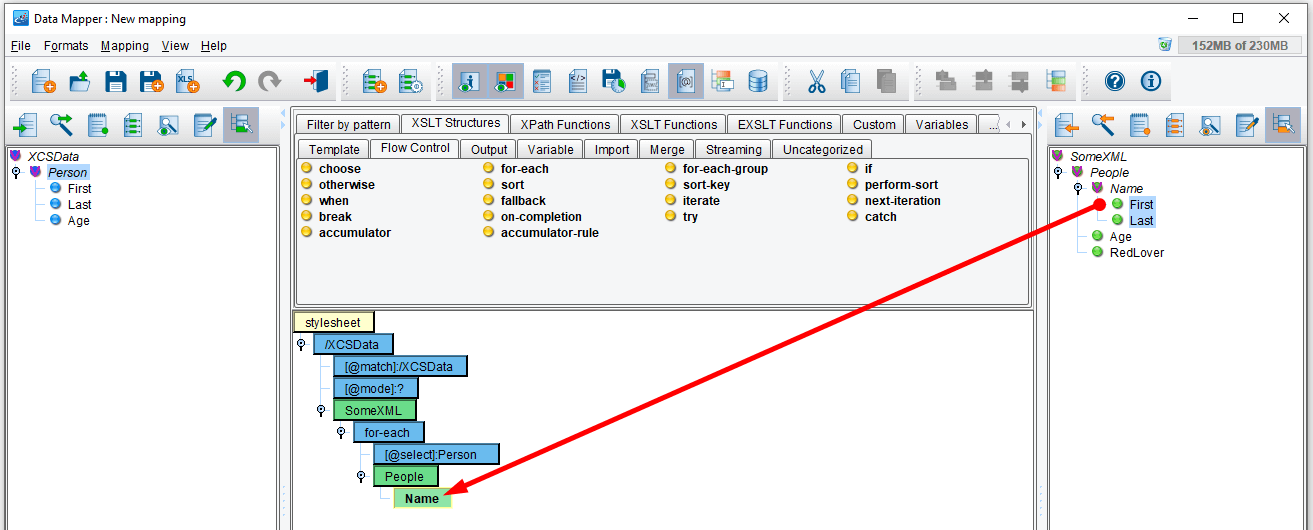
Then drag & drop First and Last on top of Name.
Note: You can drag elements individually or together. Select, shift click and drag.
Drag & drop Age on top of People.
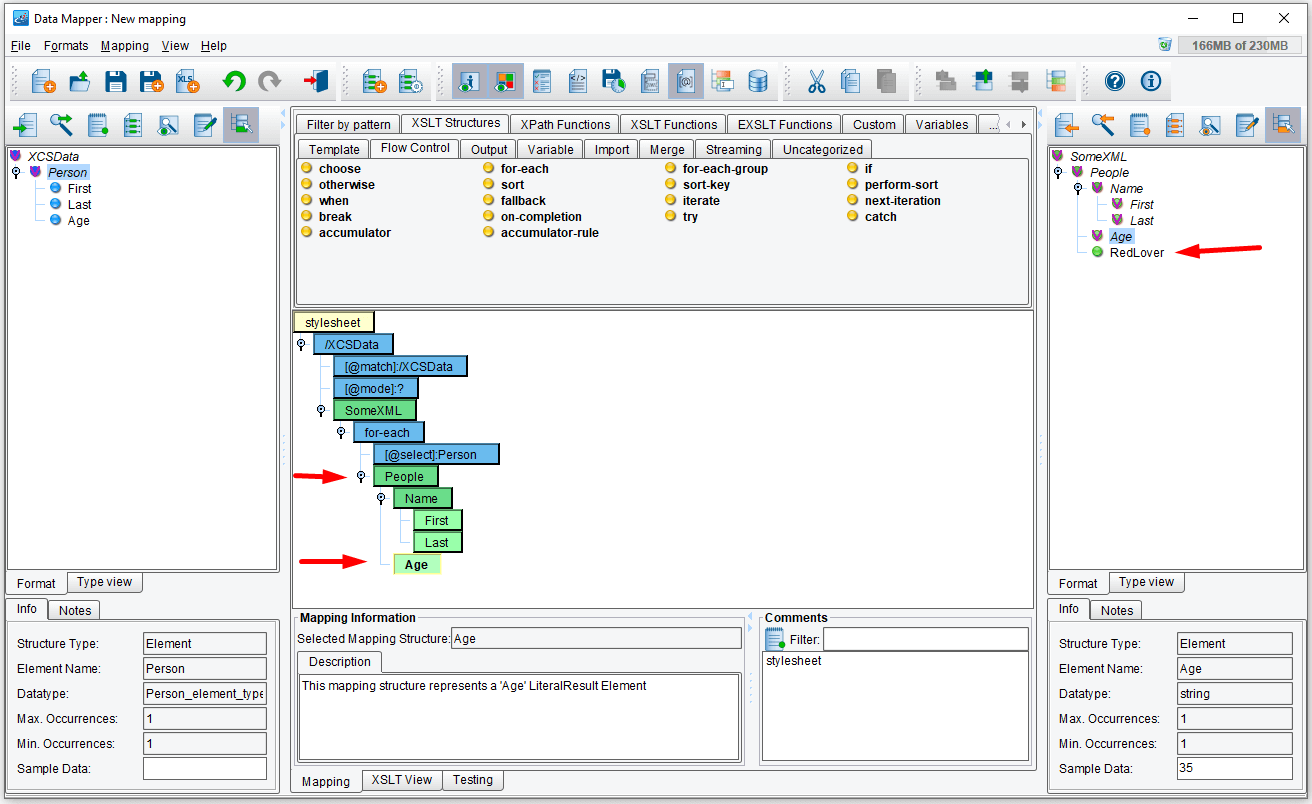
Even though you mapped Age onto People, Age appears in the correct position at the bottom of your mapping.
While RedLover is in the TargetFormat, ignore it for the purposes of this tutorial.
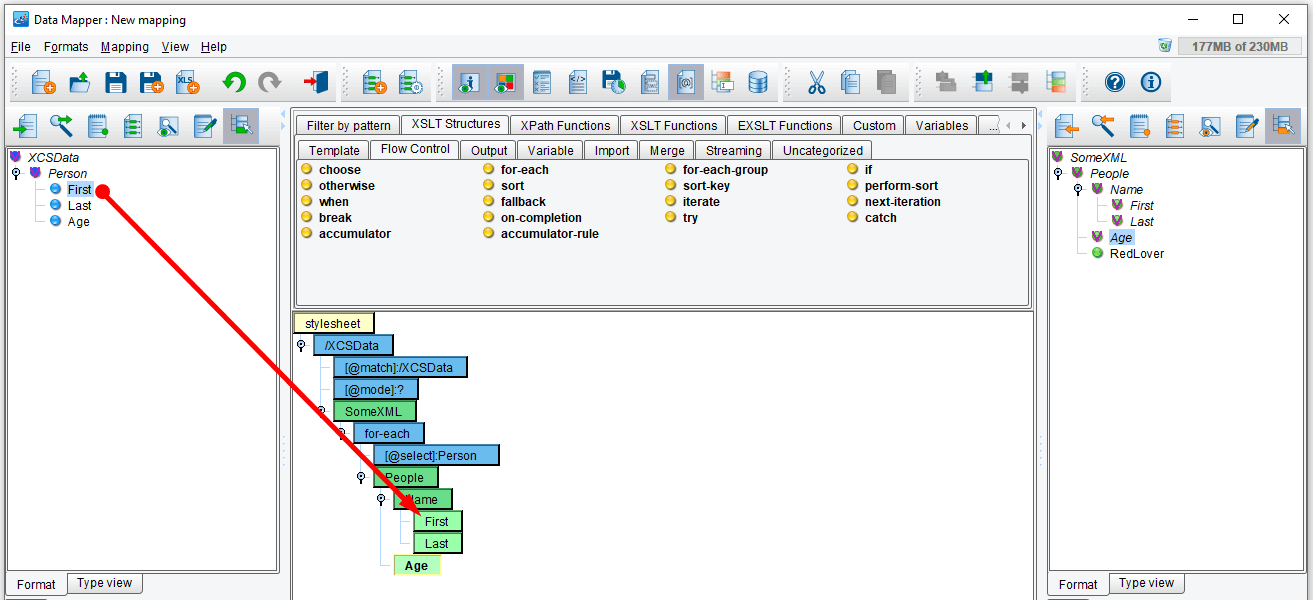
To map the First field from the Source onto the First field of the Target, drag First from the Source onto the green First node in the mapping.
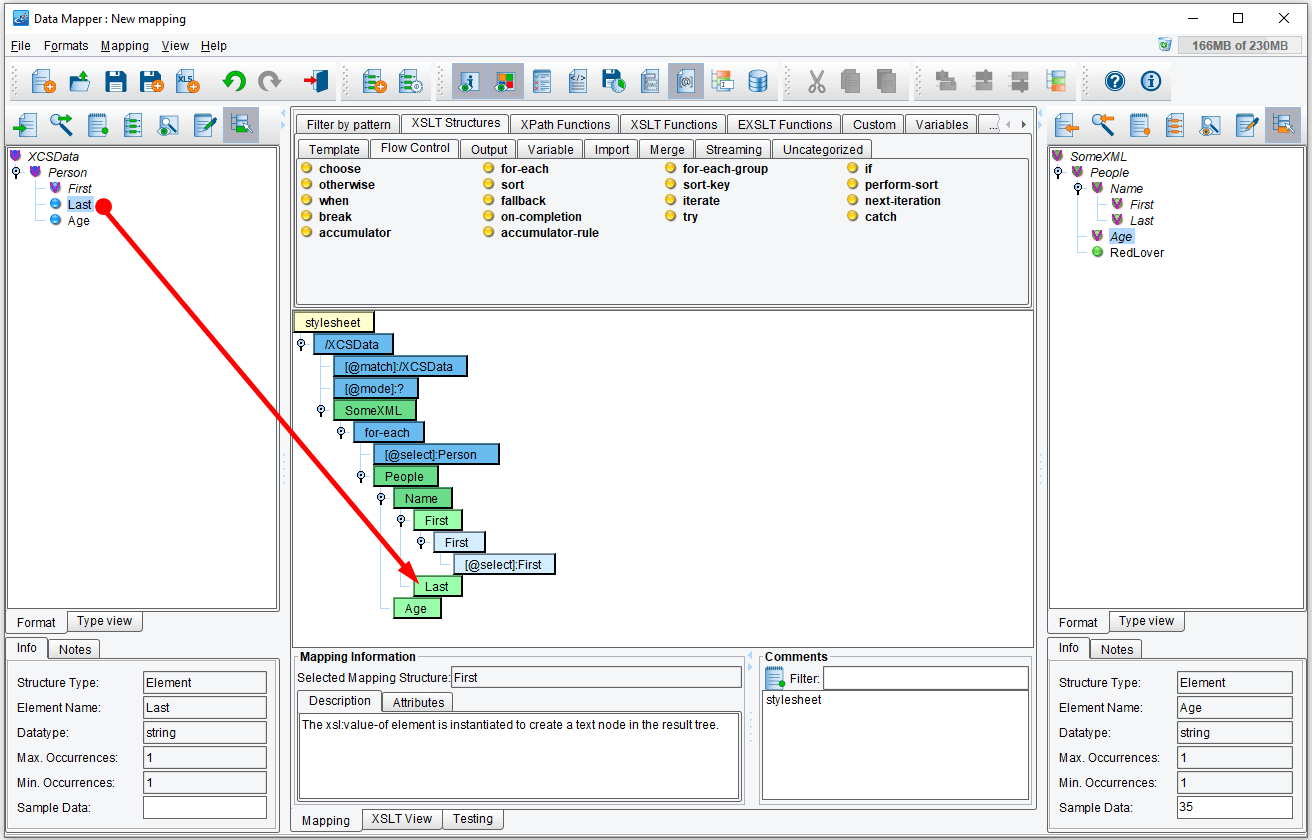
Next, drag & drop Last from the source onto the Last element in your mapping.

Repeat the process by dragging & dropping Age from the source on top of Age in the mapping.

Let’s review what the various colored nodes represent: The blue nodes are from your source, and the green are from your target. Light blue elements are “childless” fields and light green elements are “childless” elements. Dark blue and dark green elements have children (sub-elements). Attributes are always light green because they would never have children.
Other features available within the Data Mapper are:
- Information Panels
- Notes Tabs
- Type View Tabs
DATA MAPPER FEATURES – INFORMATION PANELS
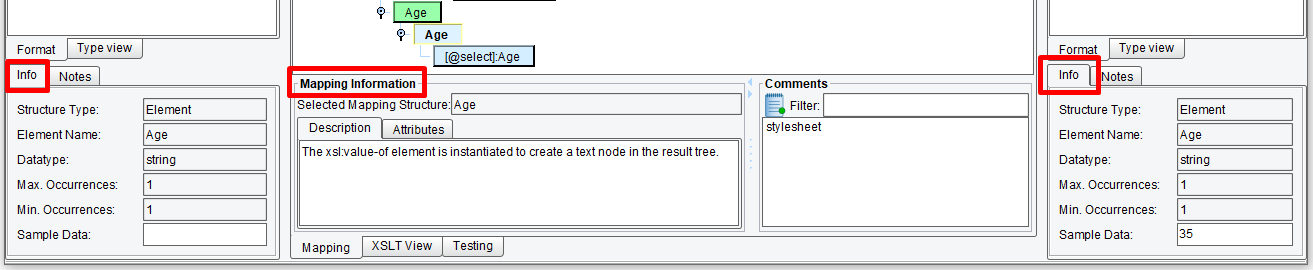
The Data Mapper has three information panels. The information panel in the center provides high-level information about a selected node. It allows you to individually edit attributes for XSLT elements and modify tabular mappings.
The information panels on the source and target show sample values for the selected node (called “sample data”); they also offer tabs for format descriptions and typecodes (for the ACORD standard, for example). This applies to both source and target.
DATA MAPPER FEATURES – NOTES TABS

The notes tab, in source and target, allows users to associate comments with a particular node. You do this by selecting an item in the source or target, clicking the Notes tab, then right-click in the empty (grey) space and selecting Add > Define new. Then provide a name for your notes. This name applies to all notes you define so that you can think of it as a group (e.g., “John’s Notes”).
Once added to a node, you can type in the information in the Notes panel. You’ll see a note icon in the source/target panel for any node you’ve added notes to.
You can also right-click in that panel again to add more notes (e.g., “Consultant Notes”).
The functionality of notes is that if multiple users are managing a mapping, they can use these notes to provide comments or information to one another or just as a convenient placeholder for comments.
DATA MAPPER FEATURES – TYPE VIEW TABS

Type view, in source and target, is mainly for schema maintenance and editing or for users who are really familiar with the format in its raw definition. For example, very experienced ACORD users can use it to find or just look up information about types in the ACORD model.
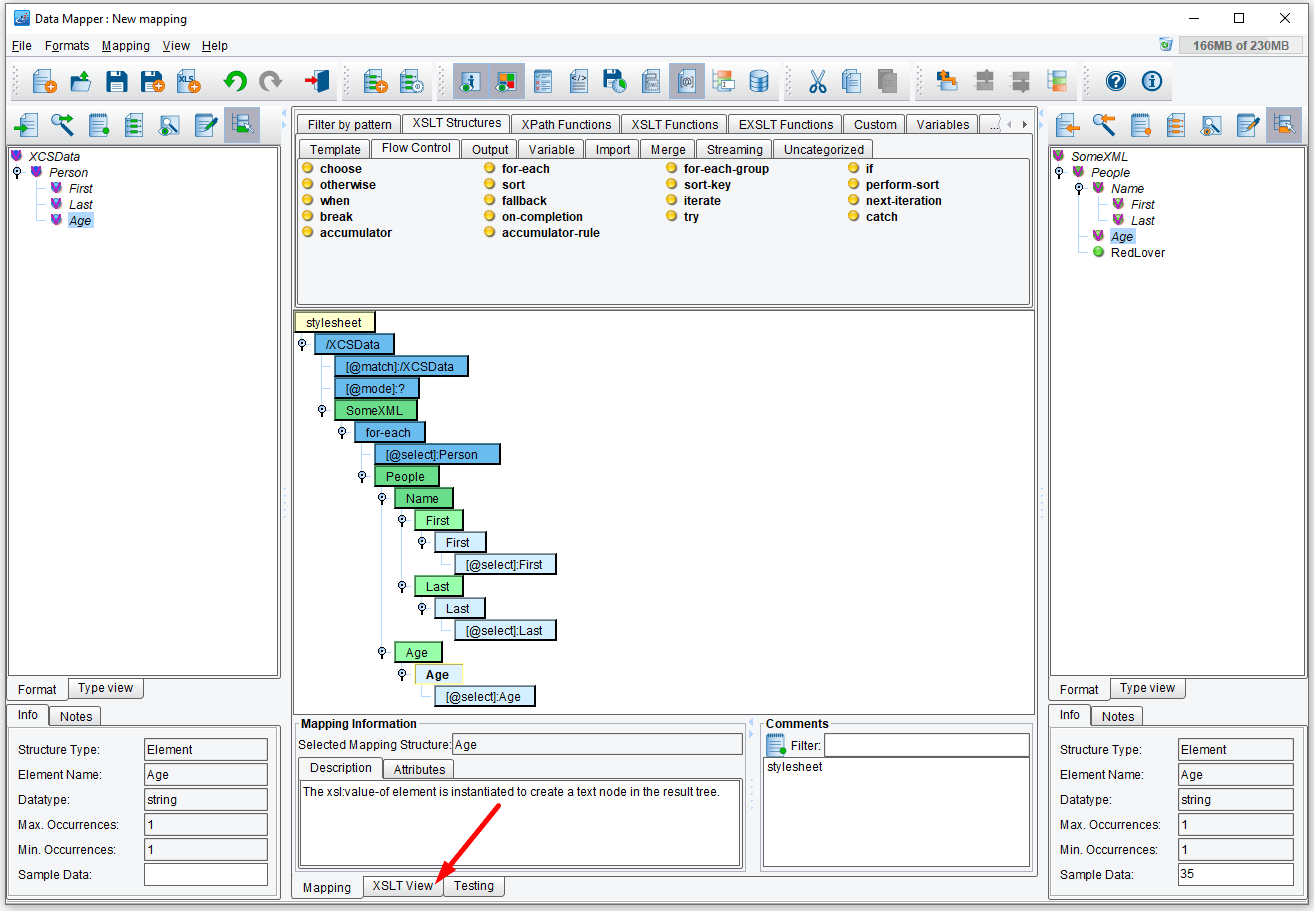
Click the XSLT View tab to view the generated XSLT.
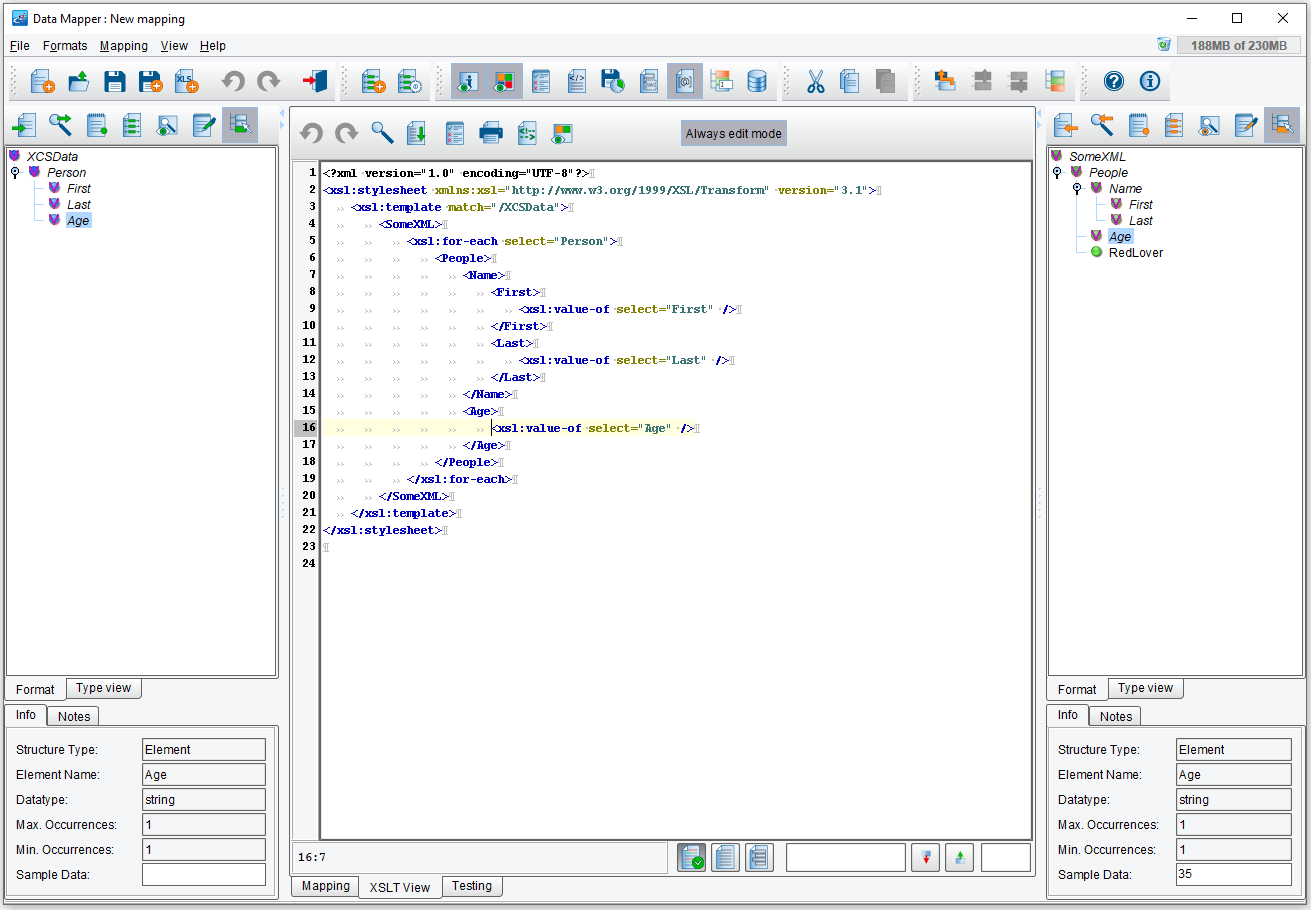
This is the XSLT generated by the Data Mapper.
Note: The Data Mapper generates W3C-compliant XSLT, in real-time, under the graphical view. There is no proprietary scripting or coding. Users can access the XSLT anytime by clicking the XSLT view tab. Should a user choose to work in the XSLT mode, the graphical view will also be updated in real-time. Users who wish to perform complex or specific functions unavailable via the eiConsole’s wide range of XSLT structures and functions can leverage the virtually unlimited reference materials and many user groups on the web. Once they find what they want, they can simply copy and paste it into the XSLT view.
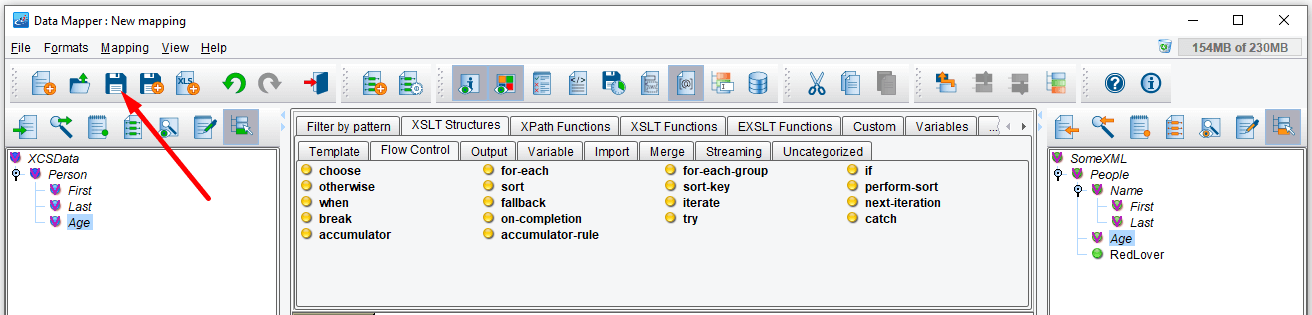
Save your mapping by clicking the Save Current Mapping button.
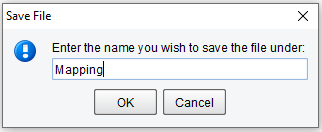
You’ll be prompted for a name in the Save File dialog. You can simply enter the name “Mapping” and click OK.
You can then return to the console by clicking the Return to Console button.
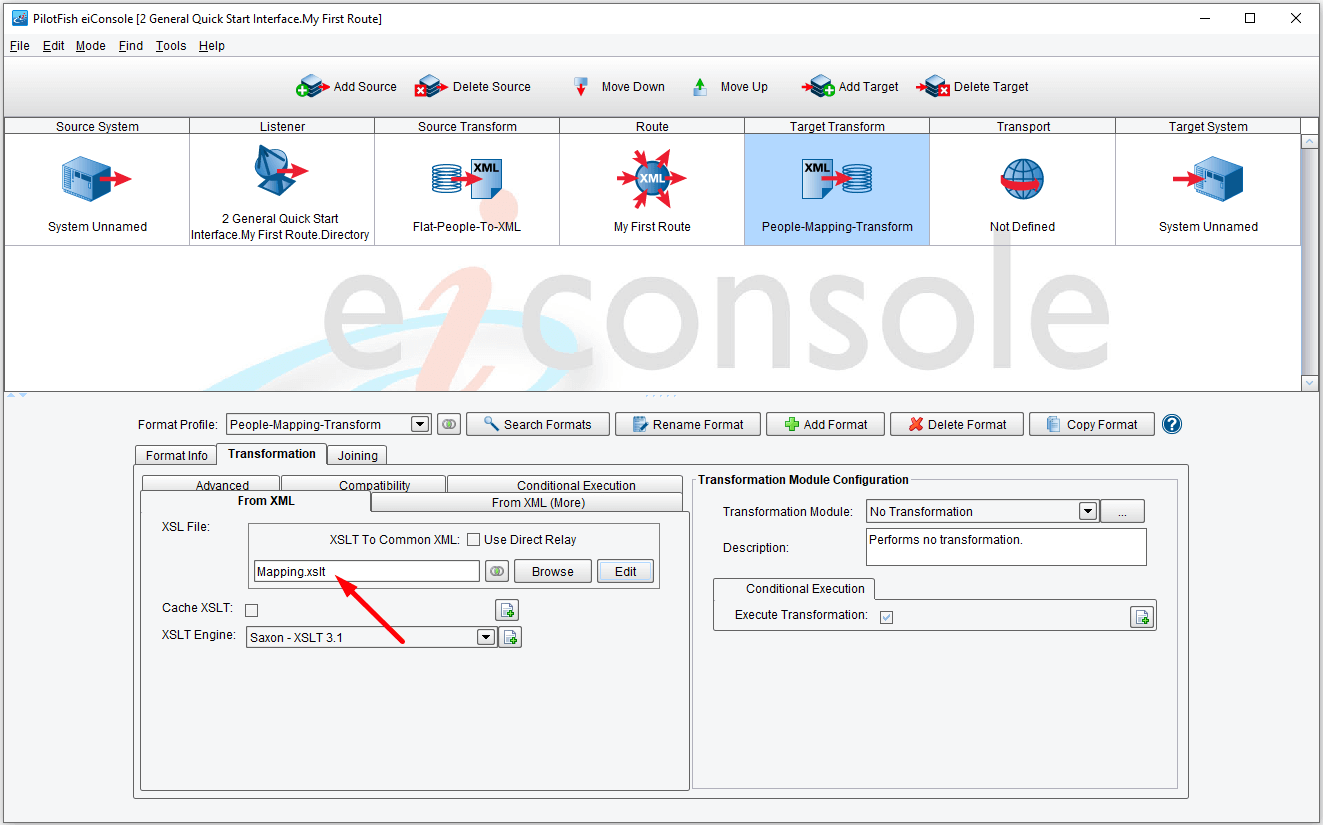
The name of the configured mapping now appears in the XSLT Configuration area. Now, click the Transport icon.
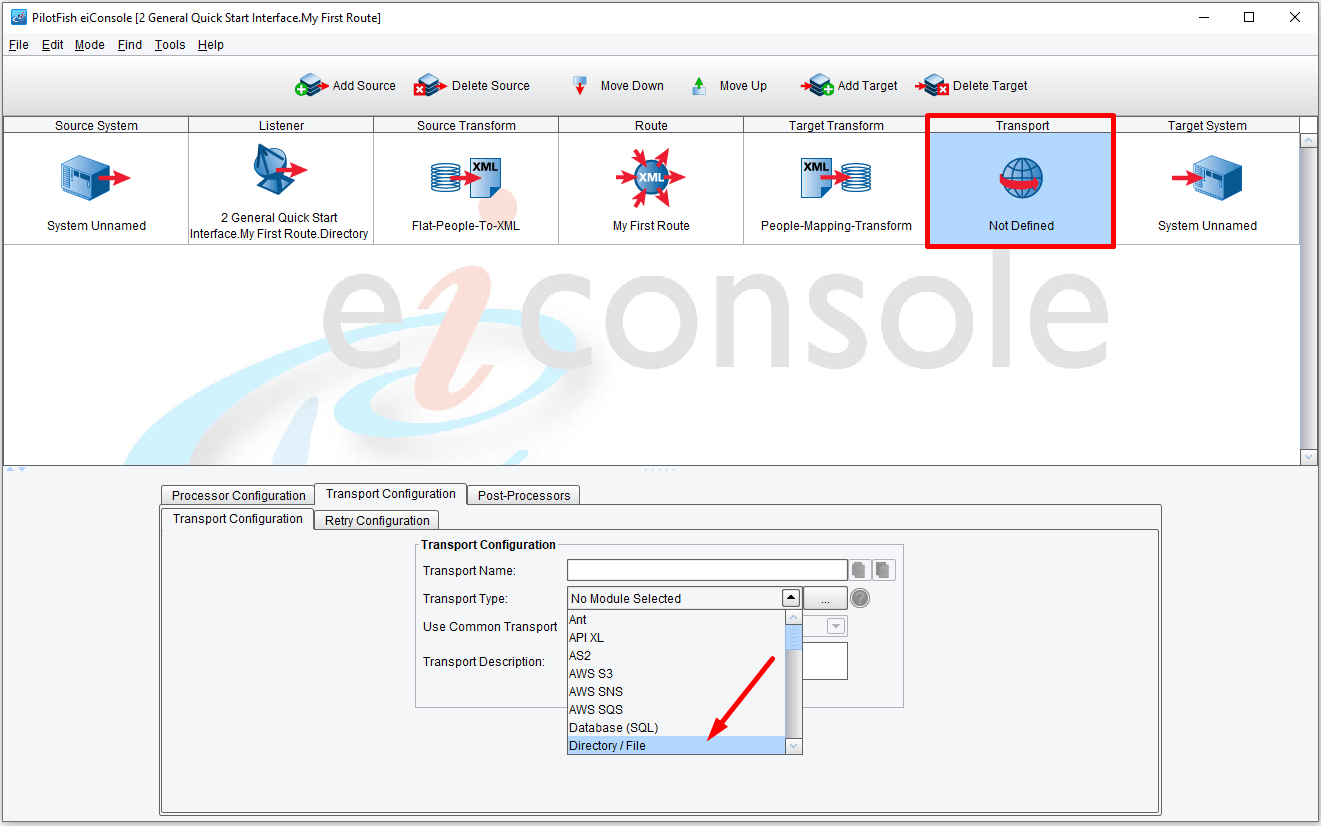
To drop the transformed XML off in a file, select Directory/File in the Transport Type drop-down.
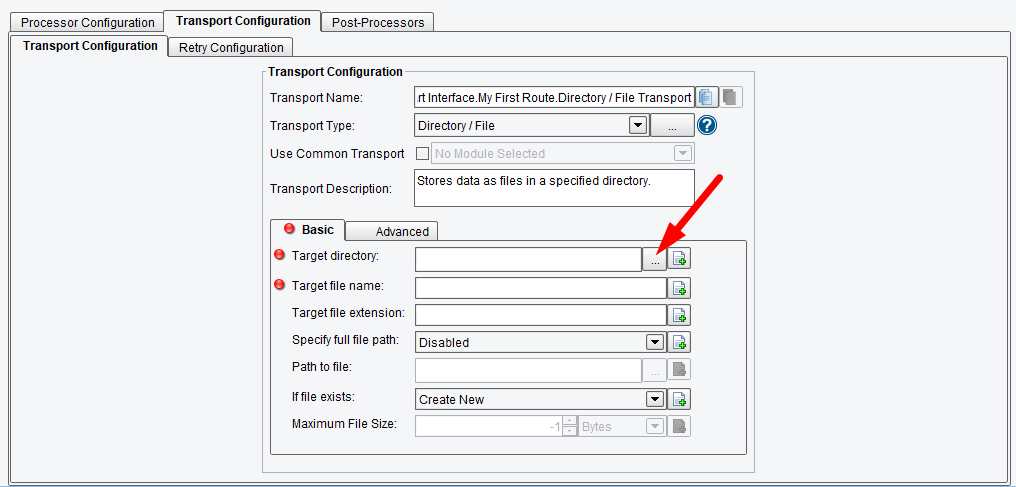
When the Transport Configuration panel opens, configure the required items. Click the Ellipsis button next to the Target directory configuration item.
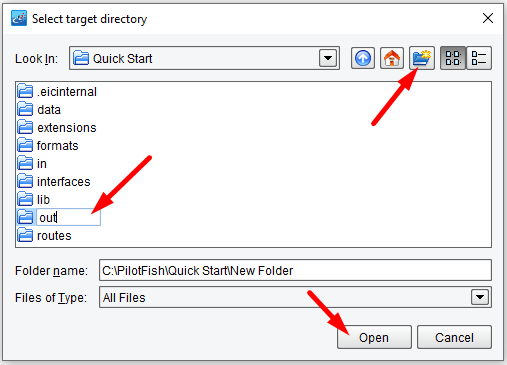
Navigate to the Quick Start directory. Select the New Folder icon to create a new folder and name it “out”. Select it and click Open.
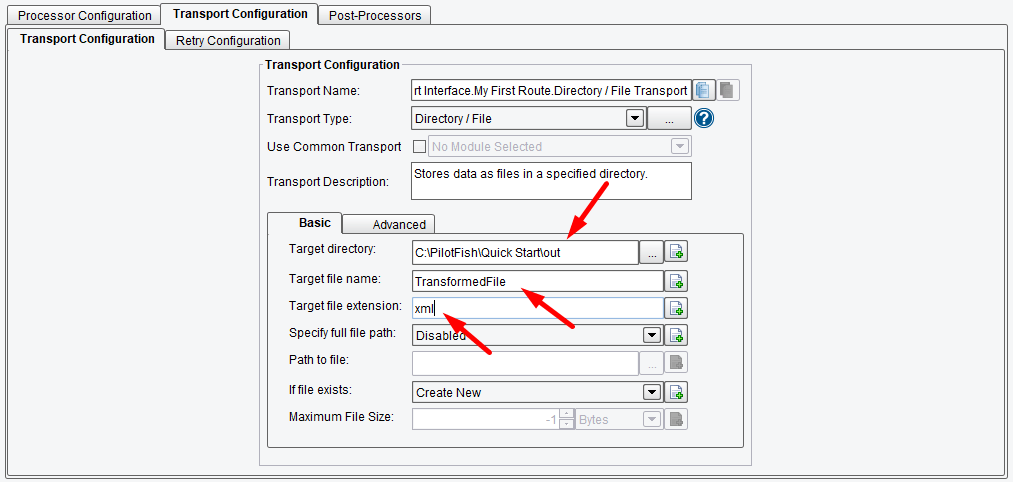
The out folder is now set in the Target directory.
In the Target file name area, type in “TransformedFile”.
In the Target File Extension, type in “xml”.
To make the interface a bit more understandable, provide Metadata for the Source and Target system.
Source & Target System Metadata
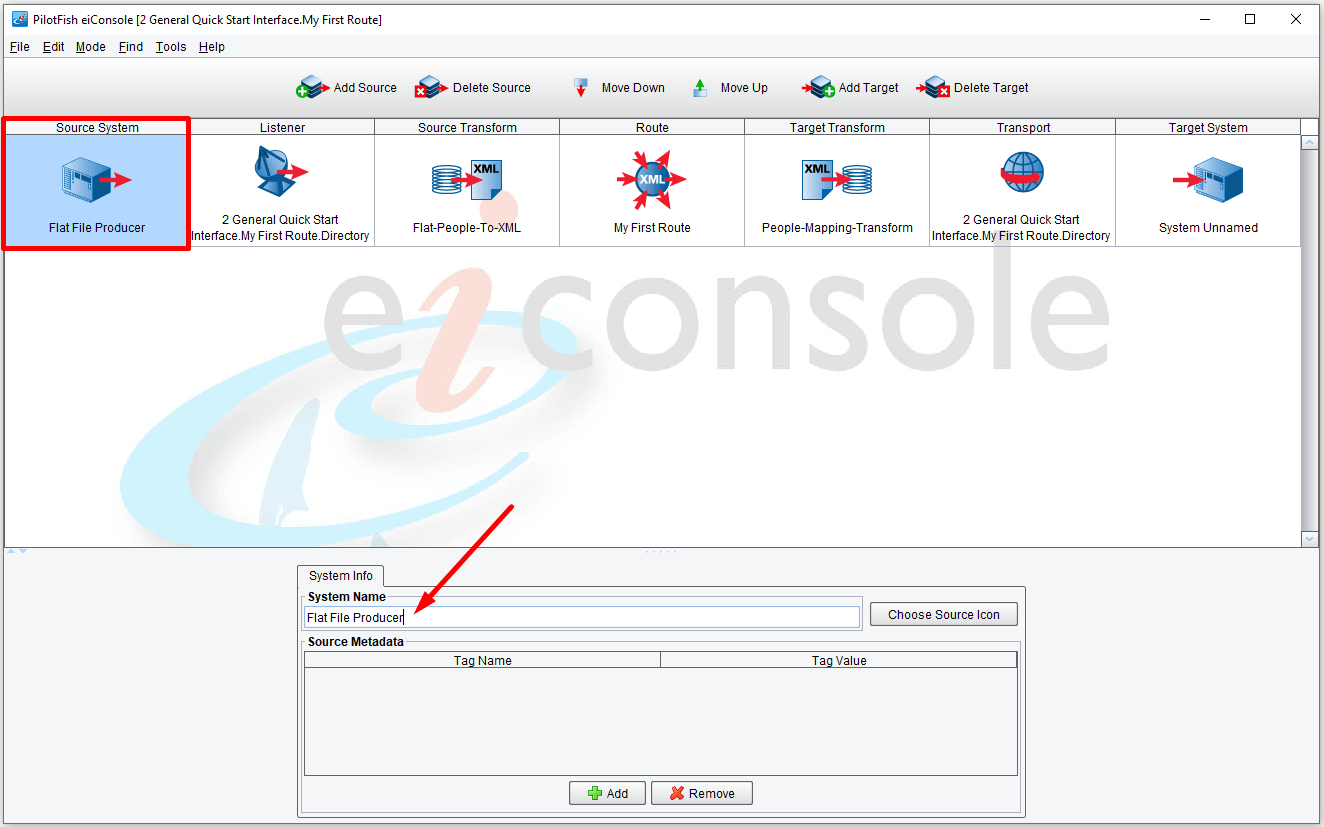
Click on the Source System stage and type “Flat File Producer” in the System Name text box.
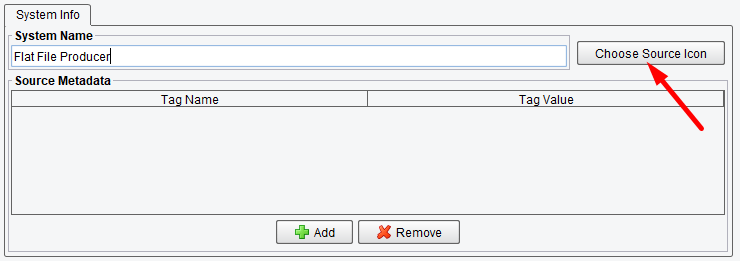
Also, you can set different icons for each of your Sources. We have only one source in our example, so let’s choose an icon for it. Click on the Choose Source Icon button.
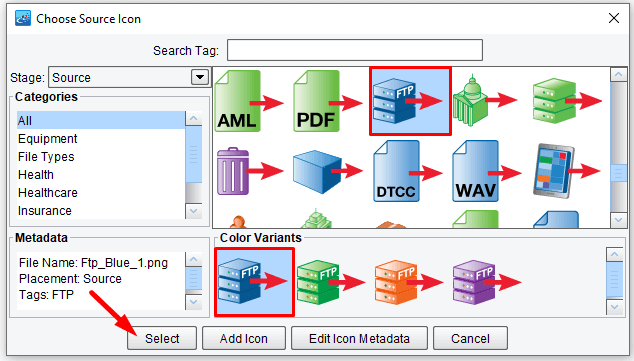
There are a number of icons in the Choose Source Icon dialog. Choose the FTP Server icon and click OK.
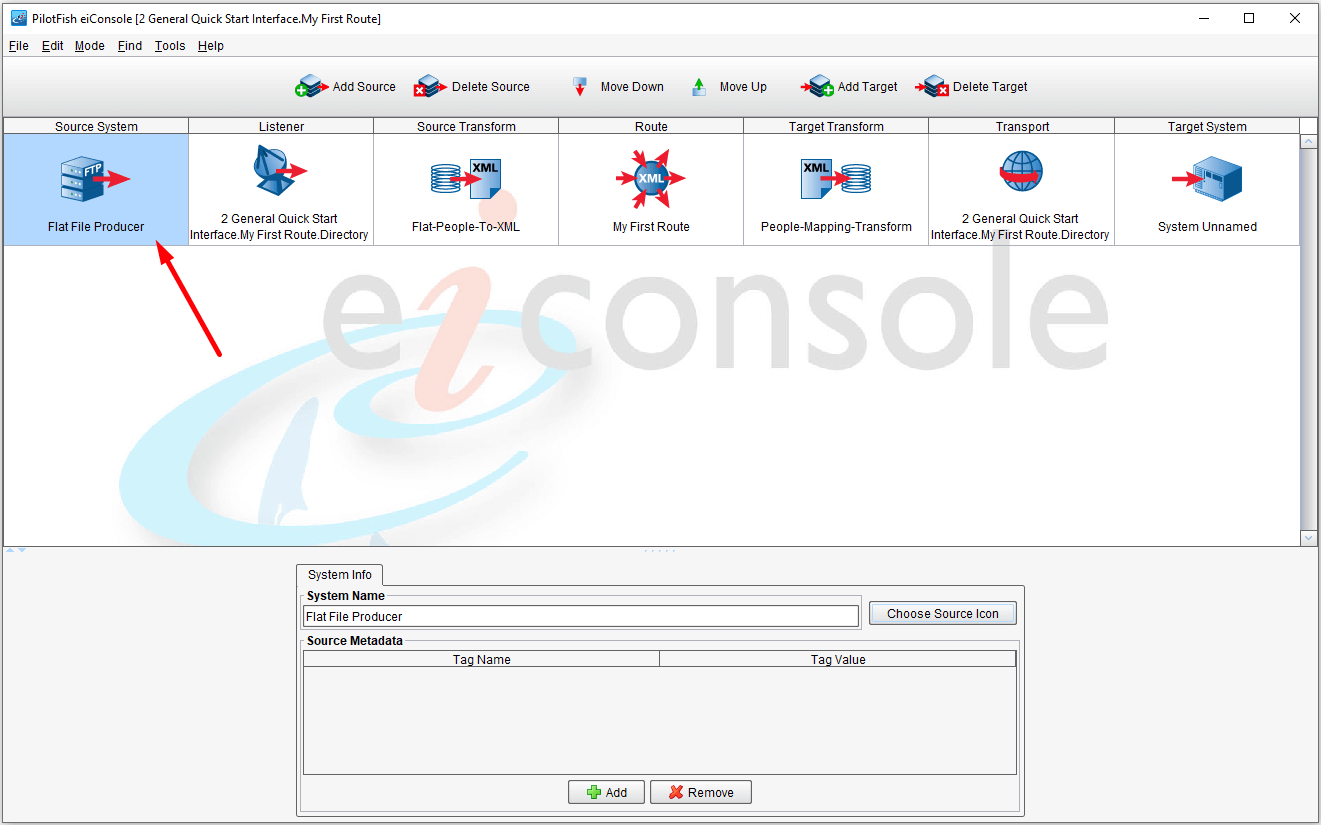
The new icon will appear in the main grid of the eiConsole.
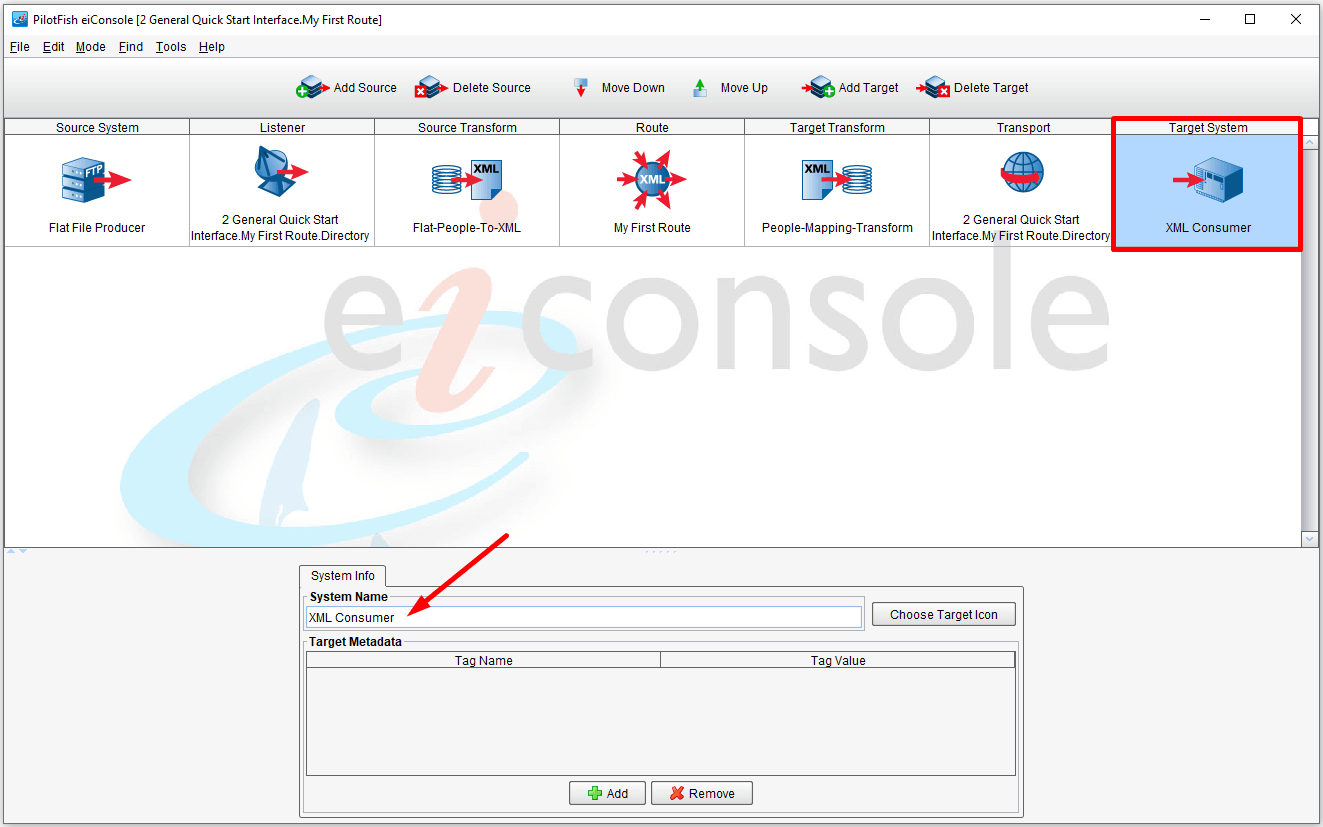
Next, click on the Target System stage—type “XML Consumer” in the Target System Name text box.
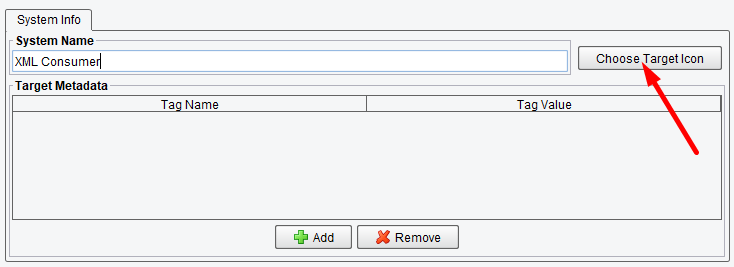
And click on the Choose Target Icon button to set a unique icon for your Target.
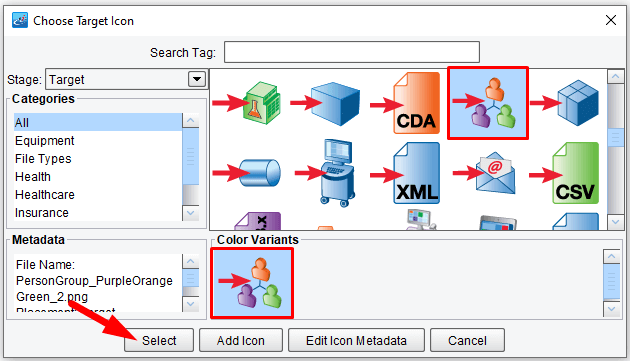
You can choose any relevant icon. We’ll use the Group People.
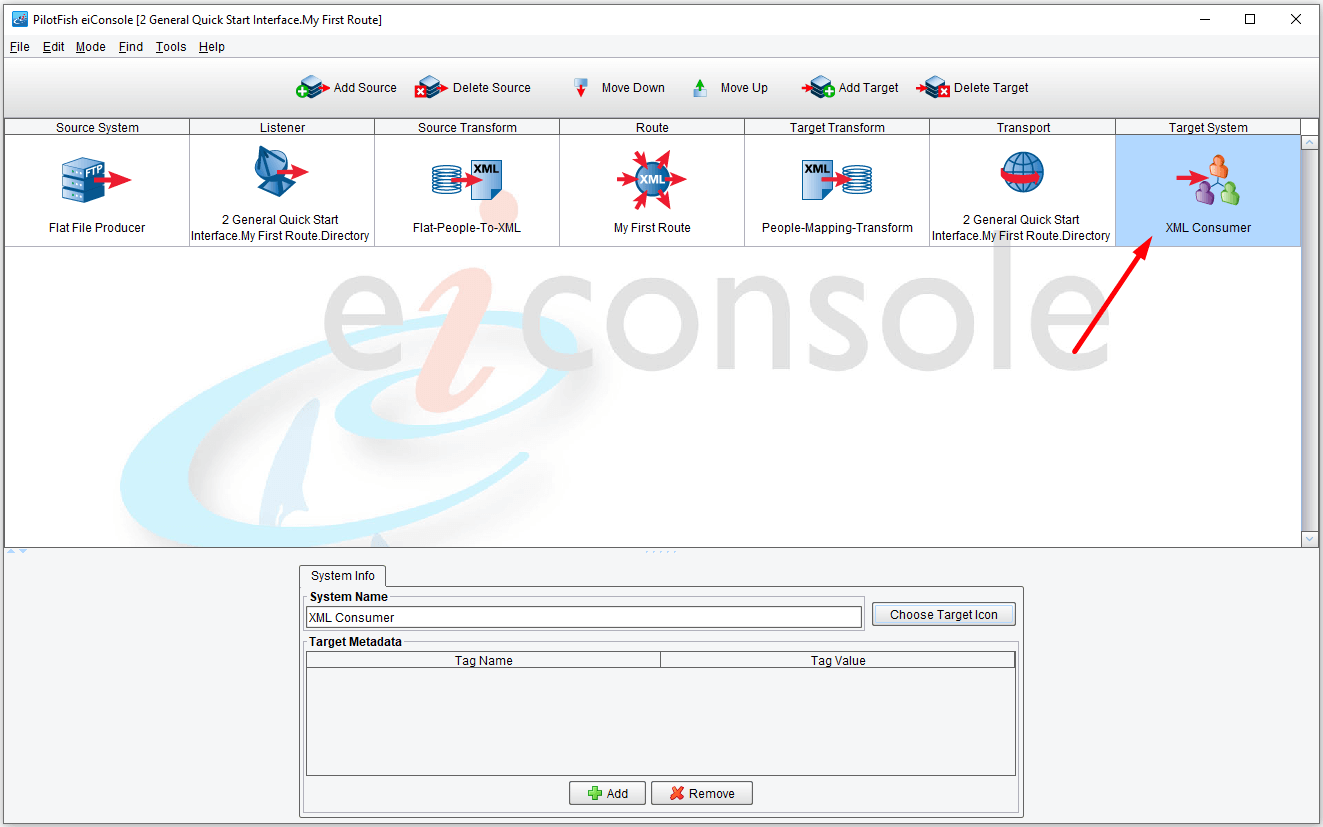
The new icon will appear in the main grid of the eiConsole.
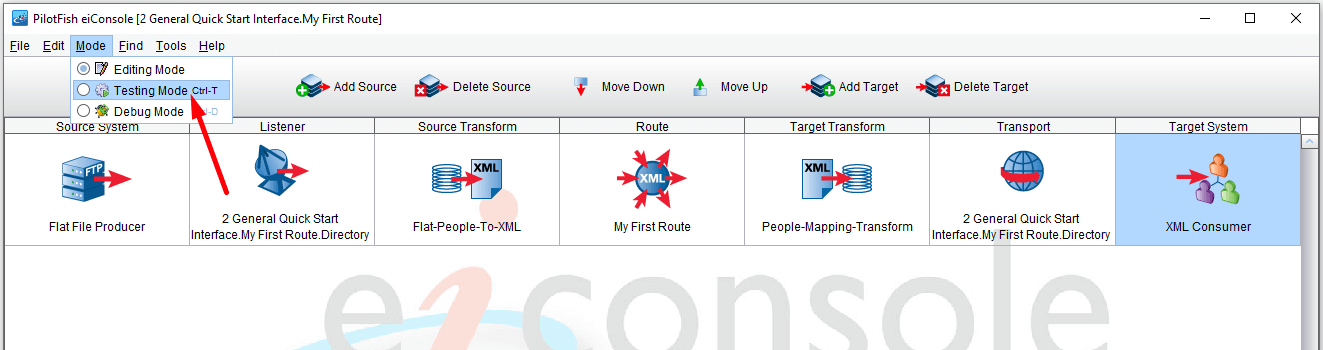
When the basic interface configuration is complete, move on to Testing Mode. From the Mode menu, select Testing Mode.
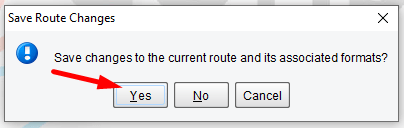
When the Save Route Changes pop-up appears and you are prompted to save the route, click Yes.
Testing Mode
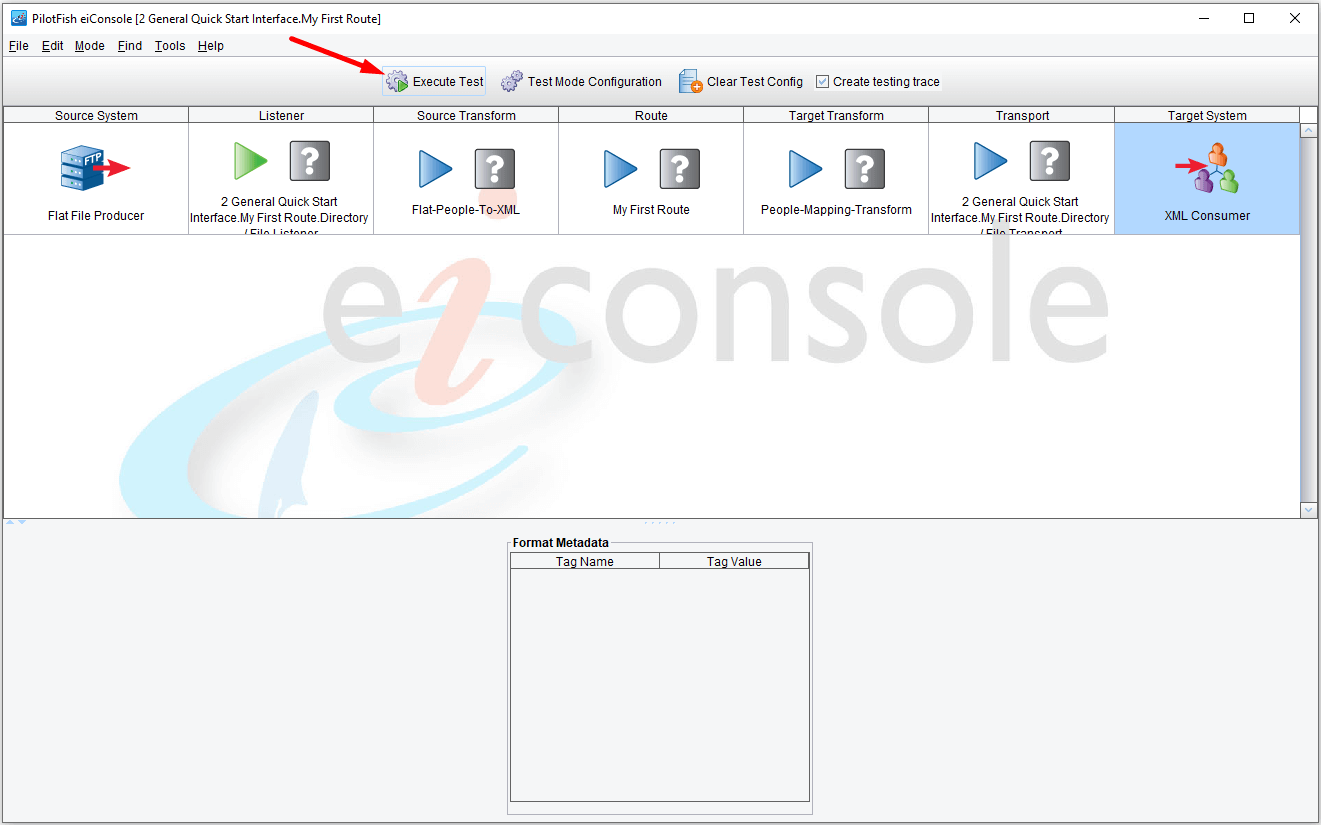
In Testing Mode, you’ll see the arrows that indicate the test’s path. You can choose to start or end your test at any point. Here, start from the beginning (the Listener stage) and run the test all the way through to the end (the Transport stage).
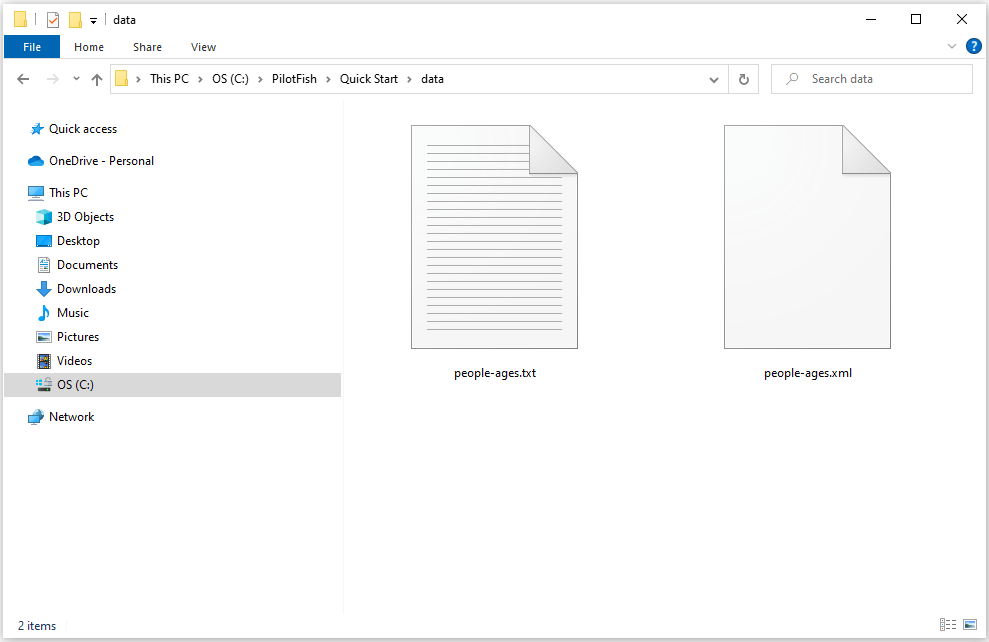
For the test, navigate to the distribution folder. Double-click the data folder, select the people-ages.txt file and copy.
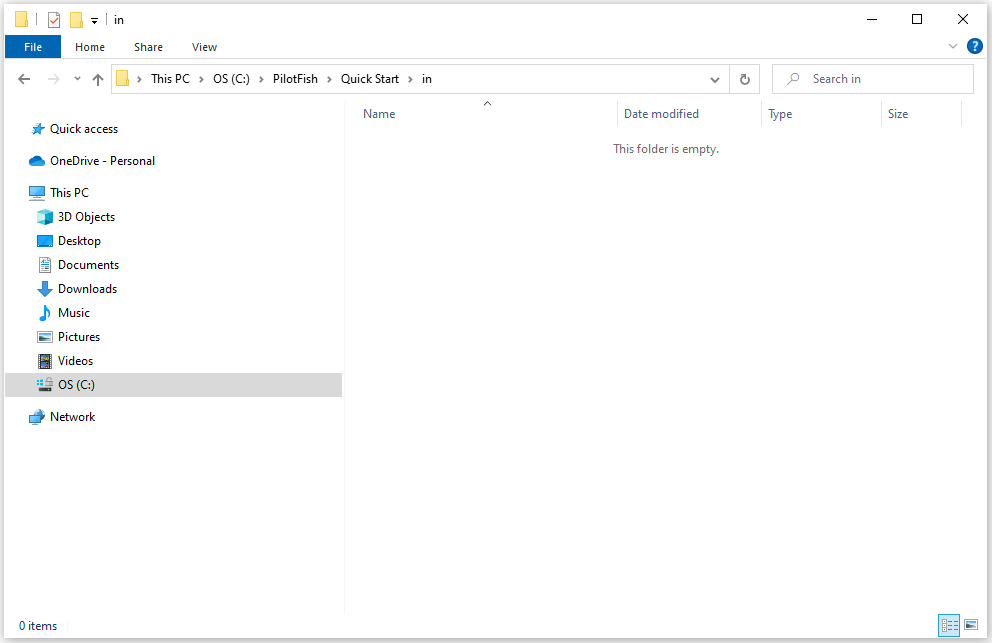
Next, navigate to the Quick Start directory or your Working Directory. Then double-click the “in” folder to open.
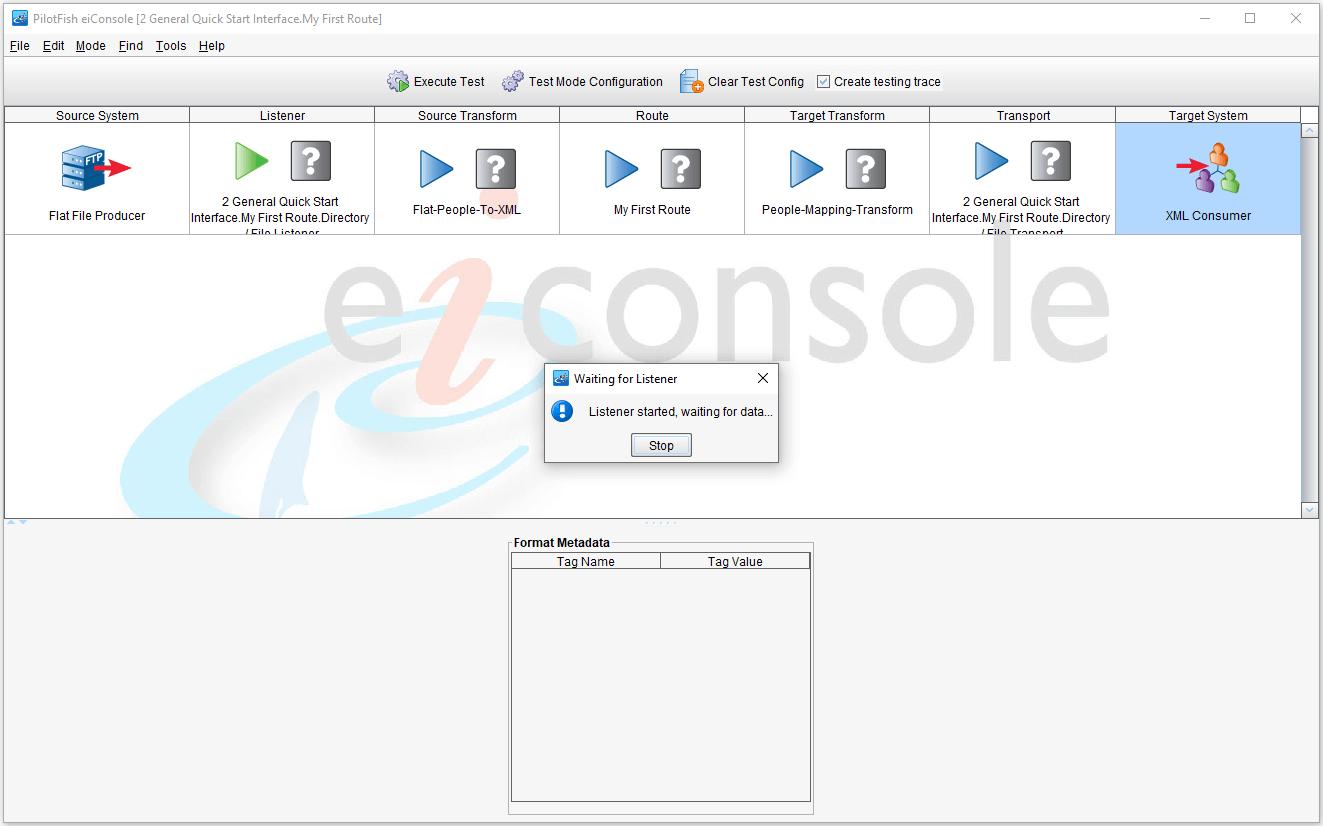
To begin testing, click the Execute Test button. The Directory Listener will start waiting for data to appear in the input folder.

Paste the “people-ages.txt” file into the “in” folder within the Quick Start of your Working Directory.
Within 10 seconds, the file should be picked up and processed.
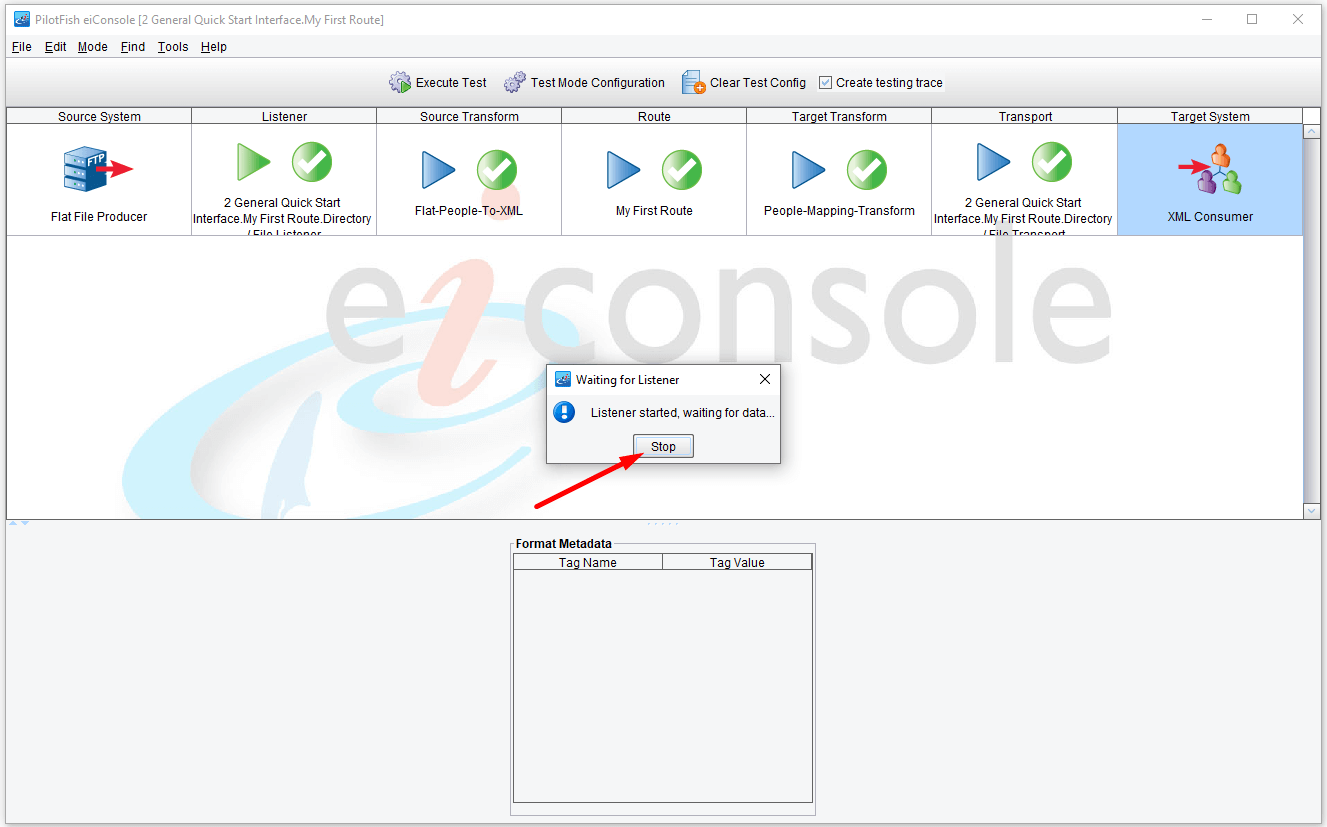
As the file is processed, the blue question marks are replaced with green checkmarks. Had there been an error, a red x would appear in one or more stage cells. Click on the Stop button.
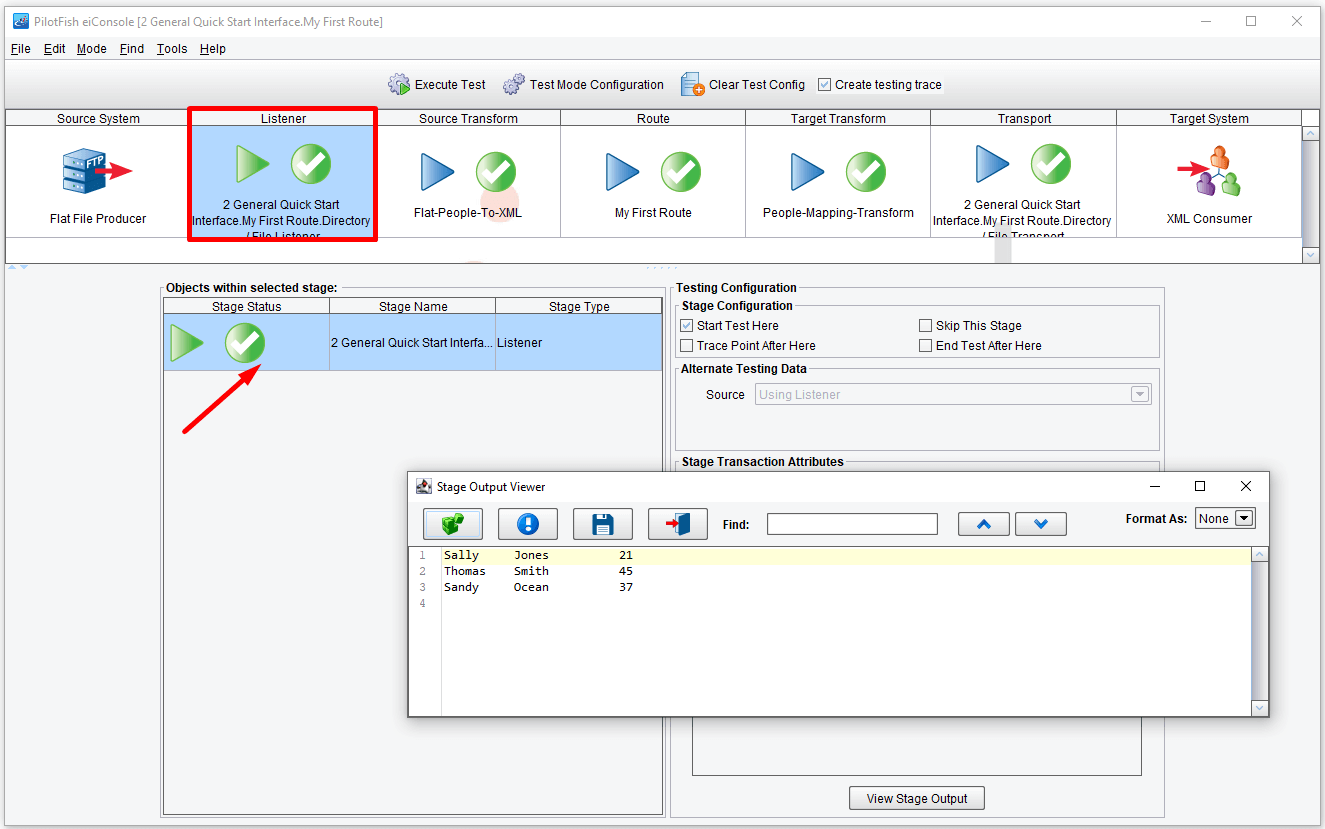
You can view the data at each part of the process. When you click on a stage, such as the Listener stage, you can double-click on any sub-stage within the Objects Within Selected Stage grid to view the output as it appeared when it exited that stage.
Here, you can see the flat file input.
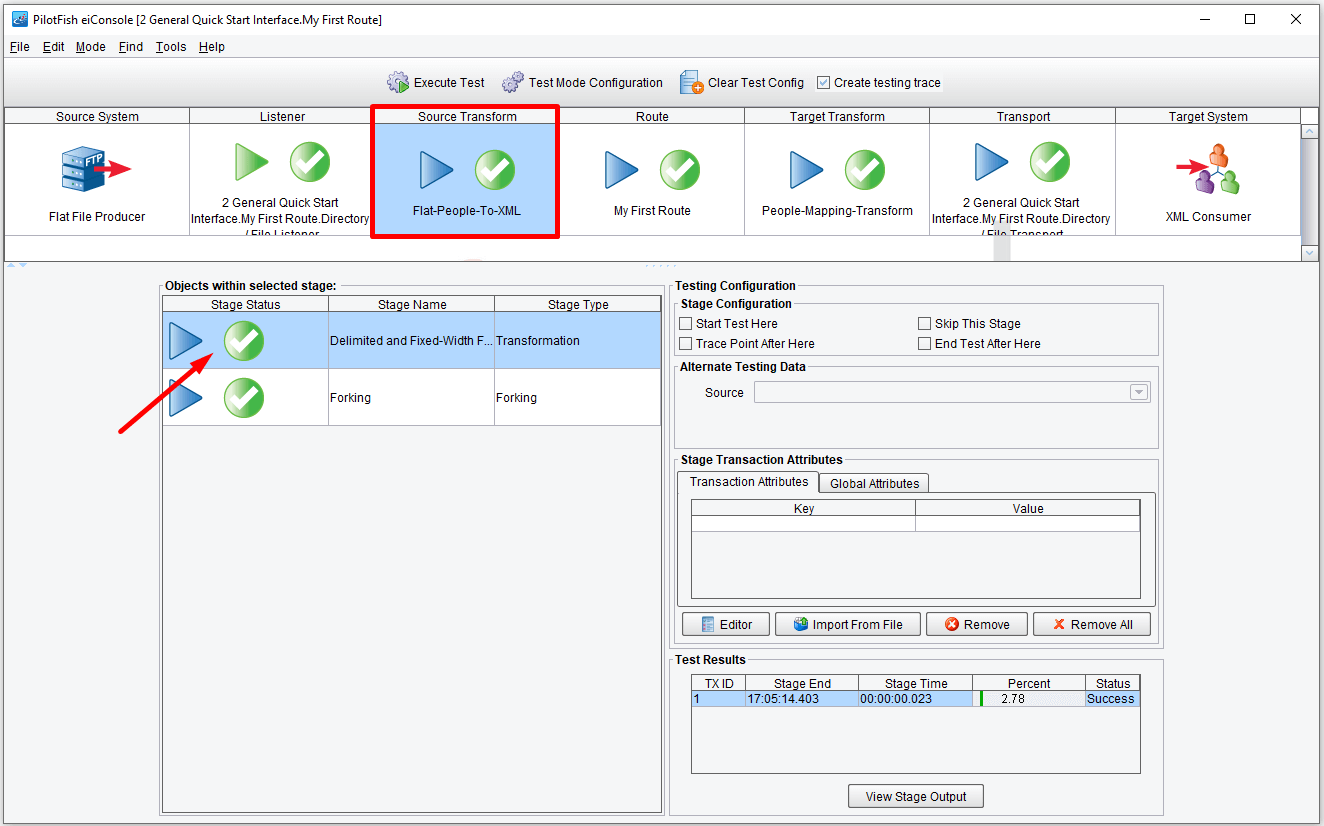
Click on the Source Transformation stage. Double-click the Delimited and Fixed-Width row to view the output.
Here, you can see the data after it’s been converted to XML. Choose the XML format.
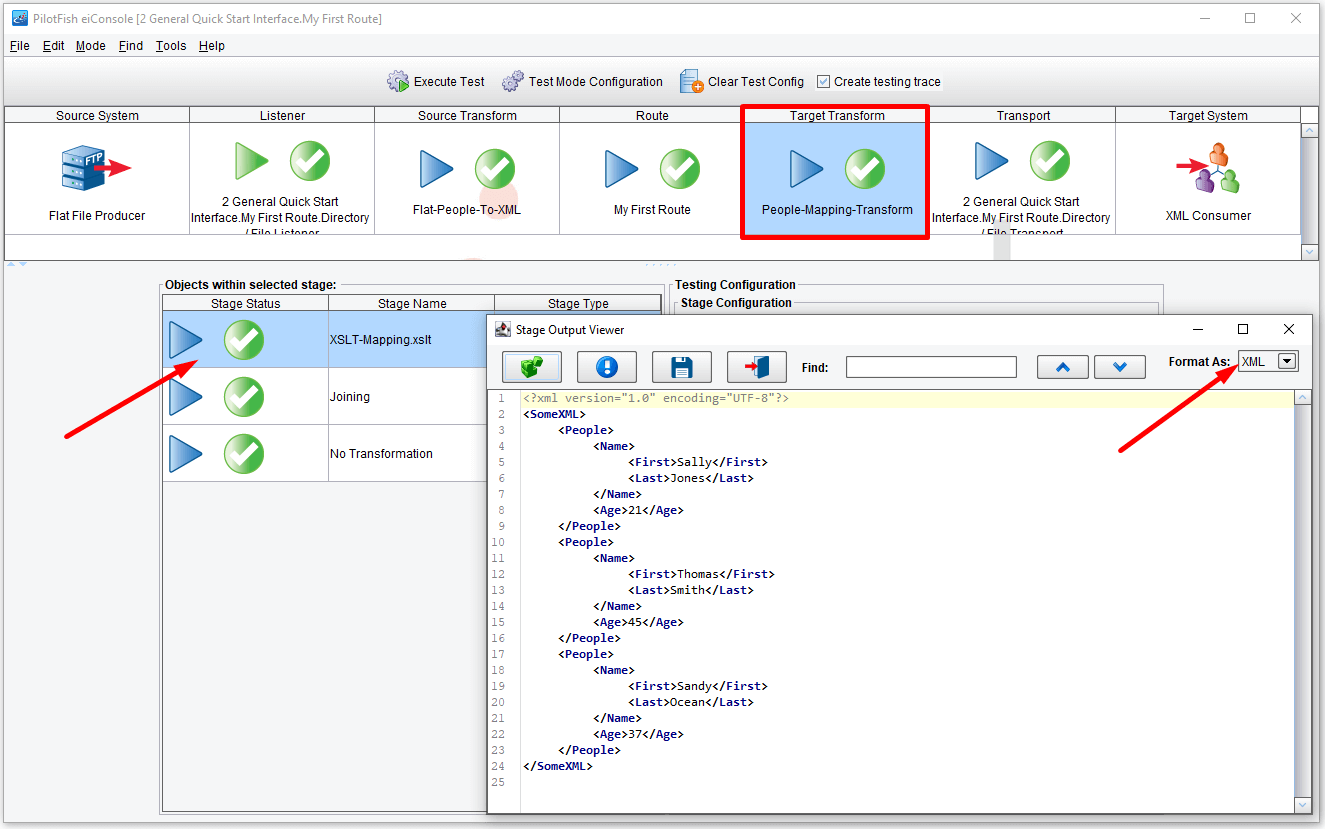
The data was routed along towards our one Transport. If you click on the Target Transformation stage, you can double-click the XSLT stage to see the transformed data. It will be in the SomeXML structure with a People tag, Name sub-tag and with First and Last name tags as children.
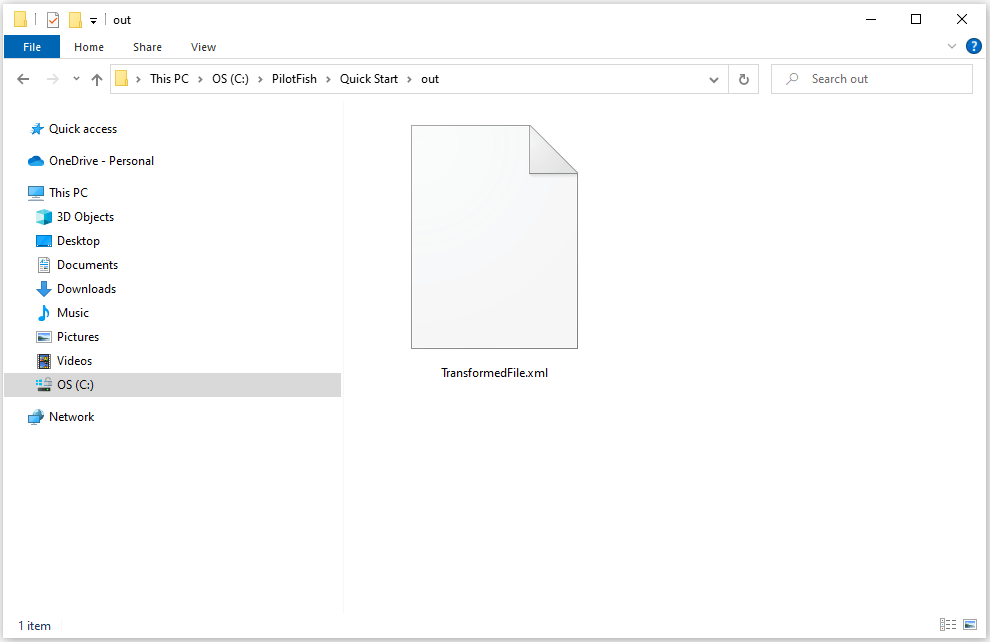
Finally, Transport deposits the TransformedFile.xml file in the selected Out folder.
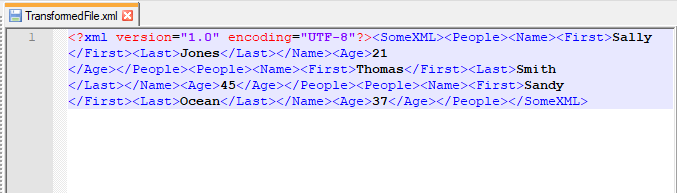
Double-click the file to open. Notice the file named TransformFile.xml has been written to the disc.
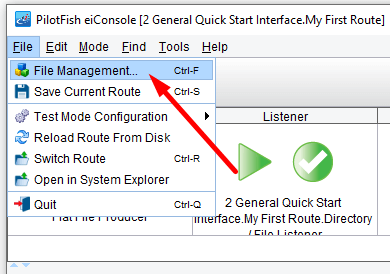
Lastly, go to the File menu and select File Management to return to the Route File Management window.
Deploying an Interface
When the Route File Management window opens, you’ll see the icon next to My-First-Route is now blue, indicating it is a fully configured interface. Typically, if you wanted to deploy this interface into production, you’d connect to your eiPlatform server and drag & drop the interface into the eiPlatform server window to deploy.
Note: An eiPlatform server needs to be configured for this option to be visible in the above window.
Now you have completed the Quick Start Tutorial and have learned the basic topology of the eiConsole; you can now move on to more complex tutorials.