Comprehensive Overview of the eiConsole (IDE)
eiConsole v.25R1
Documentation
Navigating the eiConsole: A Summary Overview of the 7 Stages & Related Tutorials
This Overview guides you through navigating around the eiConsole. Once you’ve reviewed it, the quickest way to learn how to use the eiConsole is to start with the Quick Start Tutorial, followed by the Foundation Tutorials (13 modules). Next, users should move on to one of the Industry Specific Getting Started Tutorials depending on the industry and type of data you will be working with.
7 Stages of the eiConsole Assembly Line
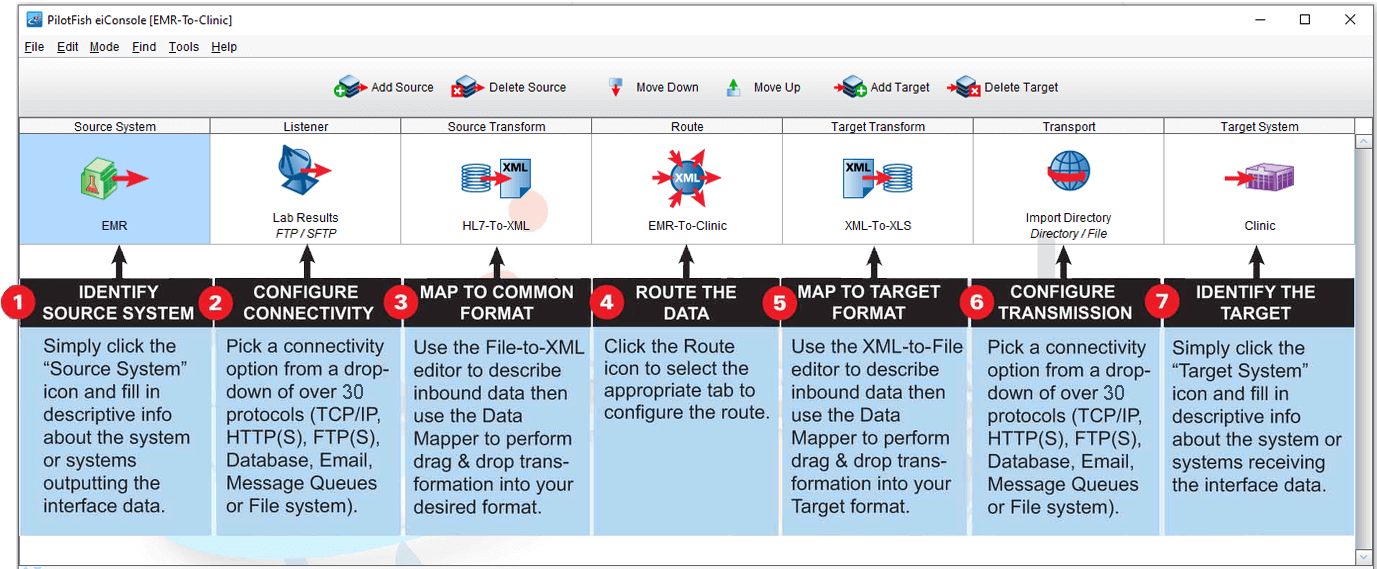
All of the configuration in the eiConsole is done following an Assembly Line process and without requiring scripting or coding. You are presented with easy-to-fill-out configuration panels and drop-down menus. You can perform data mapping using drag & drop. Even complex mapping processes can be performed using drag & drop using the Data Mapper‘s included palette of XSLT structures. After you have configured your interface, you can test your newly created interface end-to-end within the eiConsole’s inline graphical test mode or with the eiPlatform Emulator. With the eiConsole, you can configure an interface in minutes, which previously took system integrators days or longer to accomplish.
eiConsole Main Route Grid Window
The Main Route Grid window is the central component of the PilotFish eiConsole. All modifications and plans may be implemented from this window or one of its many sub-components. It is structurally organized into roughly four components, each with its own operative purpose. The first is the Title Bar (located at the top of the window), which gives the user access to various actions, dialogs, and functions via an organized text hierarchy. The second is the Toolbar, which directly complements the Routing Panel (the third and arguably most important component). Finally, the Information Panel occupies the bottom of the window, which varies wildly depending on the item selected in the Routing Panel.

Title Bar
The Title Bar provides cohesive access to the user of basic and necessary functions via a textual hierarchy.
Toolbar
The Toolbar contains four essential components for the basic yet crucial manipulation of the Routing Panel.
Routing Panel
The Routing Panel contains the routes of the current interface and allows the user to intuitively and easily interact with them.
Information Panel
The Information Panel varies quite a bit depending on the selected route component. Information or configuration data will appear in place of the information panel.
eiConsole’s 7 Stages: Your Roadmap to Effective Data Handling
Seven main stages comprise the Main Route Grid view of the eiConsole’s Assembly Line process. The Source uses the first three Stages and Target the last three. There is always one Route stage. You can have more than one Source and Target. Starting from the left (at the Source), we’ll explain each stage’s purpose.
Stage 1 – Source System
The first stage is the Source System. Selecting it in the Route table will open a configuration panel, and the screen (depending on the resolution) will look similar to this:
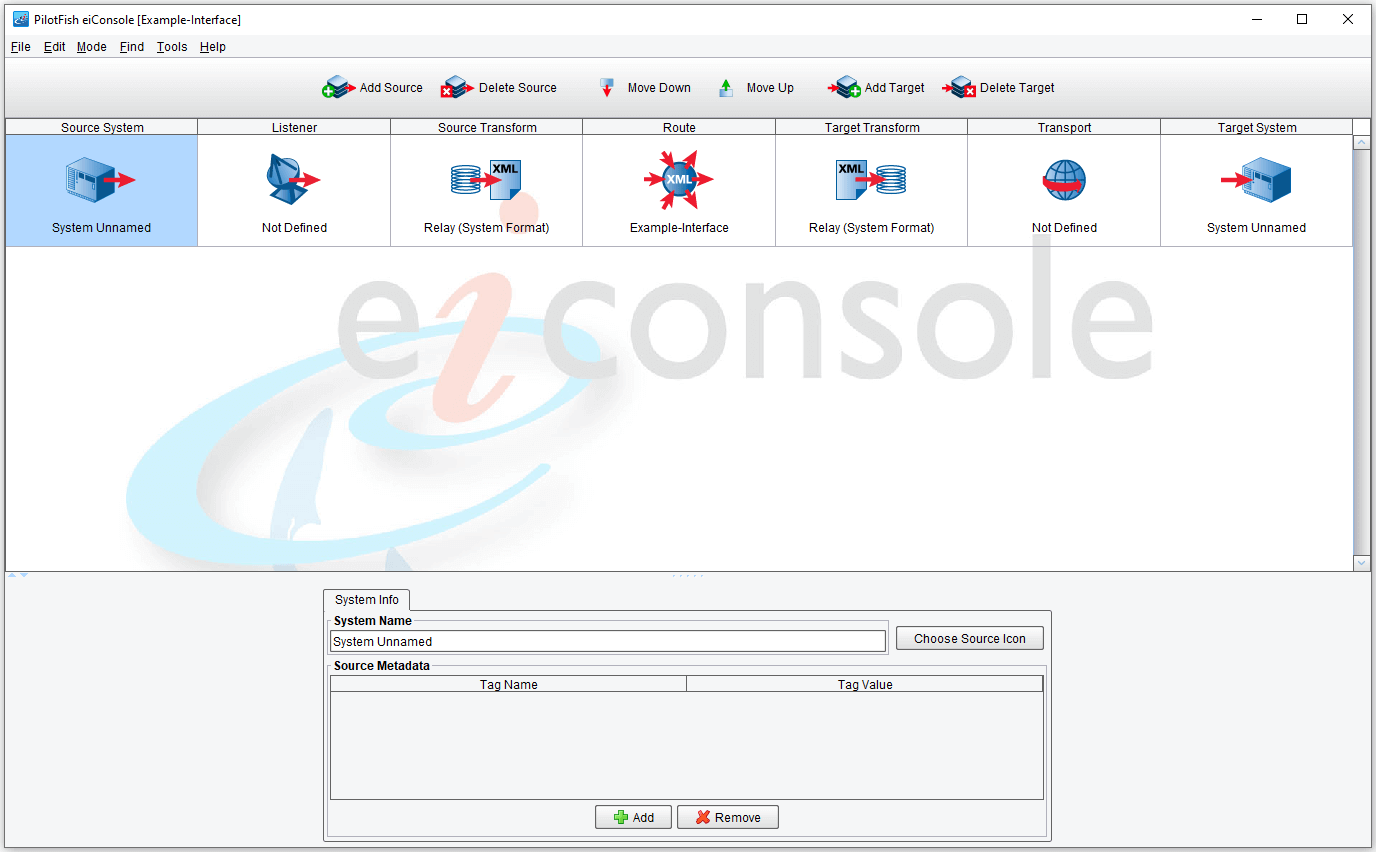
The Source stage is used to identify or name a system. It can reflect the name of the source client, vendor, a type of system such as a database or a software application. The field labeled System Name is where you want to type in the name you wish to give your Source System. Typically, the label reflects an internal or external generic name, such as Local Filesystem or Server 31-a.
Stage 2 – Listener
The next stage is the Listener stage, which is perhaps the most critical component of a Source. Select a Listener stage; once again, you will note that the configuration changes.
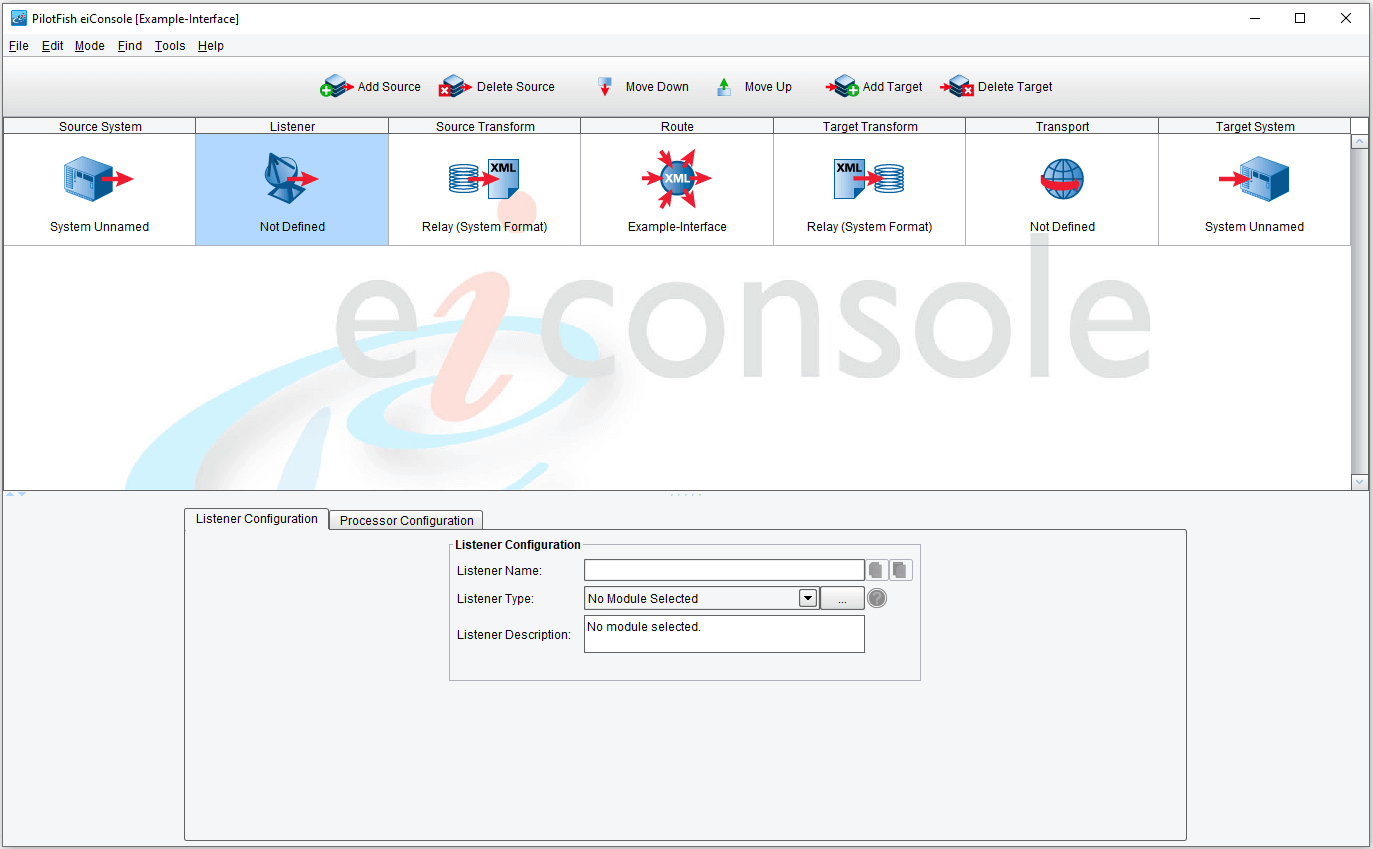
A Listener’s task is relatively straightforward – it obtains data from a particular system or Source and creates a transaction from it, which is then passed along through the various functional stages. The first thing you need to do is select what kind of Listener you want to use, which is dictated by the Listener Type list box. Out-of-the-box, a large variety of Listeners are available:
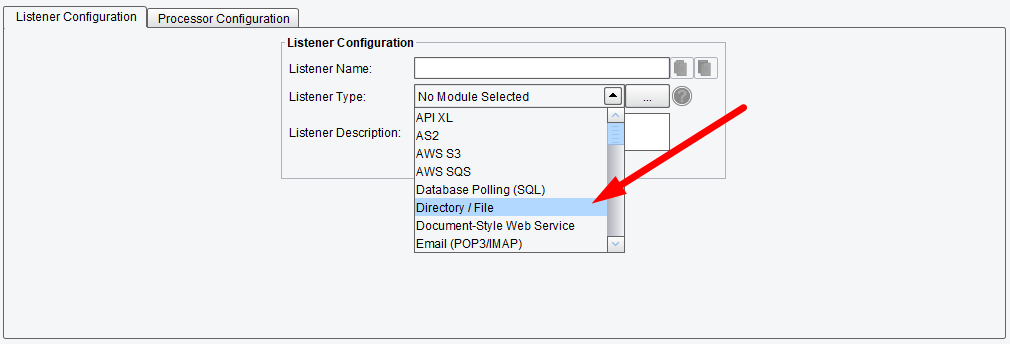
When developing interfaces and their Routes, you will need to choose a Listener that is appropriate to the Source System from which you’re trying to connect and retrieve data. Following our example of naming our Source to indicate that it is a filesystem, we’ll use the Directory/File Listener (shown selected in the list above). Select a Listener and the configuration panel will change once again to reflect the various configuration options for that module:
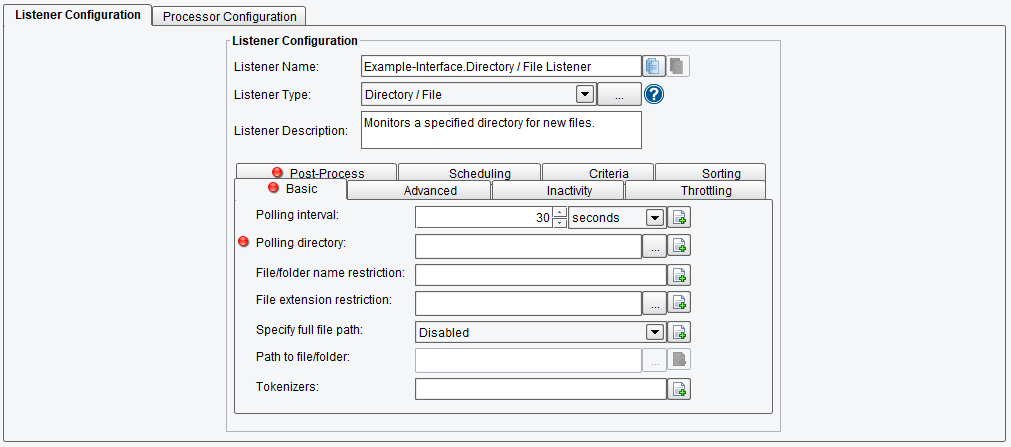
We won’t detail this particular Listener’s configuration items (you should refer to the Directory/File Listener’s documentation for a field-by-field overview). Still, we will be configuring it as a general exercise. The first thing to note is that every Listener has a name, as shown at the top of the image above. The eiConsole will automatically give a generic name to modules as they’re defined, but it will not guarantee that they are unique – which they need to be. If you plan on using multiple interfaces and Routes, it’s a good idea to use a hierarchal naming scheme, such as the one provided by default (Example-Interface.Directory / File Listener).
Each configurable module or Listener will typically have its components divided by function into tabs. Any field which is required and has not had valid data provided to it will be marked with a red dot (like Polling Interval and Polling Directory are above), and any tab containing such fields will also be marked with a red dot to let you know that you need to investigate that section.
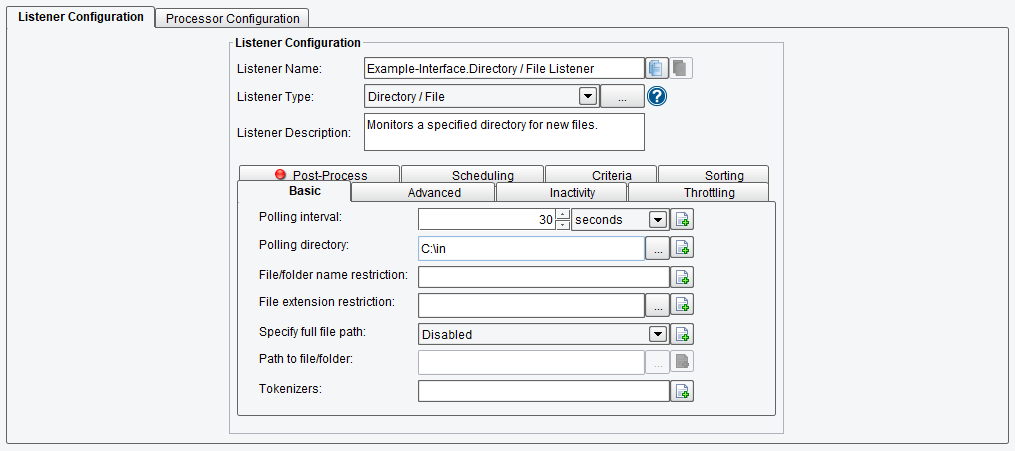
As an overview, the Directory/File Listener picks up files from a particular directory and turns their contents into Transactions. We’ll configure our example to poll C:\in for files ending in xml every thirty seconds:
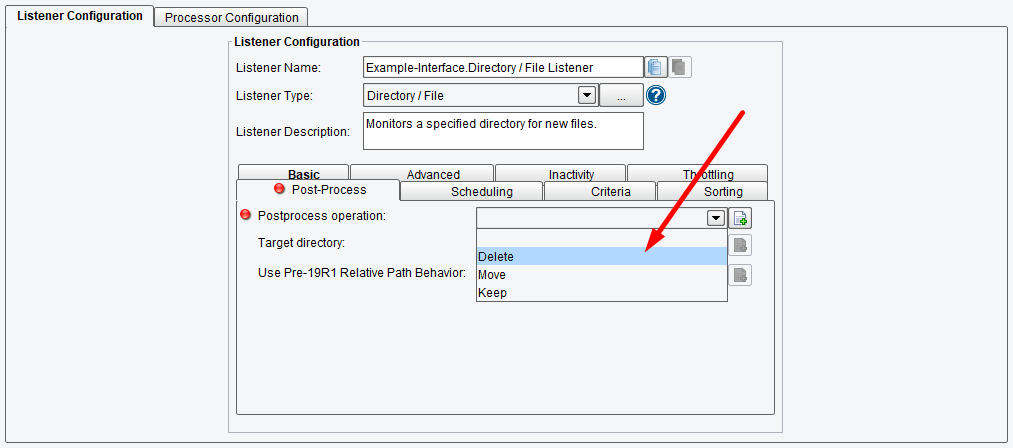
Also, we’ll specify the action to take after a file has been processed – options are: Delete, Keep, or Move. We’ll choose Delete.
Each Listener you work with will have somewhat unique requirements in terms of configuration parameters. Mousing over the label for a given field will give a short description of its purpose, as well. Refer to each module’s specific documentation for general usage. Listeners, however, do come in only two varieties: passive and active. An active Listener is like the Directory Listener – you specify how often it goes out and actively looks for data, either on a queue, in a directory, on an FTP server, an e-mail server, etc. A passive Listener waits either on a trigger or until it is invoked externally such as from HTTP posts or remote method invocations (RMI).
After a Listener picks up data, some minor work may need to be done on it. For example, a file picked up by the Directory/File Listener may be BASE64-encoded, encrypted, and/or compressed. Since the content needs to be consumable later down the process chain it becomes necessary to run operations against the data to decode, decrypt, and/or decompress it. This is what Processors are for. Each Source and Target has Processors associated with it, and they can be accessed by clicking the Processor Configuration tab at the top of the configuration panel when a Listener or Source is selected.
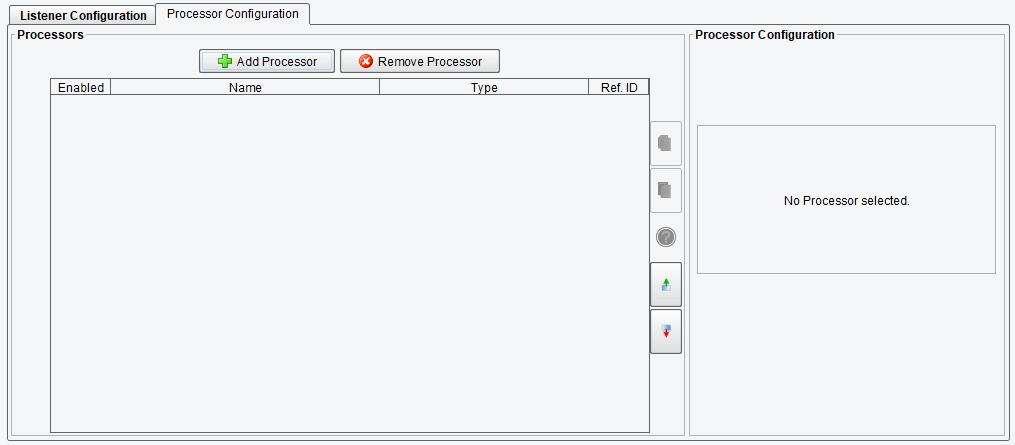
Multiple Processors can be added in a chain and run sequentially (from top to bottom in the above table). You can add or remove Processors with the Add Processor and Remove Processor buttons shown, respectively. You may also reorder listed Processors with the Move Up and Move Down buttons. Selecting Add Processor will raise a dialog similar to selecting a Listener:
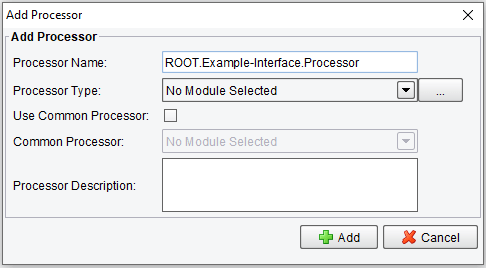
Like the Listener configuration, a Processor has a name (defined by the Processor Name field) and a type (designated by the Processor Type list box). A variety of Processors are available out-of-the-box. For our example, we’ll add a BASE64 (Input) Processor to the list:
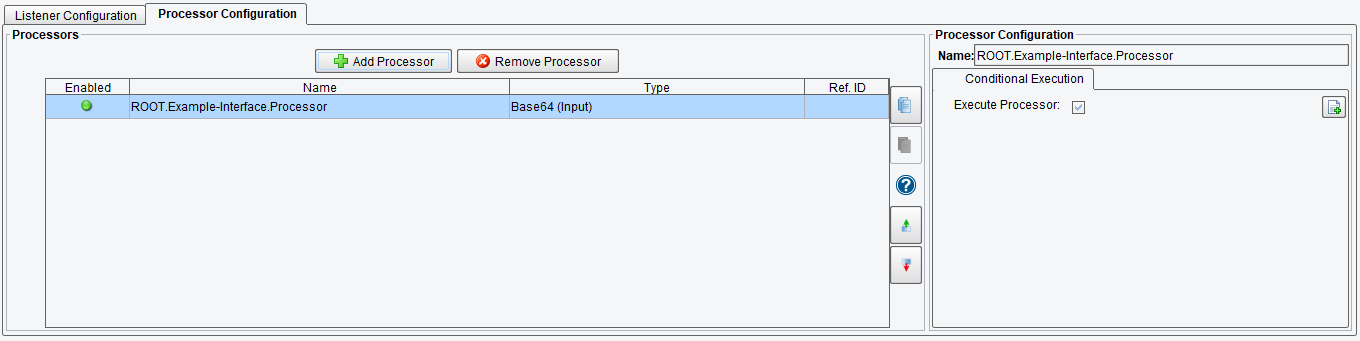
As you can see, the Processor was added to the table. If the Processor had any fields, they would be shown and marked as required, like the Listener modules shown earlier.
The Conditional Execution tab allows the user to create a condition for the execution of a processor. The processor will only be executed if the condition is met.
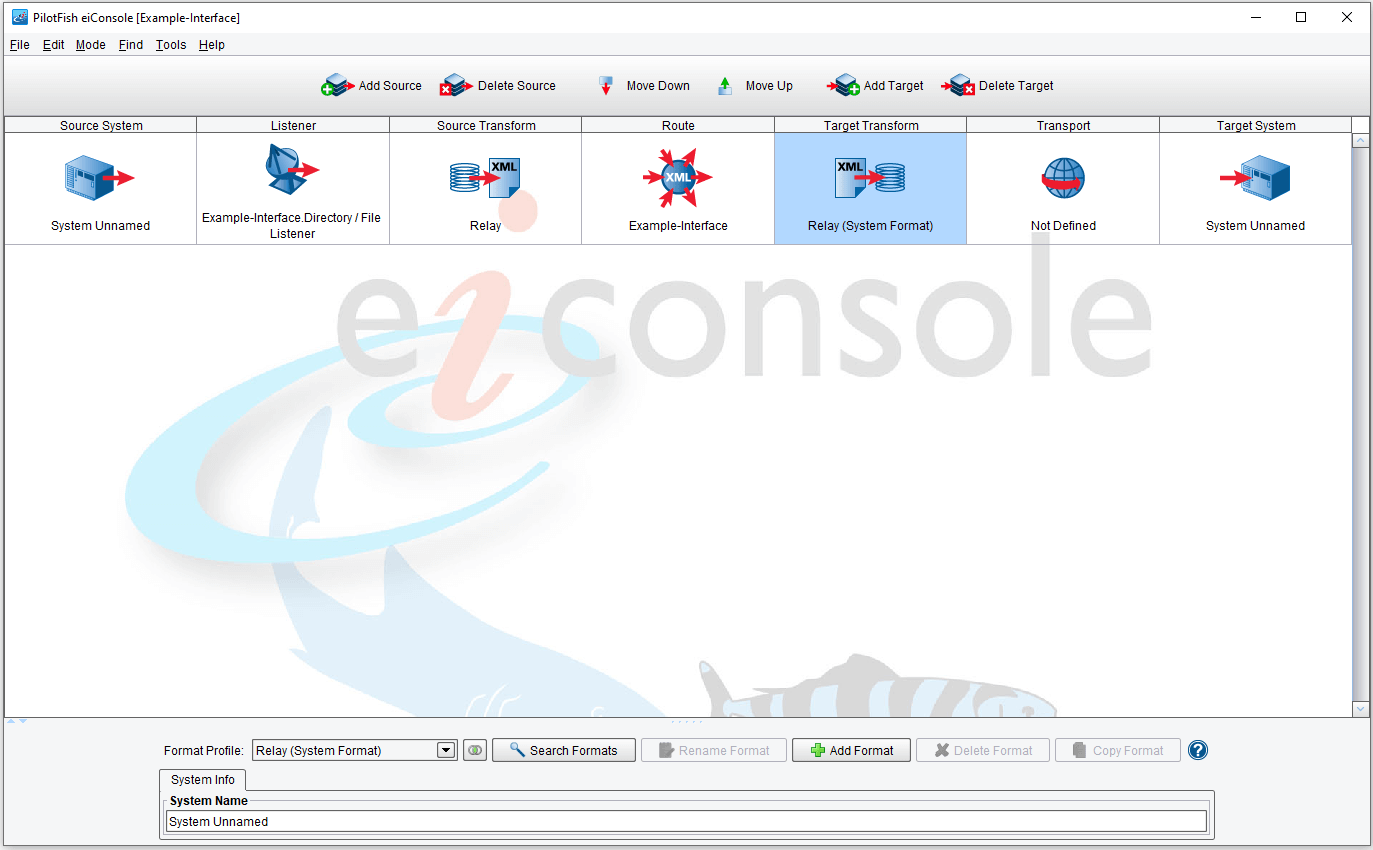
Stage 3 – Source Transformation
Continuing to the next stage, you may select the Source Transform stage:
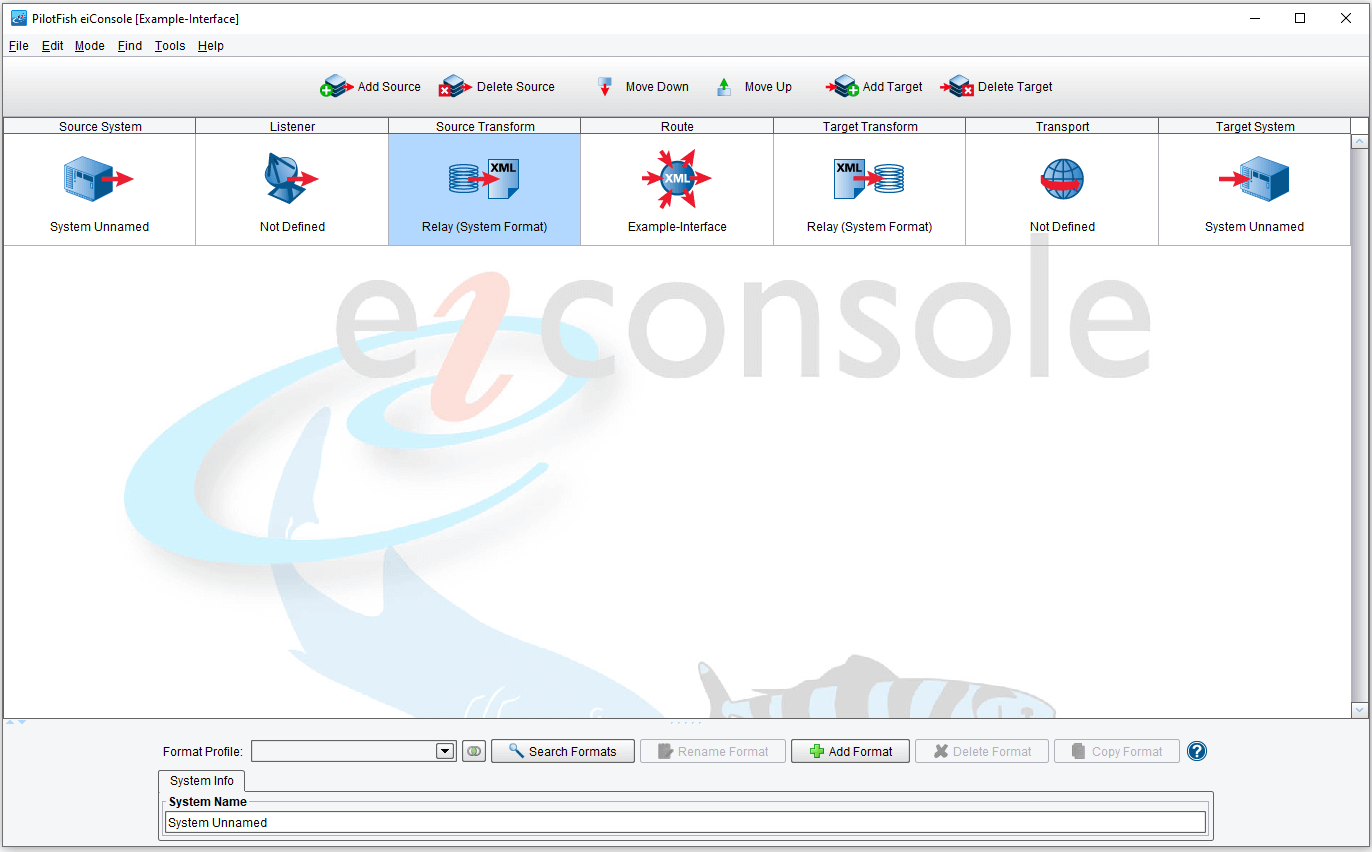
You should notice the Format Profile list box and its associated buttons. This lists Formats available to this Route, which are stored separately from it. A Format describes basic metadata and a transformational process, such as a conversion from a flat, character-delimited file to an ACORD XML transaction. Formats are reusable across multiple Routes and are not tied to a particular Source or Target.
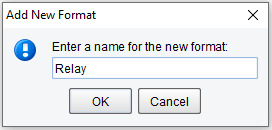
If no Formats are defined, you’ll need to add a new one. It’s a good idea to add a Format for any new kind of transformation you may be doing. If you’re doing no transformation and intend to receive information from a Source and relay it as-is, create a Format with a name like Relay and use that going forward for all such tasks. We’ll do this for our example.
Create a Format called Relay by pressing the Add Format button:
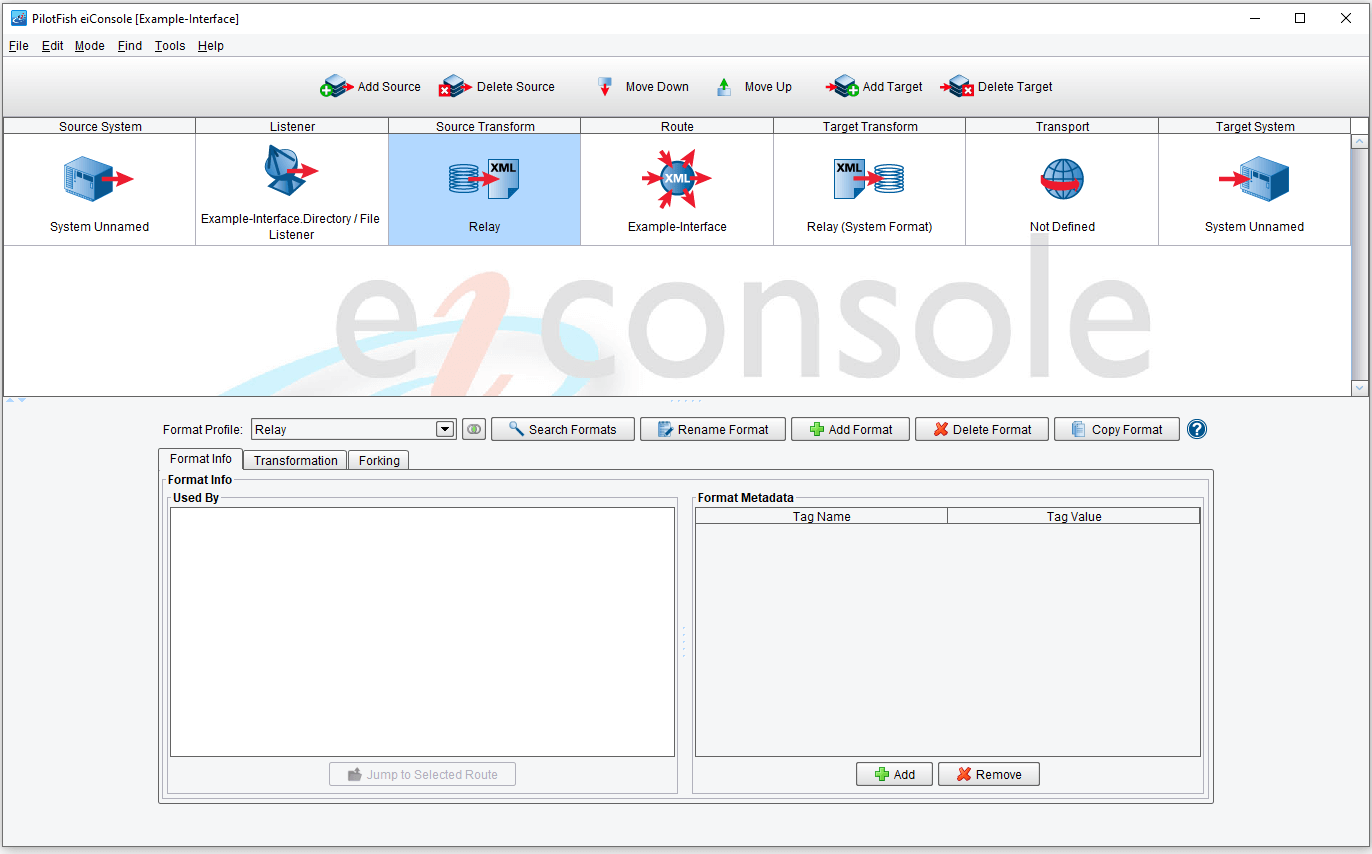
After you create a new Format, it should automatically be selected from the list box. The configuration panel view will also change.
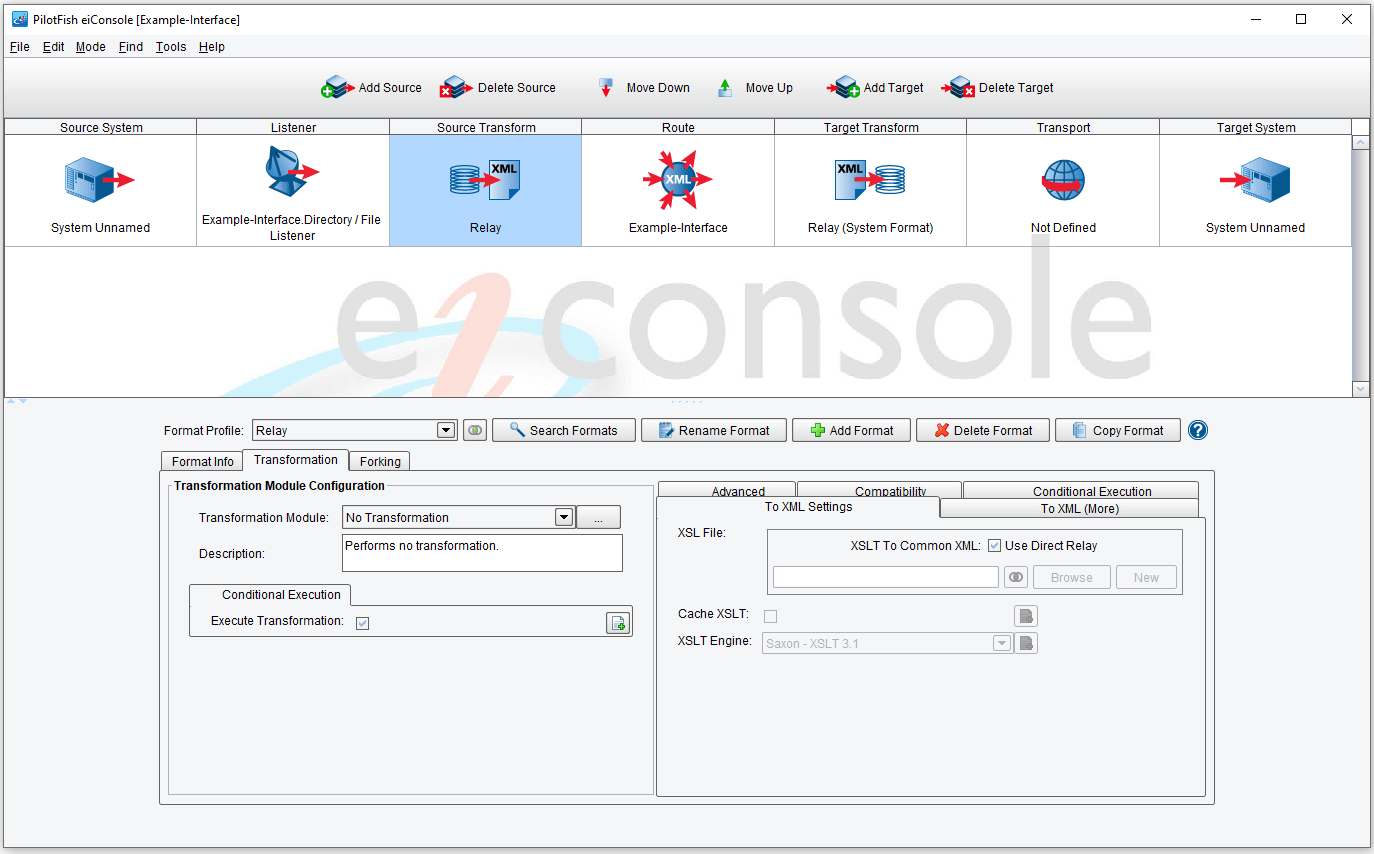
Three tabs are available in the Source Transform stage: Format Info, Transformation, and Forking.
The Format Metadata table is where you can create name/value pairs of information you wish to use later to sort through large numbers of Routes or to keep track of things. You can use the Add and Remove buttons to add or remove tags, respectively.
Forking provides module selection and configuration to perform transaction forking, an advanced feature covered in another document.

We’ll focus on the default tab, Transformation.
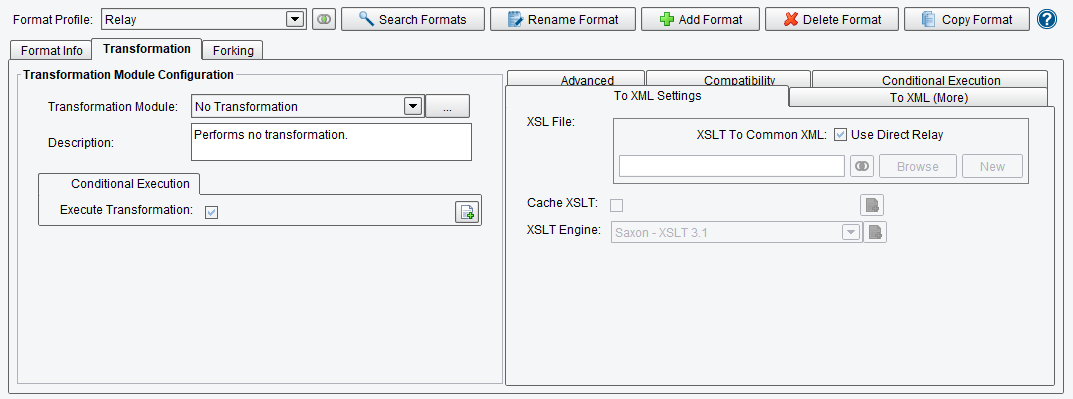
Each Source Transform has two internal stages, shown on the left and right in the above image. The first stage is for a Transformation module. These are selected similarly to Listeners and Processors via a list box. After one is selected, the panel beneath will fill with configuration tabs and items are dictated by the module. A Transformation module’s purpose is to take data that is not in XML and to get it there. This includes Microsoft Excel documents, flat/character-delimited data, name/value pairs, etc. Some modules, such as the Delimited and Fixed-Width File, have their own applications and configuration tools. These are not covered in this document – you should refer to that module or application’s information.
The other side of the Source Transform configuration is used for specifying an XSLT transform (or bypassing the process) and for opening PilotFish Technology’s bundled XSLT editor, the Data Mapper, for editing or creating XSLT transformations. You may browse for an existing XSLT transformation, as well. The Data Mapper is a potent and useful tool, though it is covered in a separate document.
One important aspect to note is that the transformations mentioned above are associated with a particular Format – the same format you specified for the Source you’re working with. Thus the Transformation module, Forking configurations, and XSLT transformations specified will apply to the Format and wherever else it is used. This allows you to reuse crucial transformation components rather than duplicate them and maintain separate versions.
Stage 4 – Route
The fourth and next stage, the Route stage, is not tied to any particular Source or Target. It is universal across the entire Route, and all transactions are routed through it (hence its name). Selecting the Route stage will raise a configuration panel similar to those you have seen before:
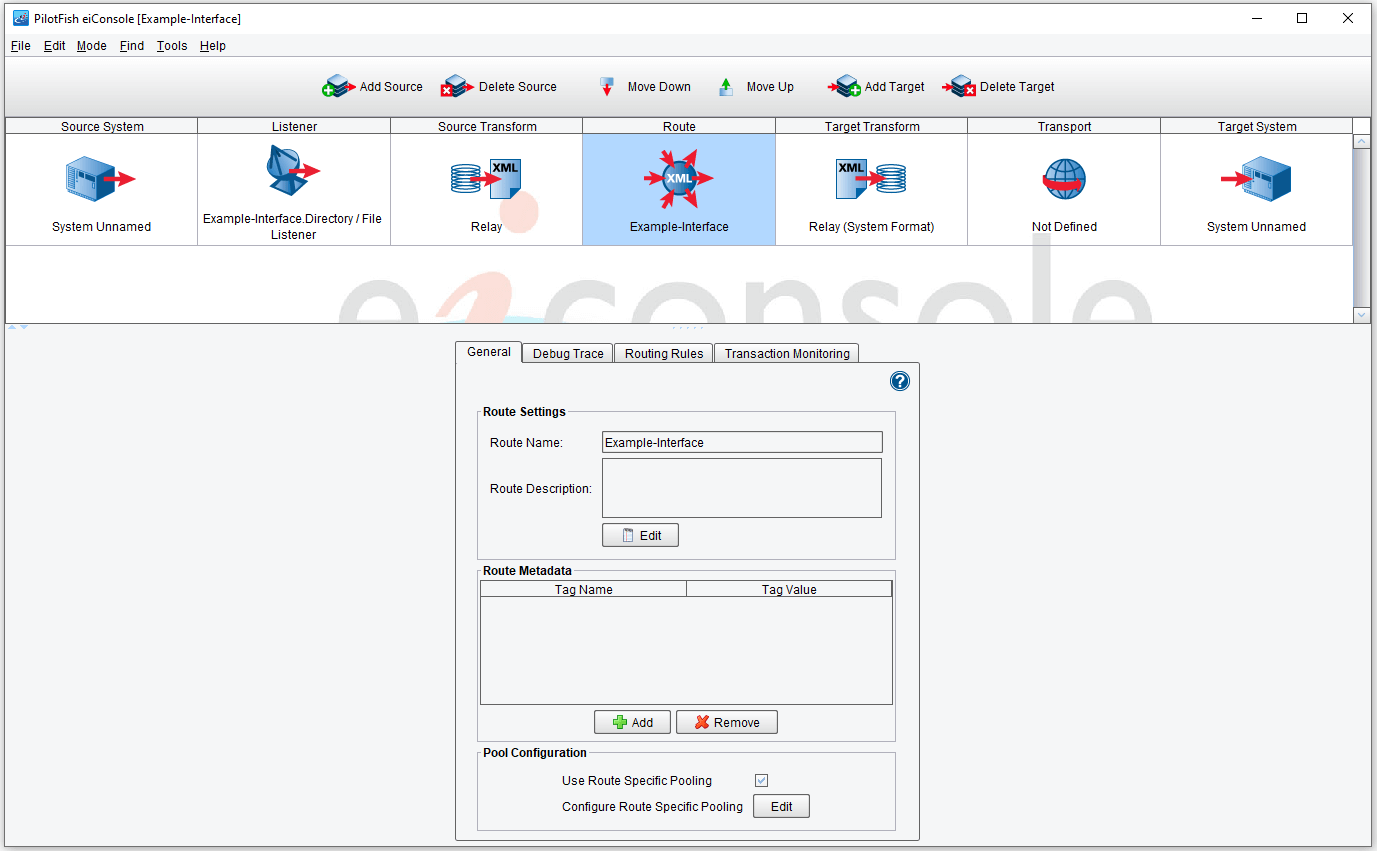
Four tabs govern the configuration of the Route stage (which is functional in its default stage). The first is the General tab, shown below:
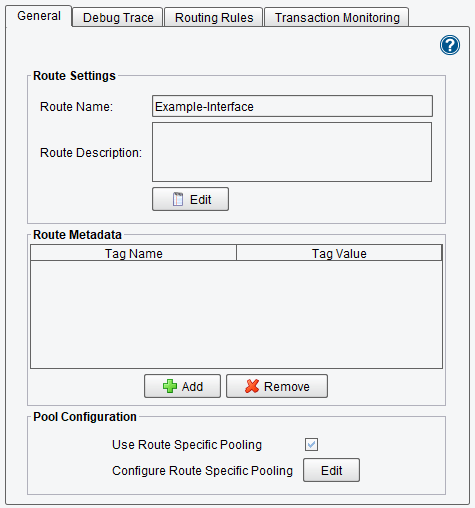
The Route Panel General Tab specifies generic route options for the current interface. This is effectively performed via three subpanels – Route Settings, which specifies general information and options; Route Metadata, which allows the user to append non-functional information to the route; and Pool Configuration, which allows the user to specify a pool for the route.
The second tab is Debug Trace, shown below:
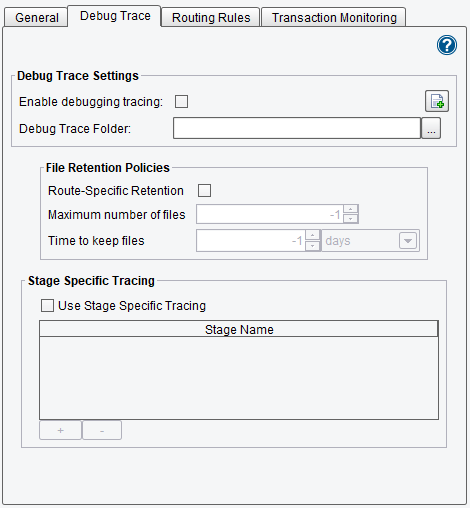
The Debug Trace Settings allow the user to enable or disable debug tracing. Enabling debug tracing allows for the creation of logs containing traces, errors and exceptions from the eiConsole. There is a slight reduction in performance upon enabling this feature. Still, it allows for the isolation and detection of errors and assists with quickly resolving any problems that may be encountered.
The File Retention Policies allow the user to prevent excessive use of available disk space.
The Stage Specific Tracing allows the users to limit debugging to a specific route stage.
The third tab is Routing Rules, shown below:
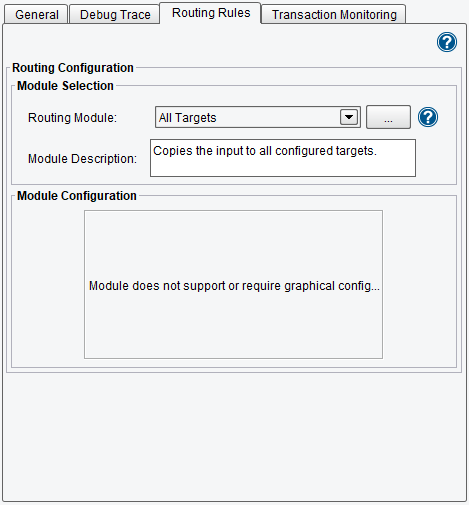
This tab determines the routing criteria and rules employed by this Route. This is handled by selecting a Routing module from the Routing Module list box and configuring it according to its panel. By default, the All Targets module is used. This states that any transaction passing through the Route stage from any Source will go to all Targets in parallel (at the same time, on separate process threads). Refer to the documentation for particular Route modules for their usage.
Finally, there is the Transaction Monitoring tab, shown again below:
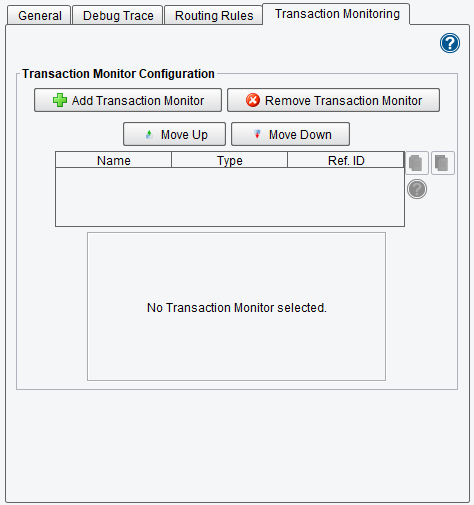
Transaction Monitors are added, removed, and managed exactly like Processors. They have a slightly different function, however. The Transaction Monitors you add to the table are only invoked if an exception or error is encountered somewhere in the Route, such as an XSLT transformation error or connectivity issues for a Listener or Transport. They allow you to perform specialized actions in these events, such as to e-mail an administrator with an alert or to trigger another Route with the error data and exception trace as the transaction content. Using Transaction Monitors, you can intelligently and methodically handle errant situations and deal with them correctly.
Stage 5 – Target Transform
The following three stages are for Targets. These will be covered in brief, as they mirror Sources almost identically. Starting with the fifth stage, Target Transform, you will once again need to select or add a Format before working with the stage directly. Once selected, the stage should look very similar to the Source Transform:
For Target Transform stages, the order of transformation components is reversed. The XSLT transformation is provided on the left and the Transformation module, if one is used, is provided on the right. This indicates a reversed order of operations since Targets may wish to accept non-XML formats. Another point of interest is that the Forking sub-stage is replacing with Joining, indicating that transactions can be joined together at this stage after being forked.
Stage 6 – Transport
In the sixth and last functional stage, a Transport can be configured much like a Listener:

Transports are configured in exactly the same manner as Listeners. For the most part, the types are about the same as well. There are a few Transports for which there are no corresponding Listeners, and vice-versa, but for the most part, they come in pairs. Transports do not come in separate varieties, either – all Transports accept a transaction, send it (to a file, to HTTP, or to whatever communications form they use), and mark the transaction as completed.
Stage 7 – Target System
Finally, there is the Target System stage:
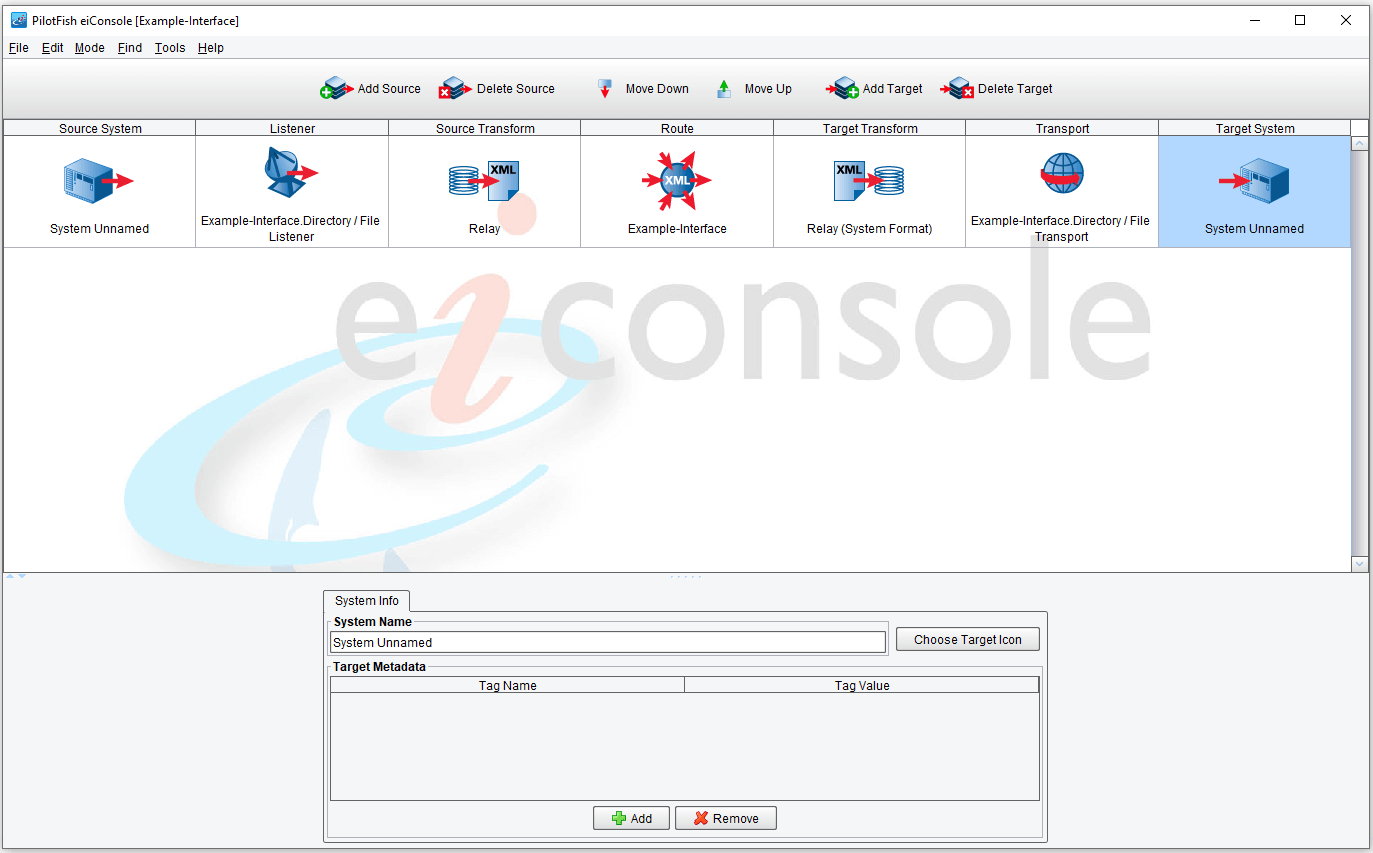
Like the Source System, the Target System stage has no functional purpose. It allows you to specify a name for the Target you’re connecting to.
This concludes the eiConsole overview.