eiConsole v.25R1
Tutorial & Working Directory
eiConsole Tutorial – Topology
Content Based Routing
Note: The Quick Start and Foundation tutorials should be completed before proceeding with the Topology Tutorials.
Overview
This PilotFish interface tutorial demonstrates how to accomplish content-based routing; that is, it is a demonstration of how to conditionally send data to an endpoint based on the data itself.
Content based routing may be used when:
- Data needs to flow conditionally to one or more Target Systems
- Data should proceed conditionally
- Data should process differently according to its contents, for example, when different data versions or data formats originate from the same Source
How to Run This Example
You may run this tutorial from the Listener by configuring the attached Environmental Properties File or from the eiConsole testing mode at any point in the process prior to the routing module itself, using the attached documents Sample2.xml and Sample3.xml.
Sample2.xml will be routed to one Transport, and Sample3.xml will be routed to the other Transport. The system utilizes the Id to identify which Transport to route to; Sample3.xml uses the Id=”3″ namespace, for example.
How it Works
- The routing module is configured in the Routing stage
- View the Routing stage in the eiConsole and you will notice two rules
- Each performs an XPath operation; if the XPath operation evaluates to a node (if the given XPath target can be found in the data), that rule evaluates to true
- If a rule evaluates to true, the configured Transport is added to the list of valid Targets for the current transaction
Note: If “Accumulate Targets” (found in the root configuration of the routing module), is checked, it will send it to all Transports in its list. If it is unchecked, only the first Transport it identifies will be utilized.
Before You Begin
Working Directory
Download the Content-Based-Routing-Working-Directory.zip file with the sample Working Directory and unzip it on your computer to a convenient place. In our case, it’s c:\Users\{USER _NAME}\PilotFish eiConsole Working Directories\Content Based Routing where {USER_NAME} is the user’s name.
Open the eiConsole, browse to your Simple Route directory, and open it. The fully configured route (Content Based Routing) is included in the working directory. Your Route File Management screen will open as shown below.
Next, follow the tutorial and walk through it step-by-step.
Double-click on the route named Content Based Routing.

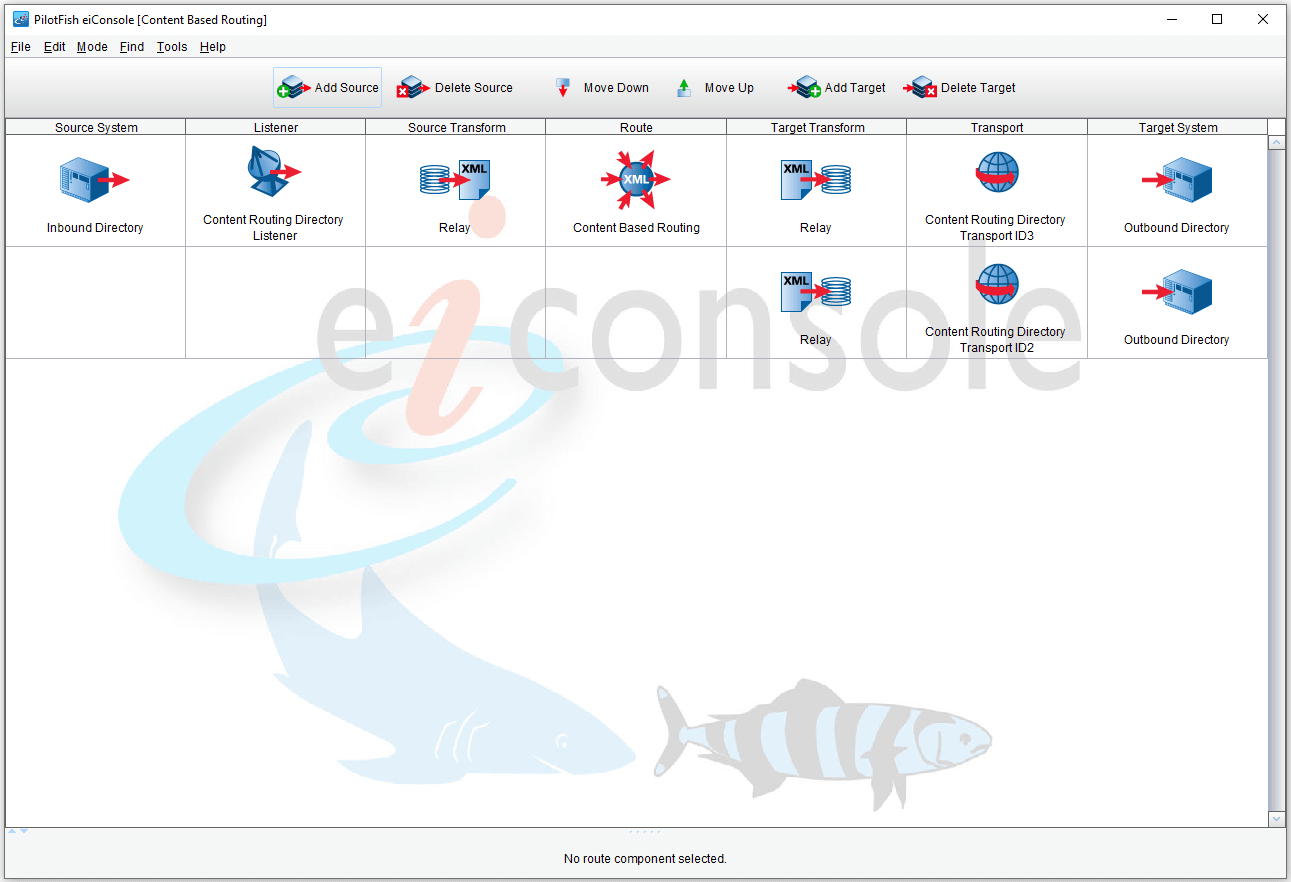
The Main Route Grid will open. This interface has 4 functioning pieces: the Listener, the Route, and the 2 Transports. It performs no data transformation.
Listener Configuration
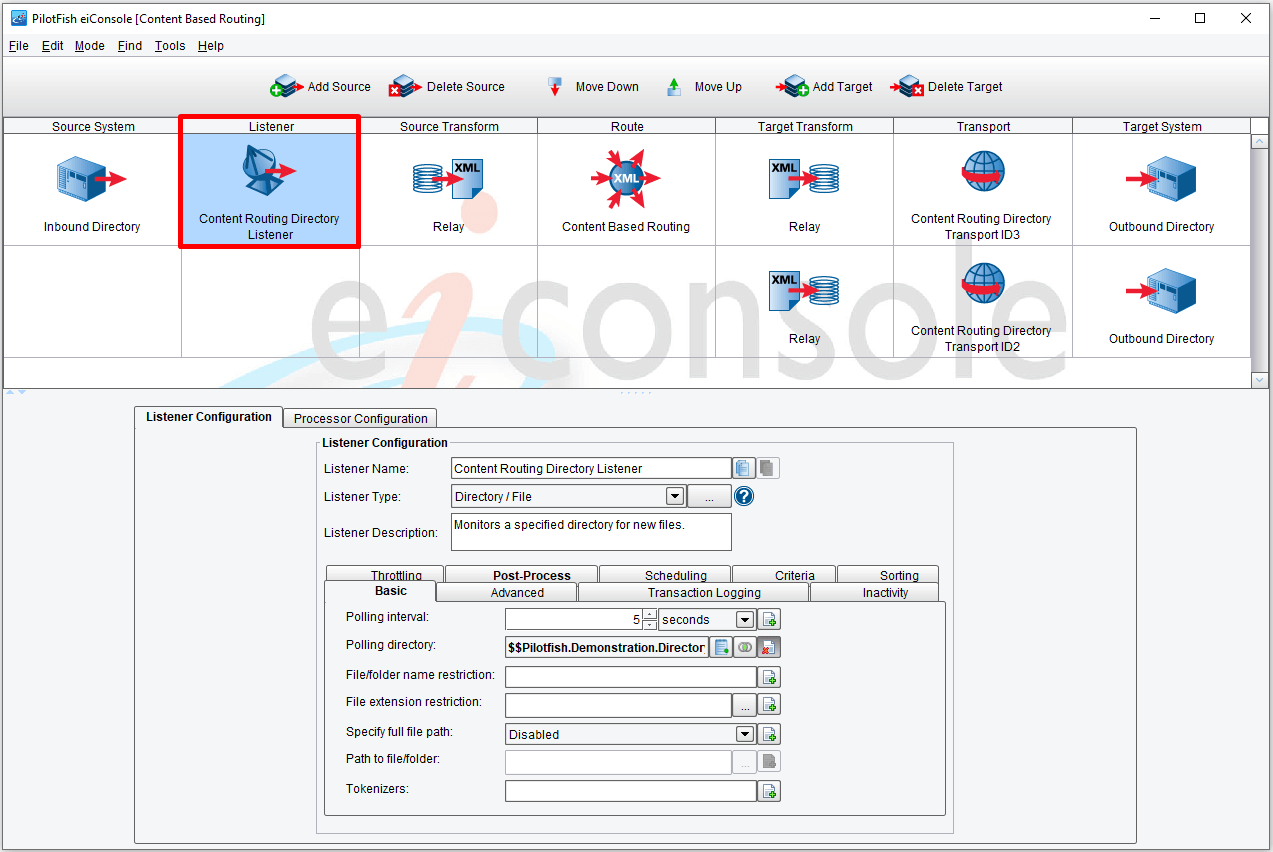
The Listener polls a directory set by a configuration value stored in the Environment Properties File (included with this interface) every 5 seconds. The Polling Directory is c:\Users\{USER _NAME}\PilotFish eiConsole Working Directories\Content Based Routing\in. In our case, we use the relative path “..\..\in“. The sample files intended to be used with this interface are provided in the c:\Users\{USER _NAME}\PilotFish eiConsole Working Directories\Content Based Routing\data directory. They are Sample2.xml and Sample3.xml.
Transport Configuration
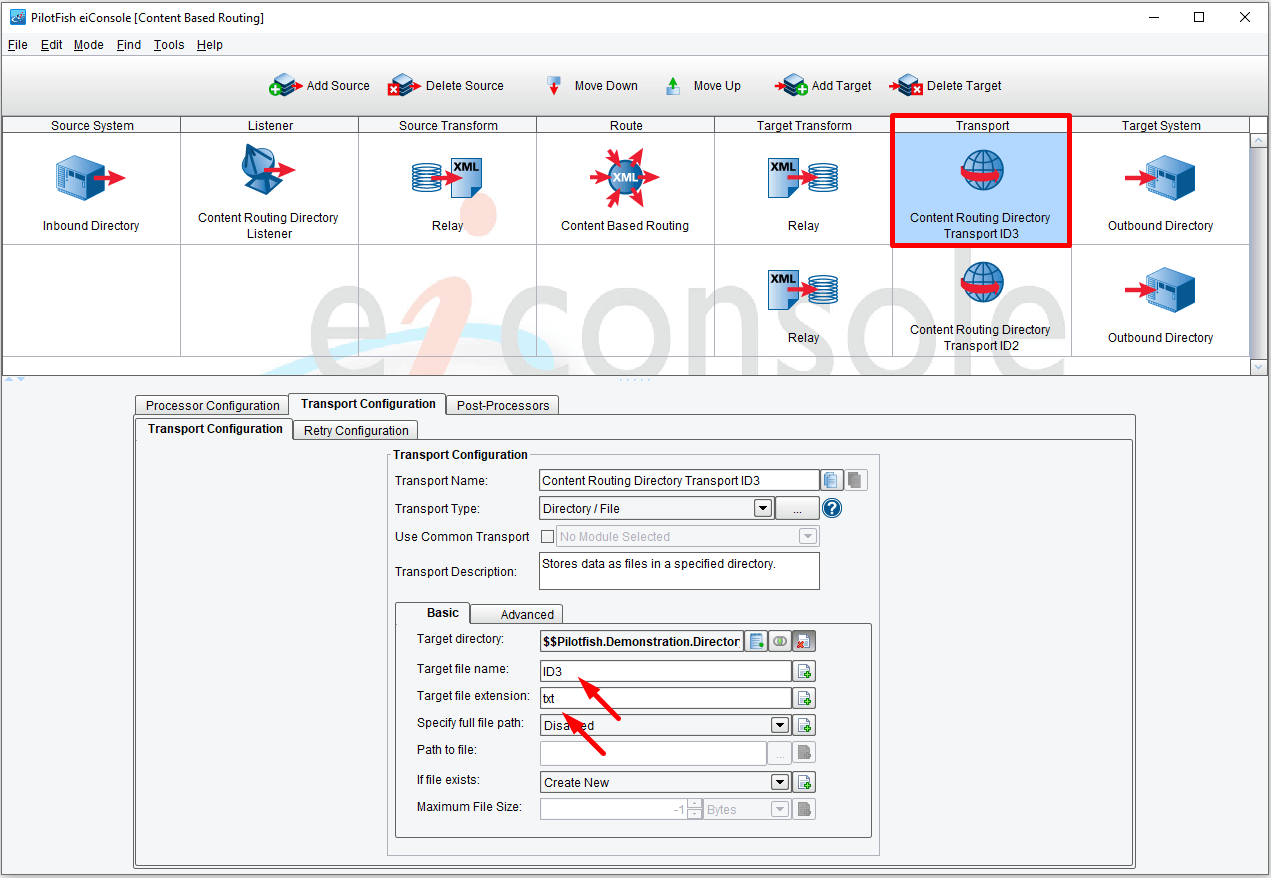
Both of the Transports are configured similarly; only the file name is different.

Here we also use an environment property: $$Pilotfish.Demonstration.Directory.Out=..\..\Out. Which translates to the c:\Users\{USER _NAME}\PilotFish eiConsole Working Directories\Content Based Routing\out directory.
Routing Configuration
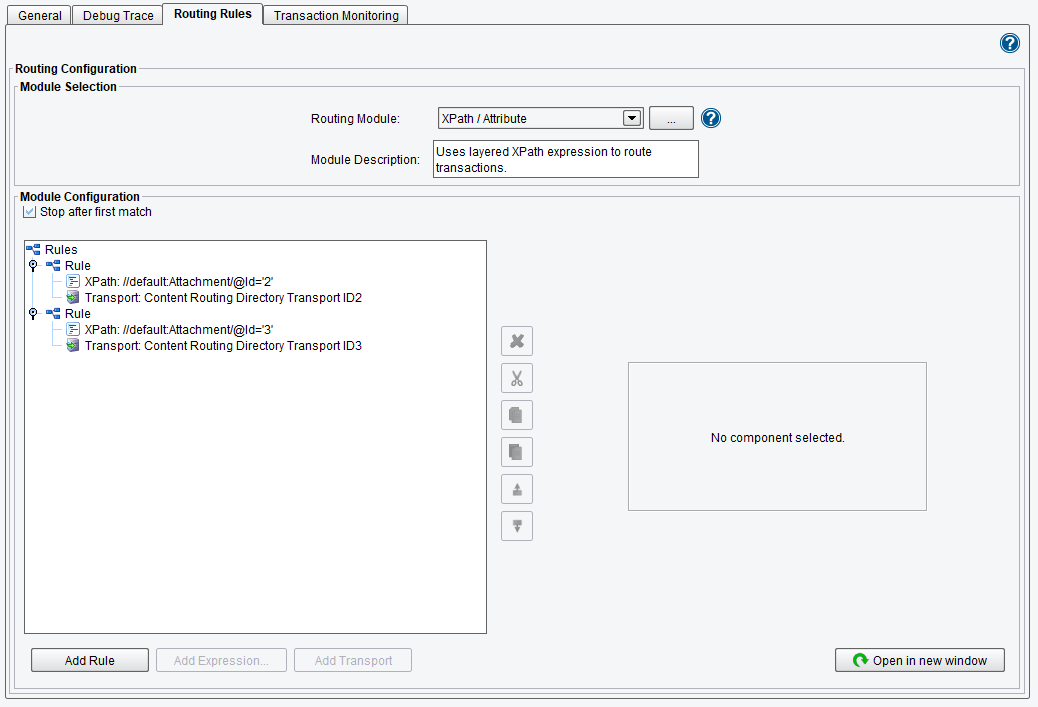
The routing configuration is very simple; it uses two XPath-based rules, each performing a different operation. One routes all transactions with an Id of 3 to a particular Transport; the other routes all transactions with an Id of 2 to a different Transport. This is the fundamental mechanism by which all routing is performed; a rule is defined, criteria are defined for that rule, and an operation is optionally defined. Rules can be nested. There are two different modes for routing; Accumulate Matched Targets and Single Target. Accumulate Matched Targets will continue evaluating rules and executing operations; Single Target will stop at the first operation successfully performed.
Below is one of our sample transactions (contained in the Sample3.xml):
- <?xml version=“1.0” encoding=“UTF-8”?>
- <ns2:Attachment xmlns:ns2=“Sample3.Namespace” Id=“3”>
- <ns2:CreatedDate>2012-07-18</ns2:CreatedDate>
- <ns2:LastModifiedDate/>
- <ns2:LifeCycleId/>
- <ns2:Mime>Text/XML</ns2:Mime>
- <ns2:AttachmentData>VEhJUyBJUyBXSUsgV0lLIEEgU0FNUExFIFRFWFQgQVRUQUNITUVOVA==</ns2:AttachmentData>
- <ns2:AttachmentReason>Order</ns2:AttachmentReason>
- </ns2:Attachment>
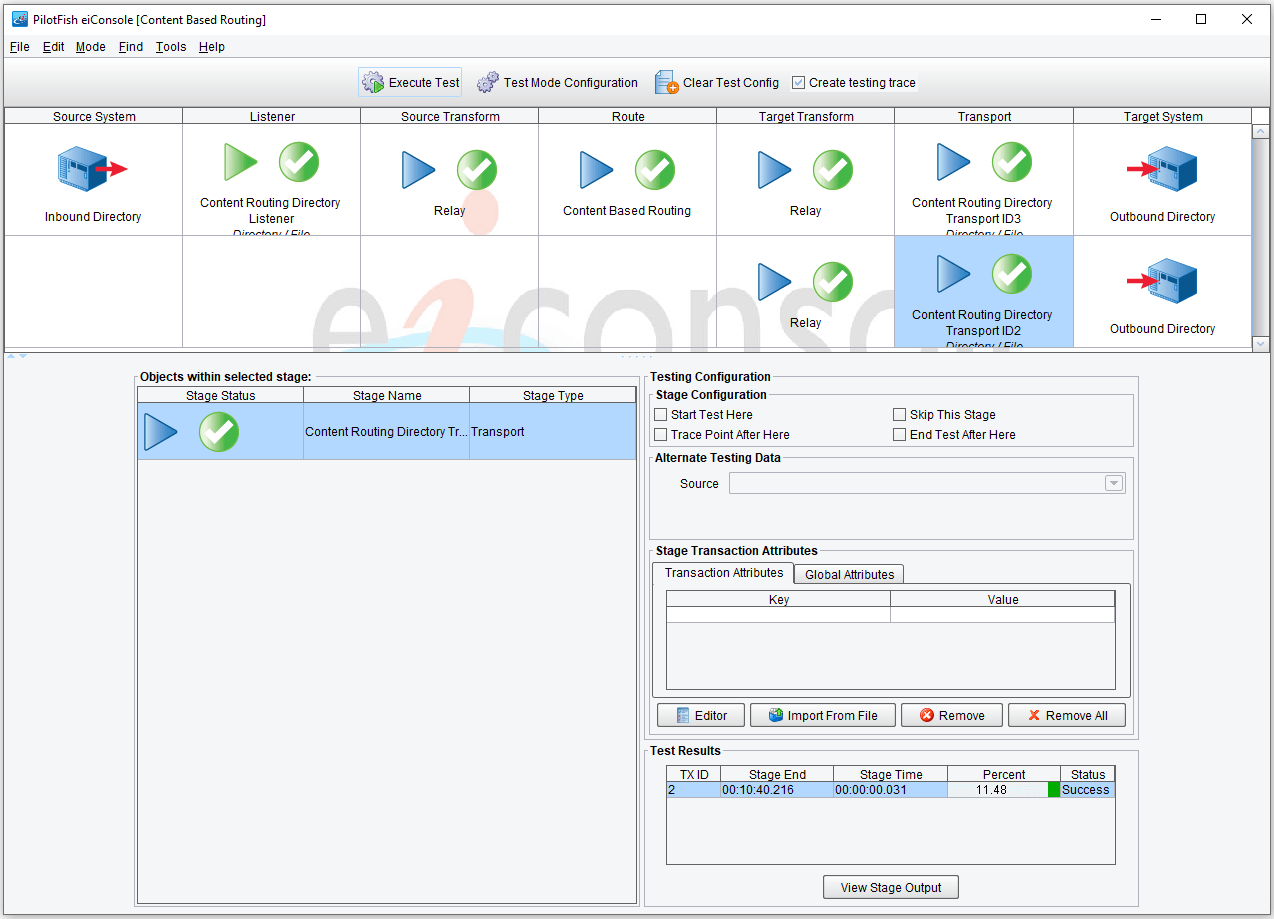
Note: The Id, in this case, is 3, so it would be routed to the ID3 Transport. This can be experimentally verified by running this transaction in test mode:
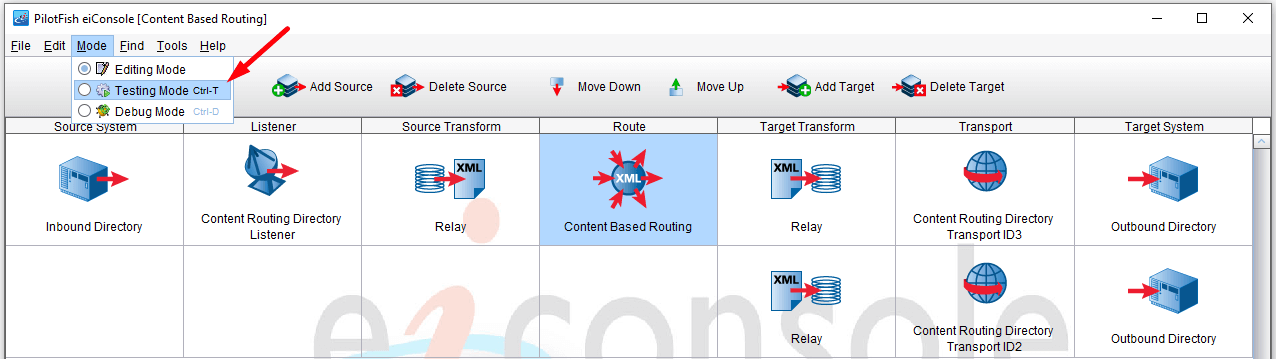
Go into the Testing Mode.
Then put the Sample2.xml and Sample3.xml files found in c:\Users\{USER _NAME}\PilotFish eiConsole Working Directories\Content Based Routing\data into the polling directory c:\Users\{USER _NAME}\PilotFish eiConsole Working Directories\Content Based Routing\in.
Then click Execute Test.

The green checkmarks show that the test finished successfully.
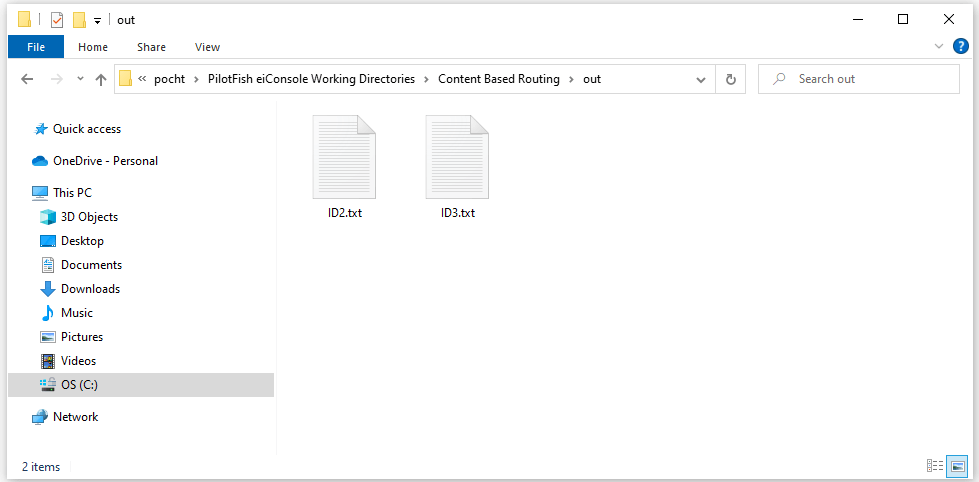
The ID2.txt and ID3.txt files should be in directory c:\Users\{USER _NAME}\PilotFish eiConsole Working Directories\Content Based Routing\out
This concludes this tutorial on Content Based Routing.