eiDashboard v.19R1
Custom Reports
When using Transaction Logging Mode, you will probably find yourself running the same transaction log filters on a regular basis – for example, when checking for transaction errors. Custom Reports are a convenient way to save common transaction log filters for easy viewing later. This tutorial will cover both saving and viewing custom transaction reports.
Saving Reports
To save a custom report, first setup the filter you would like to save in the Transaction Logs page. More information on transaction log filtering can be found here. After setting up the filter and applying, click the ‘Save Report’ button in the Message Logs table.

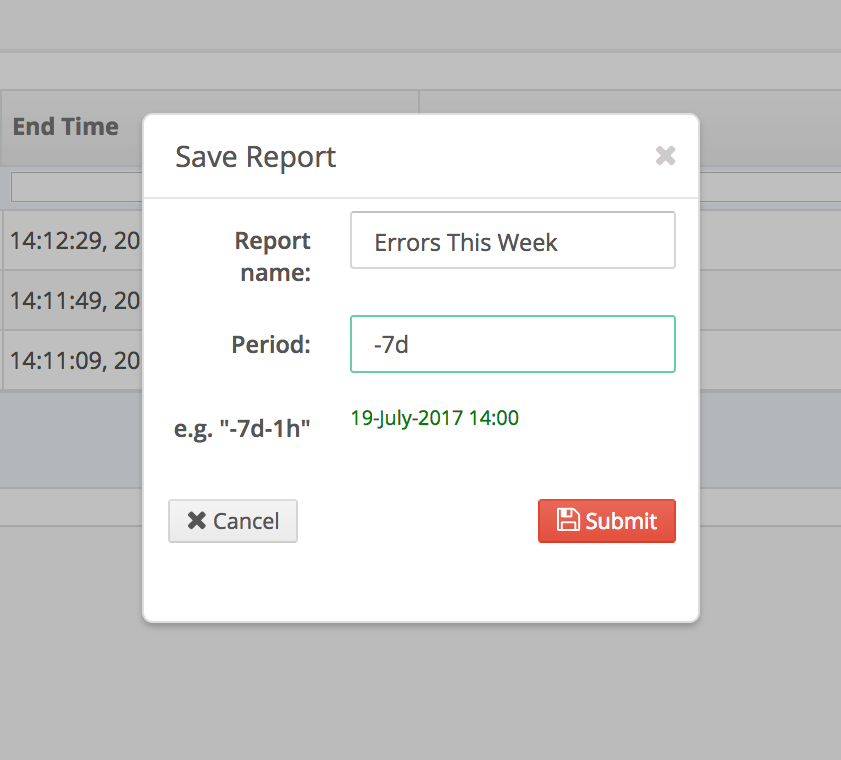
In the window that appears, provide a report name and how far back this report should search in the logs. Setting -7d, for example, will match the filter to all logs from the last 7 days. After clicking ‘Submit’, the custom report is saved.

Report Retrieval and Management
Viewing and managing reports is all handled in the ‘Reports’ tab. From here, all saved reports are on display – along with information about each one. Clicking the ‘Report’ button on our ‘Errors from…’ report will run that report against the current Transactions and filter accordingly.

From the table that appears, all matching transactions are available just as they would be from the ‘Transaction Logs’ page. Report information can be edited using the blue pencil icon and reports are deleted with the red trashcan.

Exporting to Excel
Reports can also be easily exported to Excel Format for long-term storage or further analysis. To export a report, click the sheet of paper icon in the transaction logs table and select where you would like the file to be saved.

