eiConsole for ACORD – AL3 (Demo)

Welcome to our demonstration of ACORD AL3 data manipulation in the eiConsole. Companies in the Property and Casualty value chain have been long-time adopters of the ACORD standards. The ACORD XML standards have been around for nearly a decade. However, they’re long pre-dated by using ACORD forms and ACORD AL3. Even today, much of the electronic communication between agency management systems and carriers is transacted with a fixed-width AL3 data dictionary.
The ongoing development and maintenance of the AL3 Interface are synonymous with “Project”. Interfaces are the highest-level of visible abstraction within the eiConsole. Any given Interface is defined by one or more Routes. Even as service orientation in ACORD XML becomes more prevalent. The PilotFish eiConsole has been instrumented with a number of ACORD and AL3 specific features. Taken together with the eiConsole’s best of breed integration tools, thousands of hours, and even more importantly dollars, can be saved. Let’s have a look.
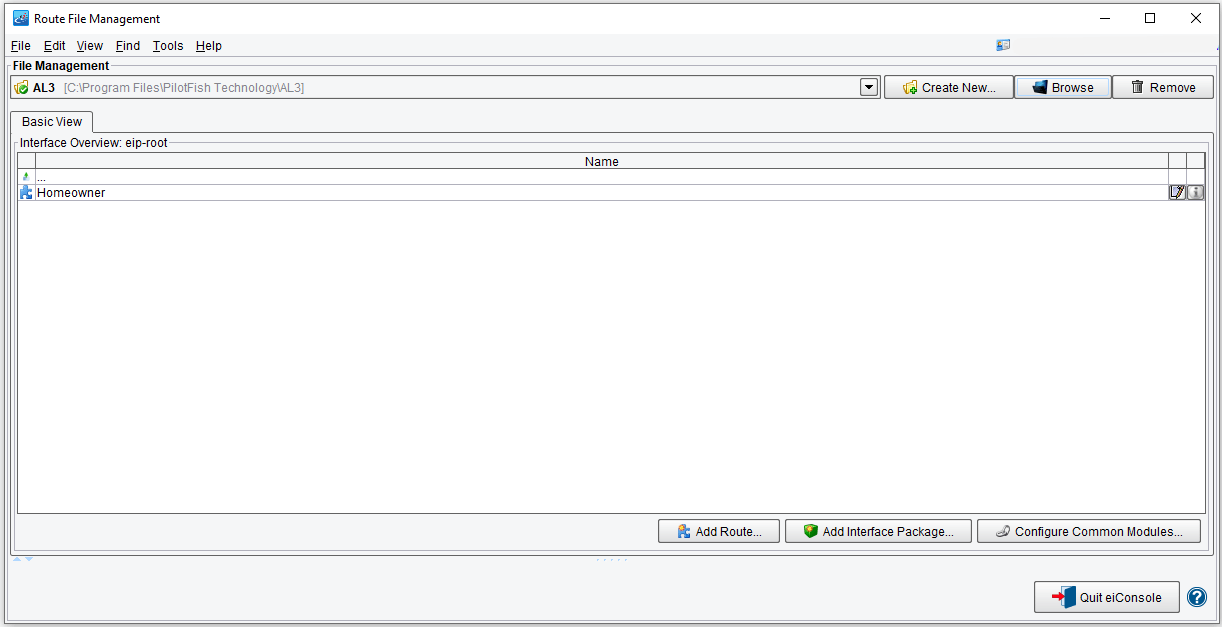
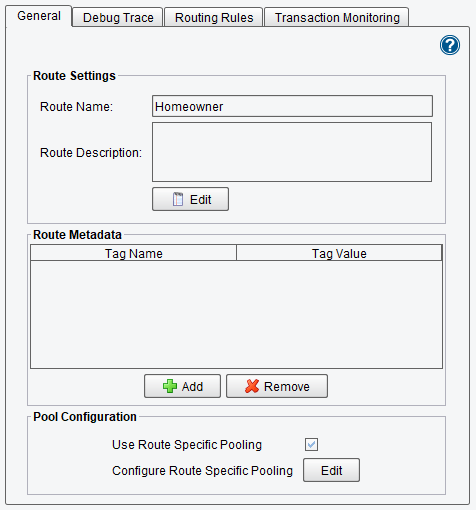
The first screen you’ll see is the eiConsole’s Route File Management window. It contains a list of Interfaces that you might choose to work with. Here we have a single route or Interface for a Homeowner’s AL3 download.
Double-clicking a route, or template, in the route grid brings us to the main eiConsole screen. Here, we depict the flow of the data from one Source System to one Target System. For this demonstration we’ll be accepting AL3 data in a directory, converting it to ACORD PCS XML, and then back.

The first configured component of our interface is the Listener. Here, we simply have a Directory / File Listener selected. However, the eiConsole supports any number of inbound connectivity protocols.

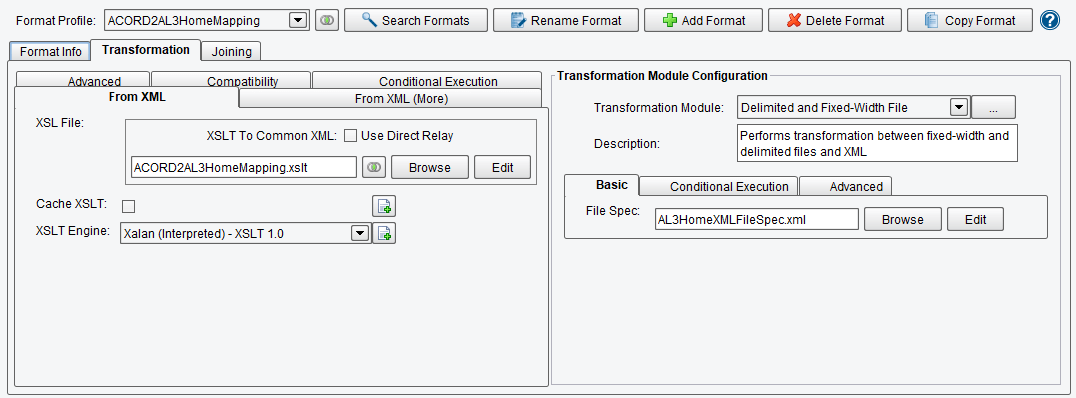
After the Listener, we move on to the Source Transformation. In the Source Transformation, we’ll be accepting the AL3 polled from a directory, and we first need to convert it into an XML format.
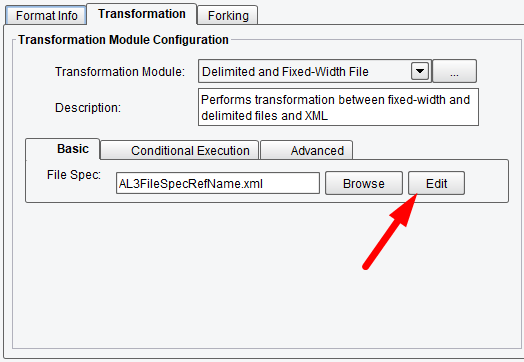
The eiConsole always converts data into XML before the logical data transformation using XSLT. There are a number of modules available to help accomplish this. When working with Delimited or Fixed-Width data, we use the Delimited and Fixed-Width File Transformation Module.

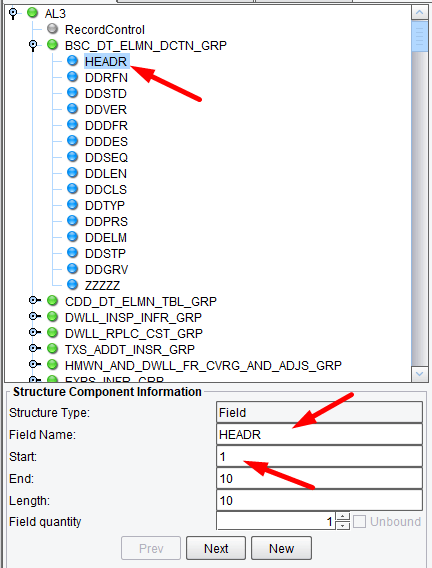
Here we define a file specification in an eiConsole tool called the File Specification Editor. In the File Specification Editor, we describe the structure of our inbound data such that it can be parsed into an XML structure. Here you’ll see that the tree on the left-hand side represents that structure, in this case, the AL3 data dictionary. Each green node represents a record type, and each blue node a field type.

When a field is selected, you’ll see the byte positions and name underneath.
When using the File Specification Editor to describe an arbitrary format, this tree can be built manually, or through an import process. However, when working with ACORD AL3, you can use the File Specification’s AL3 import.

The AL3 importer allows us to specify a data dictionary file. This file is typically terminated with the suffix asc and is part of an ACORD AL3 specification download.

Upon importing, we can choose to use the data dictionary’s Group Code, Reference Name, Description, Group/Field Codes, or Group Code/Field Index to name our fields.

Once the AL3 structure has been loaded, we can also load in a sample file.
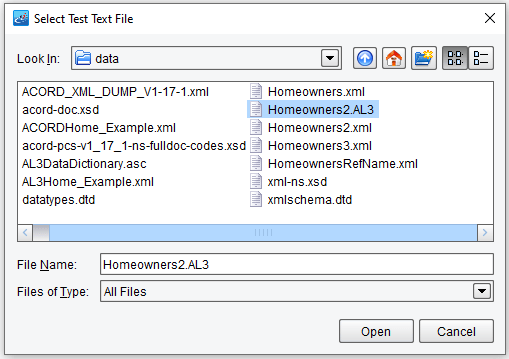
The sample file will be loaded into the “To XML” pane of the Results preview area.

We can then execute our transformation to XML using the AL3 Data Dictionary.

We’ll then be presented with a second tree. This time the tree is populated not only with the structure of the file but also with the actual field level data. We can inspect this to make sure that the parsing occurred properly.
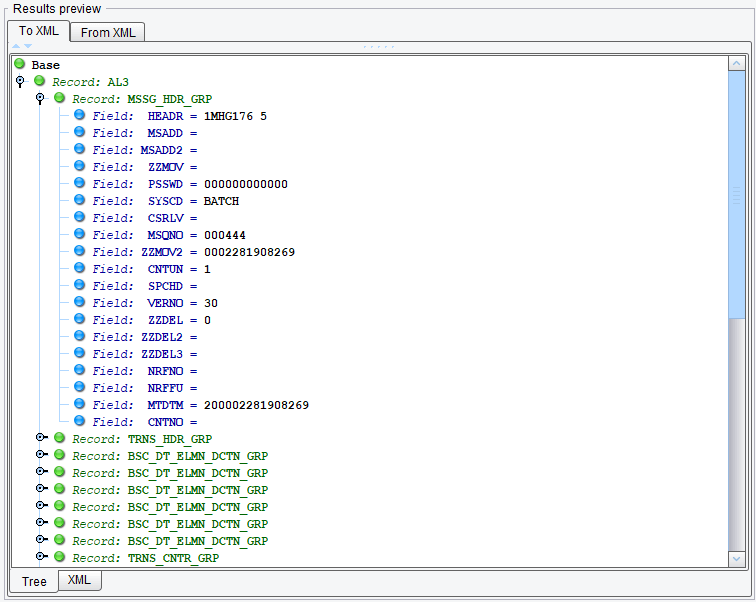
Note that here we’re going To XML, but that same process works in reverse. We can take an XML representation of an AL3 file and then use this File Specification to lay it out into the Fixed-Width file format. Once the AL3 data has been converted to XML, the next step is the logical mapping.
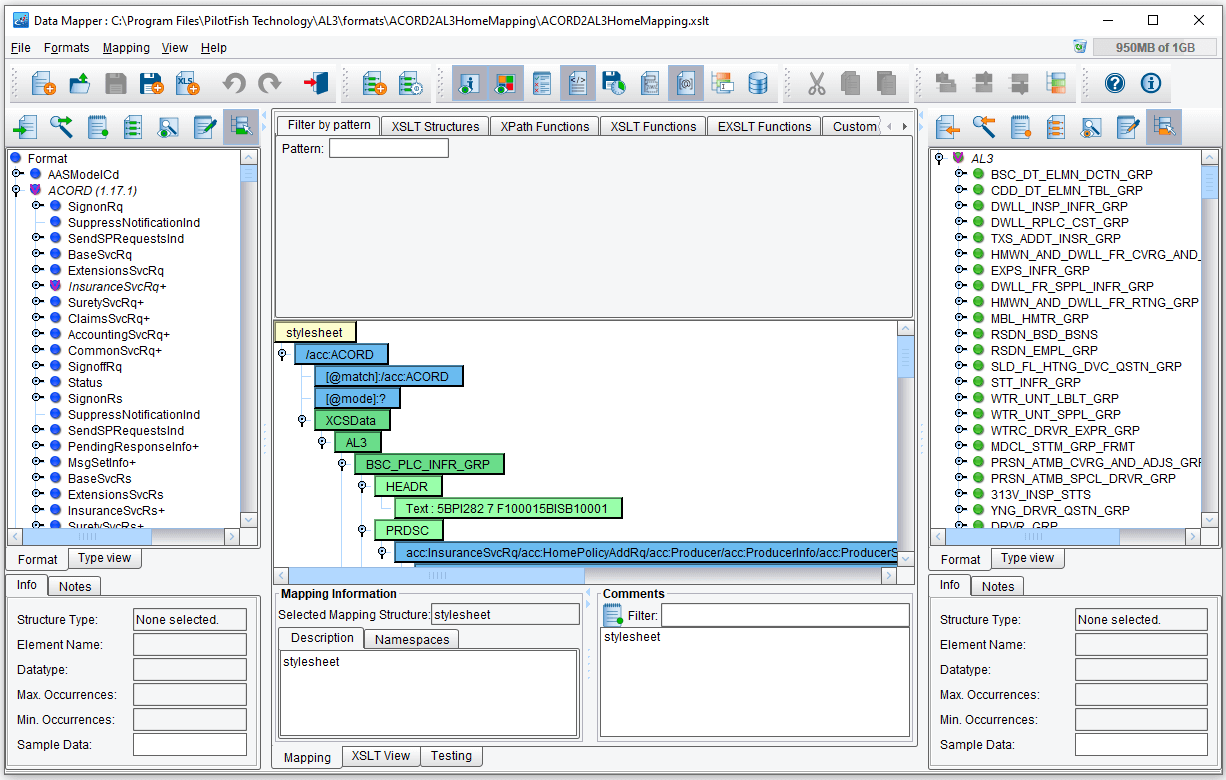
Logical mapping in the eiConsole is handled using XSLT and the best of breed data transformation tool, the Data Mapper.
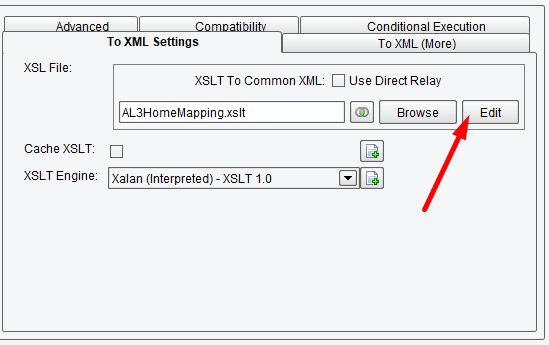
The Data Mapper is made up of three panes. We have a pane on the left containing a tree with the structure of our Source data. In this case, it’s a tree-based representation of the AL3.

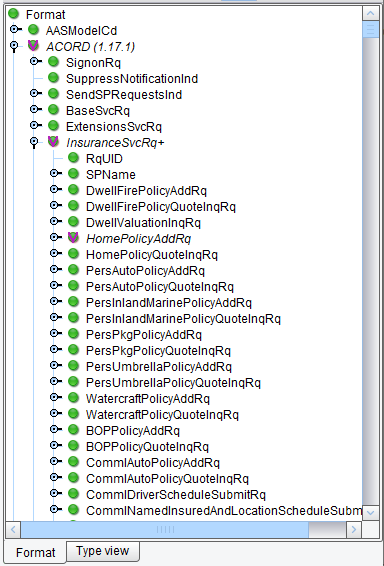
On the right-hand side, we have another tree. This tree represents the structure of our Target format. In this case, it’s loaded with the ACORD PCS XML model.
In the middle, we have the mapping between the Source and the Target. This mapping is created through drag & drop. First, adding fields from the right to the mapping and then associating it with fields from the left.
To work with AL3 in the Data Mapper, we need only choose the Flat File format reader and point it at the File Specification that we just created.

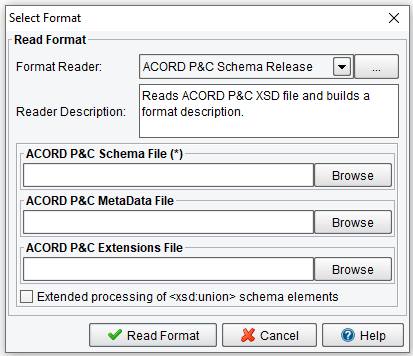
On the right-hand side, we have ACORD loaded. To load the ACORD PCS model, we use the ACORD P&C Schema Release and provide it the Schema File, codelists, and any Extension Files.
Let’s take a look at how we’d add something to the mapping. Here you’ll see the Coverage section of the mapping where we’ll be outputting an ACORD XML Coverage. You’ll see here that we’re using the XSLT for-each tool to iterate over each instance of the FRMS_GRP element.

Here we’ll be creating a Form with several sub-elements. Those elements that have blue children have already been mapped. Here you see that we have FormName that has been dragged from the right but not yet mapped from the left.
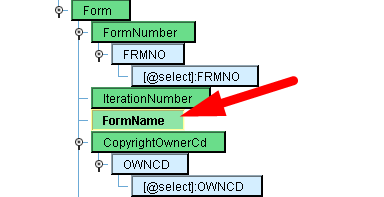
To create the mapping, we’ll drag from the left-hand panel the FNAME element and drop it on top of FormName. That creates a one-to-one mapping that’s also represented in the underlying XSLT.

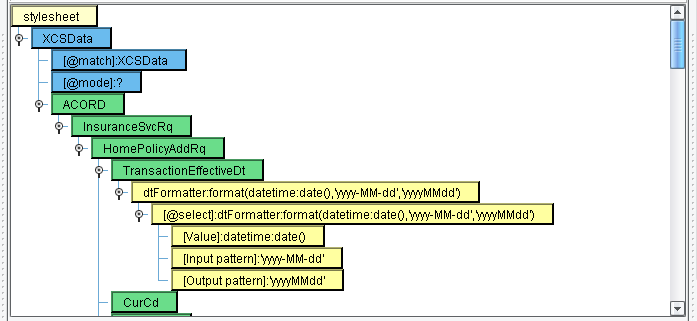
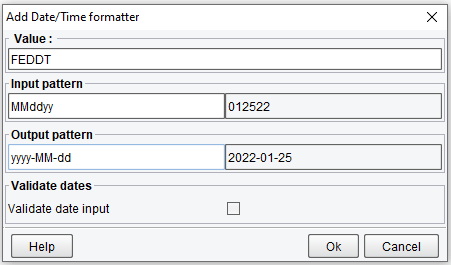
More complicated manipulations are also available. For instance, if we needed to do date formatting on this EditionDt element, mapped from the FEDDT field, we could use the Date/Time Formatter tool from the pallet, which allows us to provide an input pattern and our desired output pattern.

Additionally, we support Tabular Mapping. Here we see the LOBCd element mapped to a field from AL3. You’ll note that when this element is selected, on the right-hand side the ACORD documentation and codelists will be available.
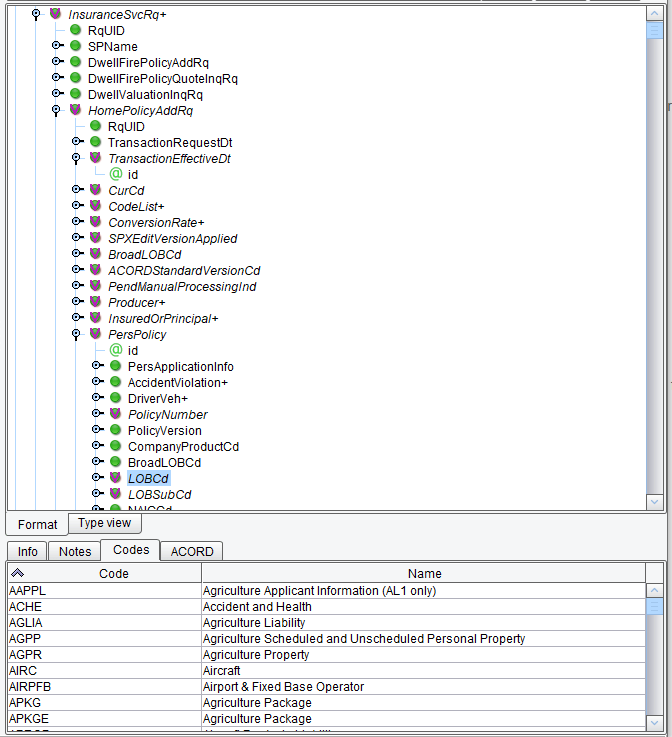
To map between a set of allowable codes in AL3 to a set of values in ACORD, we can use our Tabular Mapping tool. Here we can enter in values on the left-hand side that map to pre-populated values from the ACORD standard.

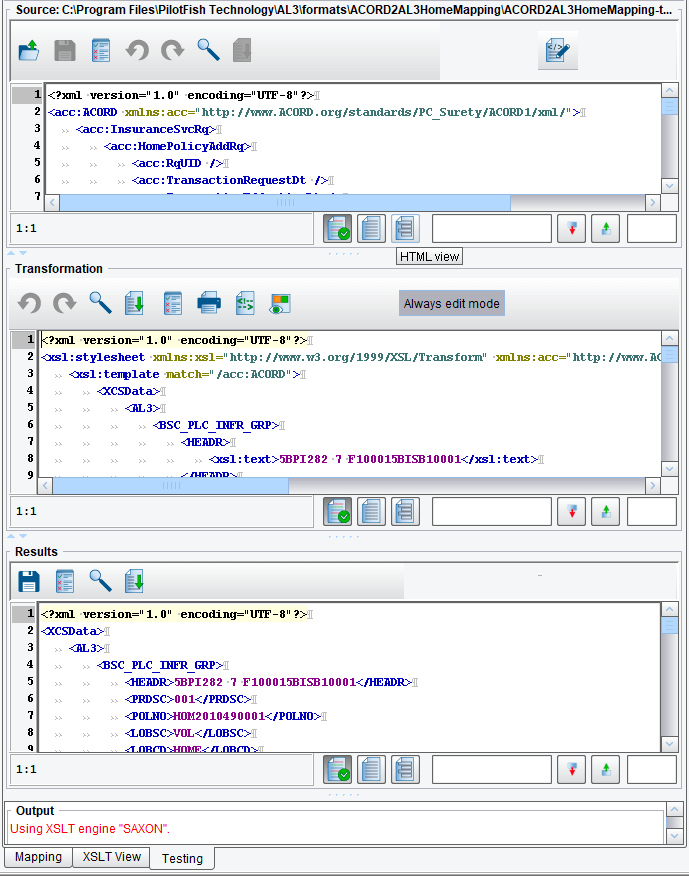
Of course, once our mapping is complete, we can test our mapping in the testing pane. You’ll see our Source is AL3 and it has been converted to XML, and our result is an ACORD PCS XML transaction.

Moving along, the next stage in our interface is the Router. Here we’re just routing the data along to our one defined Target System, and moving along to the Target Transformation.
In the Target Transformation we’re using the same transformation tools that we used in the Source; however, this time we’ll show you how it works in reverse. First, we use XSLT to map from our ACORD XML into an XML representation of AL3.
This time in the Data Mapper we see the ACORD PCS model on the left and the ACORD AL3 model on the right.
Instead of generating ACORD tags, we’re generating AL3 records and their corresponding fields. Values from the ACORD PCS model, represented as XPaths, are being used to populate each one of these fields. The output of this transformation is, again, an XML representation of the AL3.
Then, we move on to the Transformation Module where the XML representation of the AL3 is then converted with the same File Specification from XML to the Fixed-Width format.


Finally, we’re just dropping this data into a local directory.

Let’s take a look at the interface from end-to-end in the Console’s Testing Mode. Here we’ll begin our test with the Source Transformation and end the test after the final Target Transform.
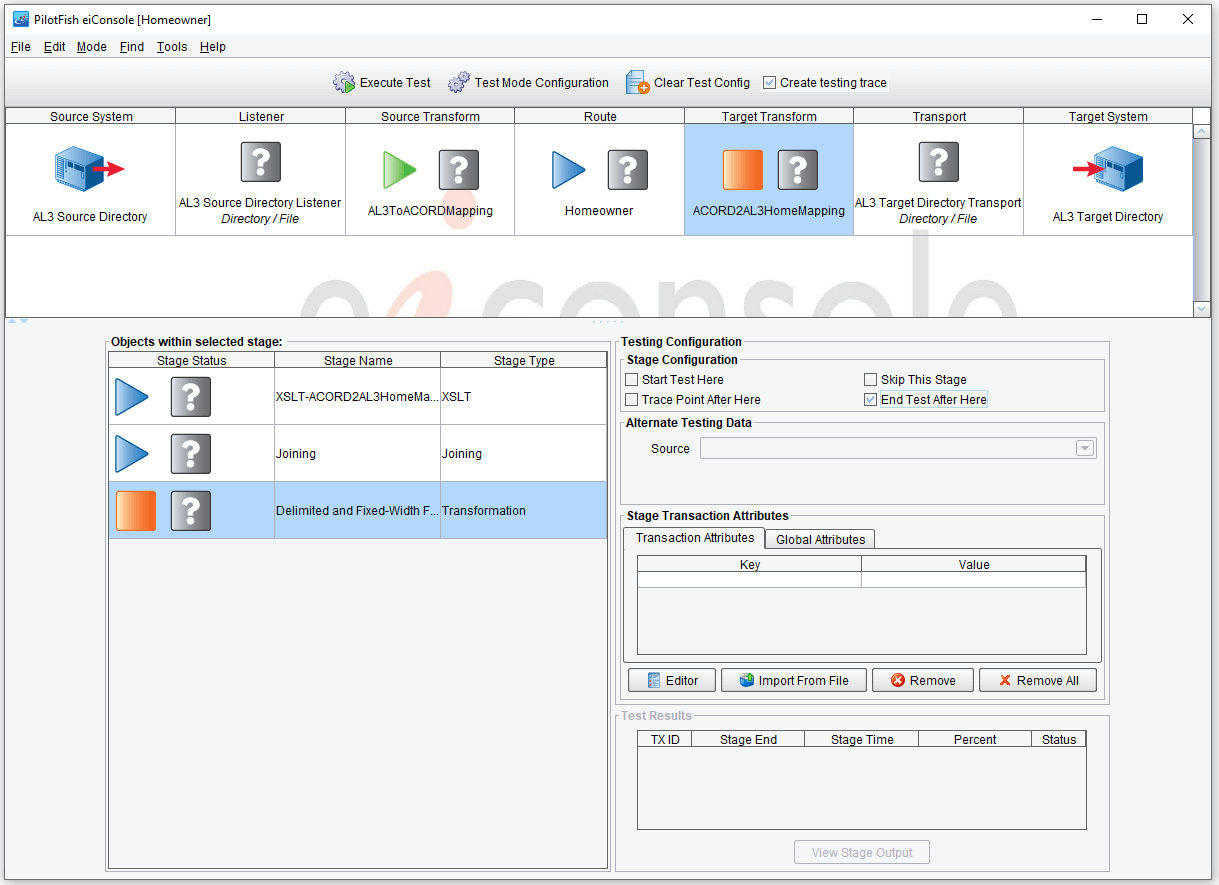
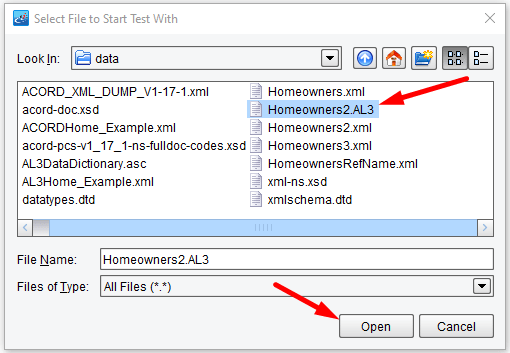
We choose the Source as From File and click Execute Test and choose an AL3 sample file.
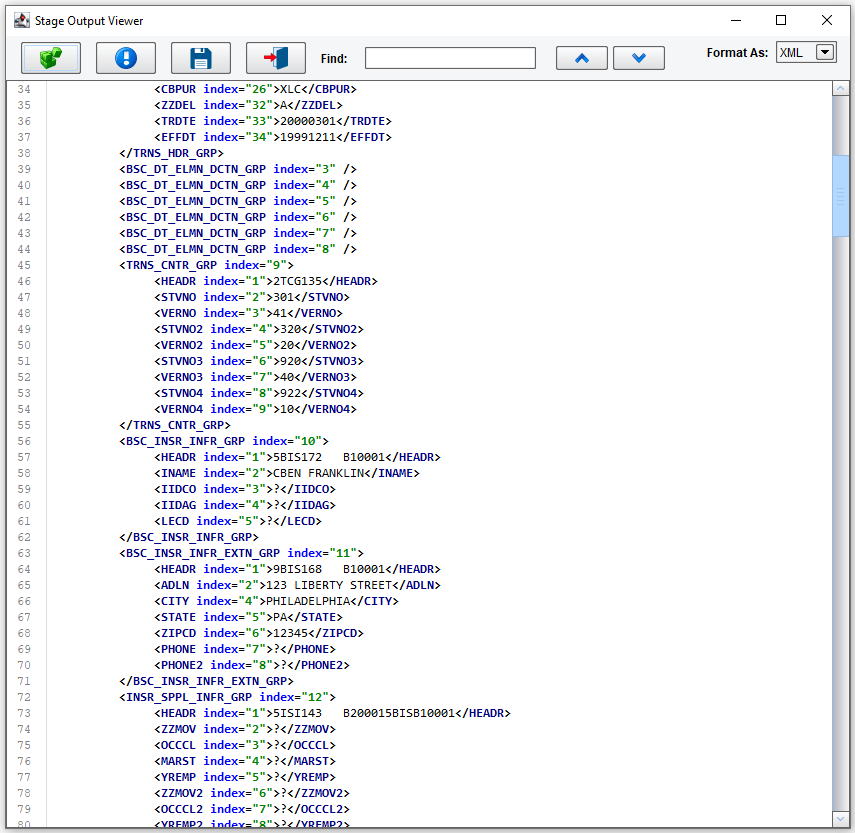
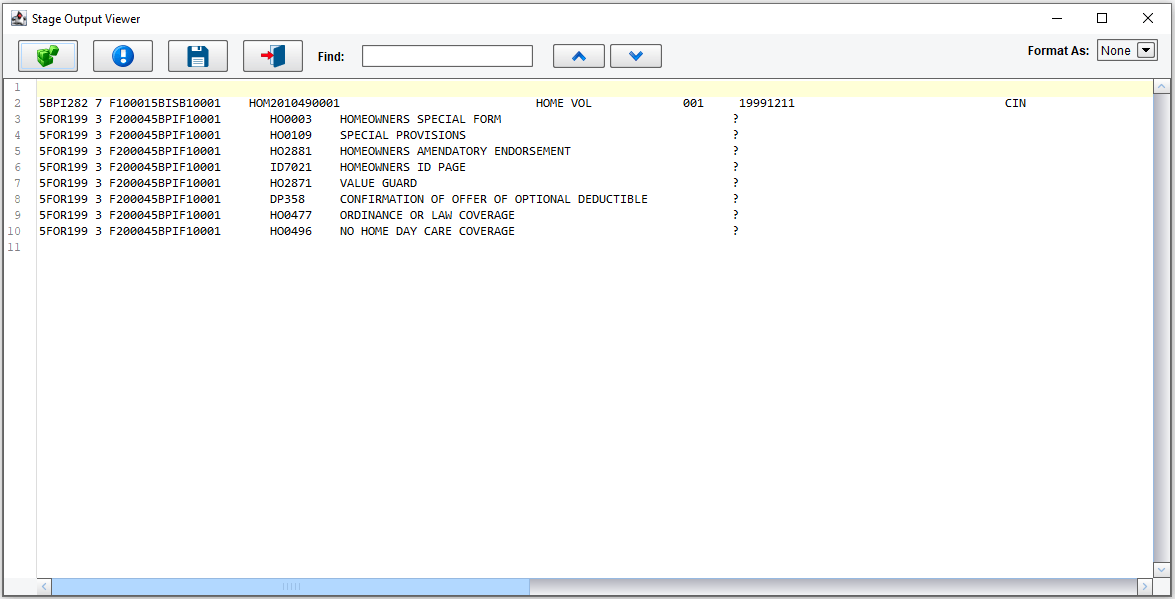
As each stage completes, the question marks turn into checkmarks. We can view our original flat format AL3 data.

The result of the initial transformation of that data into an XML format.
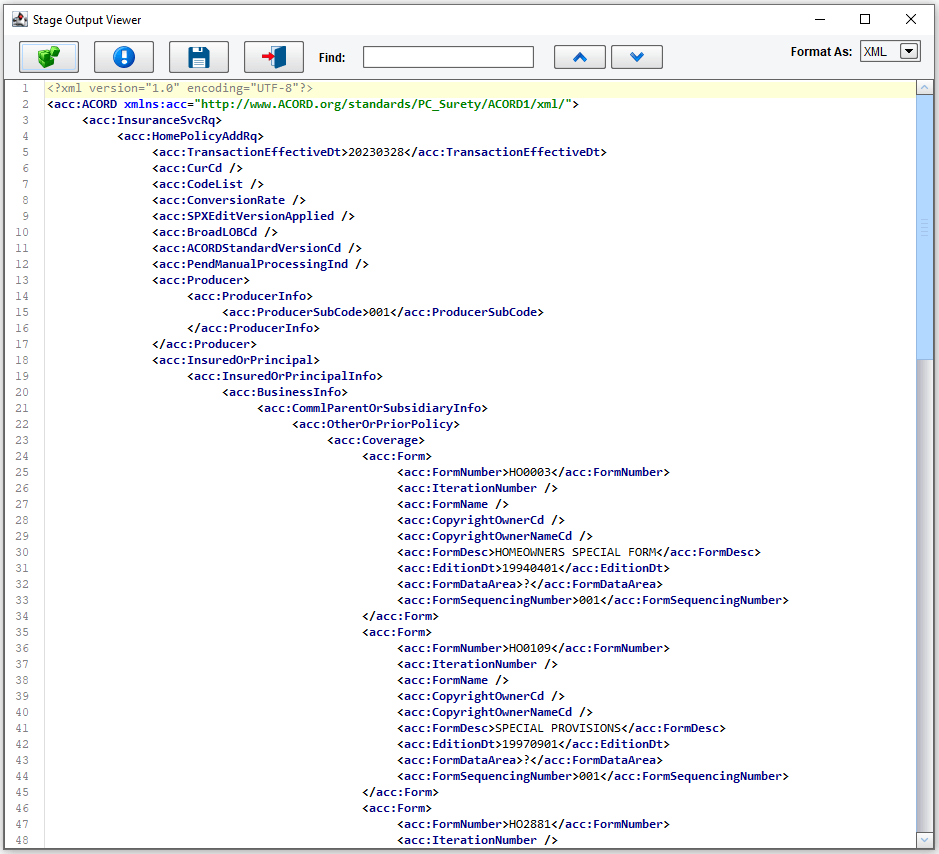
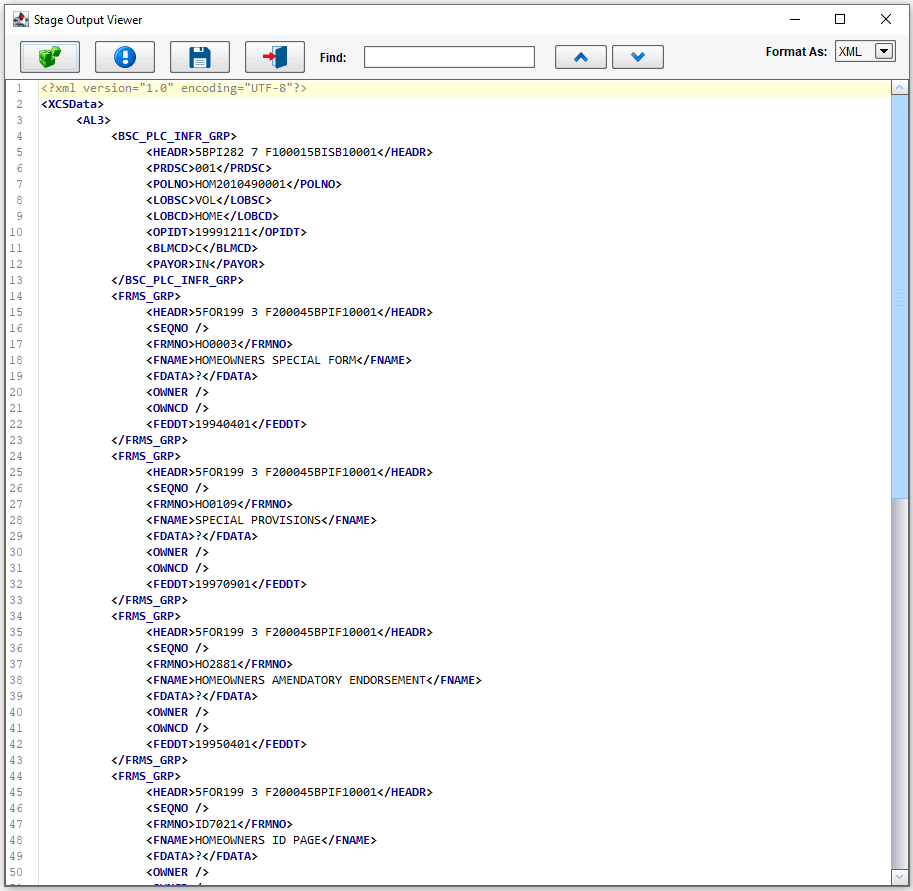
The result of our XML mapping onto an ACORD PCS XML transaction.
The result of mapping that data back into an ACORD AL3 XML structure.
And then, finally, that data is back into an ACORD AL3 fixed-width file format.
This concludes our demonstration of using the eiConsole to work with the ACORD XML and AL3 formats.