Exercise 8.3 – SQLXML Querying and Mapping
Purpose:
To practice querying data from a database and mapping it using SQLXML.
References:
Note: This exercise assumes the completion of Unit 8.2, so data will currently be populated in the H2 database. If that exercise hasn’t been completed, this tutorial will not have sample data to retrieve.
Create a Route
- From the eiConsole File Management screen, select the Add Route button.
- In the dialog that appears, enter the name DB to People and select OK.
- The Route should now appear in the table on the screen. Double-click it to open it.
Document Source System
- Select the Source System stage in the Route Editing Grid. The configuration panel will appear at the bottom.
- Change the System Name to H2 Database.
- Select the Choose Source Icon button, and scroll down to select one of the database icons.
Configure the Database Listener
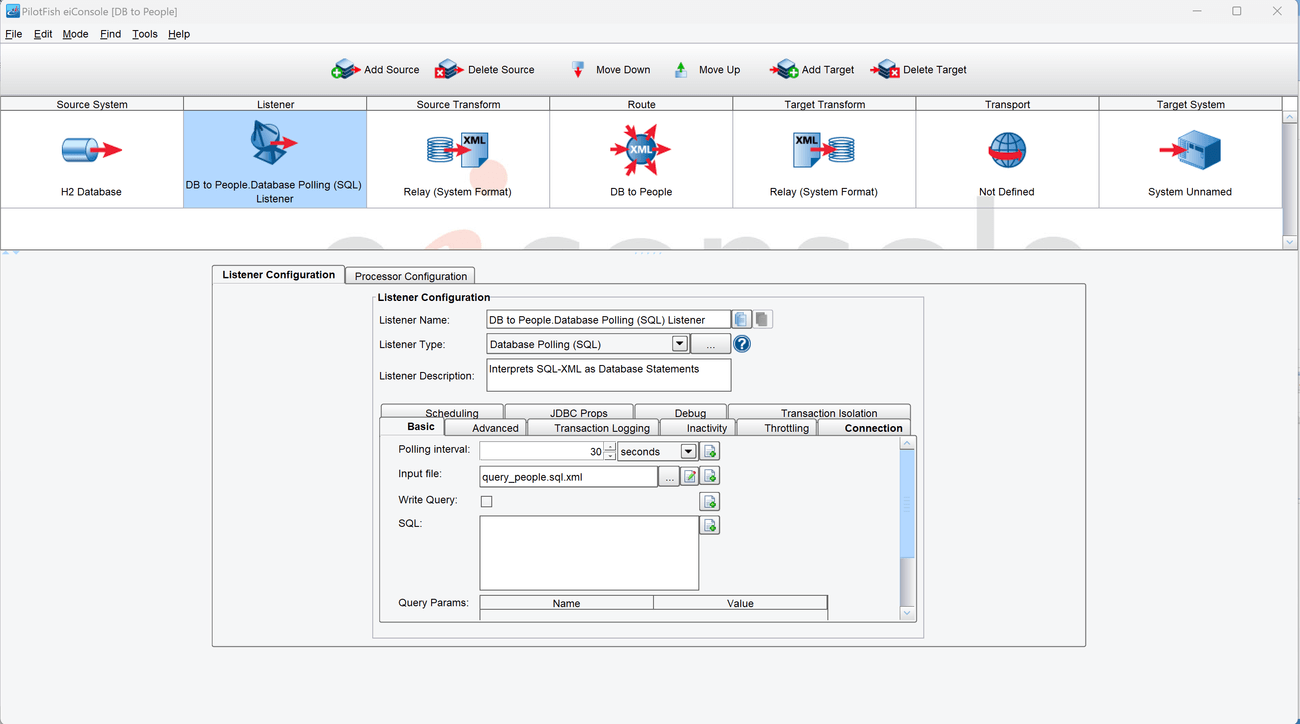
- Select the Listener stage in the Route Editing Grid. The configuration panel will appear at the bottom.
- Select Database Polling (SQL) from the Listener Type selection box. Optionally, click the … button to open the Module Search Dialog, which provides a faster way to find the module you want.
- In the Basic tab of the Listener’s configuration, click the … button next to the Input File text field. When the File Selector opens, navigate to the sample files directory and select the file called query_people.sql.xml. When prompted to copy it into the route’s directory, press Yes.
- Set the Polling Interval to 30 seconds.
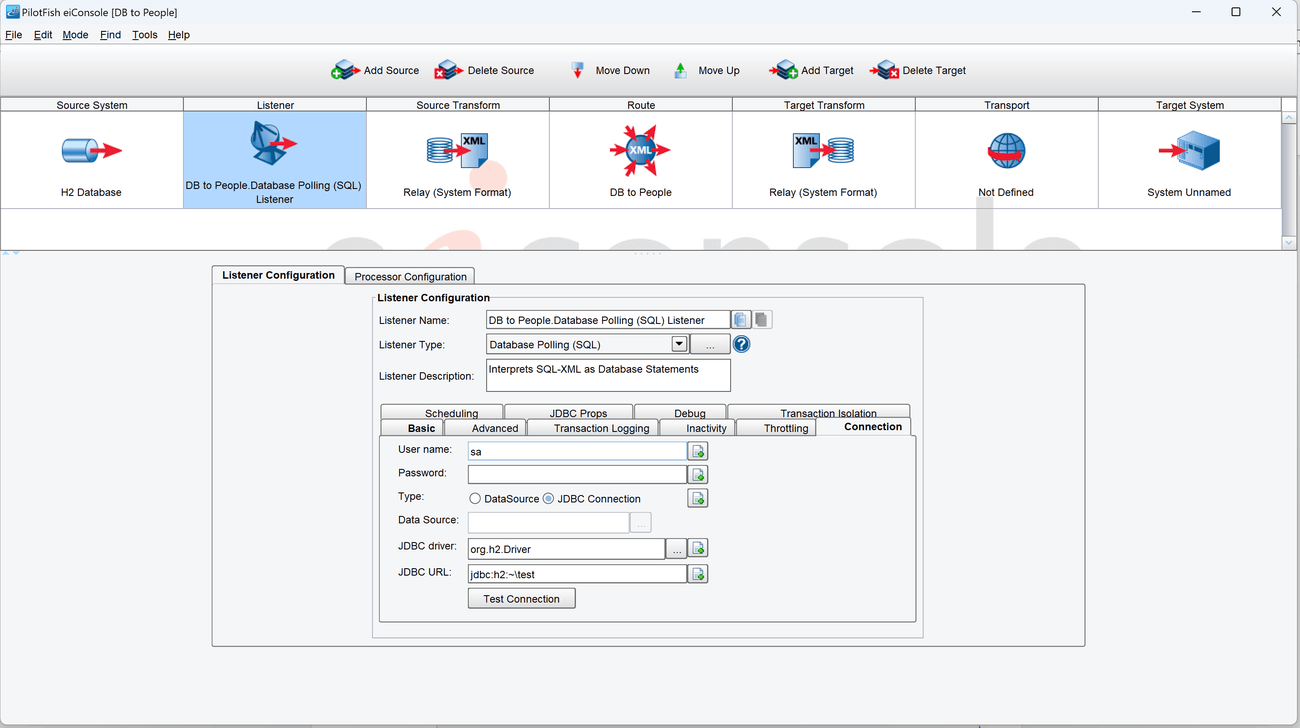
- Go to the Connection tab and in the configuration panel that appears, enter the following database information:
- Username: sa
- Password: (leave this blank)
- JDBC Driver: org.h2.Driver
- JDBC URL: jdbc:h2:~\test

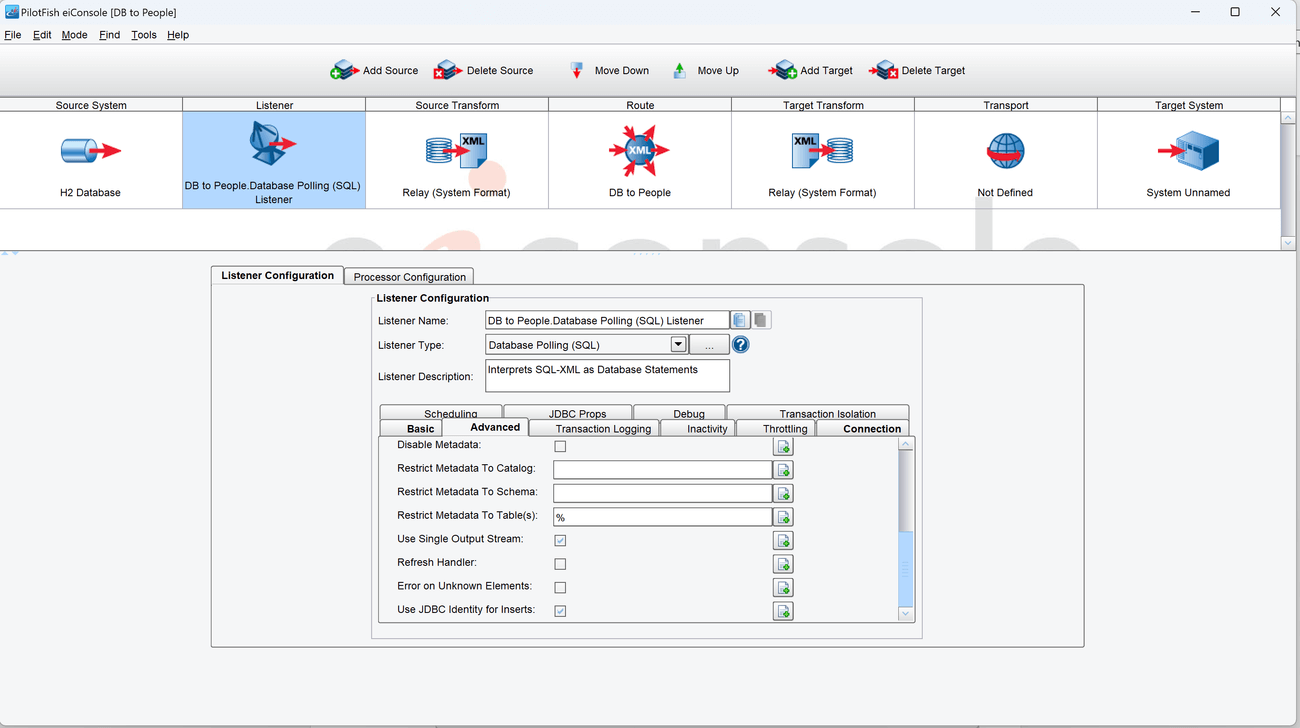
- In the Advanced tab, click the checkbox Use Single Output Stream.
Add Source Format and Open the Data Mapper
- Select the Source Transform stage in the Route Editing Grid. The configuration panel will appear at the bottom.
- Click the Add Format button. In the dialog that appears, name the format DB to People and click OK. The transformation configuration panel will appear below.
- On the right-hand side, in the XSLT To XML configuration panel, uncheck the Use Direct Relay button. The options in that panel will now be enabled.
- Click the New button beneath the checkbox to open the Data Mapper.
Load Source and Target Formats
- Use the Open Source Format button above the Source Format panel to open the Select Format dialog. Choose XML from the Format Reader selection box.
- Click the Add button and in the File Selector, navigate to where the sample files are located. Choose the file called sql_select.xml. Click OK and then click Read Format.
- Use the Open Target Format button above the Target Format panel to reopen the dialog. Select the XML format reader again and select the sample file called people.xml. Click OK and then click Read Format.
- The Source and Target Format panels should now be populated.
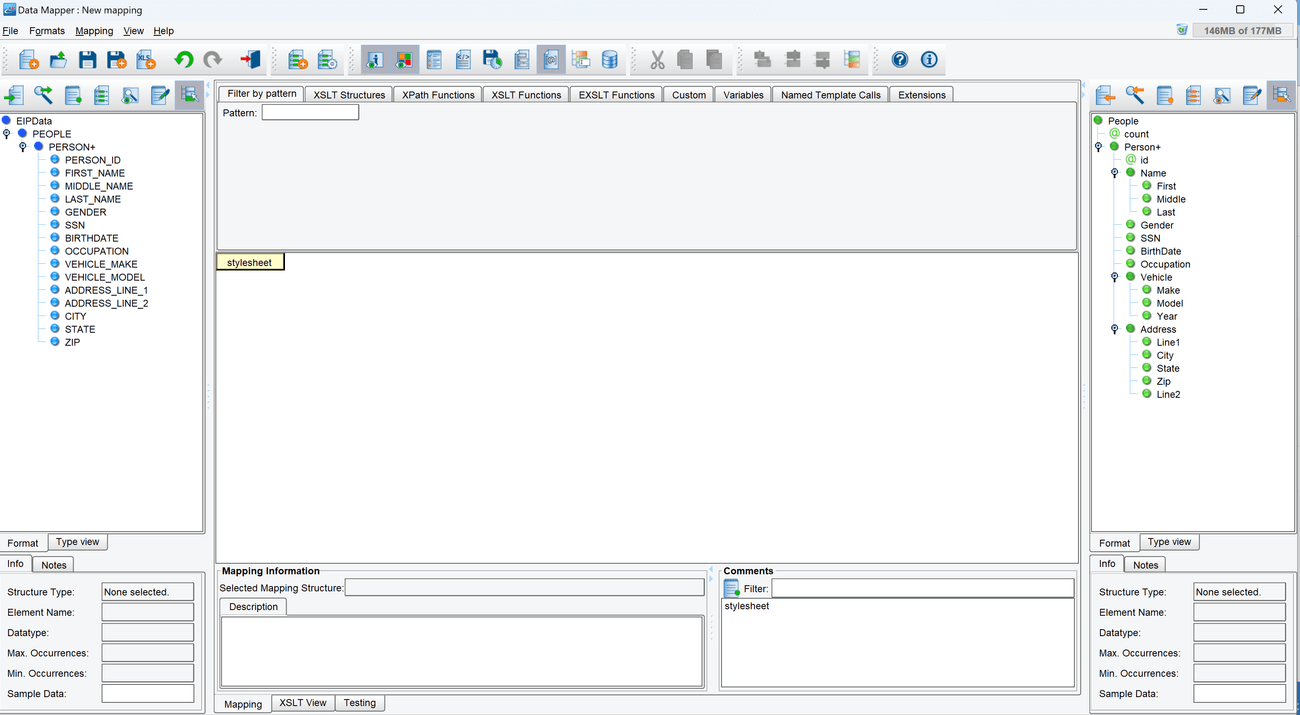

Map the Root Nodes and Add Iteration
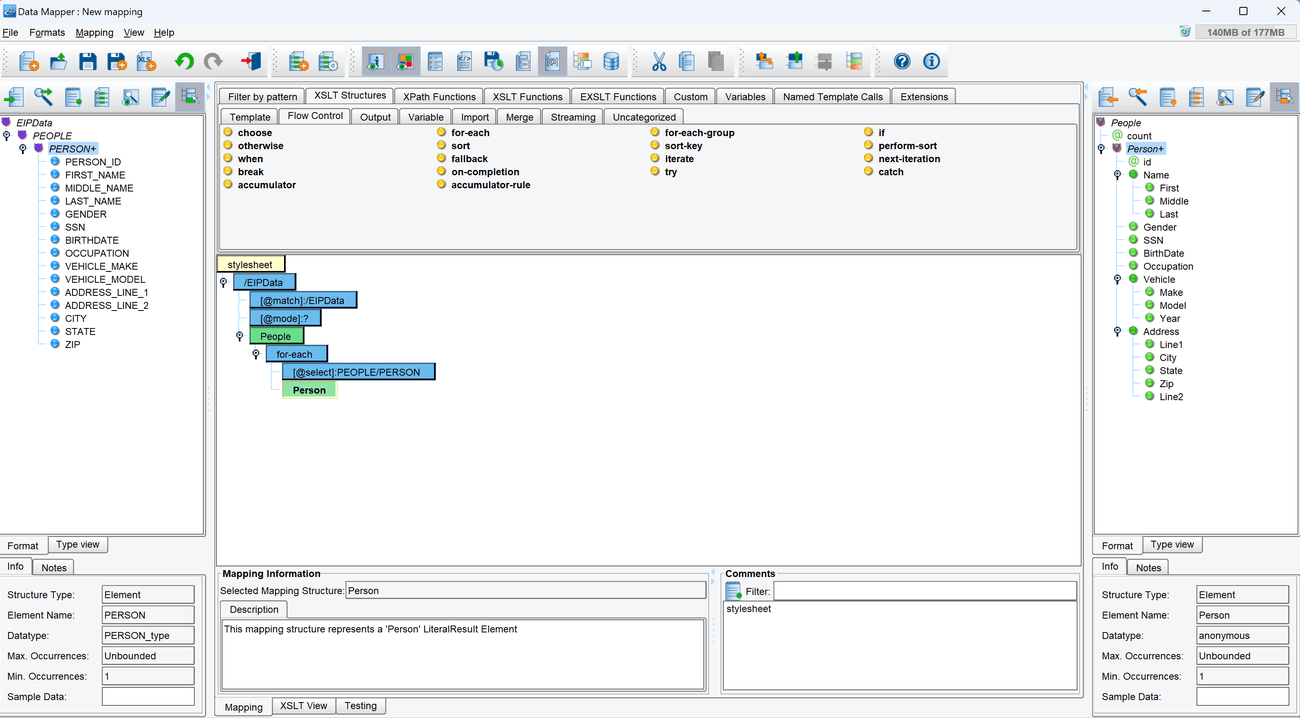
- Select the EIPData Node that is the root of the tree in the Source panel to the left. Drag it onto the center panel and drop it on the stylesheet node that’s already there.
- Select the People node that is the root of the tree in the Target panel to the right. Drag it onto the center panel and drop it on the EIPData node that was just dropped there.
- Above the center mapping panel is the extensions panel. The currently displayed tab, Filter by Pattern, has a text field called Pattern. Type for-each into that field.
- A single item should be present in the panel. This item should also be called for-each. Select it and drag it onto the People node in the center mapping panel.
- Select the PERSON node that is a child of the PEOPLE node in the Source format tree and drag it onto the @select node beneath the for-each node in the center mapping panel.
- Select the Person node that is the child of the People node in the Target format tree and drag it onto the for-each node in the center mapping panel.

Map SQL Data to People XML
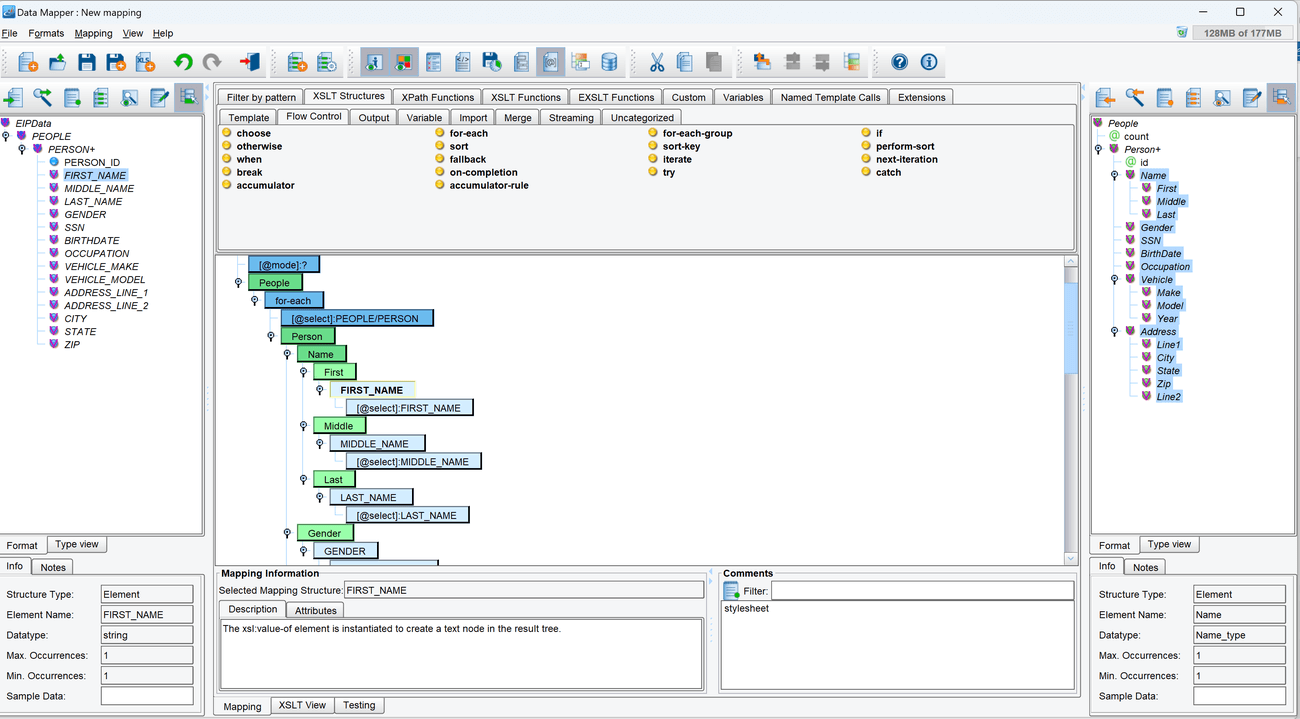
- Expand all children of the Person node in the Target format tree and drag all the children onto the center mapping panel, dropping them onto the Target Person node that is there.
- Map the children of the Source PERSON node onto those Target nodes:
- Target: @id -> Source: Person_ID
- Target: Name/First -> Source: First_Name
- Target: Name/Middle -> Source: Middle_Name
- Target: Name/Last -> Source: Last_Name
- Target: Gender -> Source: Gender
- Target: SSN -> Source: SSN
- Target: BirthDate -> Source: Birthdate
- Target: Occupation -> Source: Occupation
- Target: Vehicle/Make -> Source: Vehicle_Make
- Target: Vehicle/Model -> Source: Vehicle_Model
- Target: Address/Line1 -> Source: Address_Line_1
- Target: Address/Line2 -> Source: Address_Line_2
- Target: Address/City -> Source: City
- Target: Address/State -> Source: State
- Target: Address/Zip -> Source: Zip

Save Mapping
- Now that the mapping is complete click the Save icon in the toolbar above the tree. When prompted for a name, use the default, transform.
- Click the X button in the top right corner to close the Data Mapper and return to the Route Editing Grid.
Configure the Transport
- Select the Transport stage in the Route Editing Grid. The configuration panel will appear at the bottom.
- Select Directory/File from the Transport Type selection box. Optionally, click the … button to open the Module Search Dialog, which provides a faster way to find the module you’re looking for.
- Select the Target Directory using the … button to open the file selector.
- Set people-output as the Target File Name.
- Set xml as the Target File Extension.
Document the Target System
- Select the Target System stage in the Route Editing Grid. The configuration panel will appear at the bottom.
- Change the System Name to People XML File.
- Select the Choose Target Icon button and scroll down to select one of the XML icons.
Prepare to Test
- In the menu bar at the top, select Mode -> Testing Mode. Make sure the changes to the Route are saved.
Perform the Test
- At the top of the Testing Mode screen, select the Execute Test button.
- If the Route was configured successfully, all the Stages should light up with green checkmarks.
- In the OS File Explorer, open the directory selected as the Target Directory. The file people-output.xml should be there, with the transformed contents produced by the XSLT.
Output Files
- Compare the results from the exercise with the following example output files to see if they are correct.