Exercise 4.3 – Transforming Conditional Fixed-Width Files
Purpose:
To practice transforming fixed-width files using the File Spec Editor and Field Record Control conditions.
References:
Create a Route
- From the eiConsole File Management screen, select the Add Route button.
- In the dialog that appears, enter the name Conditional Fixed-Width Files and select OK.
- The Route should now appear in the table on the screen. Double-click it to open it.
Document Source System
- Select the Source System stage in the Route Editing Grid. The configuration panel will appear at the bottom.
- Change the System Name to Text File
- Select the Choose Source Icon button, and scroll down to select one of the plain file icons
Configure the Listener
- Select the Listener stage in the Route Editing Grid. The configuration panel will appear at the bottom.
- Select Directory / File from the Listener Type selection box. Optionally, click the … button to open the Module Search Dialog, which provides a faster way to find the module you’re looking for.
- Assign a polling directory, using the … button to open the file selector. The polling directory should NOT be the directory with all the sample files, since files will be moved/deleted by the listening process.
Add Source Transformation Module
- Select the Source Transform stage in the Route Editing Grid. The configuration panel will appear at the bottom.
- Click the Add Format button. In the dialog that appears, name the Format People Conditional Fixed File Spec, and click OK. The transformation configuration panel will appear below.
- Select Delimited and Fixed-Width File from the Transformation Module selection box. Optionally, click the … button to open the Module Search Dialog, which provides a faster way to find the module you’re looking for.
- In the new configuration panel that appears below, select the Edit button next to the File Spec configuration field to open the File Spec Editor.
Create a File Spec
- When the File Spec Editor opens, a dialog called Select for New File Type will be present. In the sole selection box, choose the last option in the list, called User-defined, and click Next.
- In the new screen, leave Record Style set to Delimited with the Record Delimiter as \n. Change the Field Style to be Fixed Width. Finally, click Save.
- In the File Spec Editor, the left-hand panel is a tree where the specification will be built.
- Right-click on the root Node of the tree, called Base, and select Add New Record. In the dialog that pops up, enter Animal as the record name, and click OK.
- Right-click on the Animal record to add the following fields. After adding each field, set the length for that field in the configuration panel below.
- RecType (3)
- ID (5)
- Type (10)
- Name (10)
- Flavor (5)
- Right-click on the root node of the tree, called Base, and select Add New Record. In the dialog that pops up, enter Building as the record name, and click OK.
- Right-click on the Building record to add the following fields. After adding each field, set the length for that field in the configuration panel below.
- RecType (3)
- ID (5)
- Type (10)
- Value (6)
- Right-click on the root node of the tree, called Base, and select Add New Record. In the dialog that pops up, enter Employee as the record name, and click OK.
- Right-click on the Employee record to add the following fields. After adding each field, set the length for that field in the configuration panel below.
- RecType (3)
- ID (5)
- Type (10)
- Salary (8)
- Right-click on the root node of the tree, called Base, and select Add New Record. In the dialog that pops up, enter Unknown as the record name, and click OK.
- Right-click on the Unknown record to add the following fields. After adding each field, set the length for that field in the configuration panel below.
- Unknown (10)

- Unknown (10)
Create a Field Record Control
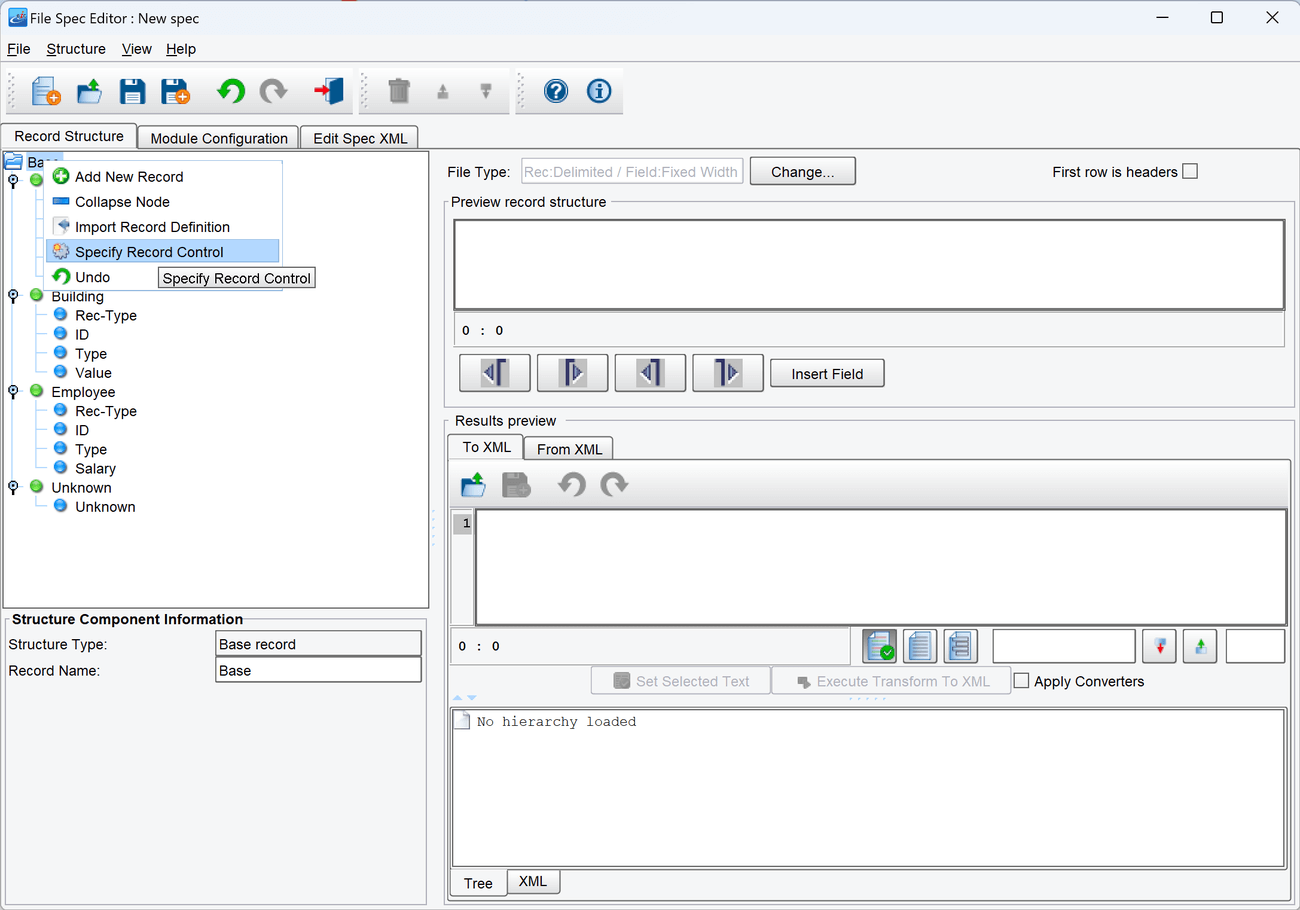
- Now that the spec is complete, right-click on the Base node at the root of the tree, and select Specify Record Control.

- From the dialog box that appears, click the Define new… button, to open a second dialog, Add new Record Control.
- In the Record Control Type selection box, choose Field Record Control. Then click Add Converter to save the changes.
- Now that the spec is complete, right-click on the Base node at the root of the tree, and select Specify Record Control.
- The Field Record Control item should be populated in the selection box in the Add Record Control Instance dialog. Click Select to save the changes.


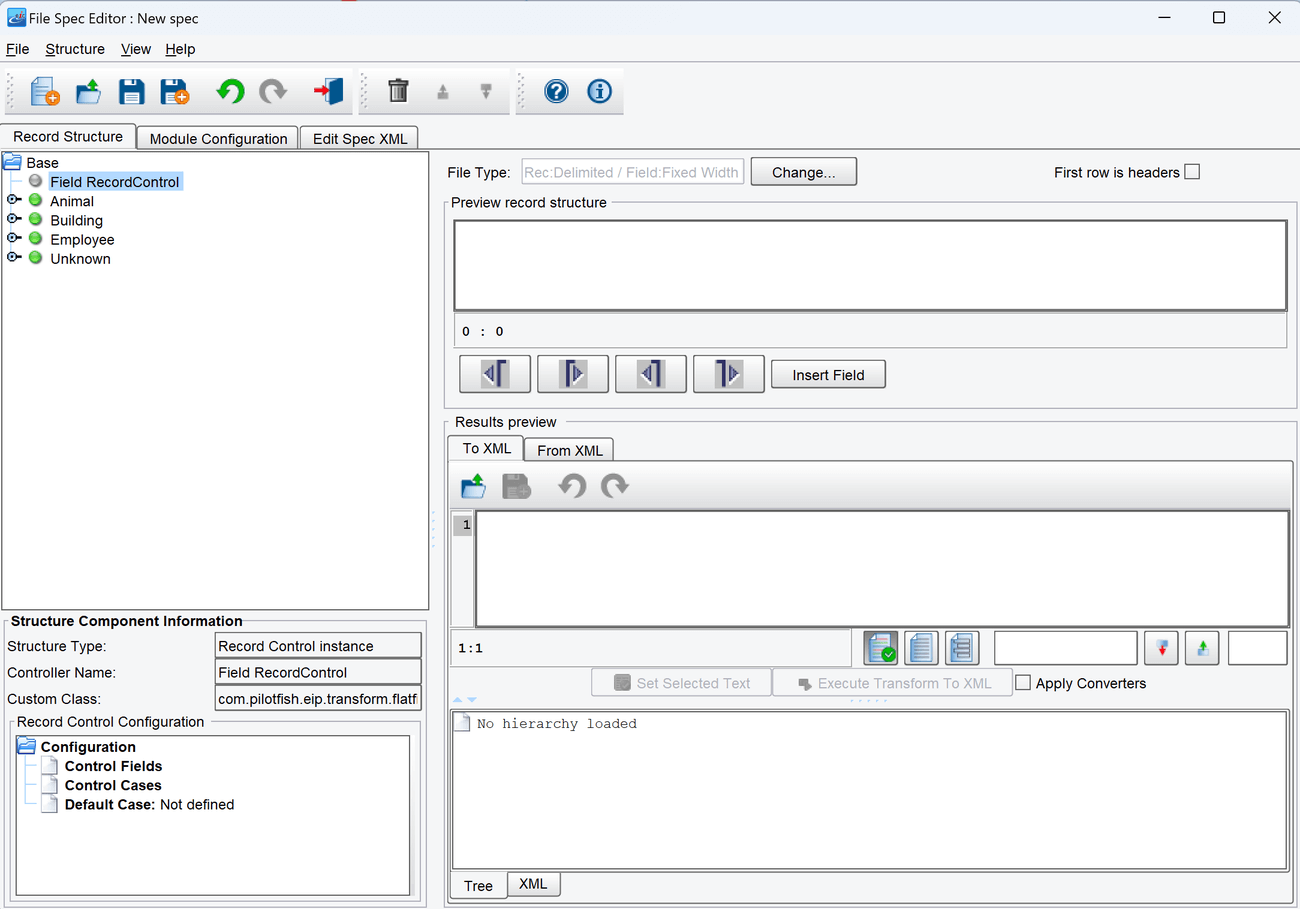
- Select the Field Record Control node that is now in the tree. The bottom panel should display a new configuration panel with its own tree.

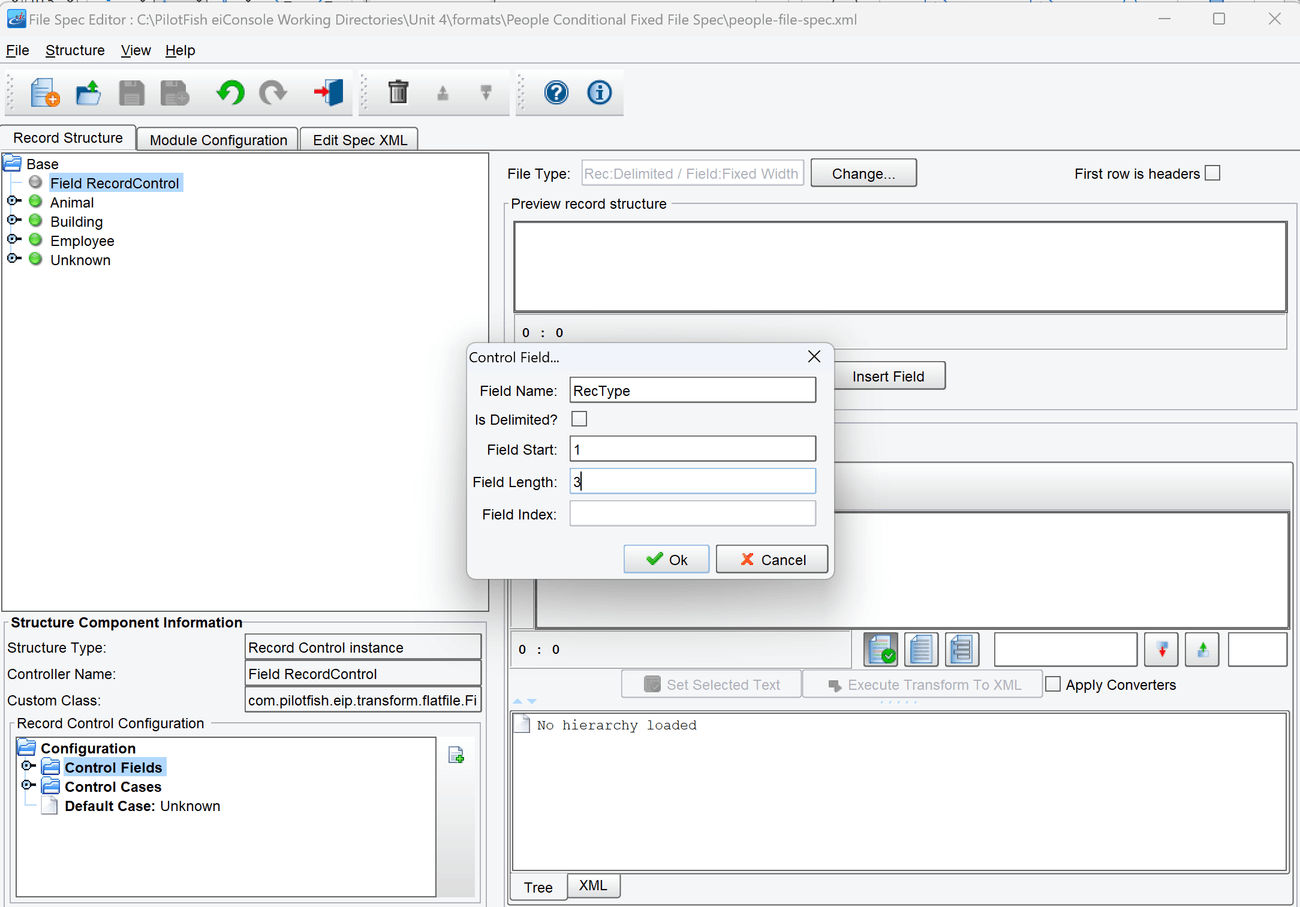
- Right-click on Control Fields in the bottom panel, and choose Add. A dialog will appear. Type RecType in Field Name and 1 in Field Start and 3 in Field Length. Click OK.
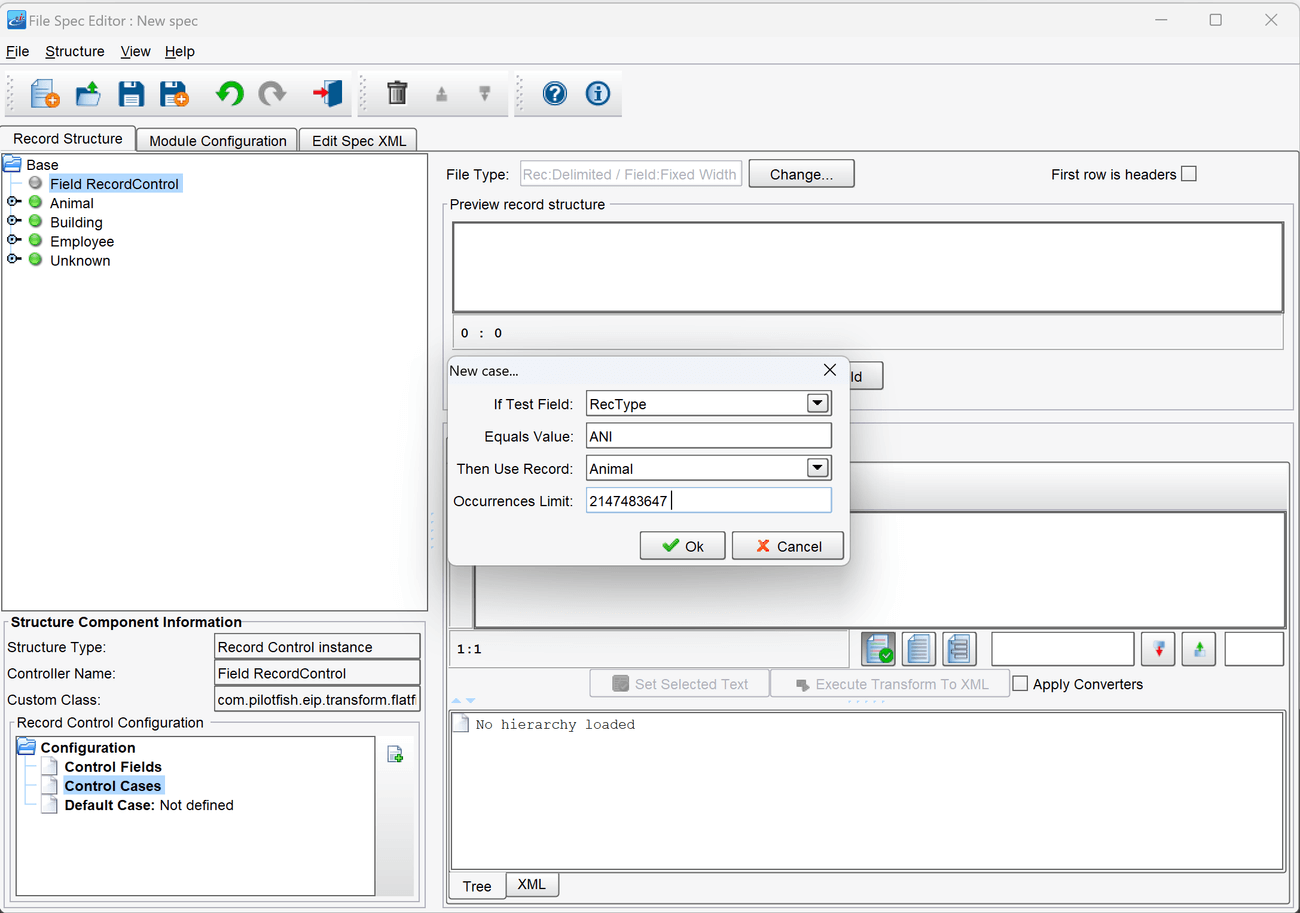
- Right-click on Control Cases in the bottom panel, and choose Add. A dialog will appear.
- For the Use Record field, input Animal. For Test Field, input RecType. For Value, input ANI. Input 2147483647 for Occurrences Limit. Click OK to save.

- Right-click on Control Cases again to add another case. In the dialog, for Use Record input Building, for Test Field input RecType, and for Value input BUI. Input 2147483647 for Occurrences Limit. Click OK to save.
- Right-click on Control Cases again to add another case. In the dialog, for Use Record input Employee, for Test Field input RecType, and for Value input EMP. Input 2147483647 for Occurrences Limit. Click OK to save.
- Right-click on the Default Case node, and select Define. In the dialog that appears, for Default Record Name, input Unknown. Input 2147483647 for Occurrences Limit. Click OK to save the changes.


- Click the Save icon in the toolbar above the tree. Enter people-file-spec as the name of the specification to save it.
- After saving it, press the X button in the top right of the screen to close the File Spec Editor and return to the Route Editing Grid.
Configure the Transport
- Select the Transport stage in the Route Editing Grid. The configuration panel will appear at the bottom.
- Select Directory / File from the Transport Type selection box. Optionally, click the … button to open the Module Search Dialog, which provides a faster way to find the module you’re looking for.
- Select the Target Directory, using the … button to open the file selector.
- Set farm-output as the Target File Name.
- Set xml as the Target File Extension.
Document the Target System
- Select the Target System stage in the Route Editing Grid. The configuration panel will appear at the bottom.
- Change the System Name to XML File
- Select the Choose Target Icon button, and scroll down to select one of the XML icons
Prepare to Test
- In the menu bar at the top, select Mode -> Testing Mode. Make sure the changes to the Route are saved.
- Copy the file called farm.txt from the Samples directory provided into the directory chosen as the polling directory.
Perform the Test
- At the top of the Testing Mode screen, select the Execute Test button.
- If the Route was configured successfully, all the Stages should light up with green checkmarks.
- In the OS File Explorer, open the directory selected as the Target Directory. The file farm-output.xml should be there, with the contents of the original file transformed into XML.
Output Files
- Compare the results from the exercise with the following example output files to see if they are correct.