Exercise 9.1 – REST Services
Purpose:
To practice and set up a REST HTTP service to consume a POST and GET request.
Create a Route
- From the eiConsole File Management screen, select the Add Route button.
- In the dialog that appears, enter the route name Restful Echo Services and select OK.
- The Route should now appear in the table on the screen. Double-click it to open.
Document Source System
- Select the Source System stage in the Route Editing Grid. The configuration panel will appear at the bottom.
- Change the System Name to Postman Request.
- Select the Choose Source Icon button, and scroll down to select an icon.
Configure the Listener
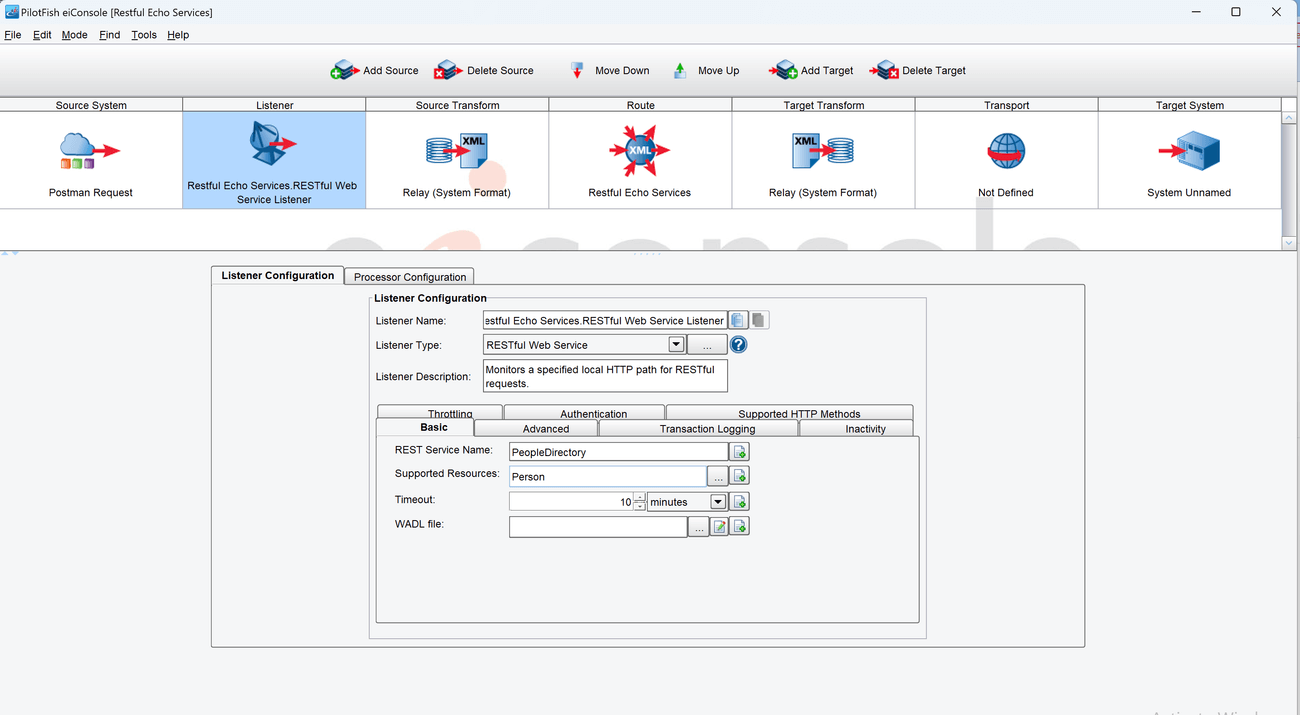
- Select the Listener stage in the Route Editing Grid. The configuration panel will appear at the bottom.
- Select RESTful Web Service from the Listener Type selection box. Optionally, click the … button to open the Module Search Dialog, which provides a faster way to find the module you want.
- For Rest Service Name, enter PeopleDirectory and for Support Resources, enter Person.

- On the Advanced tab, select the Synchronous check box.
- On the Advanced tab. Add an HTTP Header. Name it Content-Type with Value application/xml.

Configure the Transport
- Select the Transport stage in the Route Editing Grid. The configuration panel will appear at the bottom.
- Select Synchronous Response from the Transport Type selection box.
- Name the Transport Name Get Synchronous Response.

- Select Add Target to add an additional Target.
- Select Synchronous Response from the Transport Type selection box.
- Name the Transport Name Post Synchronous Response.
Document the Target Systems
- Select each Target System stage in the Route Editing Grid. The configuration panel will appear at the bottom.
- Change the System Name to Get Request Echo for the Get Synchronous Response Transport.
- Change the System Name to Post Request Echo for the Post Synchronous Response Transport.
- Select each Choose Target Icon button, and scroll down to select one of the icons.
Configure the Route Stage
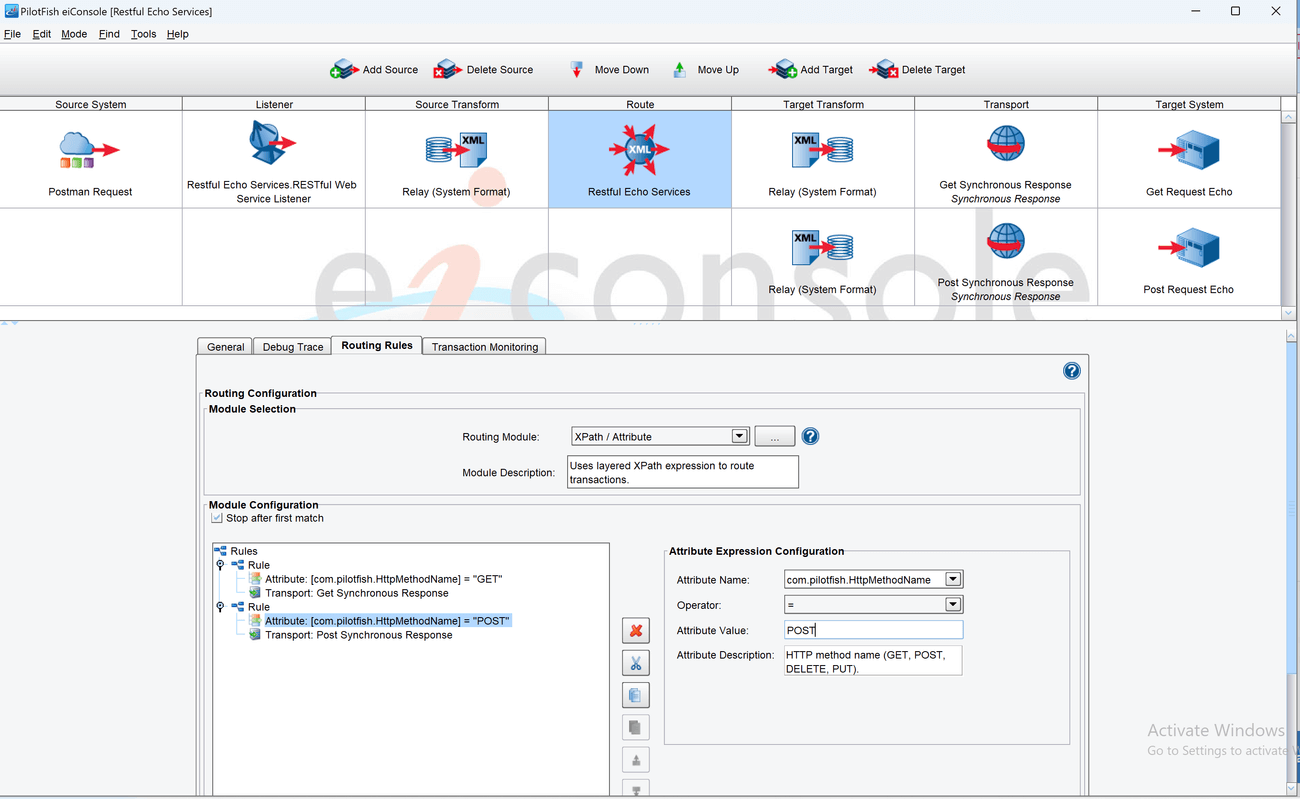
- Select the Route stage in the Route Editing Grid. The configuration panel will appear at the bottom.
- Select the Routing Rules tab.
- In the Routing Module dropdown, select XPath/Attribute.
- Right Click Rules and select Add Rule. In the Expression dropdown, select Transaction Attribute Query. In the Transport, select the Get Synchronous Response Transport and hit OK.

- Select the Attribute under the Rule in the left pane. In the right pane, select com.pilotfish.HttpMethodName as the Attribute Name, Operator to = and Attribute Value type GET.

- Right Click Rules and select Add Rule. In the Expression dropdown, select Transaction Attribute Query. In the Transport, select the Post Synchronous Response Transport and hit OK.
- Select the Attribute under the Rule in the left pane. In the right pane, select com.pilotfish.HttpMethodName as the Attribute Name, Operator to = and Attribute Value type POST.

Prepare to Test
- In the menu bar at the top, select Mode -> Testing Mode. Make sure the changes to the Route are saved.
Perform the Test
- At the top of the Testing Mode screen, select the Execute Test button.

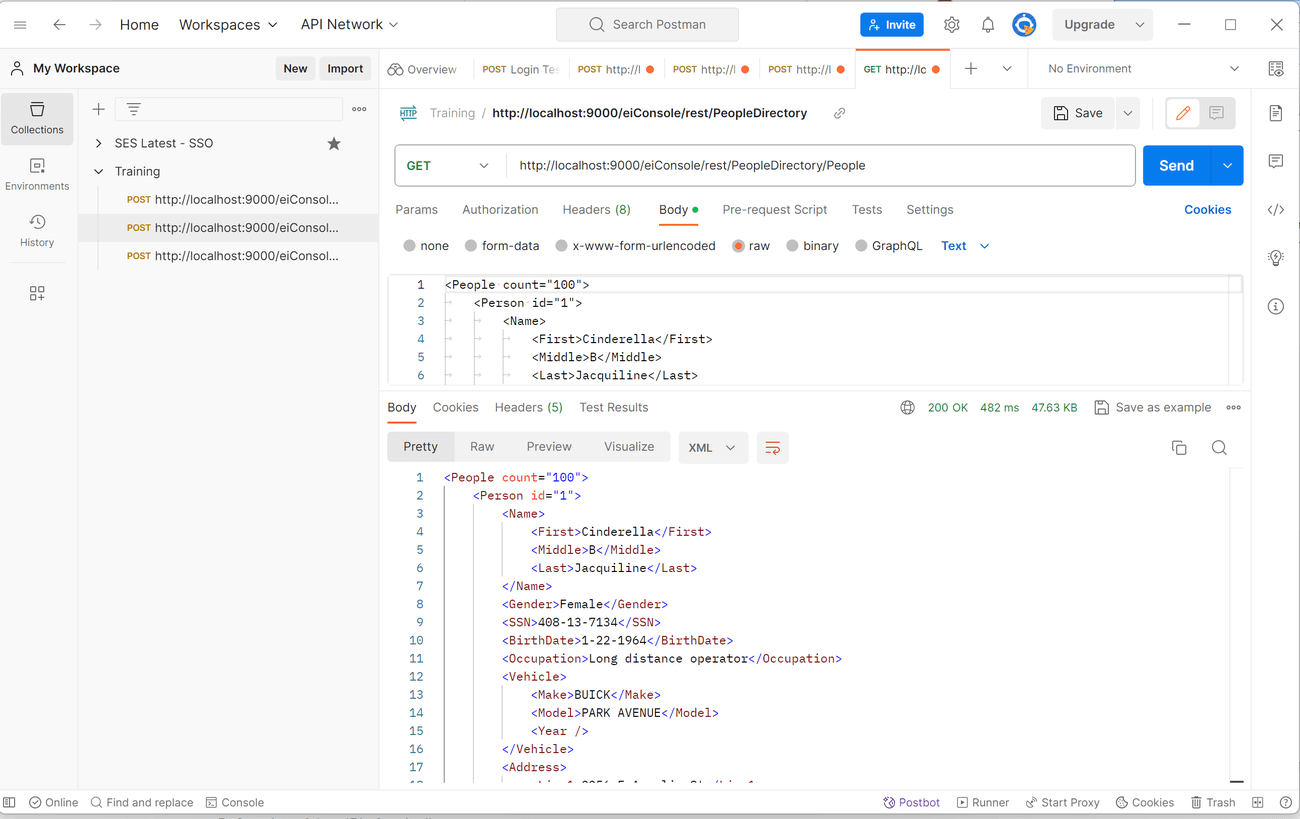
- Create a Postman request to the URL. Copy the URL from the screen above.
http://localhost:9000/eiConsole/rest/
Remember to add /PeopleDirectory/People to the URL above.
http://localhost:9000/eiConsole/rest/PeopleDirectory/People
PeopleDirectory is the Rest Service name from the Listener.
People is the Supported Resources name from the Listener.
Select and copy the data from the person.xml file and paste it into the raw Body section of Postman.
Note: The port number may vary depending on the number of times the test has been launched.
- Submit a POST request and a GET request while viewing the Route and data flow.
- At the top of the Testing Mode screen, select the Execute Test button.


