Exercise 4.1 – Transforming Basic Delimited Files
Purpose:
To practice transforming delimited files using the File Spec Editor.
References:
Create a Route
- From the eiConsole File Management screen, select the Add Route button.
- In the dialog that appears, enter the name Delimited Files and select OK.
- The Route should now appear in the table on the screen. Double-click it to open it.
Document Source System
- Select the Source System stage in the Route Editing Grid. The configuration panel will appear at the bottom.
- Change the System Name to Text File
- Select the Choose Source Icon button, and scroll down to select one of the plain file icons
Configure the Listener
- Select the Listener stage in the Route Editing Grid. The configuration panel will appear at the bottom.
- Select Directory / File from the Listener Type selection box. Optionally, click the … button to open the Module Search Dialog, which provides a faster way to find the module you’re looking for.
- Assign a polling directory, using the … button to open the file selector. The polling directory should NOT be the directory with all the sample files, since files will be moved/deleted by the listening process.
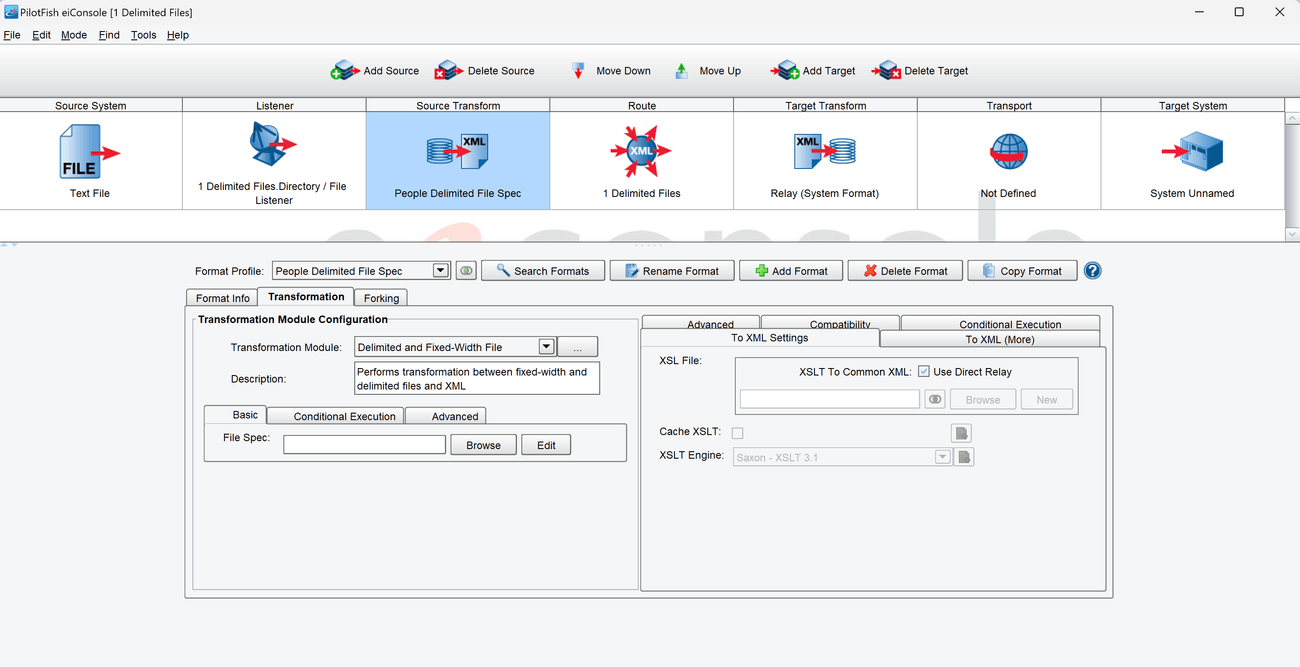
Add Source Transformation Module
- Select the Source Transform stage in the Route Editing Grid. The configuration panel will appear at the bottom.
- Click the Add Format button. In the dialog that appears, name the Format People Delimited File Spec, and click OK. The transformation configuration panel will appear below.
- Select Delimited and Fixed-Width File from the Transformation Module selection box. Optionally, click the … button to open the Module Search Dialog, which provides a faster way to find the module you’re looking for.
- In the new configuration panel that appears below, select the Edit button next to the File Spec configuration field to open the File Spec Editor.
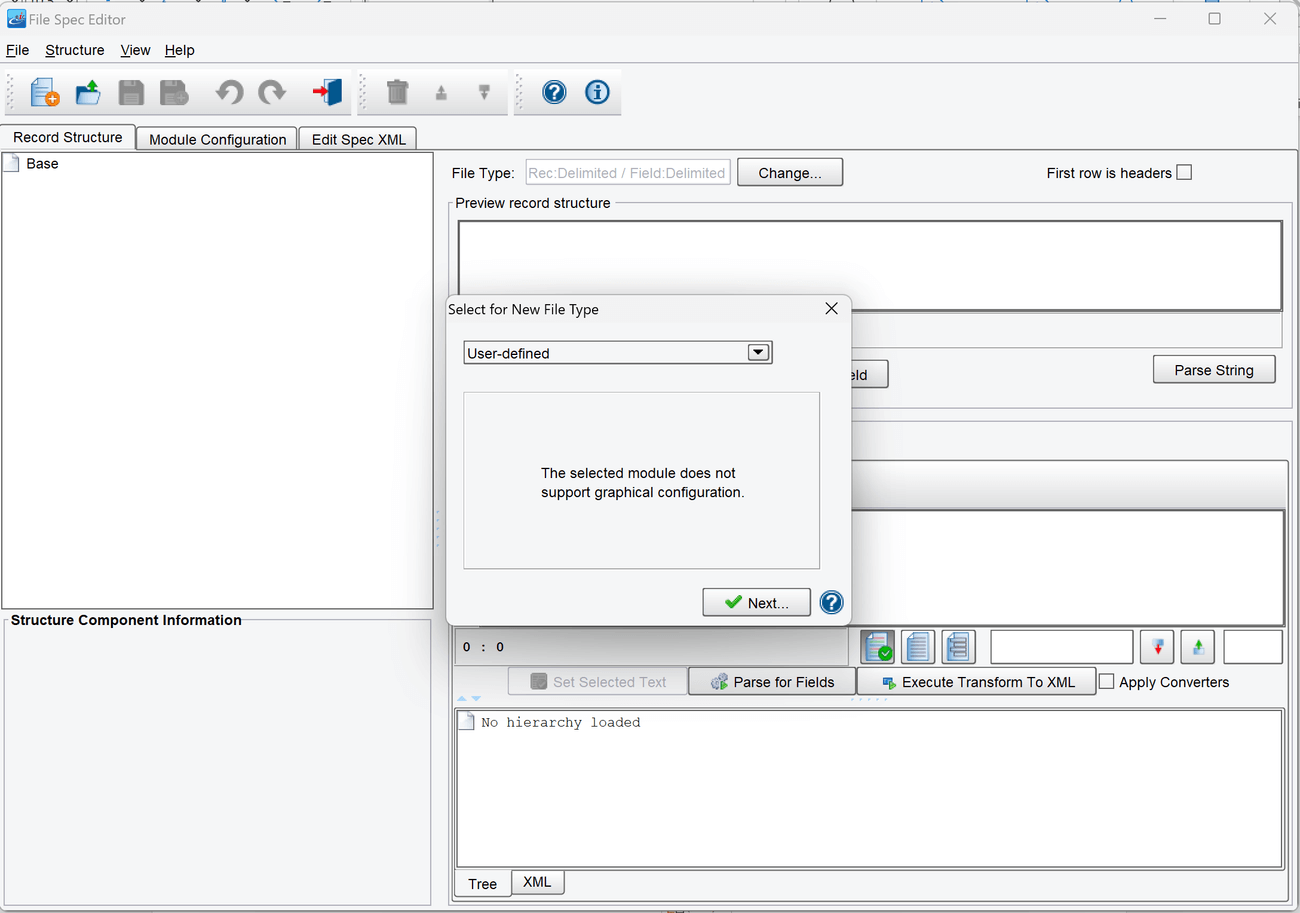
Create a File Spec
- When the File Spec Editor opens, a dialog called Select for New File Type will be present. In the sole selection box, choose the last option in the list, called User-defined, and click Next.

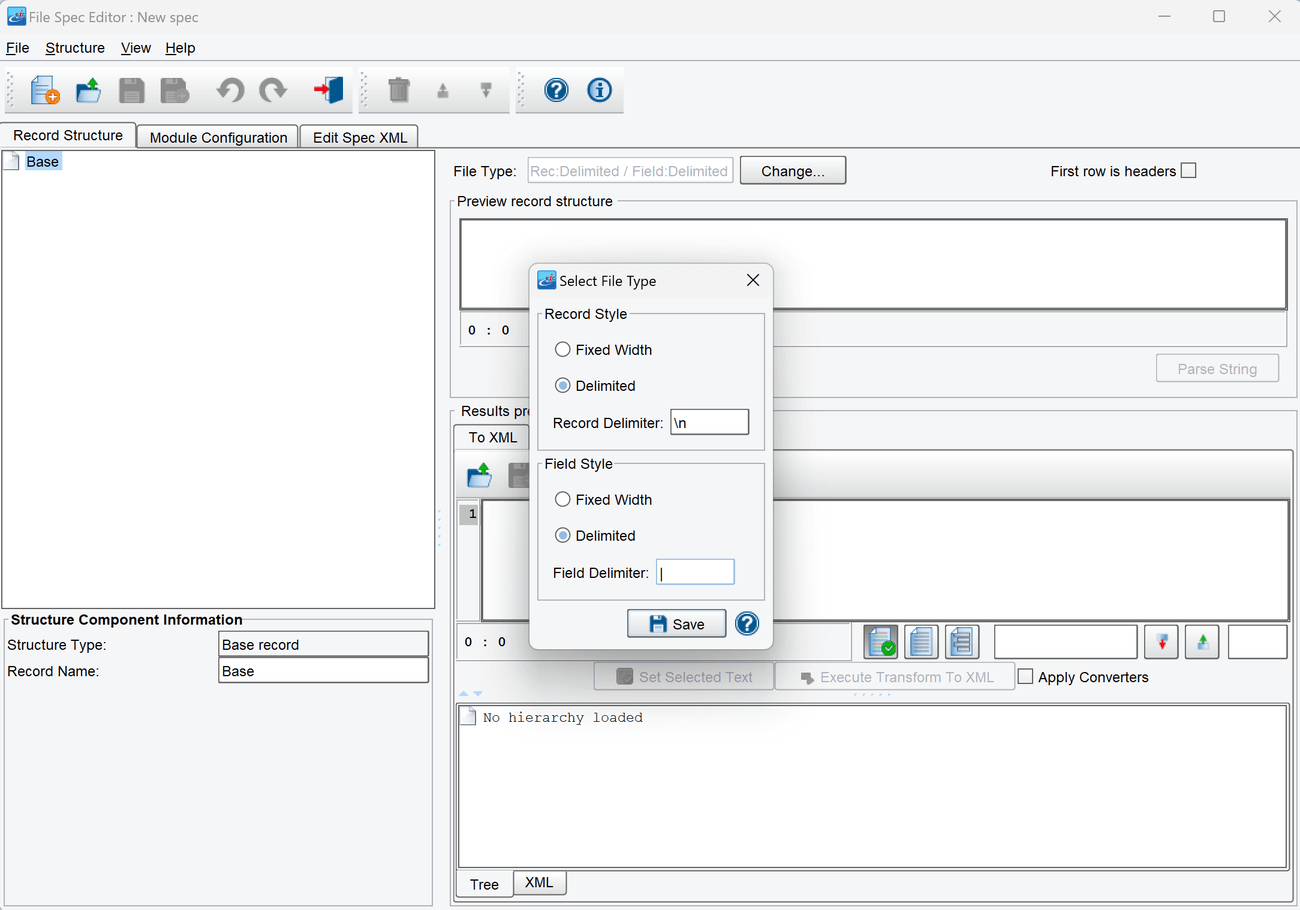
- In the new screen, leave Record Style set to Delimited with the Record Delimiter as \n. Change the Field Style to be Delimited with a Field Delimiter of |. Finally, click Save.

- In the File Spec Editor, the left-hand panel is a tree where the specification will be built.
- Right-click on the root Node of the tree, called Base, and select Add New Record. In the dialog that pops up, enter People as the record name, and click OK.


- Right-click on the new People record, and select Add New Field. Name the field First Name, and click OK.
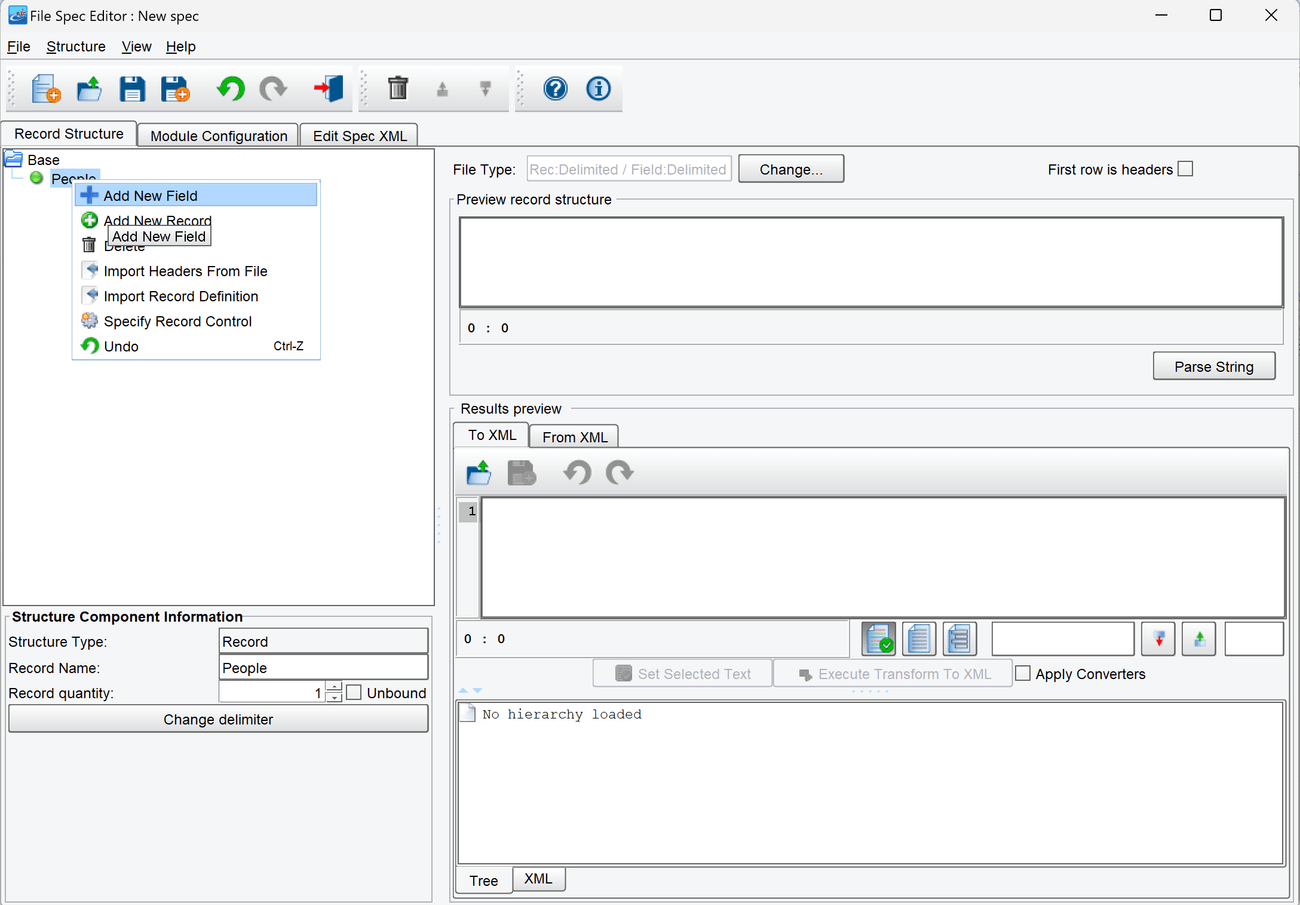

- Repeat the above process to add the following new fields until the specification is complete:
- Middle Initial
- Last Name
- Gender
- SSN
- Birth Date
- Occupation
- Vehicle Make
- Vehicle Model
- Address1
- Address2
- City
- State
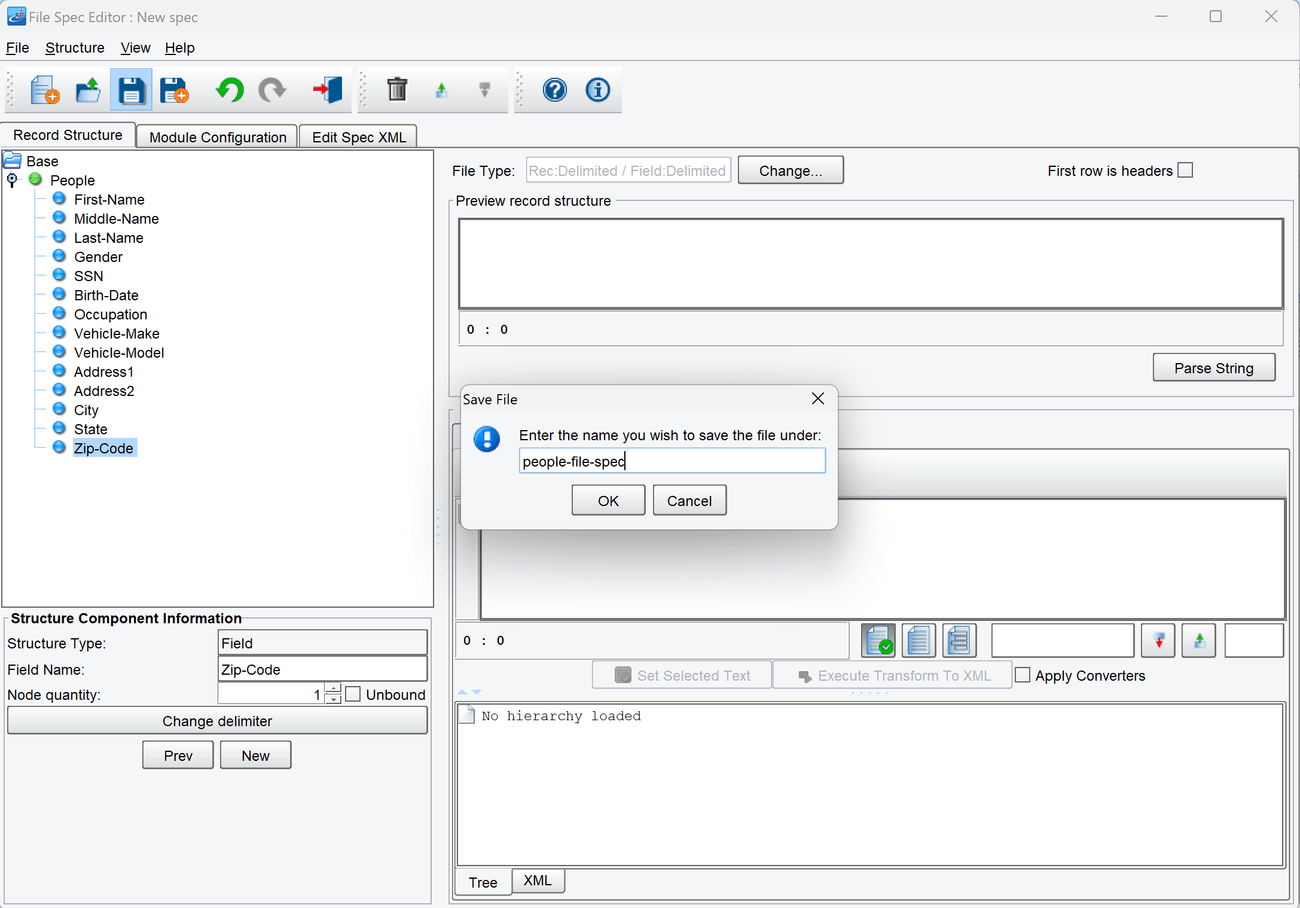
- Zip Code
- Once the spec is complete, click the Save icon in the toolbar above the tree. Enter people-file-spec as the name of the specification to save it.

- After saving it, press the X button in the top right of the screen to close the File Spec Editor and return to the Route Editing Grid.
- When the File Spec Editor opens, a dialog called Select for New File Type will be present. In the sole selection box, choose the last option in the list, called User-defined, and click Next.
Configure the Transport
- Select the Transport stage in the Route Editing Grid. The configuration panel will appear at the bottom.
- Select Directory / File from the Transport Type selection box. Optionally, click the … button to open the Module Search Dialog, which provides a faster way to find the module you’re looking for.
- Select the Target Directory, using the … button to open the file selector.
- Set people-delimited-output as the Target File Name.
- Set xml as the Target File Extension.
Document the Target System
- Select the Target System stage in the Route Editing Grid. The configuration panel will appear at the bottom.
- Change the System Name to XML File
- Select the Choose Target Icon button, and scroll down to select one of the XML icons
Prepare to Test
- In the menu bar at the top, select Mode -> Testing Mode. Make sure the changes to the Route are saved.
- Copy the file called people_delimited.txt from the Samples directory provided into the directory chosen as the polling directory.
Perform the Test
- At the top of the Testing Mode screen, select the Execute Test button.
- If the Route was configured successfully, all the Stages should light up with green checkmarks.
- In the OS File Explorer, open the directory selected as the Target Directory. The file people-output.xml should be there, with the contents of the original file transformed into XML.
Output Files
- Compare the results from the exercise with the following example output files to see if they are correct.